{{ secondMenu.name }}


The process of creating an agentless backup account on SCP is as follows:
Step 1.Log in to SCP using the admin account.
Step 2.Click admin in the upper-right corner and click Users and Access Management, as shown in Figure 2‑12.

Figure 2‑12 Users and Access Management on SCP
Step 3.On the Users and Access Management page, click Permission Policies and then click New to create a permission policy for agentless backup, as shown in Figure 2‑13.
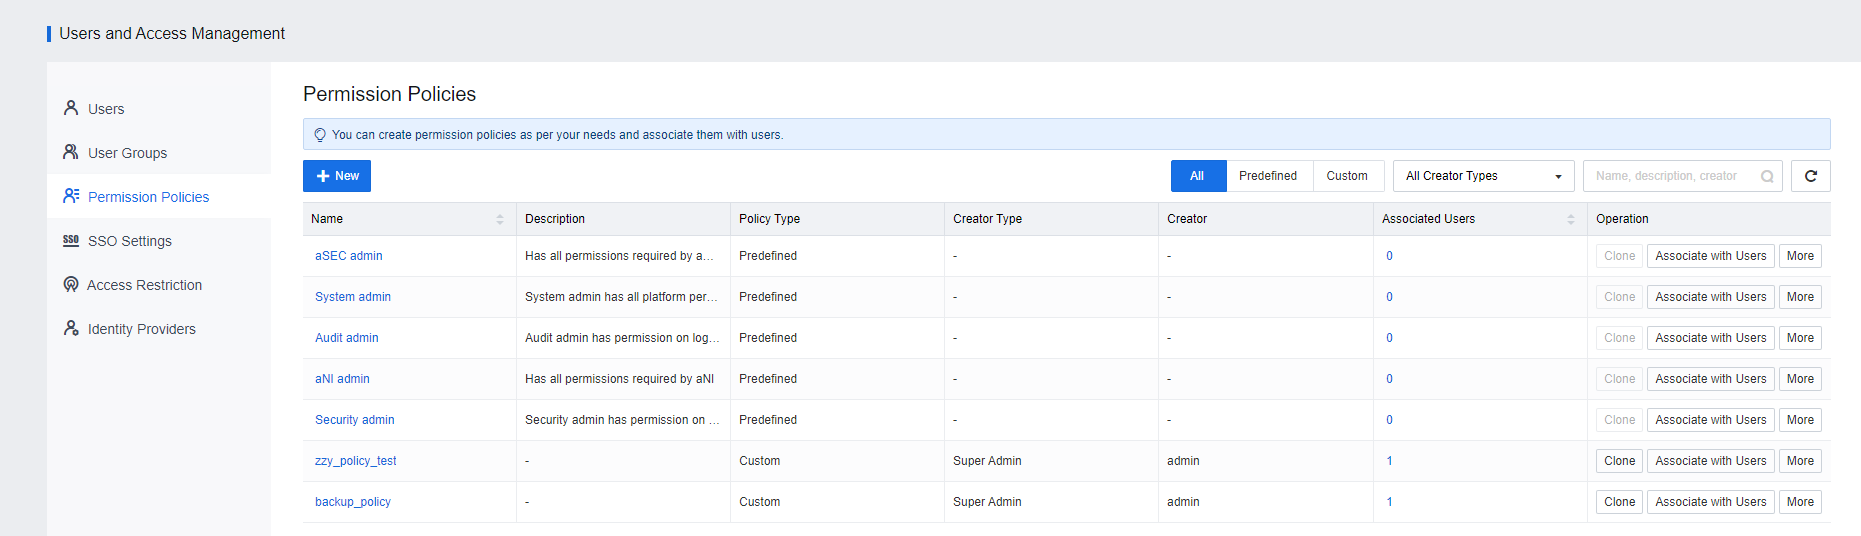
Figure 2‑13 Permission Policies on SCP
(1)On the Create Policy page, select Agentless Backup Template for Policy Content to associate the policy with interface permissions required for agentless backup, as shown in Figure 2‑14. You can select the interface permissions as needed.

Figure 2‑14 Create Permission Policy on SCP (1)
(2)If you want to use an access key and a secret key for authentication, click Add Permissions, click Select next to Services, select Users and Access Management, and then select all permissions for API Keys in the Operations section, as shown in Figure 2‑15.
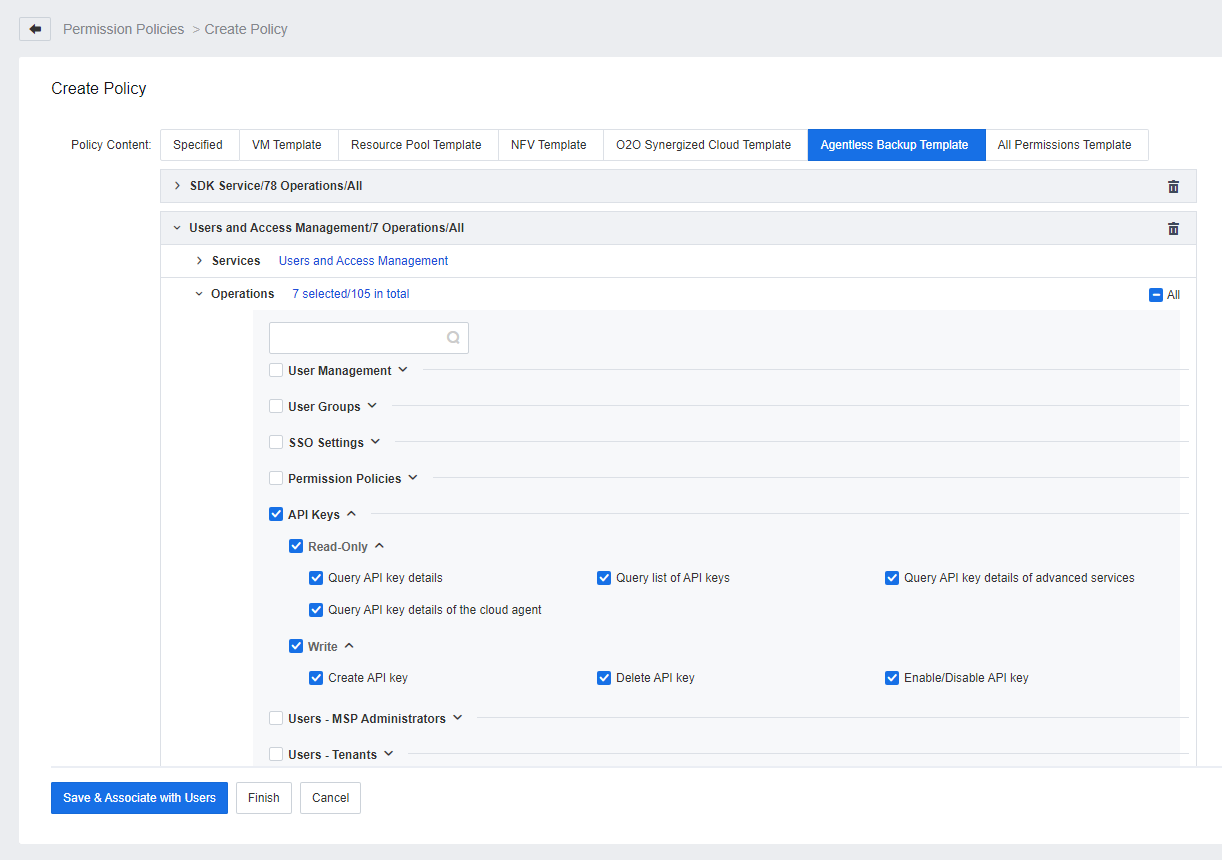
Figure 2‑15 Create Permission Policy on SCP (2)
(3)You can also click Add Permissions to add other required permissions, such as Quota Management, as shown in Figure 2‑16.
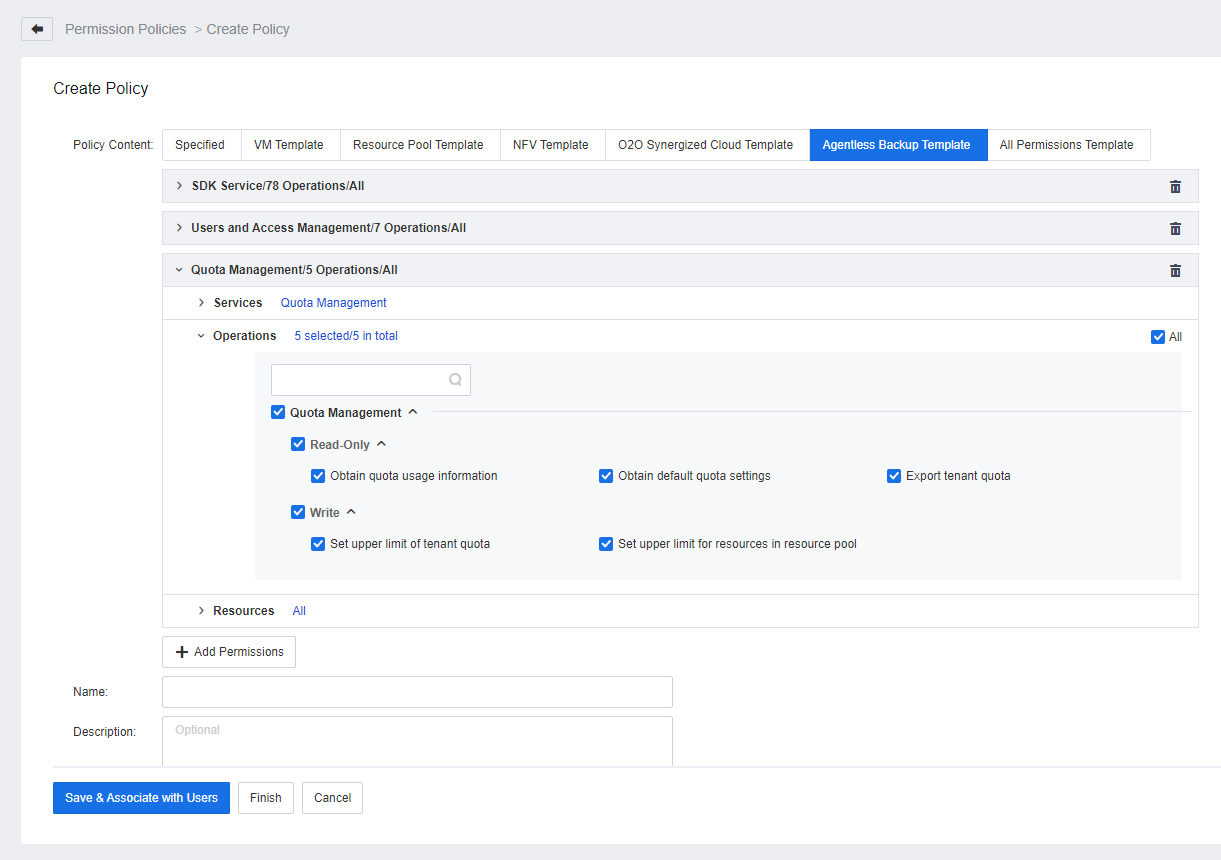
Figure 2‑16 Create Permission Policy on SCP (3)
All is selected for Resources by default. Specify a policy name, such as agentless_backup, and then click Finish.
Step 4.Go to Users and Access Management > Users > Platform Admins, and click New to create a platform admin.
(1)Enter the basic information of the platform admin.
(2)Associate the platform admin with the permission policy (agentless_backup) created in Step 3, as shown in Figure 2‑17.
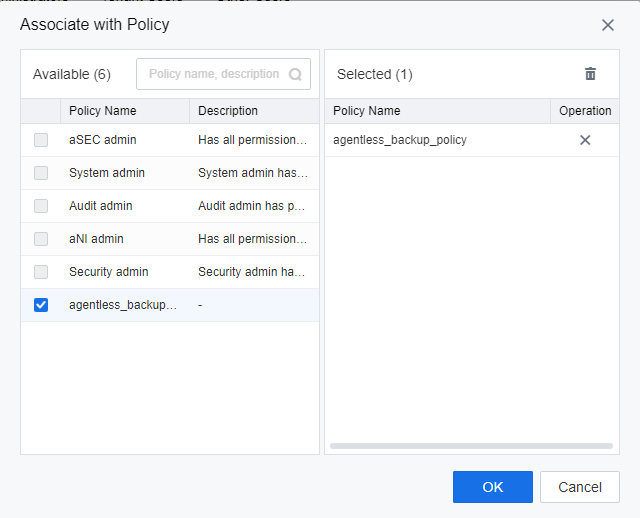
Figure 2‑17 Associate User with Permission Policy on SCP
The backup account is created.
To use an access key and a secret key for authentication, follow the steps below to create the keys first:
Step 1.Log in to SCP using the backup account, click the username in the upper-right corner, and then click API Keys, as shown in .Figure 2‑18
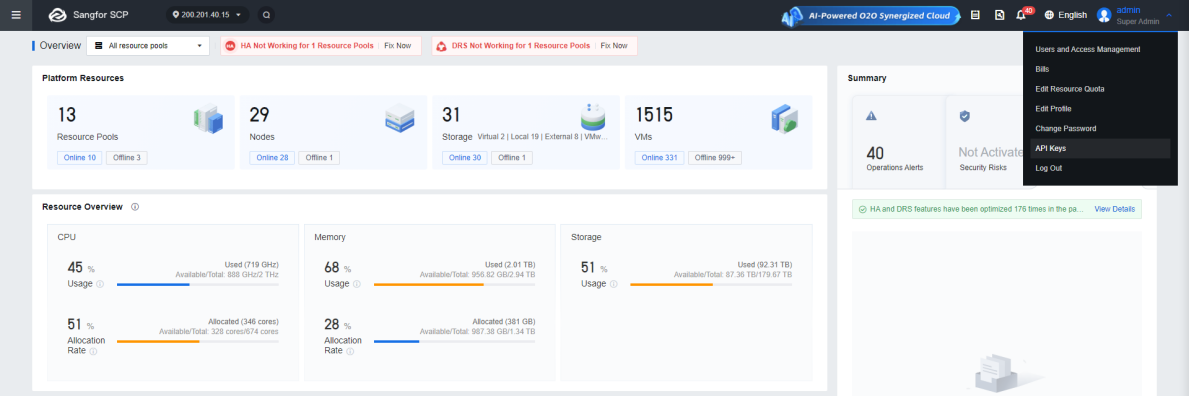
Figure 2‑18 Create Access Key and Secret Key on SCP (1)
Step 2.On the API Keys page, click New. In the Verify Identity pop-up window, enter the account password to create an access key and a secret key, as shown in Figure 2‑19.
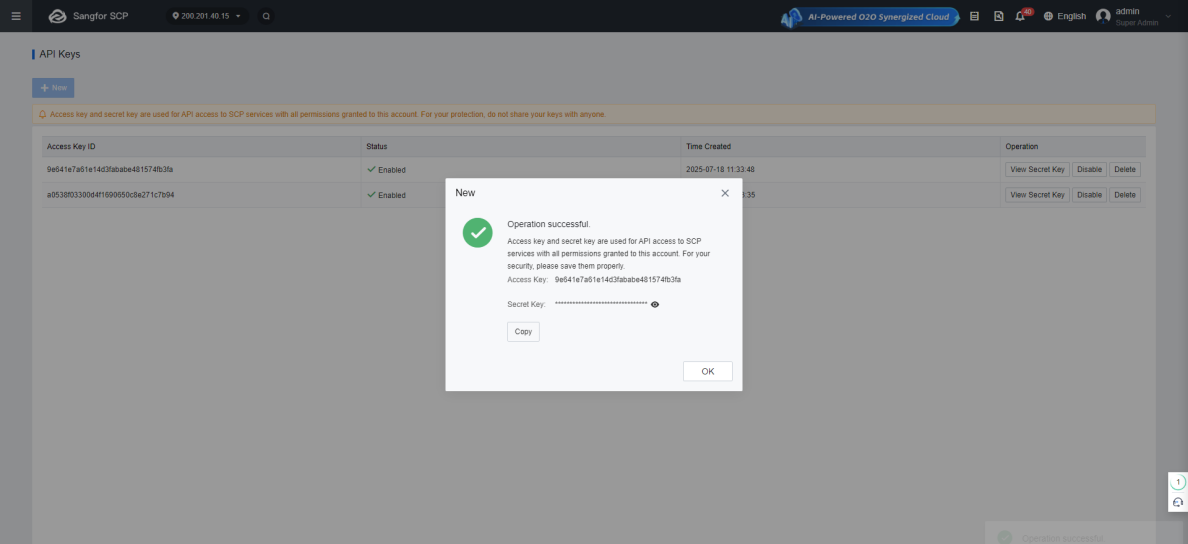
Figure 2‑19 Create Access Key and Secret Key on SCP (2)
For information about how to use the access key and secret key, see the EC2 Authentication section in SCP OpenAPI documentation.
Note: Only the platform admin can perform agentless backup on SCP 6.10.0.

 {{ $t('index.defaultHeader.chromeBrowserTip') }}