{{ secondMenu.name }}


This section describes the DFW migration feature, including the definition, value description, application scenarios, feature description, and principle description.
Definition
The DFW migration feature supports bulk migrating DFW policies from other platforms to SCP. For large-scale migrations from VMware to HCI/SCP by key accounts (KAs) and more important customers around the world, SCP adds a policy import capability to the DFW creation process. It supports importing DFW policies from the VMware platform at one time and provides an assessment report for policy analysis and assessment.
Value Description
DFW migration supports bulk importing DFW policies from VMware platform to effectively cope with large-scale migration from VMware to HCI/SCP. This feature aims to solve the problems that the manual migration efficiency is low and that policies are easy to be omitted. It ensures that no policy rule is missing to avoid network interruptions during VM migration and enables rapid migration to SCP.
Description
The DFW migration feature consists of two modules: DFW policy export and DFW policy import. After DFW policy migration is complete, VM migration starts. The policy will automatically identify referenced VMs after VM migration and apply the firewall feature to these VMs.
DFW Policy Export
You can connect to the VMware NSX environment using the migration tool provided by SANGFOR Checks (6.1.1), obtain all VMware DFW policies, and export them as a predefined standard CSV file for subsequent import.
Required environment information:
IP address, username, and password of the VMware vSphere vCenter environment.
IP address, username, and password of the VMware vSphere NSX environment
After the environment is successfully connected, the tool obtains all DFW policies and the rule configuration of the environment. It also generates a standard CSV file in the target path along with an assessment report. The file contains configuration information, such as the policy name, ID, applicable scope, rule, source, destination, and service. The assessment report contains the total number of generated policies, the number of policies fully supported for migration, and the number of policies not fully supported for migration for subsequent assessment.
DFW policies on the VMware platform have fields not completely the same as policies on SCP. Therefore, some fields cannot be fully converted, some fields are not supported, and some fields need to be converted through other methods. These fields are included in the report and require further assessment.
DFW Policy Import
After the CSV file is exported using the tool, you can import the file into SCP to create corresponding DFW polices.
Required environment and file information:
SCP (6.11.3 and later)
CSV file of DFW policies
Load the CSV file to import policies. The detailed policy content will be displayed. You can edit and delete polices and rules and import them directly once the conditions are met. The platform will then create corresponding policies.
Key Metrics
A single resource pool supports importing up to 300 policies. The maximum size of a single CSV file is 1 MB. If the number of policies is too large, the tool will generate multiple files.
Limitations
None.
Feature Configuration
Prerequisites
1. The VMware NSX platform version is 3.0 or later, and the SCP version is 6.11.3 or later.
2. The VMware environment for DFW policy export is consistent with the VMware environment for VM migration.
Precautions
1. The fields of DFW policies on the VMware platform are not completely the same as those of policies on SCP, such as the group information. Such fields will be converted into internally recognizable fields on SCP, and unsupported fields will be discarded.
2. The number of policies cannot exceed the upper limit. Otherwise, you need to edit the file.
3. In case of any abnormal policy that cannot be imported, you need to edit or delete the policy before proceeding to the next step.
4. The policy import logic is consistent with the policy creation logic. If the task contains policies that fail to be imported, you can solve the issues and import them again.
Procedure
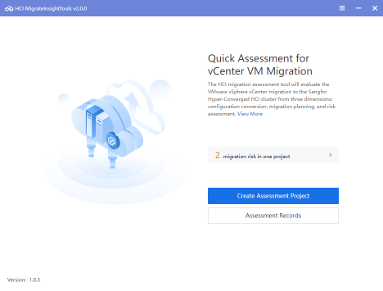
1. Log in to SANGFOR Checks and run the migration tool.
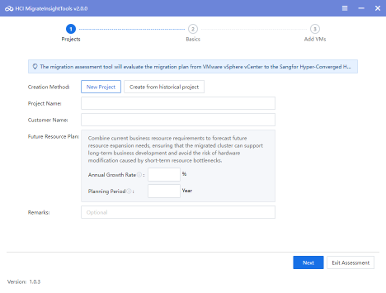
2. Create an assessment project.
You can create a new project or create from a historical project. Enter the project name and customer name, and click Next.
3. Enter the following VMware environment information:
IP address, username, and password of the VMware vSphere vCenter environment
IP address, username, and password of the VMware vSphere NSX environment
4. Perform a one-click full assessment.
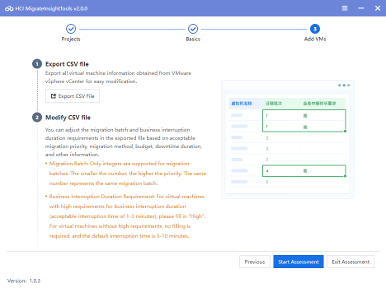
5. Wait until the file is generated for download.
6. Download and decompress the file.
7. Import the CSV file.
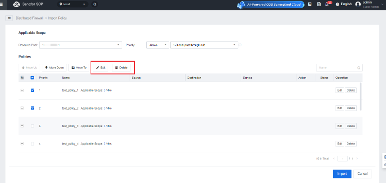
Log in to SCP, go to Resources > Security > Distributed Firewall, and choose Create Policy > Import Policy.
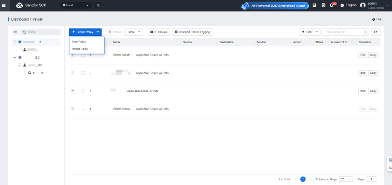
8. Load the decompressed CSV file and select a resource pool and policy priority.

9. Perform operations such as editing and deletion to handle abnormal policies.
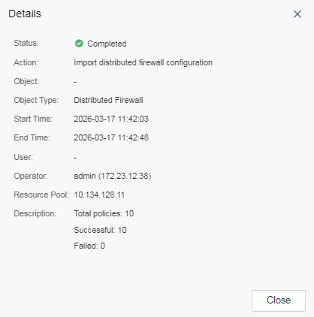
10. Start policy import if all policies are normal. An import task will be created in the background. Wait for the task to complete.
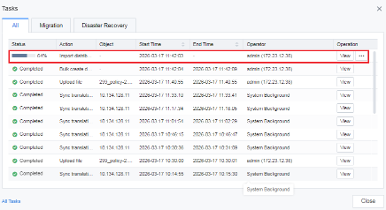
11. All policies are created after the task is complete. You can view the task status in operation logs.
O&M and Modification
The task status and task failure cause can be viewed in the backend.


 {{ $t('index.defaultHeader.chromeBrowserTip') }}