{{ secondMenu.name }}


Introduction
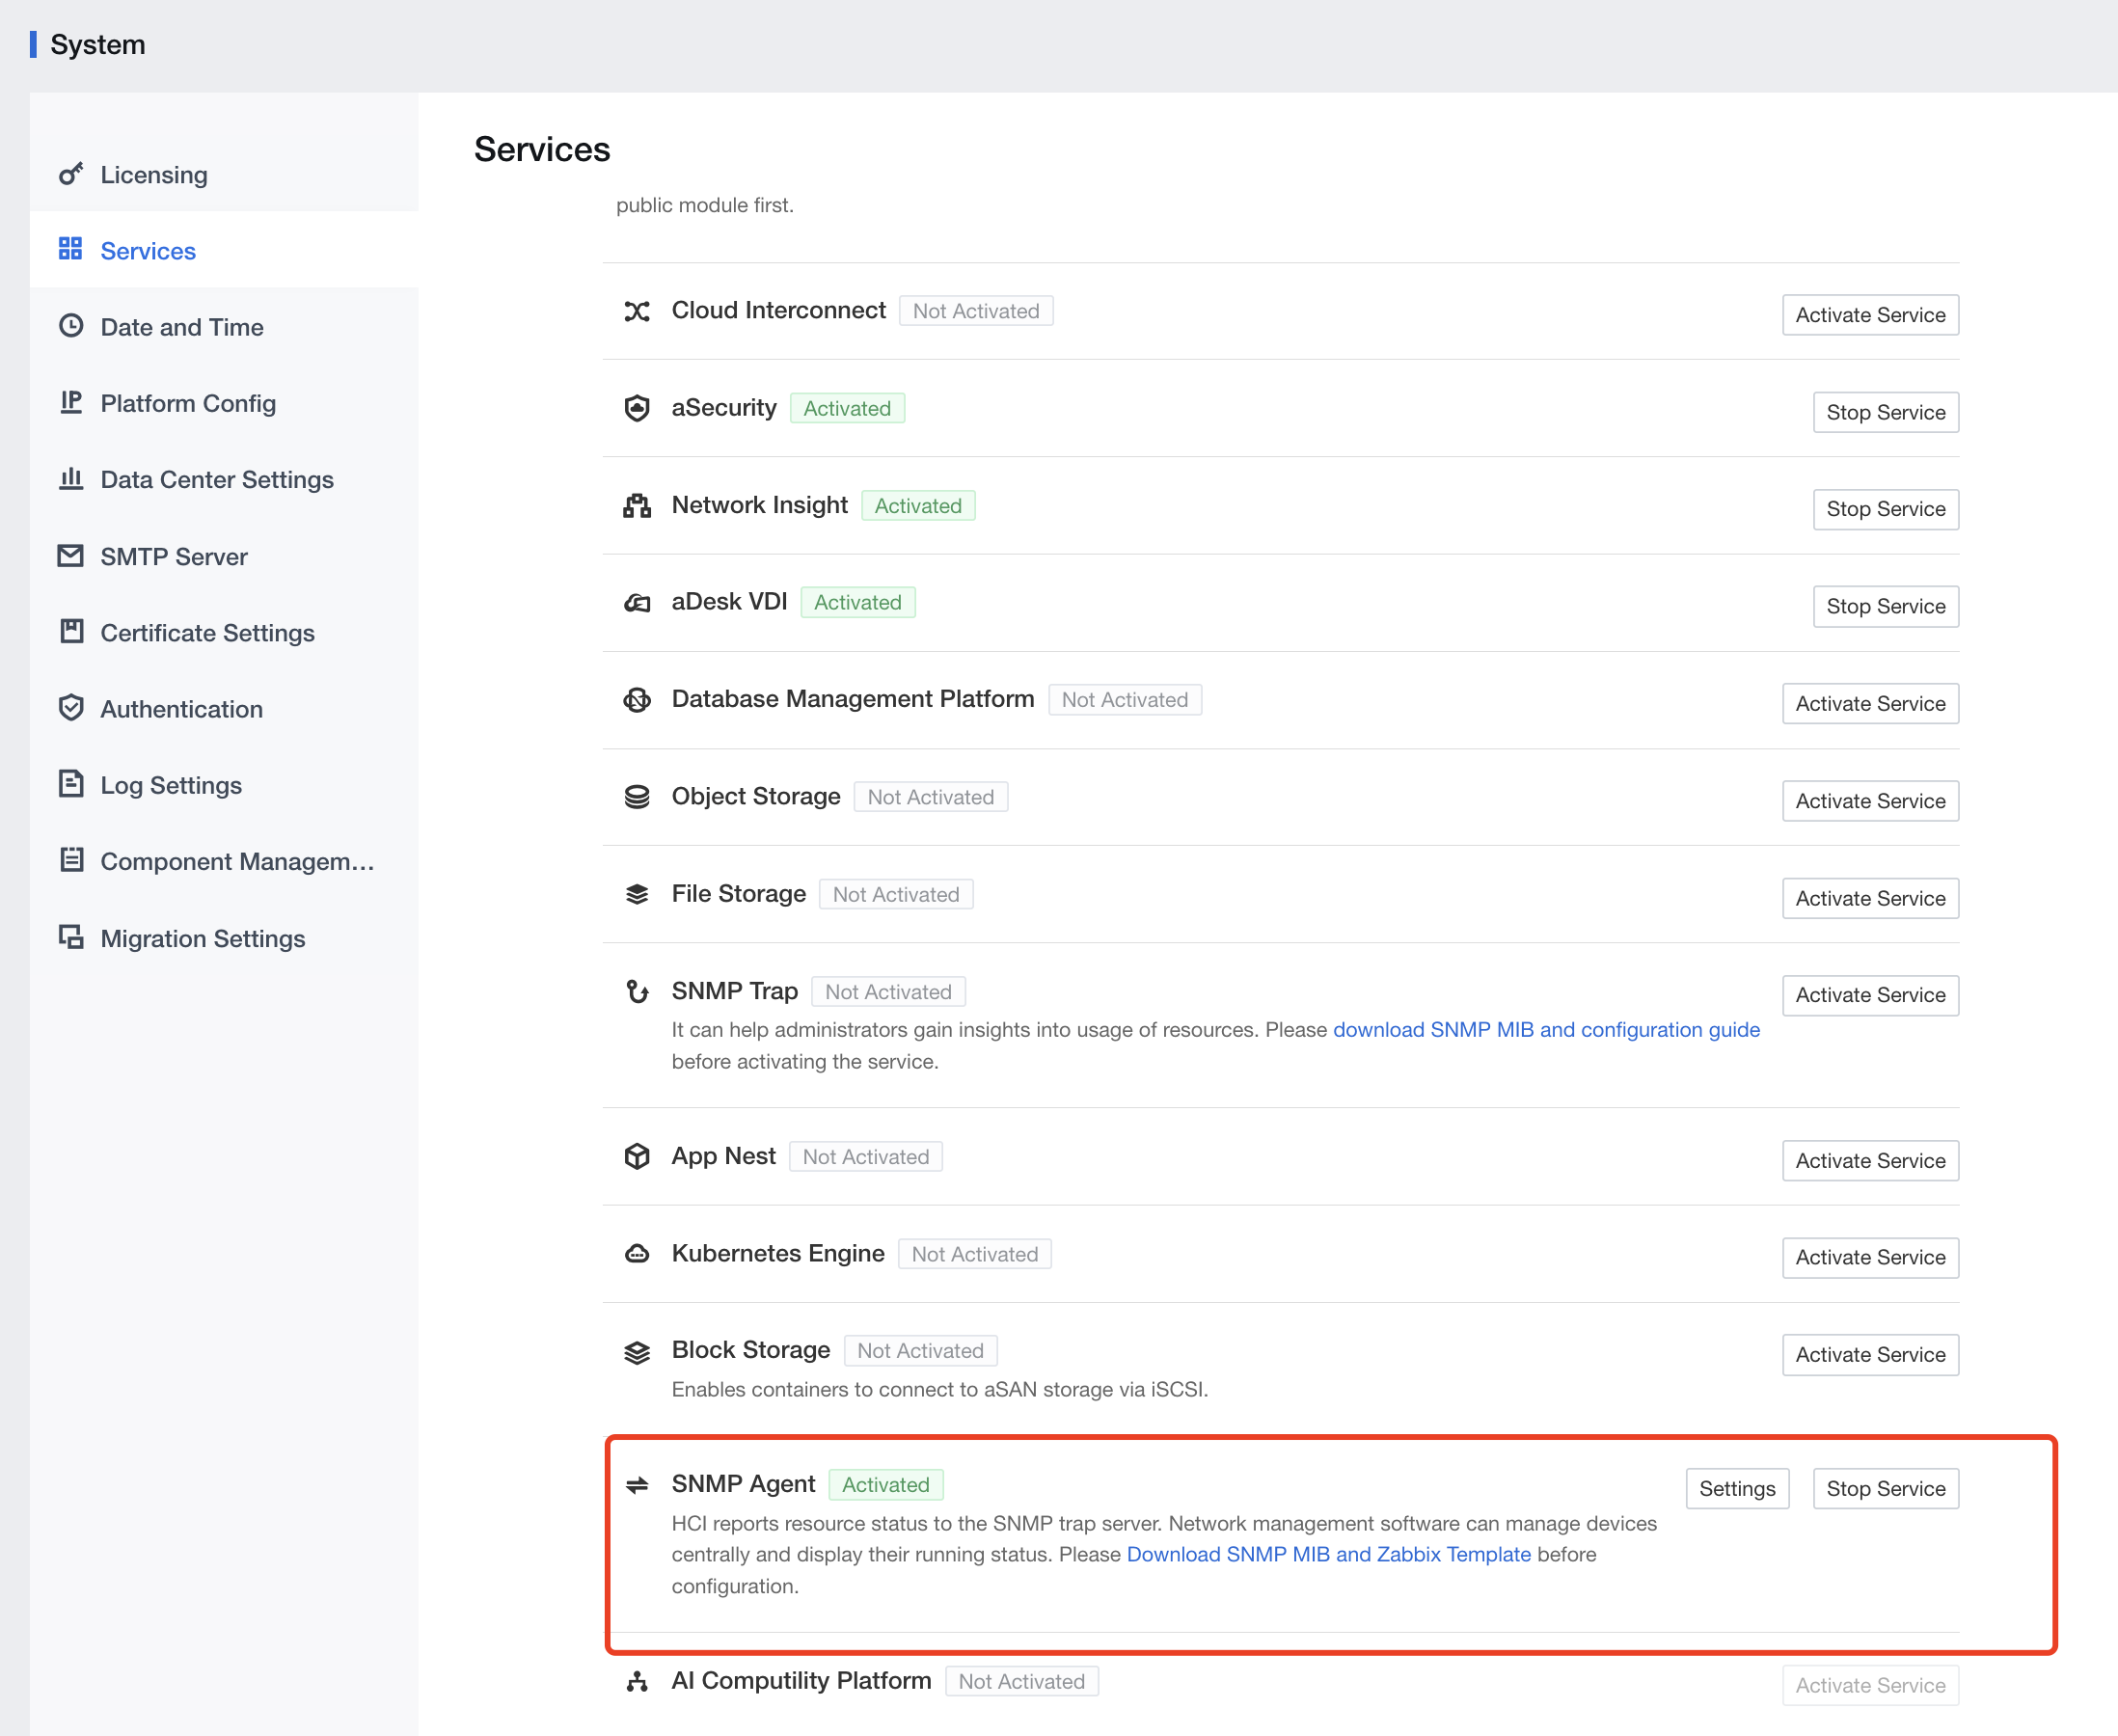
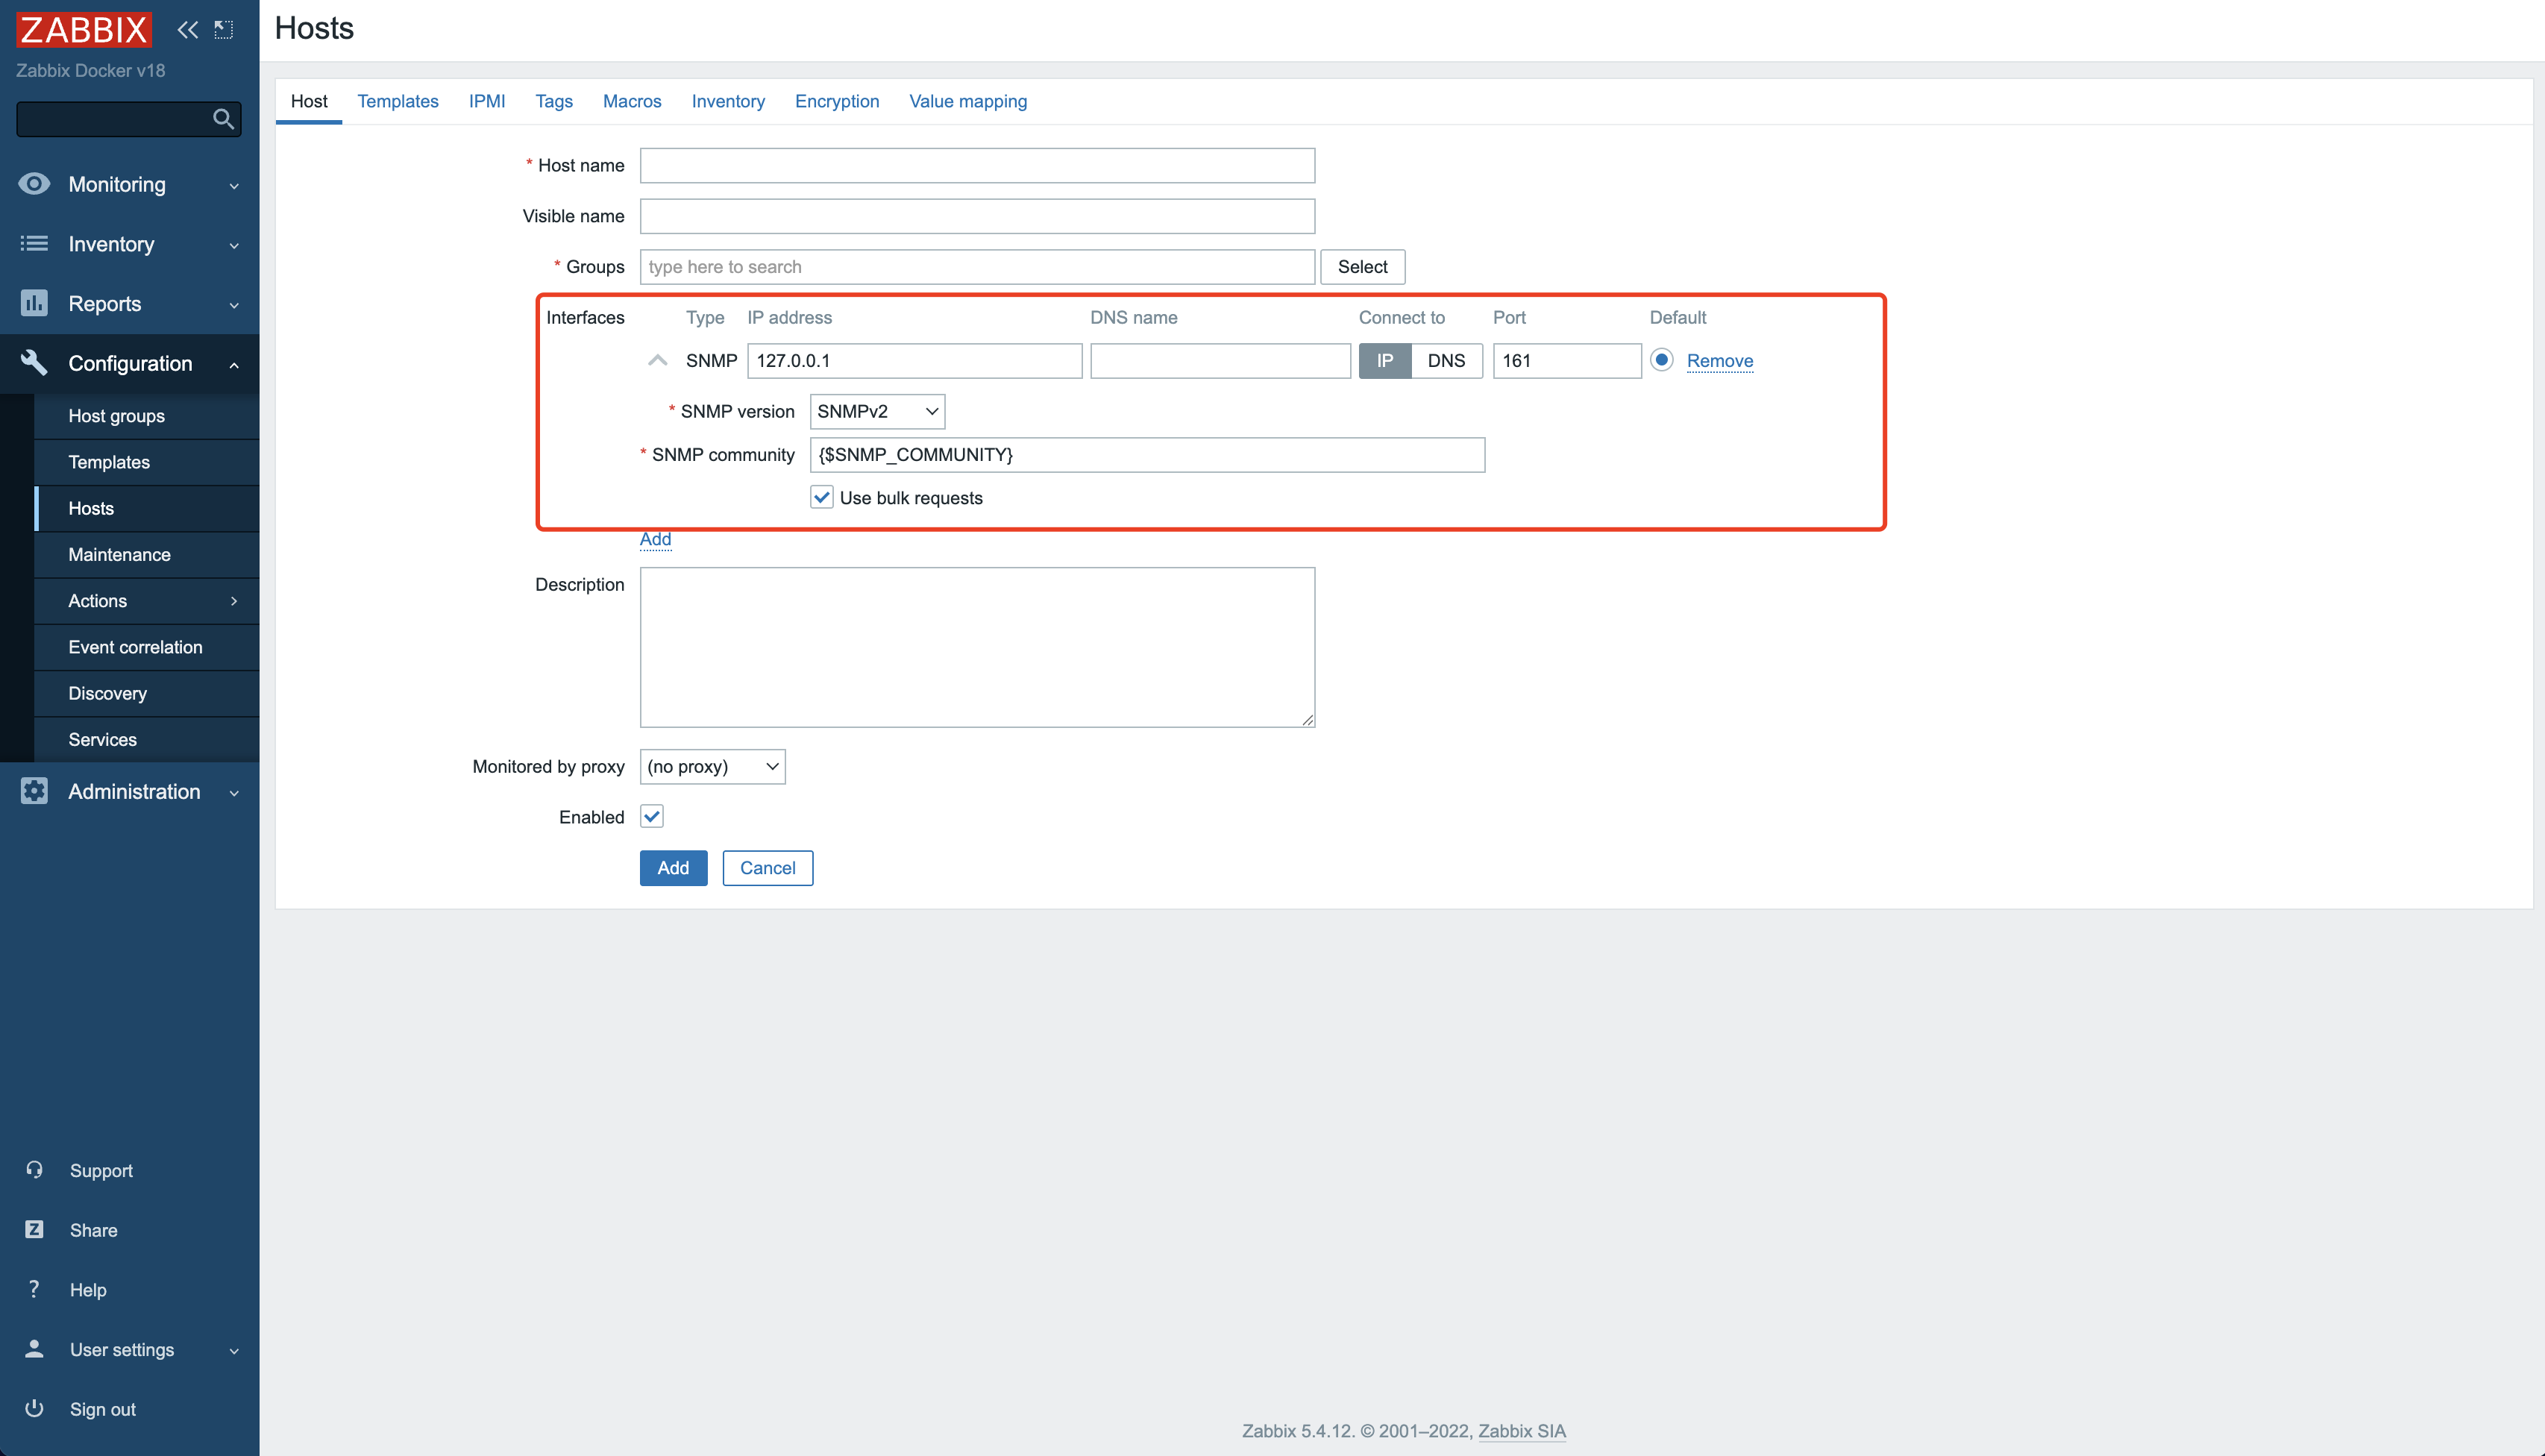
You can centrally manage network devices and observe their status by pushing resource status to an SNMP trap server and using network management software.
Prerequisites
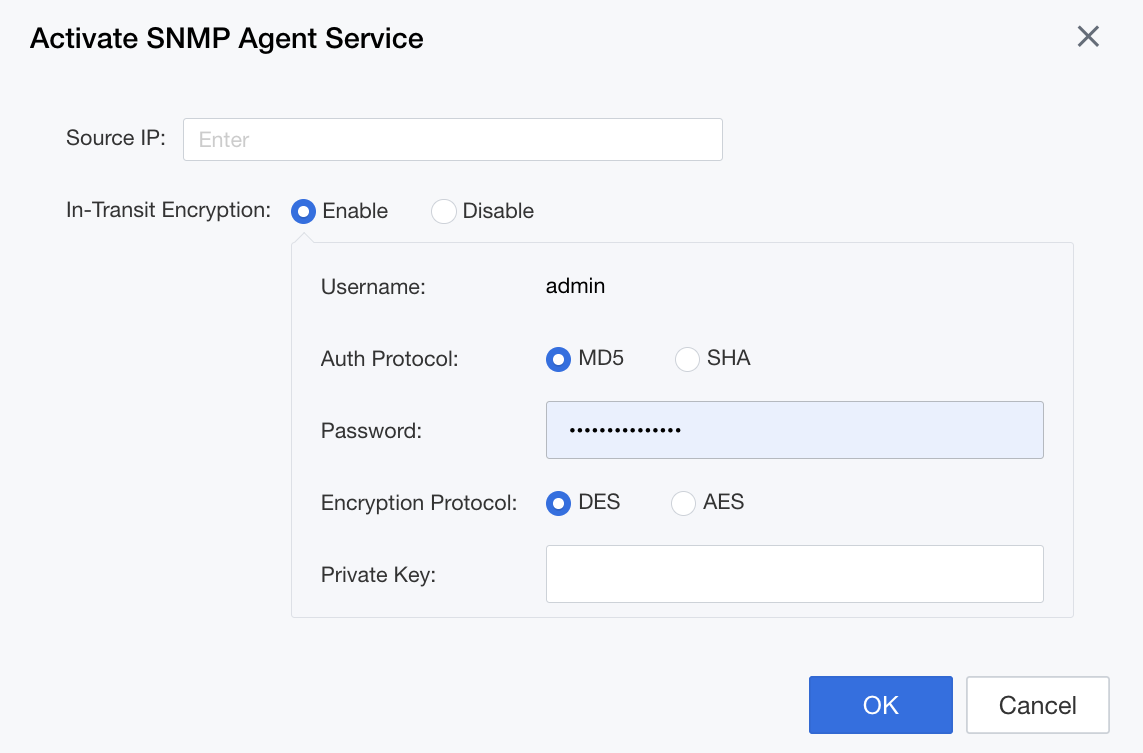
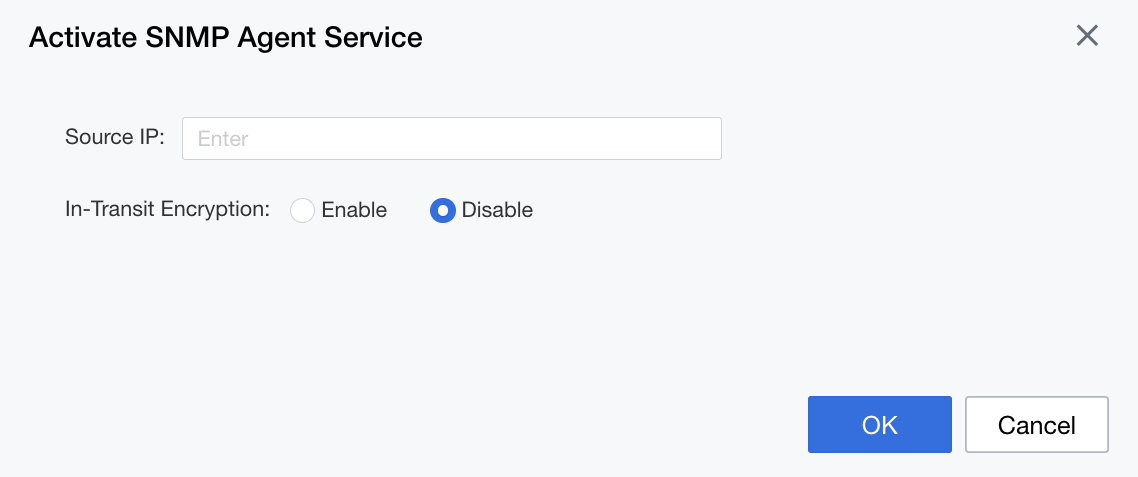
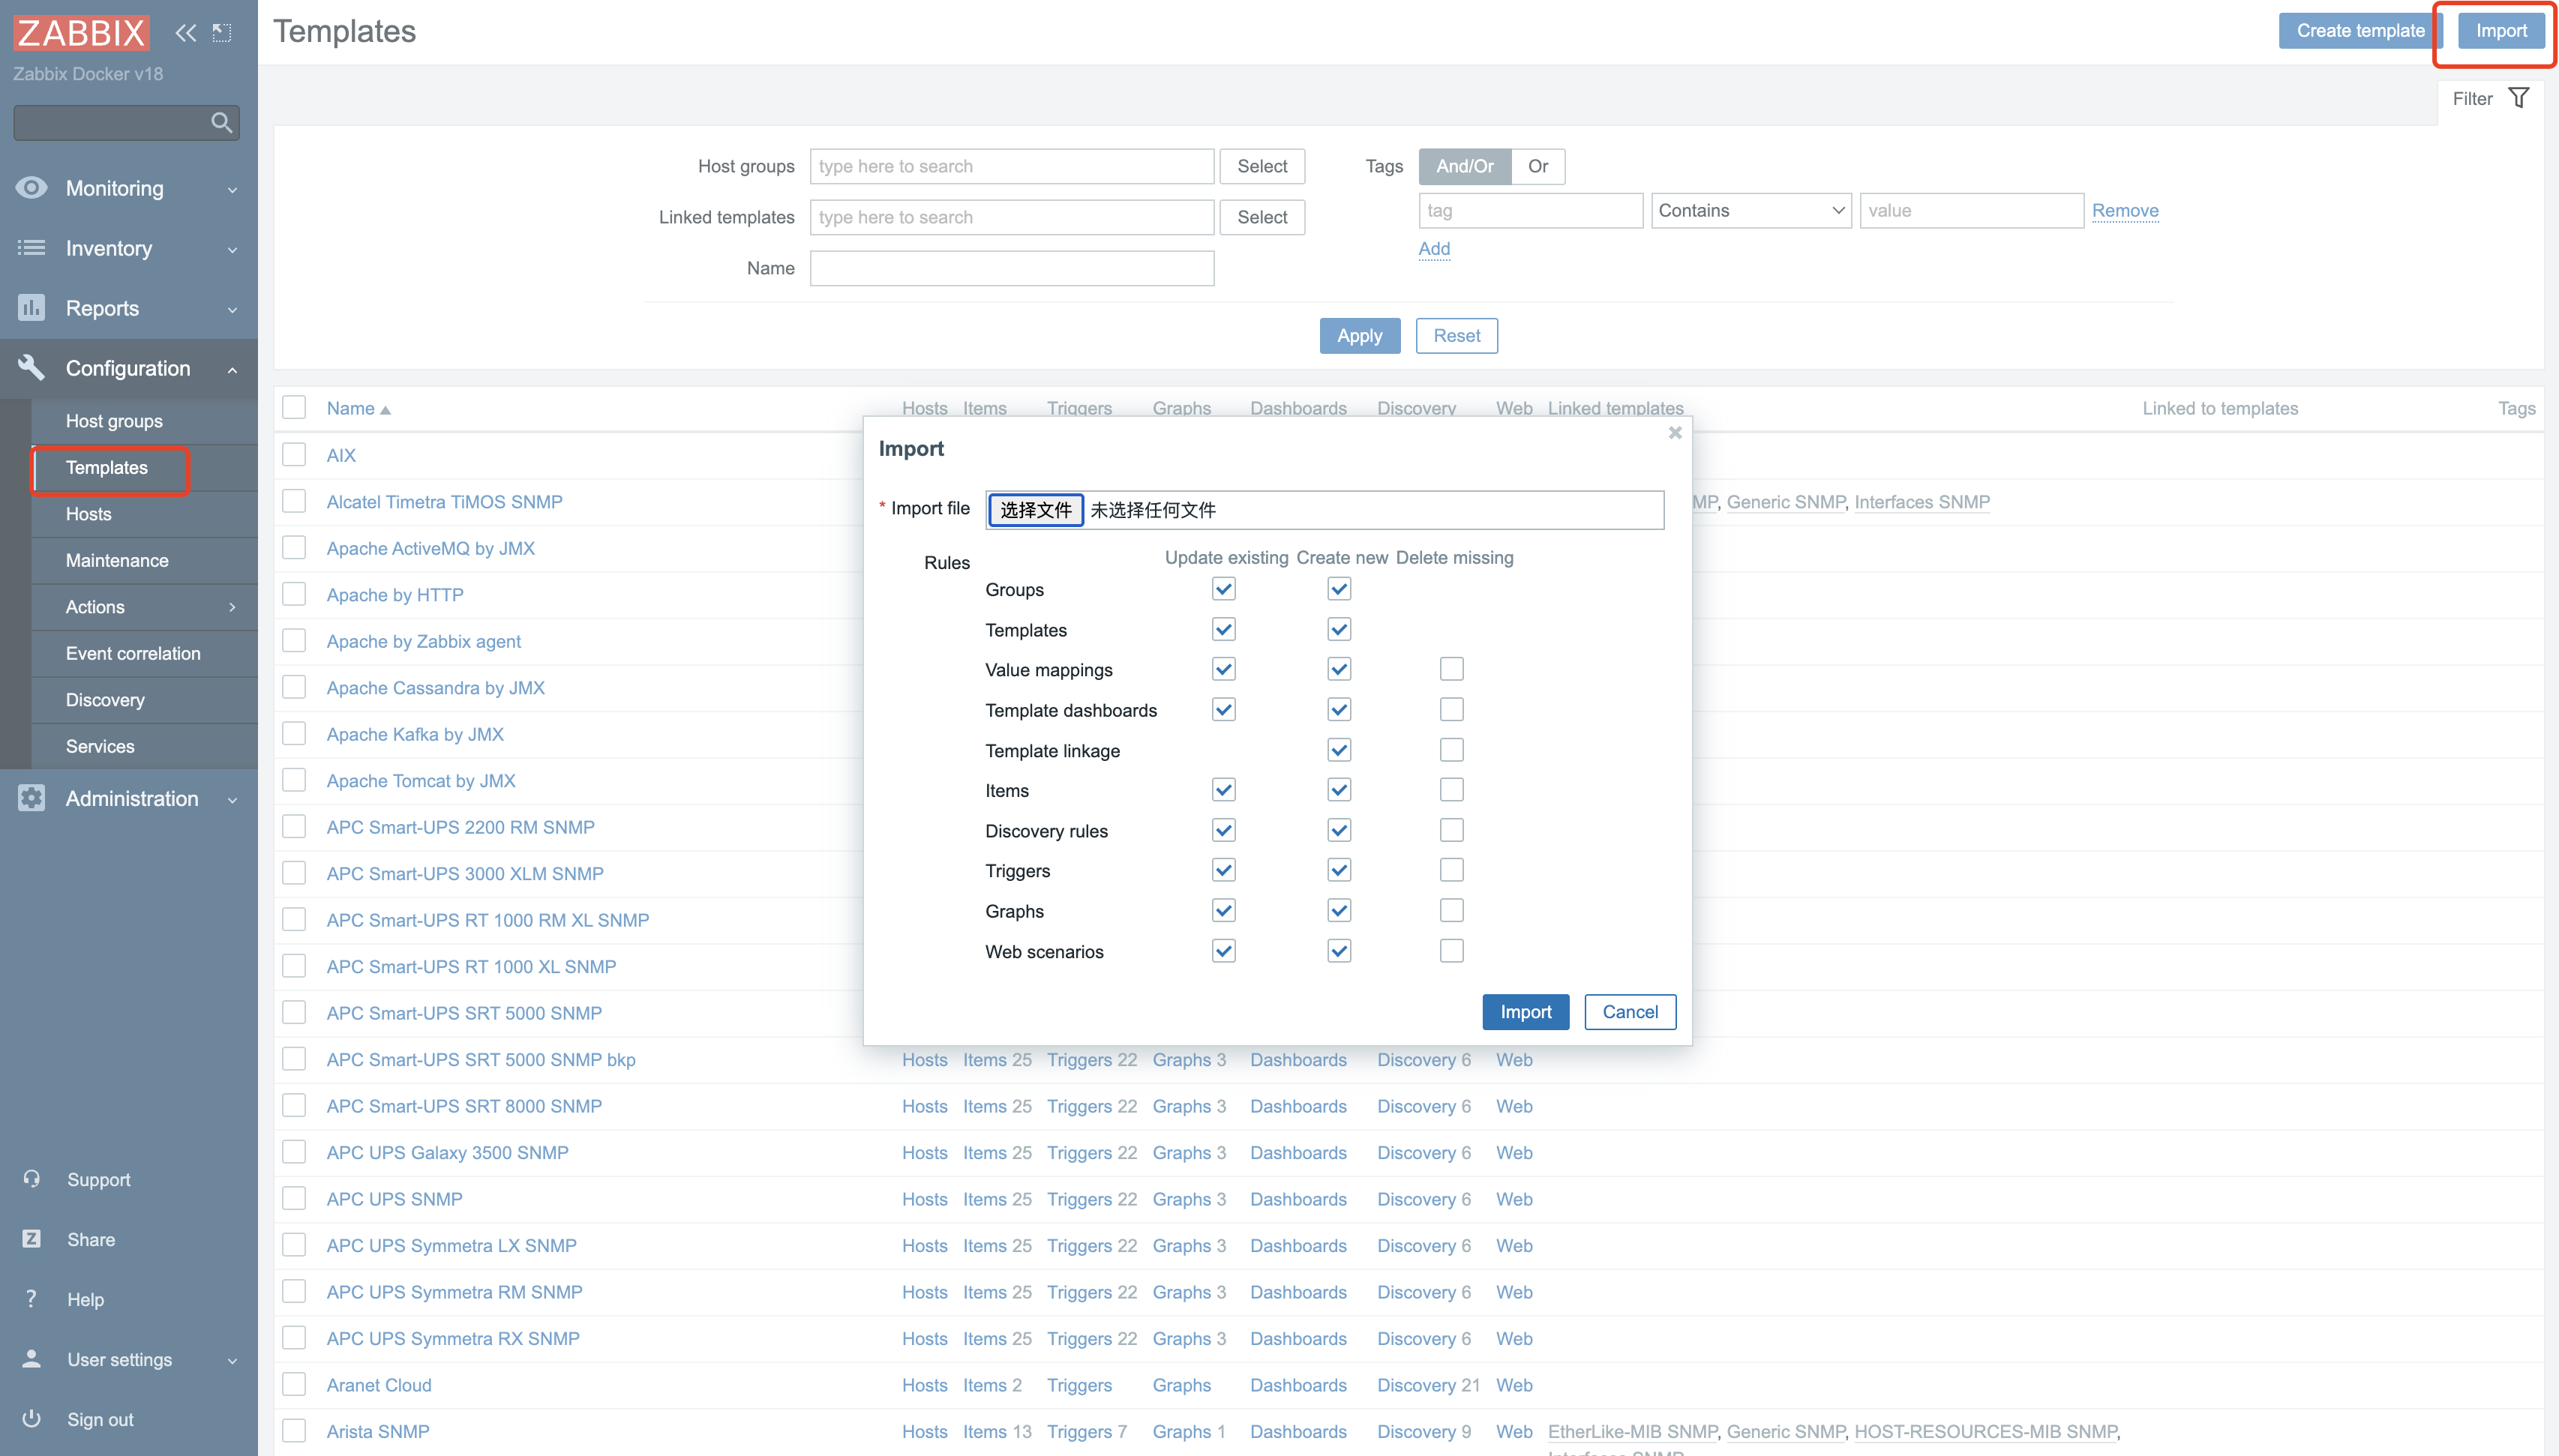
Procedure


 {{ $t('index.defaultHeader.chromeBrowserTip') }}