{{ secondMenu.name }}


The ISO tool migration requires a system shutdown, which will interrupt the client's business operations.
Prerequisite
Steps
Step 1.Create Bootable Media, Burn the HCI ISO to a USB drive or CD/DVD to boot the server.
You can download HCI ISO file on Sangfor community.
![]()
Please note the version of HCI ISO used as the boot media must be the same with the destination HCI platform.
Step 2.Power off the server that needed to migrate, and start the machine and select boot from USB.
Step 3.Select Migrate this machine to Sangfor HCI.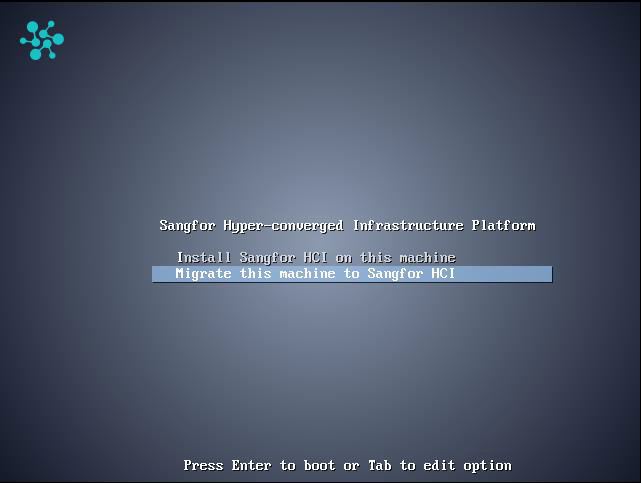
Step 4.Select a network interface that used for communication between host and HCI.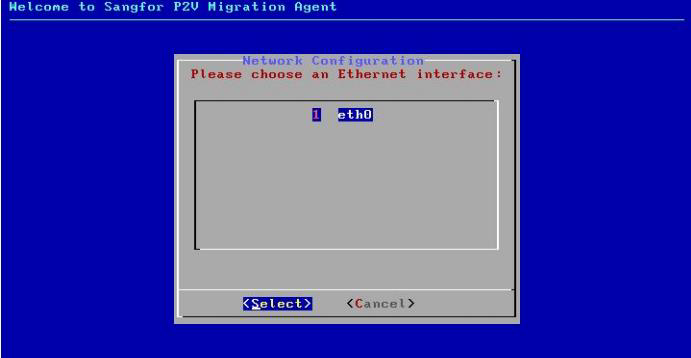
Step 5.Configure the network interface with static IP address, netmask, gateway and last but not least is the HCI cluster IP.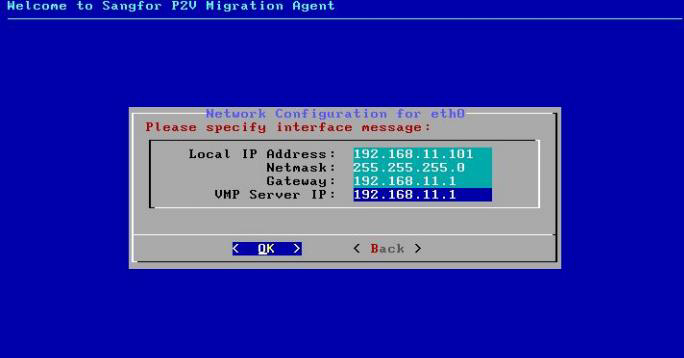
Step 6.After configuration, the system will check the connection between host and HCI. If the connection failed, the system will back to the network configuration to let users edit the setting.
Step 7.After the connectivity is success, following interface will be shown. This indicated the migration is in progressing.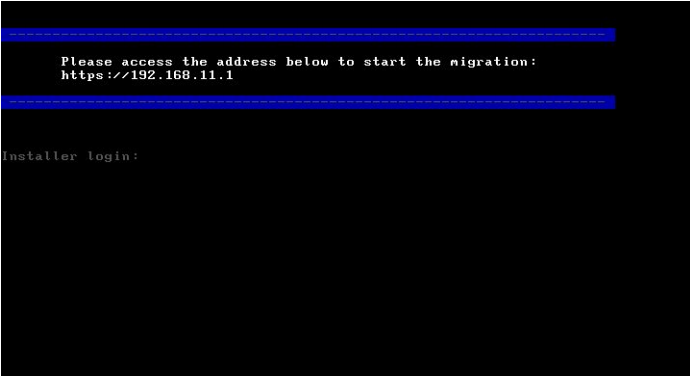
Step 8.After logging in to HCI platform, the migration information will appear, or you can click Convert to VM on the HCI homepage to view the VM being migrated.
Please configure the VM’s settings (including CPU, memory, hard disk, etc.), then submit. The VM start to migrating, you can check the task bubble in the lower-right corner to monitor the migration process.
Step 9.Switch to HCI
Check the migration task progress in the HCI. Once the HCI migration is completed, power on the VM, then verify if the VM’s network connectivity and business services are functioning properly.

 {{ $t('index.defaultHeader.chromeBrowserTip') }}