{{ secondMenu.name }}


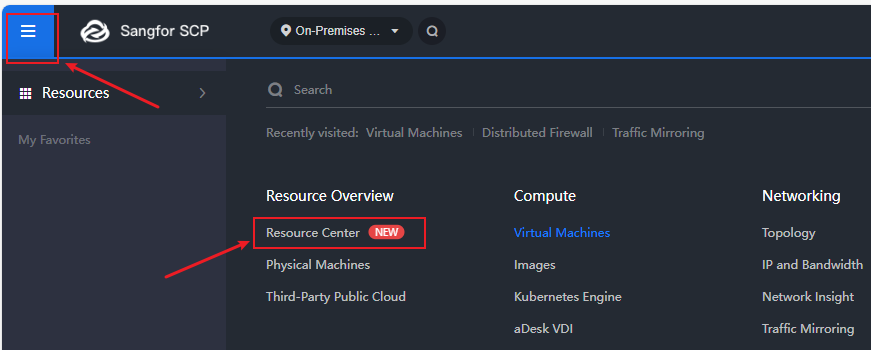
Step 1.Log in to Sangfor SCP, click the three-line icon ![]() in the upper-left corner, and then select Resource Center.
in the upper-left corner, and then select Resource Center.
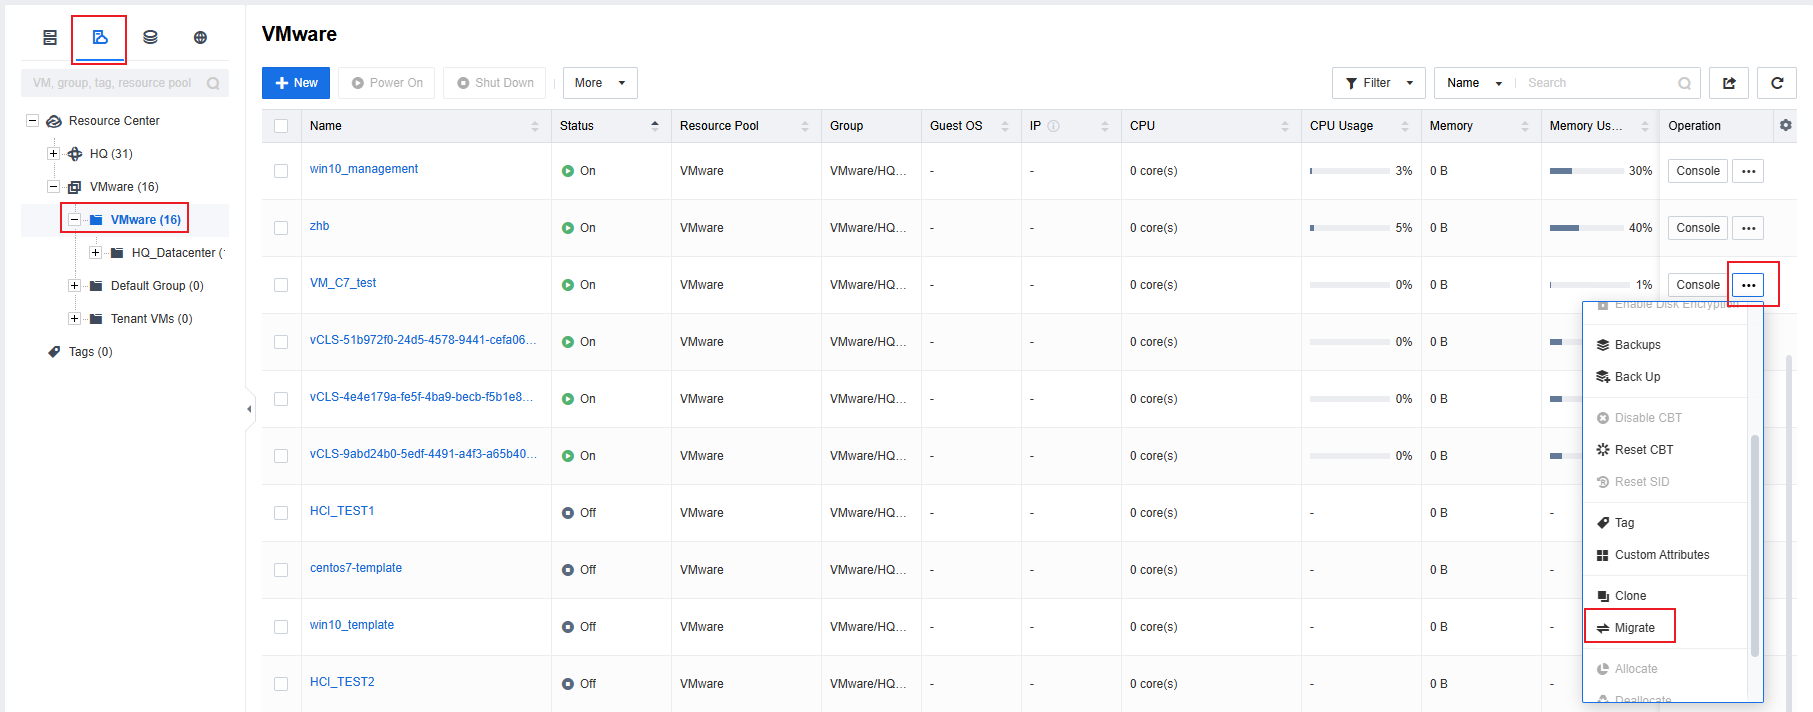
Step 2.Click the ![]() icon, select the VMware resource, then you can see the VMs created in VMware. Choose the VM you want to migrate to Sangfor, then click the
icon, select the VMware resource, then you can see the VMs created in VMware. Choose the VM you want to migrate to Sangfor, then click the ![]() icon and select Migrate.
icon and select Migrate.
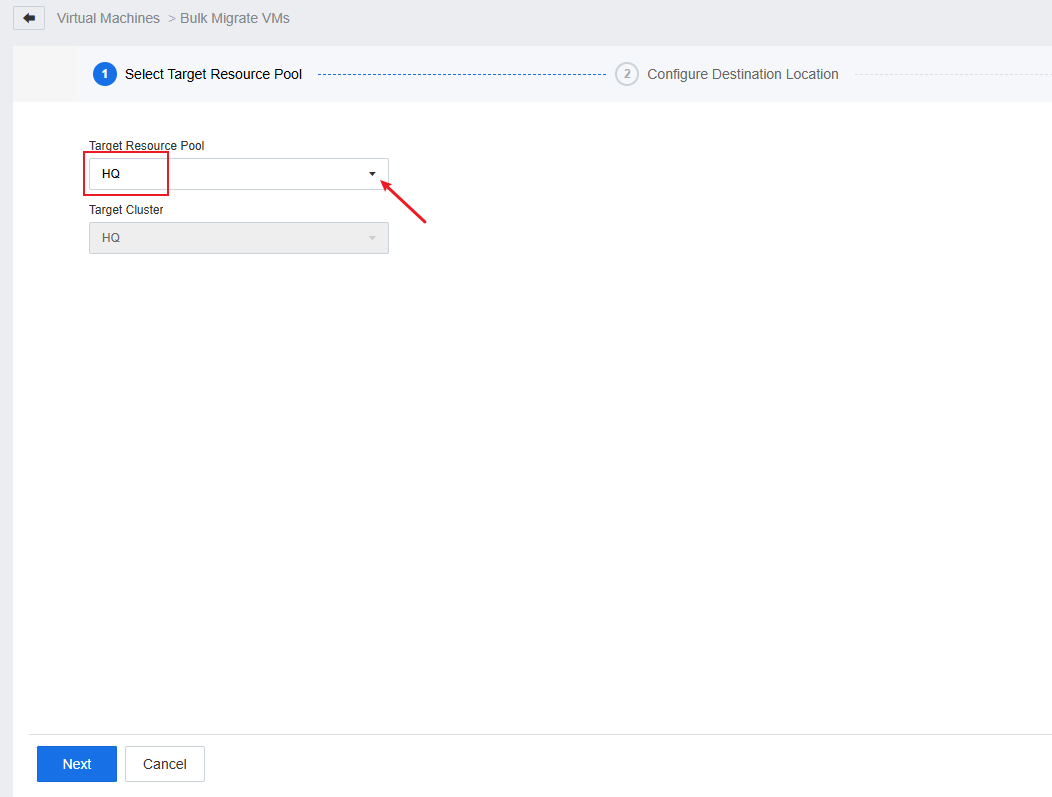
Step 3.Select the target HCI resource pool, click Next.
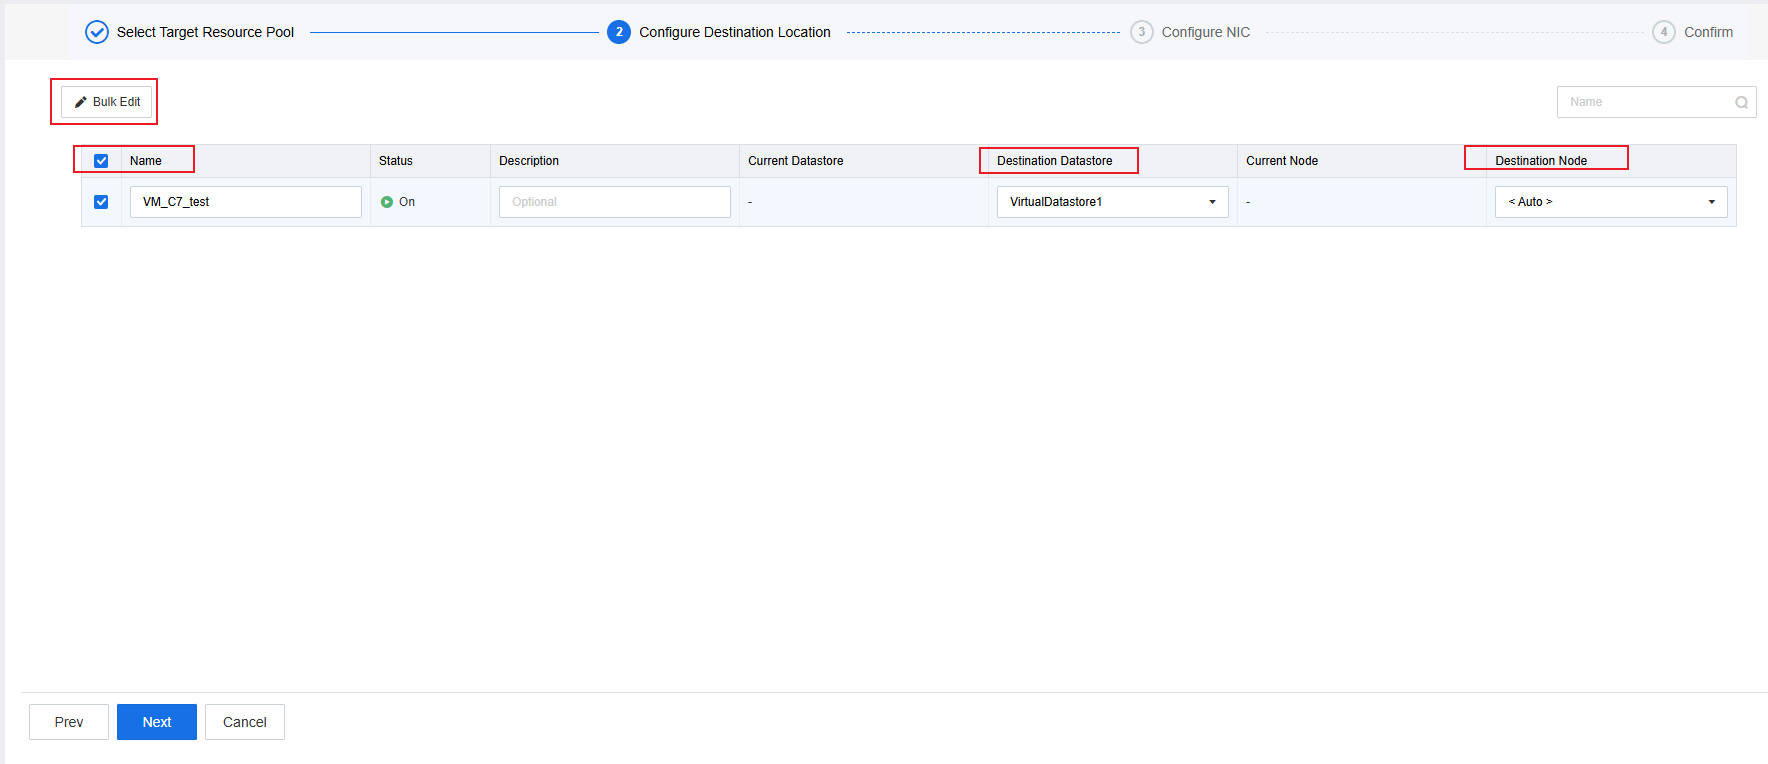
Step 4.Confirm the VM name, Destination Datastore in HCI, the Destination Node selects Auto, then click Next.
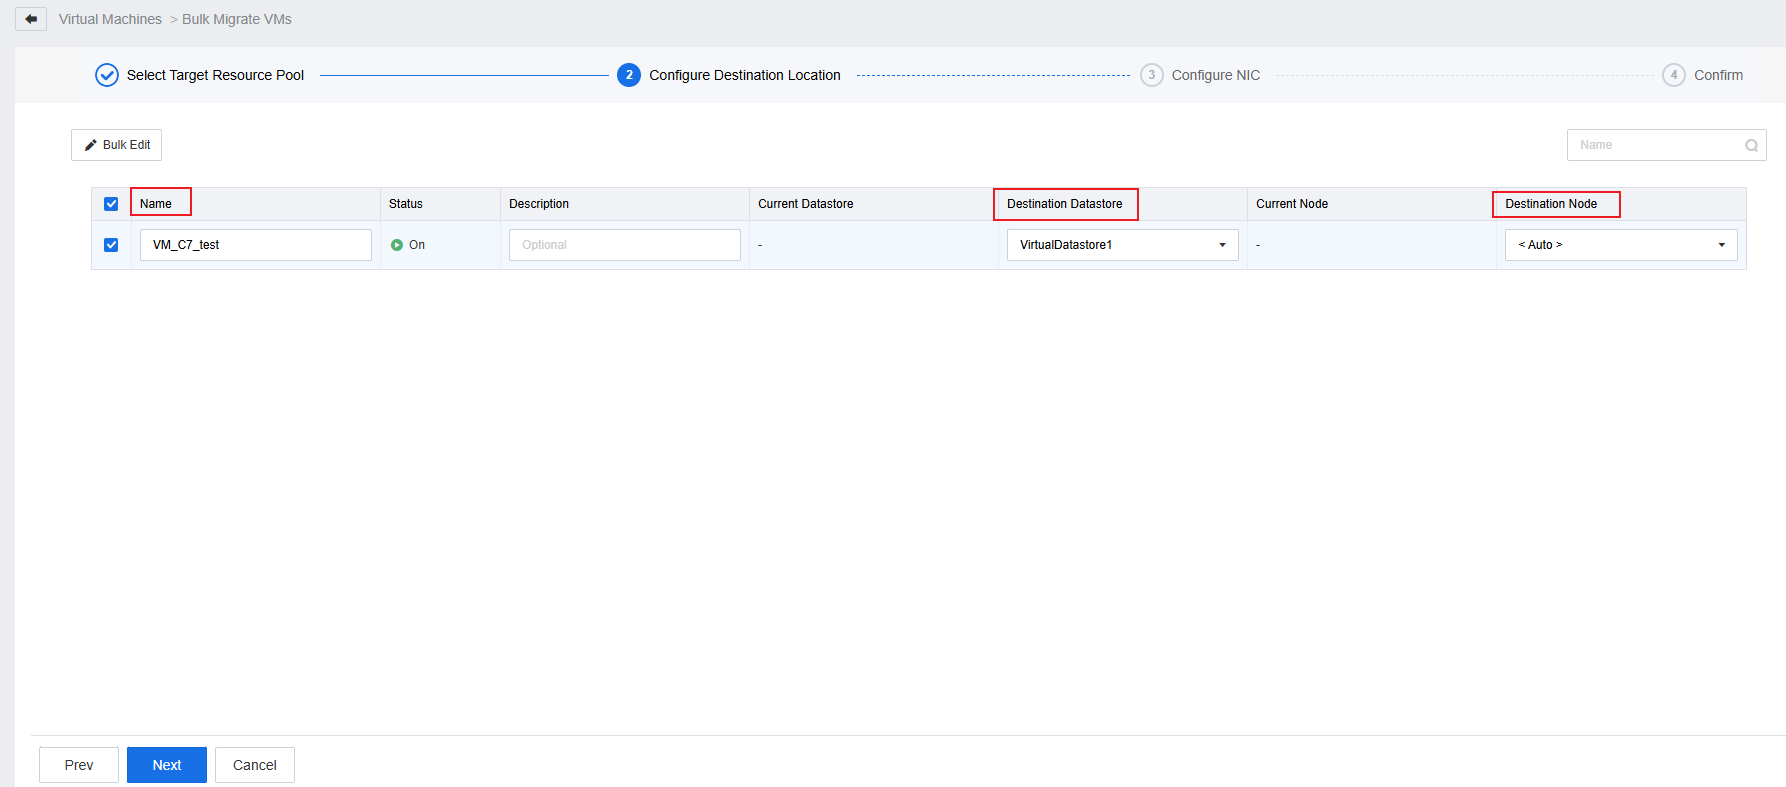
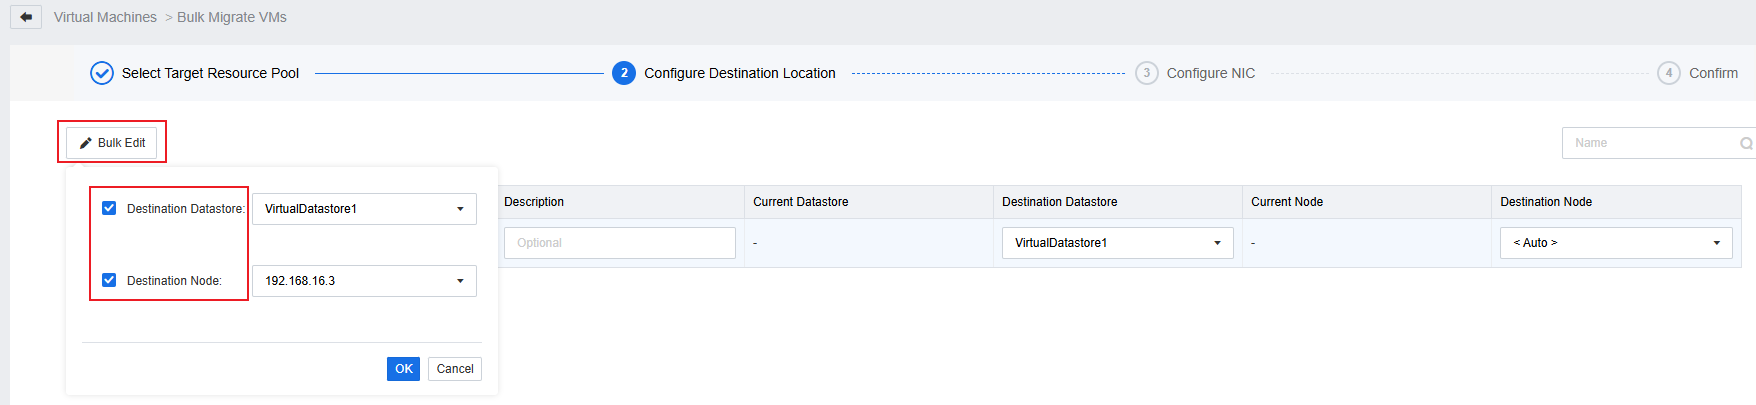
If you are migrating multiple VMs simultaneously, you can click the Bulk Edit to select the Destination Datastores and Destination Node.
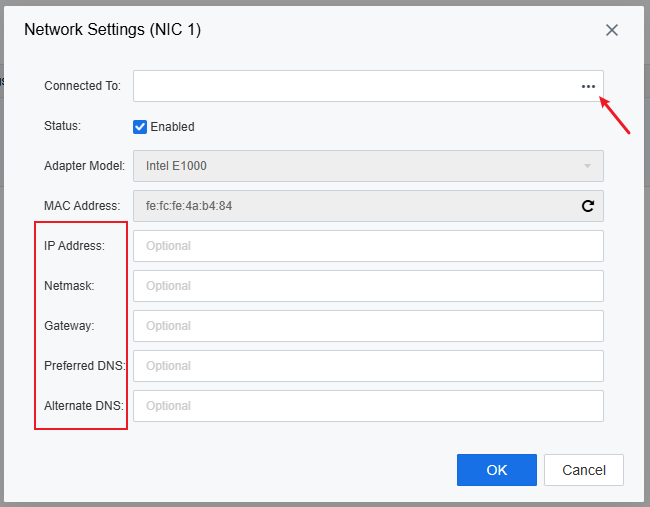
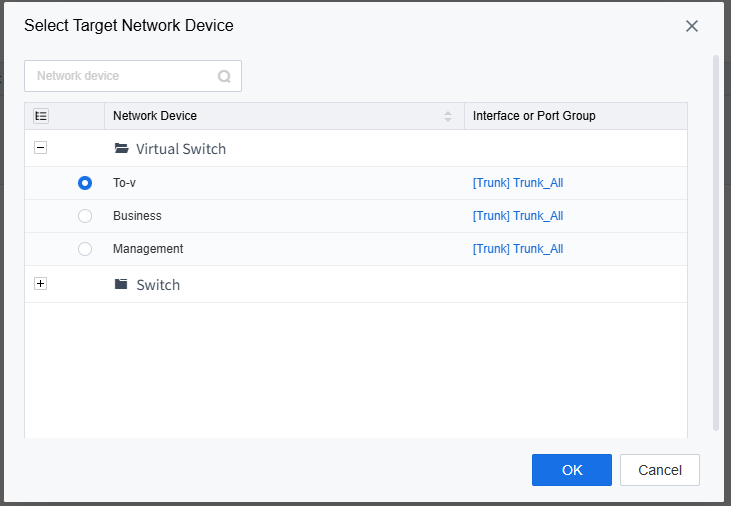
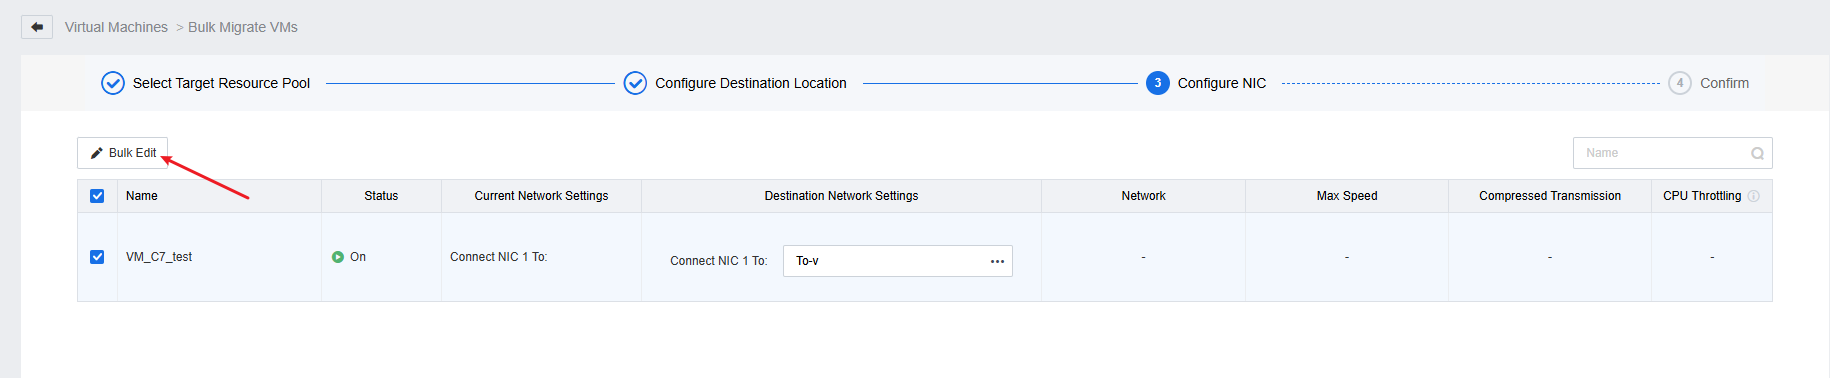
Step 5.Then you can specify which port group and virtual switch the VM should connect to after migration.

If you don’t modify the IP address, the VM will retain its original IP from the VMware environment. You can also specify a new IP address during this process if needed.
You can also click the Bulk Edit button when you have many VMs to migrate, you can set the Max Speed, Compressed and CPU Throttling in this menu, then click Next.
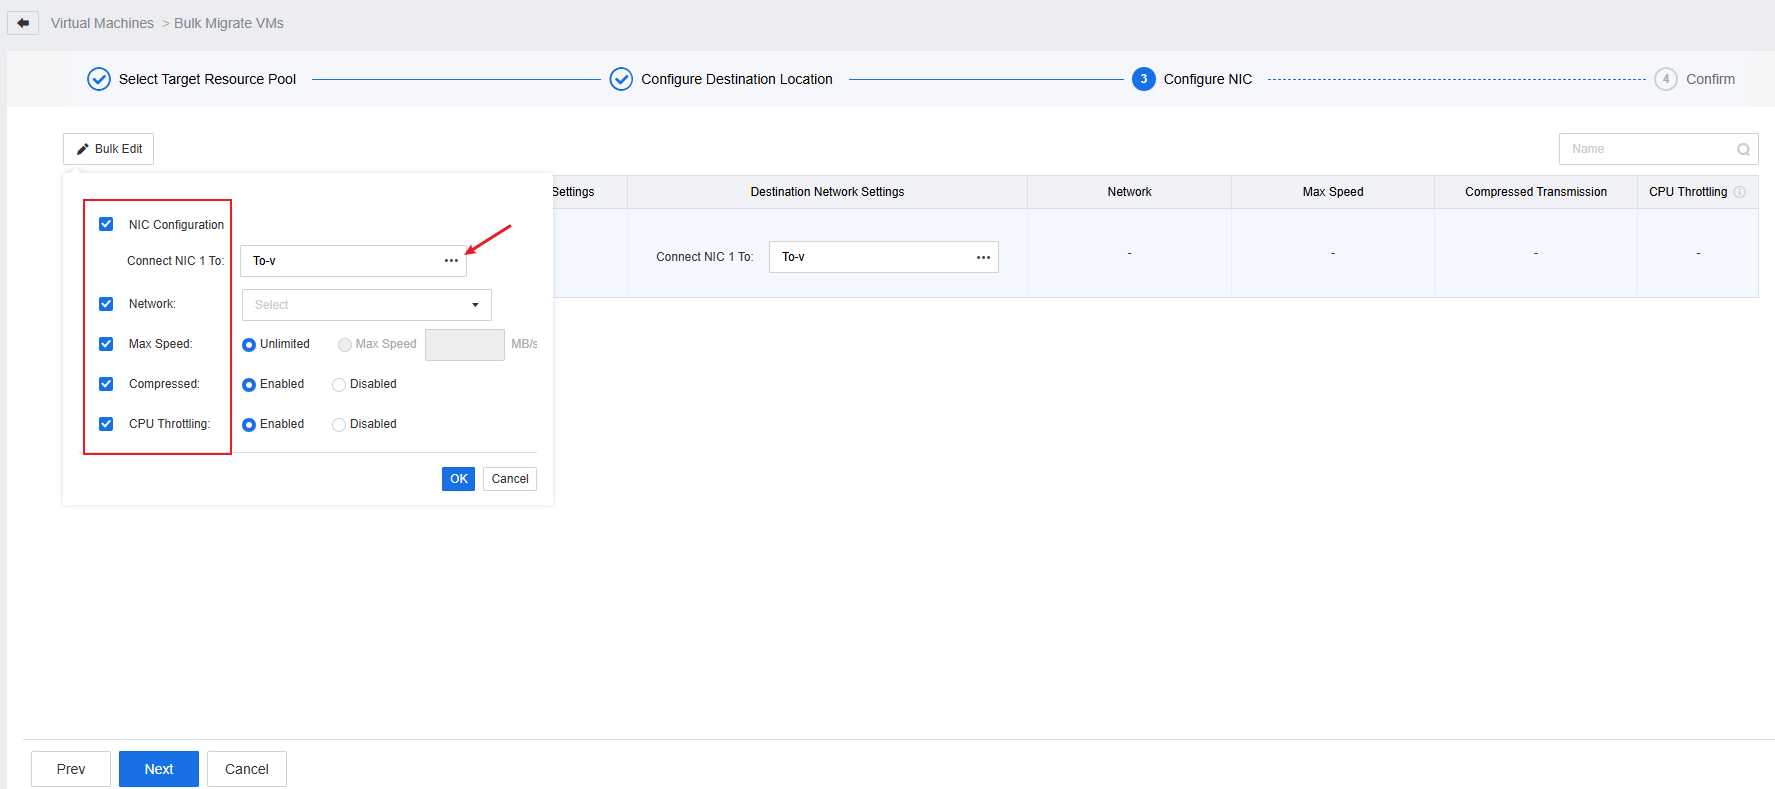
The Network setting is used for migration across the HCI cluster, you can ignore it here.
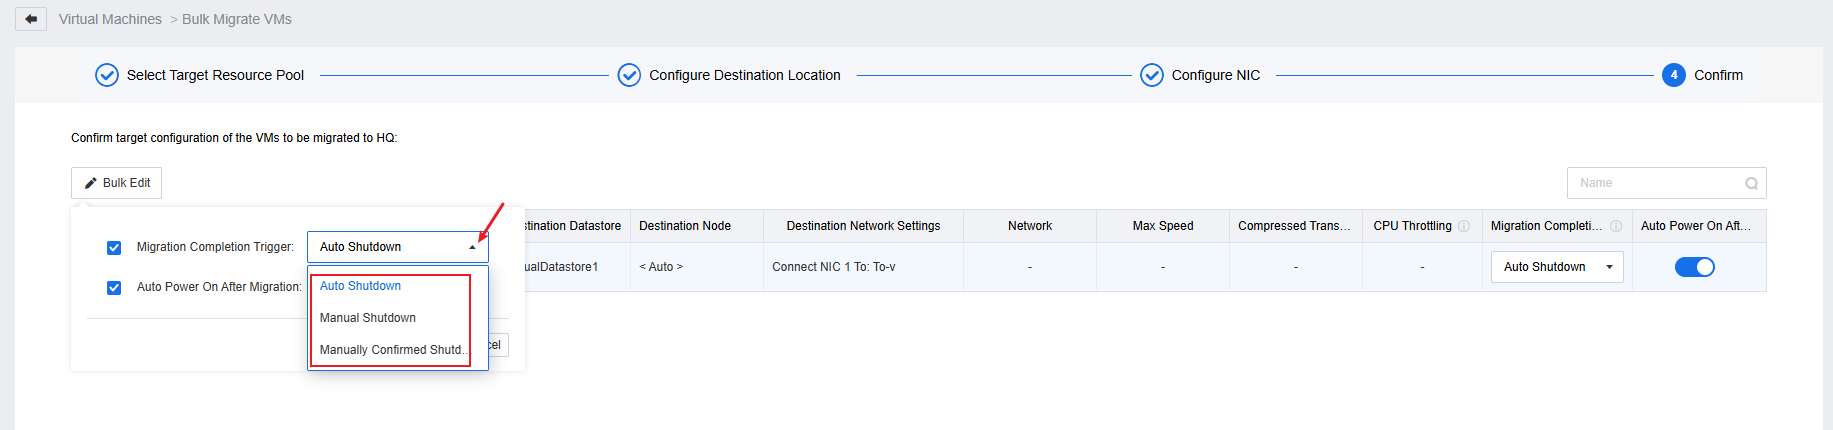
Step 6.Before fail over, you need to shutdown the VM. To make the migration process can be more controllable, we suggest selecting Manual Shutdown and enabling Auto Power On After Migration, then click Next.
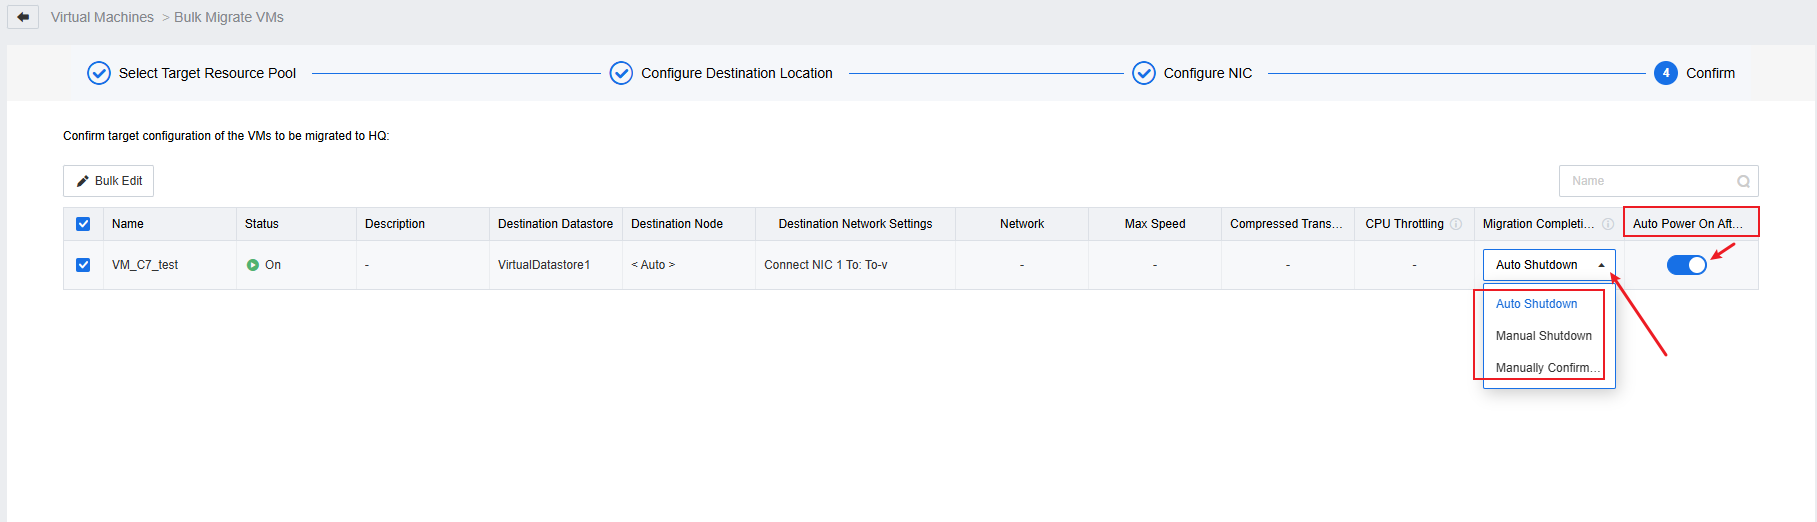
Here you can also set this configuration in batches by clicking the Bulk Edit.
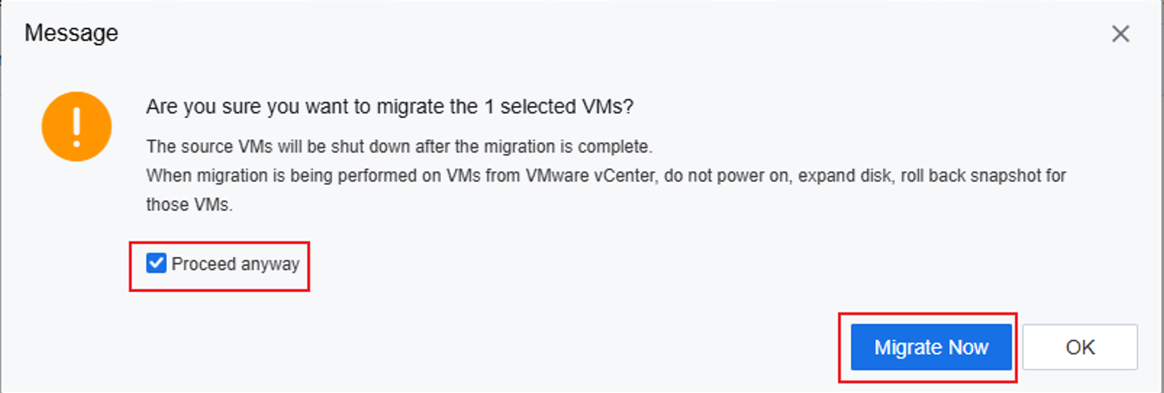
Step 7.A pop-up will appear with migration requirements, please review and follow these requirements, check Proceed any way, then click Migrate Now.

 {{ $t('index.defaultHeader.chromeBrowserTip') }}