{{ secondMenu.name }}


Here is the guidance how to migrate the VM via SCMT Point-to-Point Agentless method.
Below are the key steps for Point-to-Point Agentless method.
Prerequisite:
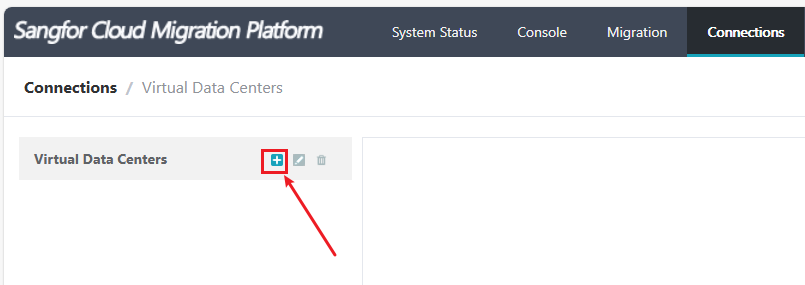
Step 1.Log in to the SCMT using created account, go to Connections click Virtual Data Centers.
![]()
Do not use the admin account, need create a new administrator account. For create new administrator account please refer to the user creation.

Step 2.Click the ![]() button.
button.
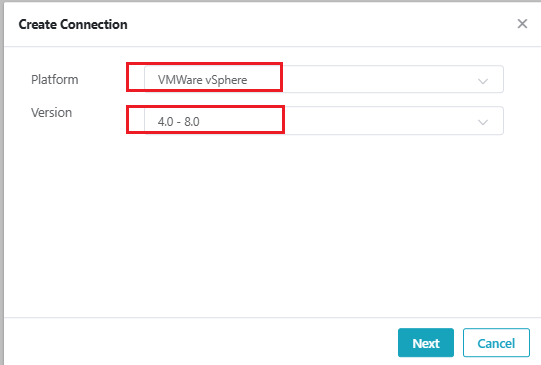
Step 3.Select VMware vSphere for Platform. Version keeps 4.0-8.0, then click Next.
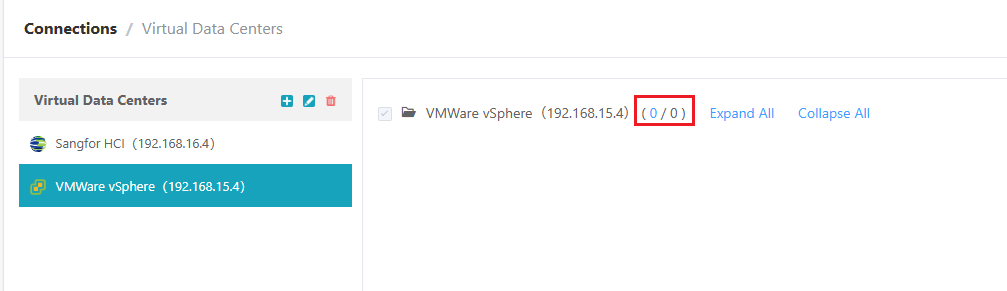
Step 4.Fill the VMware vCenter IP or Domain, keep the Port as 443, input the vCenter username and password, check Scheduled Auto Data Sync, then click Finish.

Step 5.If the network and all information is correct, you can see the VMware has connected to SCMT successfully, wait a while and refresh the page to get the full VMware’s VM information.

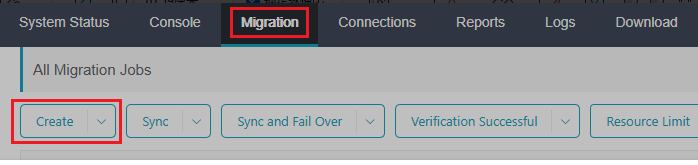
Step 1.Log in to SCMT using the created account, go to Migration, click Create.
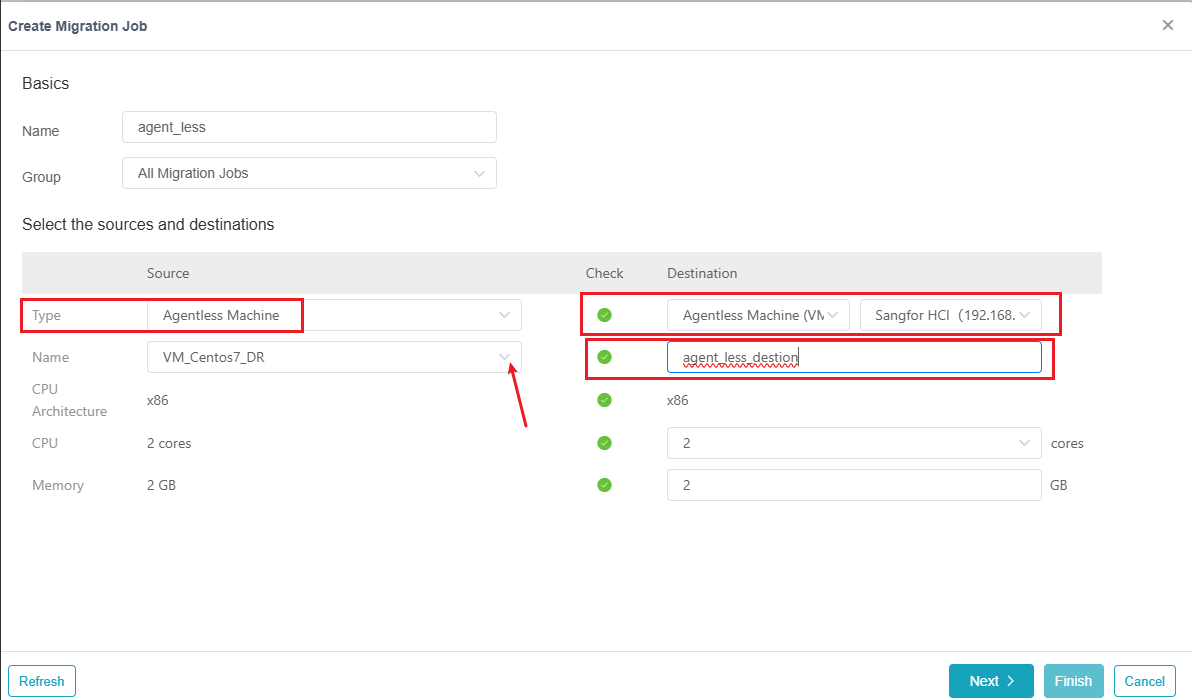
Step 2.Fill in the name of the migration job, keep the Group as default.
In left Source section, the Type select Agentless Machines, the name is the source VM to be migrated, you can click the ![]() button to select the VM that is running on the VMware platform.
button to select the VM that is running on the VMware platform.
In the right Destination section, select the Agentless Machine (VM Create by Virtualization Platform), then select the HCI cluster. In the second line, enter the VM name (This will be the name that SCMT creates in the HCI cluster), then click Next.
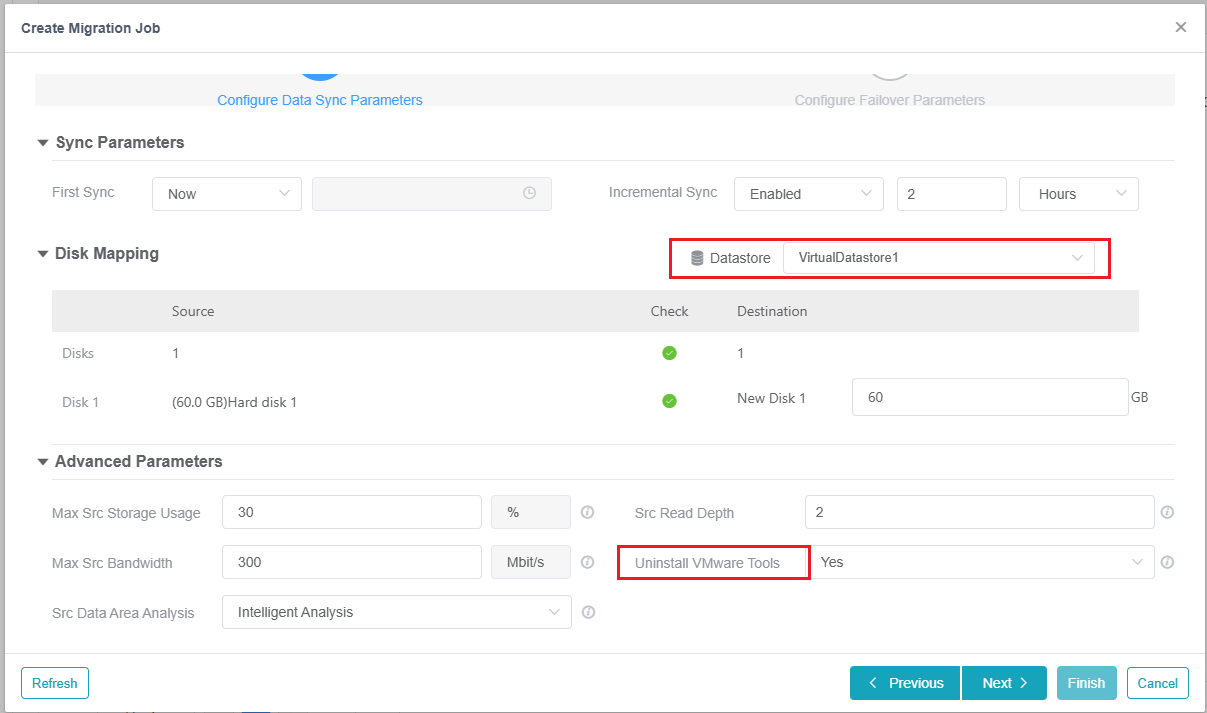
Step 3.In the Disk Mapping section, you can select which datastore to run the VM in HCI platform. In the Advanced Parameters section for the Uninstall VMware Tools select Yes, click Next.
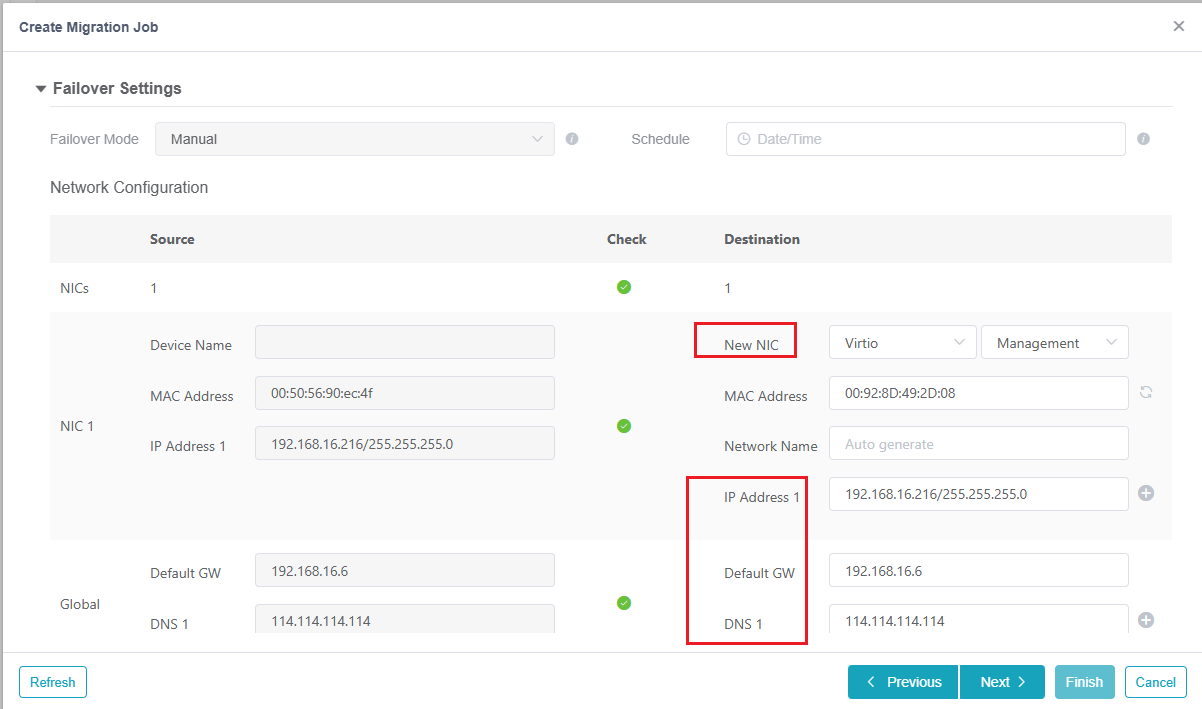
Step 4.Keep the Failover Settings as default.
In the right-side Destination section, select Virto for the the New NIC, you can choose which port group or virtual switch to connect to in HCI virtual topology by clicking ![]() button. Keep the Network Name as default. After migrating VM to Sangfor, the VM’s IP address will keep the same, click the
button. Keep the Network Name as default. After migrating VM to Sangfor, the VM’s IP address will keep the same, click the ![]() button can add one more IP in one NIC if needed. Keep the global configuration as default if the information is correct. Then click Next.
button can add one more IP in one NIC if needed. Keep the global configuration as default if the information is correct. Then click Next.
![]()
After the task created success, SCMT will automatically create a destination VM in HCI and will boot it from Bare Metal Recovery PE. If the destination VM created by SCMT cannot get IP from DHCP server or the IP get from DHCP server cannot communicate with SCMT, you must configure the suitable IP for the destination VM after the migration task is created.
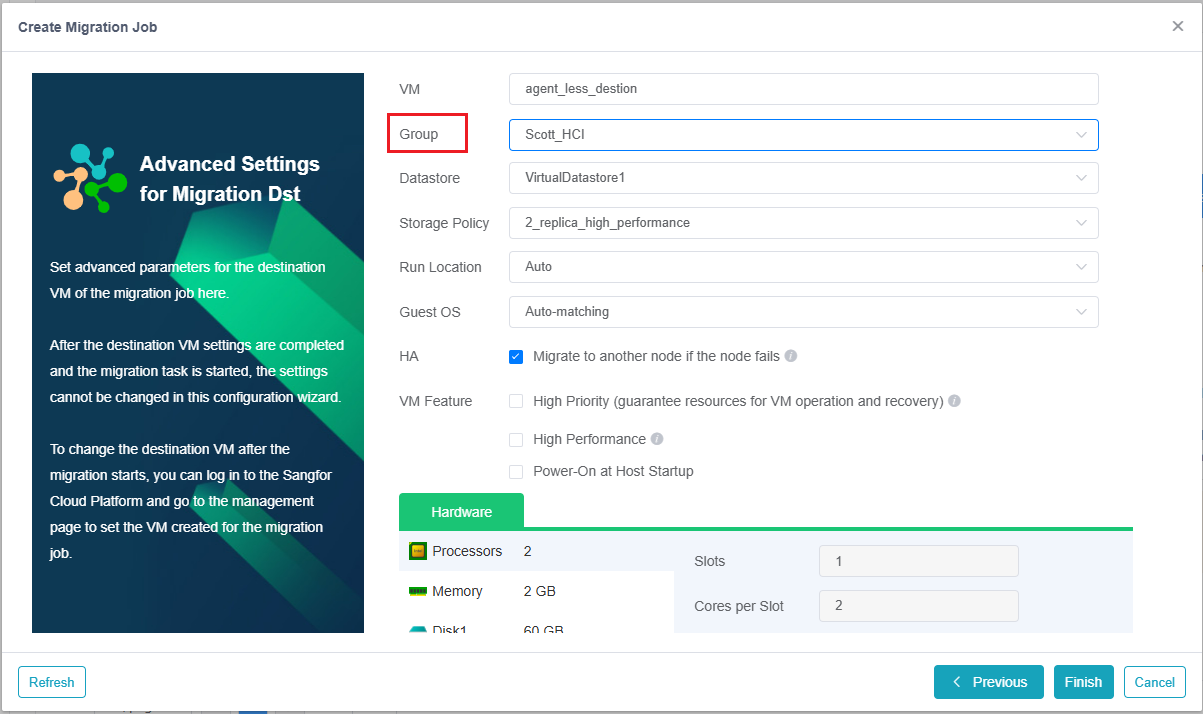
Step 5.Select the HCI VM group, confirm all other configurations are correct, then click finish.
Click OK after Job Created Successfully message appears.

Step 6.Check the task. After the migration task created successfully, go to the Migration, you can see the new created migration task. The status is Initializing the job.
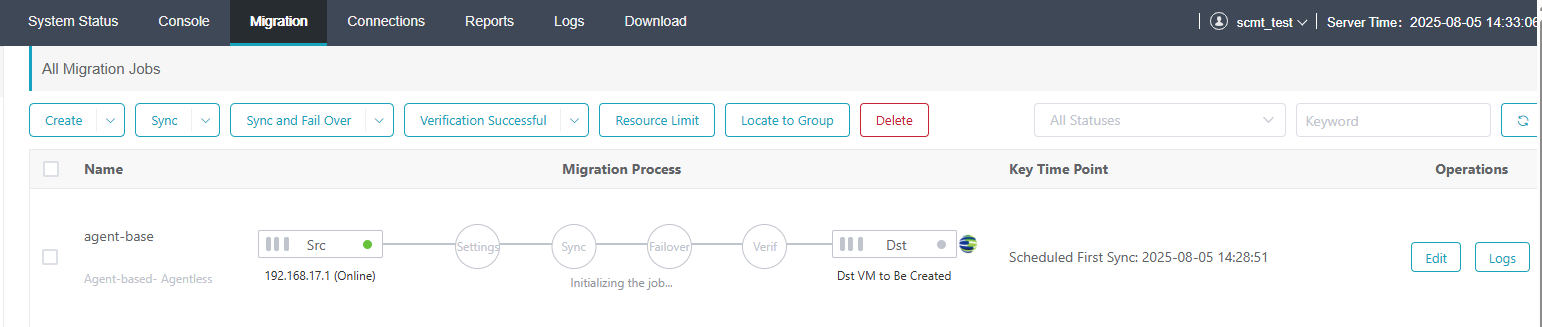
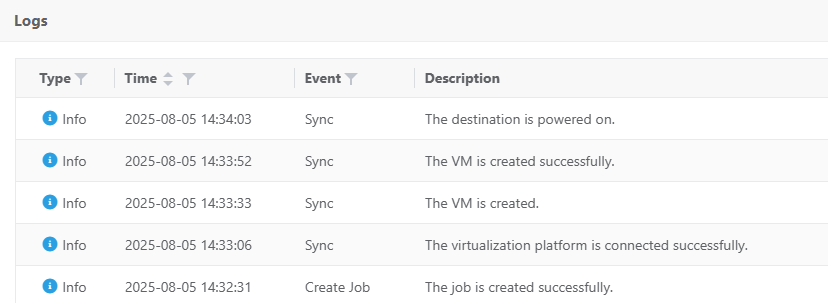
You can click the Logs to check the job’s detail information.
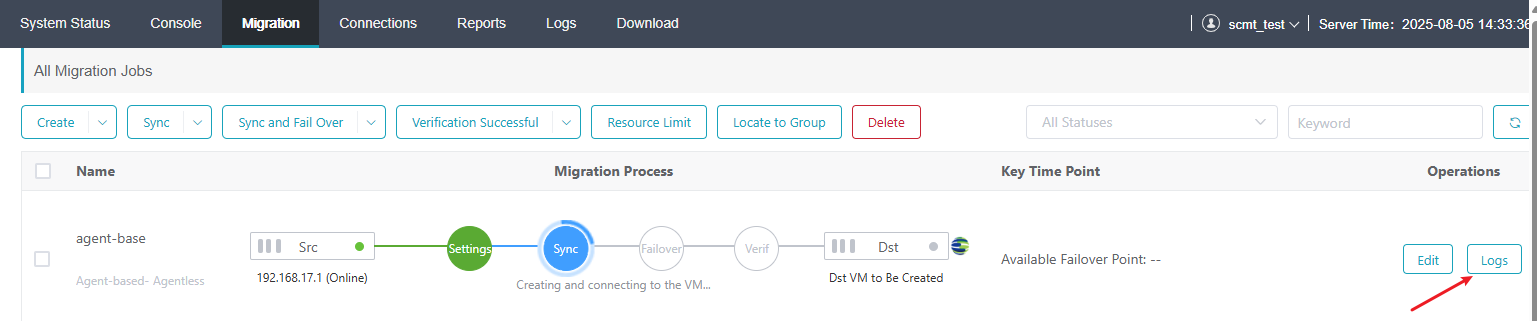
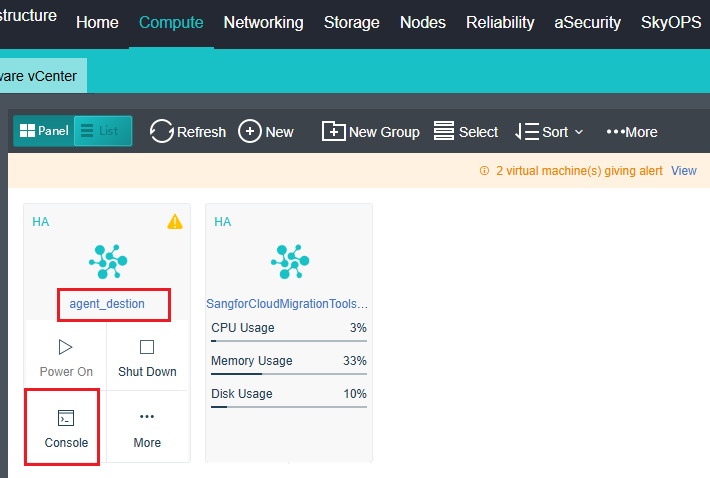
Step 1.When the migration job’s status is Creating and connecting to the VM, and the Logs shows The destination is powered on, log in to HCI cluster, go to Compute and locate the VM created by SCMT, click Console.

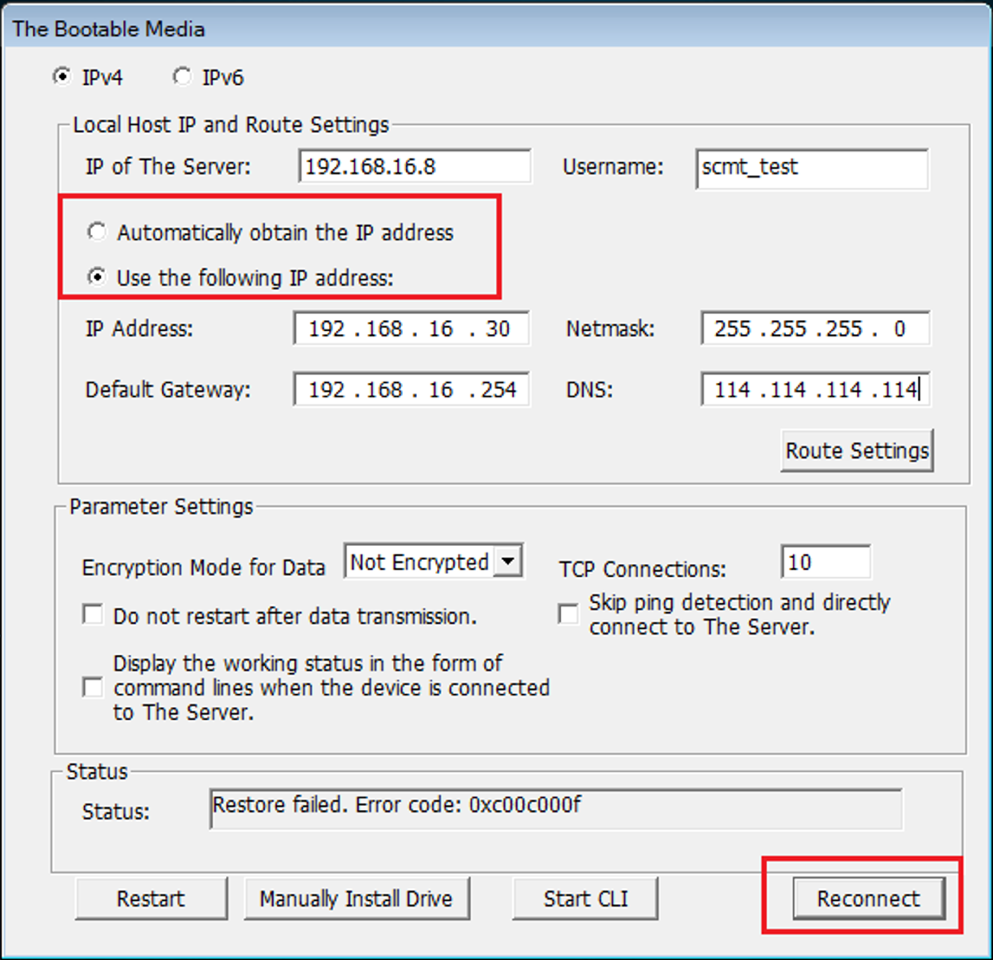
Step 2.Access the Console, you can see the VM boot from Bare Metal Recovery PE. You can select Automatically obtain the IP address so that the PE system to obtain an IP from DHCP server (ensure this IP can communicate with SCMT and the source VM), or you can select Use the following IP address to set the IP address manually. Click Reconnect.
![]()
Please ensure that the destination VM can communicate with SCMP and source machine.
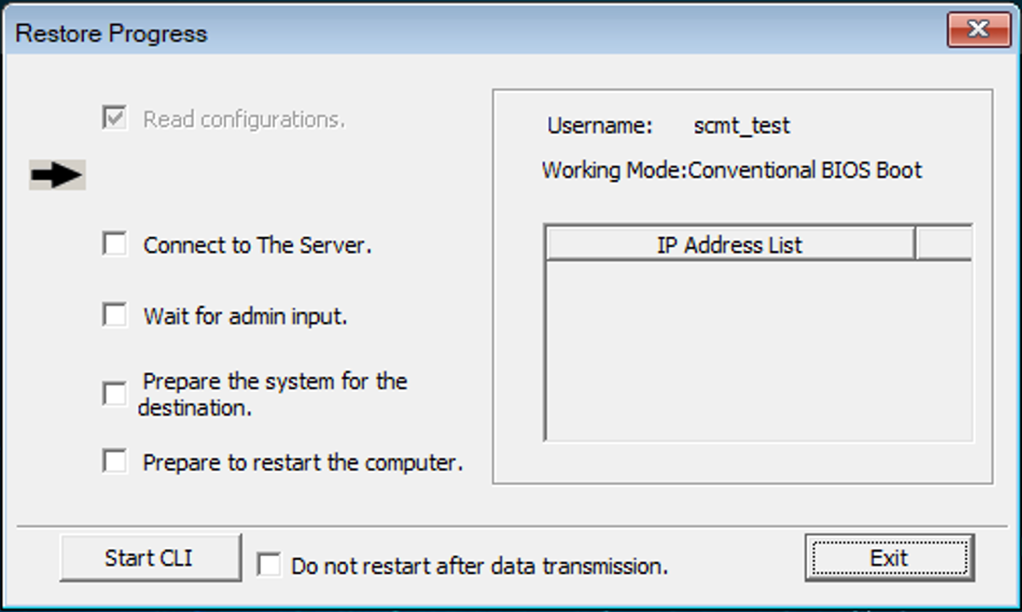
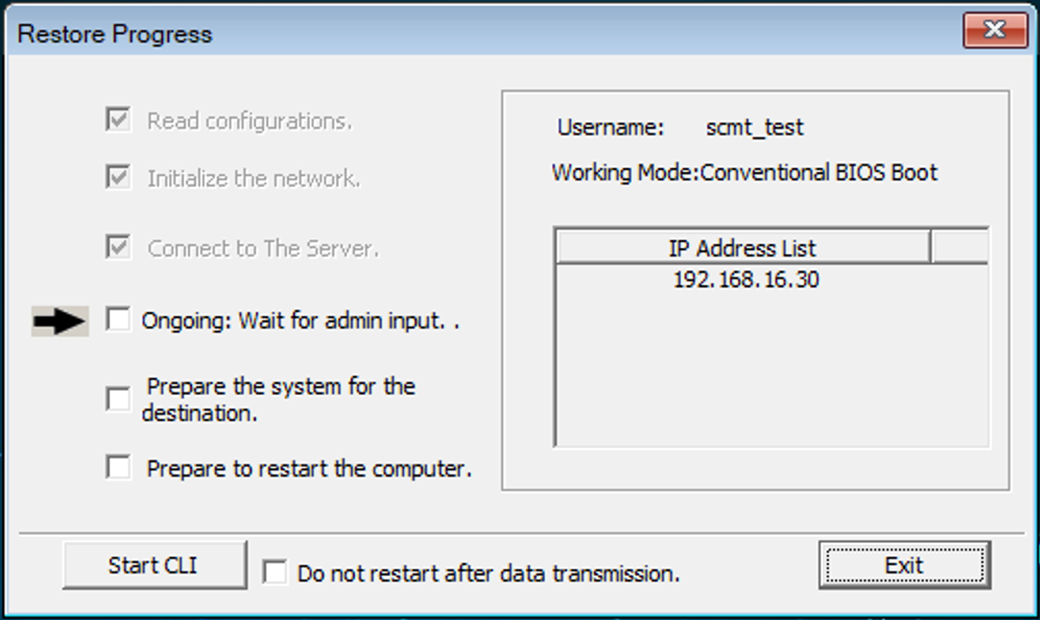
Step 3.Wait for the IP address initiation completed, when the process reaches Ongoing: Wait for admin input, it means the IP address initiation successfully.
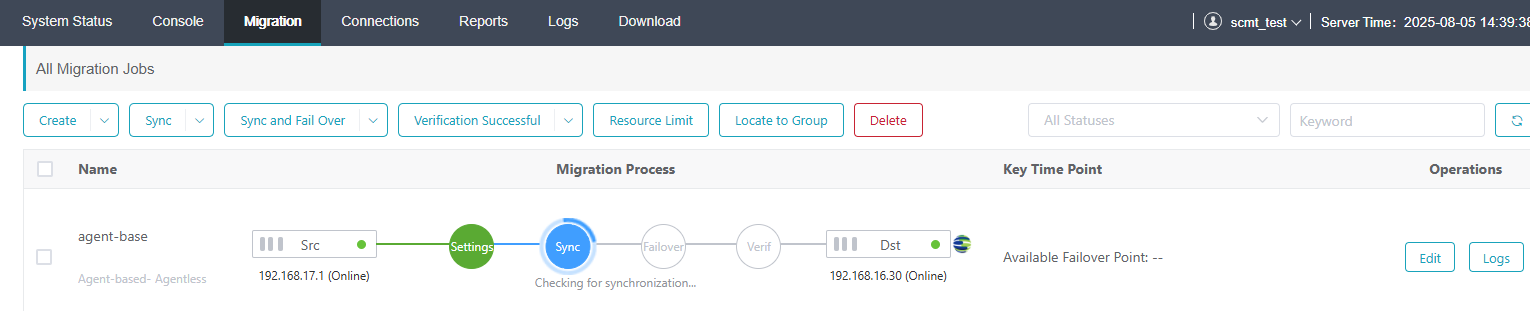
Step 4.Log in to SCMT using created account, if the network is functioning properly, you can see the task status is Checking for synchronization, then change to Synchronizing data after a while.
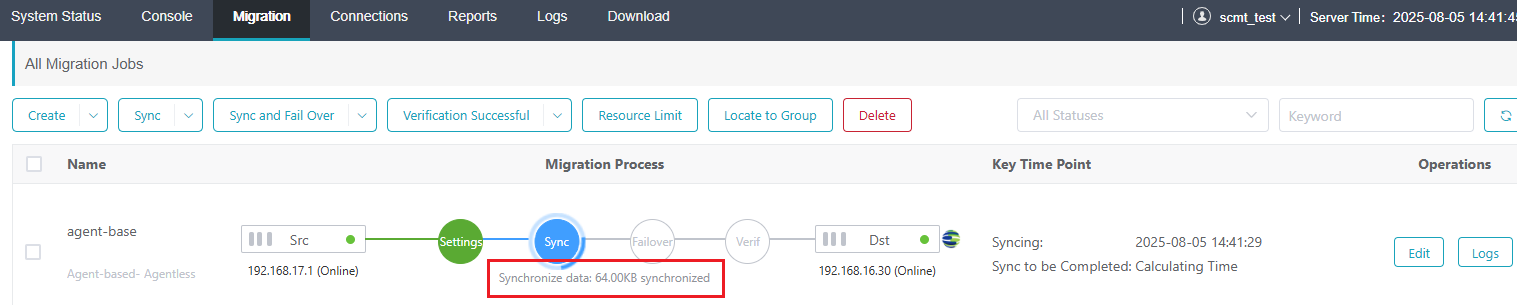
Step 1.Wait for the task status reaches Synchronization succeeded. Waiting for the next synchronization. Click Sync and Fail Over.

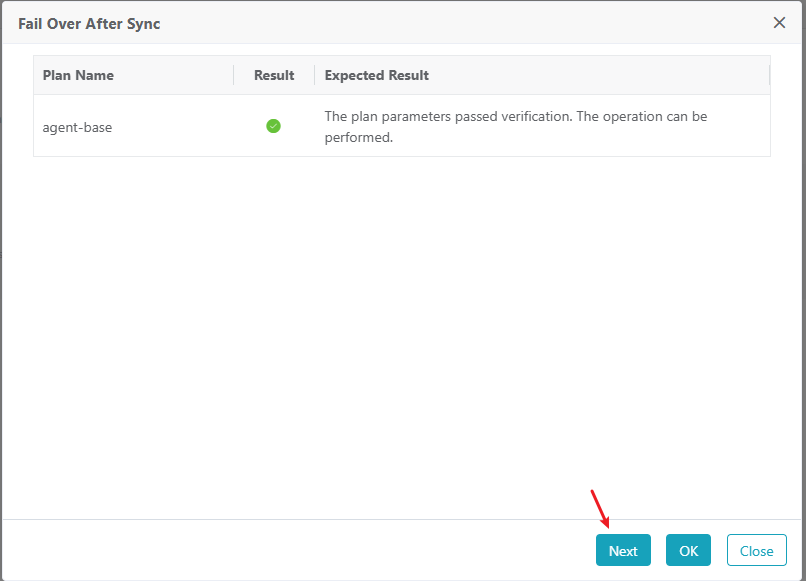
Step 2.Click Next in the pop-up window.
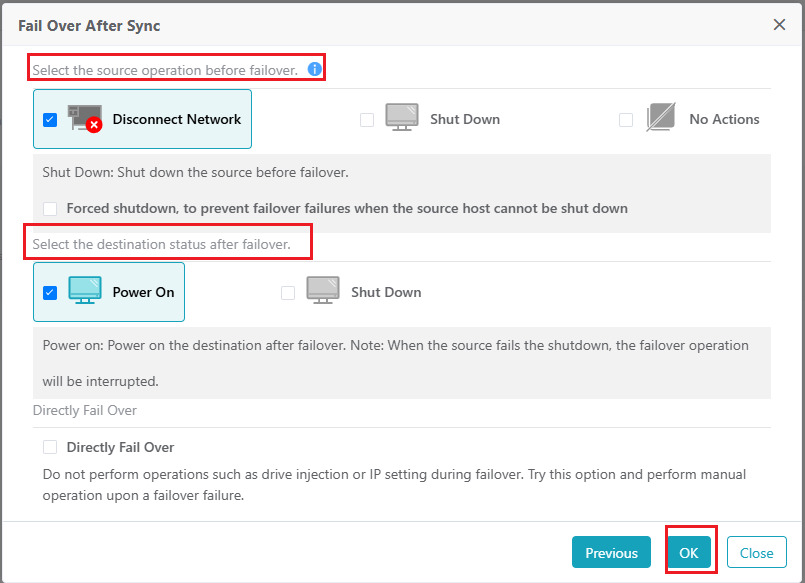
Step 3.Select Disconnect Network under the Select the source operation before failover, select Power On under the Select the destination status after failover (recommended if customer no other require), then click OK.
![]()
This operation will disconnect network of source machine, please perform it only during periods when business operations are permitted.
Step 4.Click OK after Sync Now and Fail Over operation Successful message appears.

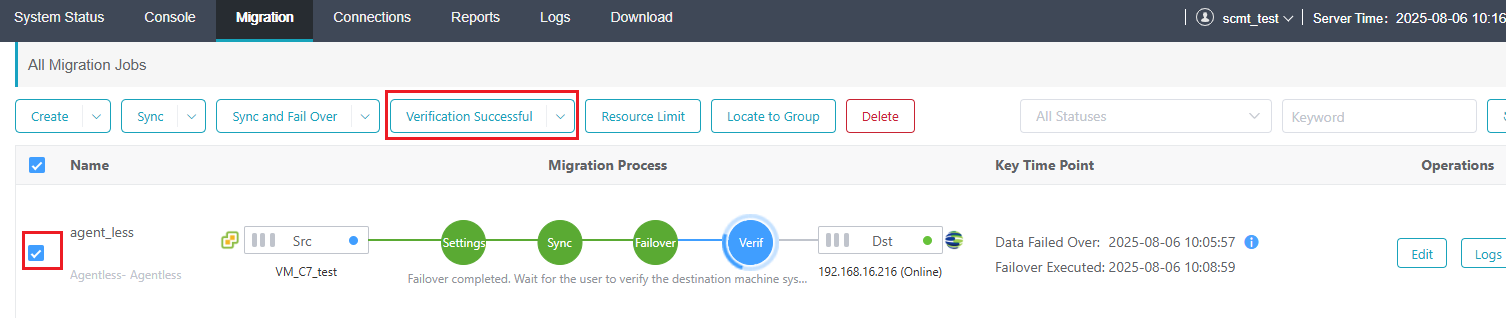
Step 5.When the task reaches Failing over: Waiting for dest host online, log in to HCI and open the VM console to confirm the destination VM power on normally (need wait a while here). If the VM works normally after check, then click Verification Successful under SCMT migration task.

Step 6.Click OK after Verification Successful setting Completed message appears, the SCMT point to point agent-less migration task is completed.

 {{ $t('index.defaultHeader.chromeBrowserTip') }}