{{ secondMenu.name }}


Here is the guidance how to install SCMT on Sangfor Platform.
Prerequisite:
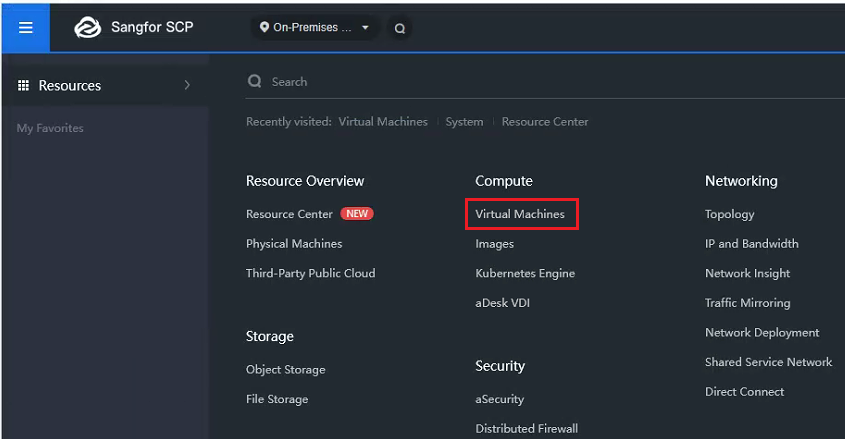
Step 1.Log in to Sangfor SCP, click the three-line icon ![]() in the upper-left corner, and then select Virtual Machines.
in the upper-left corner, and then select Virtual Machines.
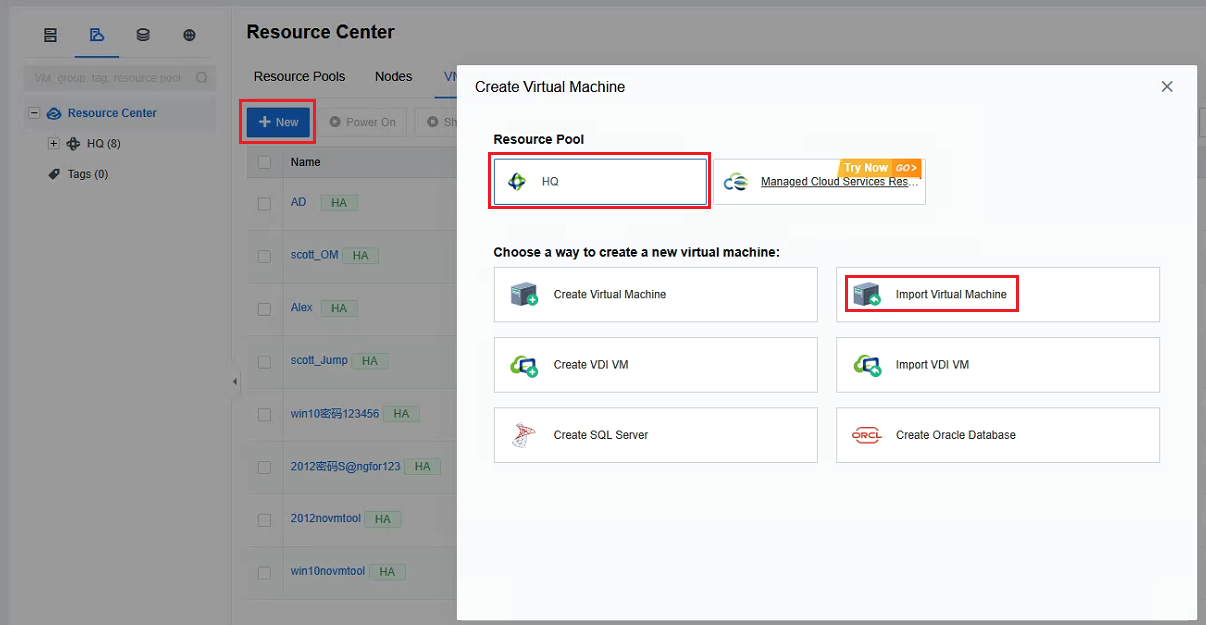
Step 2.Click New, select the Resource Pool > Import Virtual Machine.
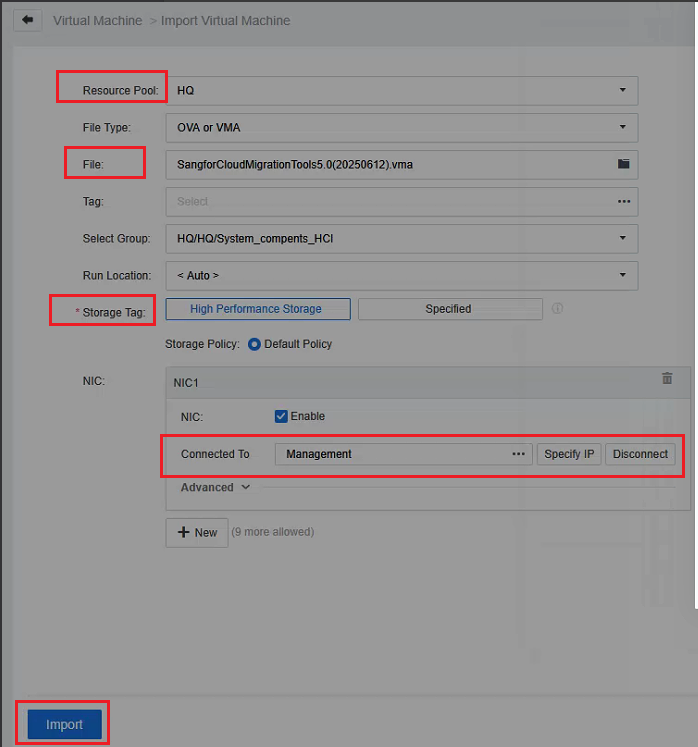
Step 3.Confirm the resource pool is correct, file Type select OVA or VMA, In File section, click the folder icon ![]() next to it and select the downloaded SCMT VMA file. Select the group you want to put in, keep the tag default. The Storage tag determines which datastore the SCMT will be placed in. If you want to change it or have forgotten which tag corresponds to which datastore, you can click the Specify button to select it. Storage Policy keep the default. In the NIC section click the
next to it and select the downloaded SCMT VMA file. Select the group you want to put in, keep the tag default. The Storage tag determines which datastore the SCMT will be placed in. If you want to change it or have forgotten which tag corresponds to which datastore, you can click the Specify button to select it. Storage Policy keep the default. In the NIC section click the ![]() button. You can select which port group or switch the SCMT connect to. Then click Import.
button. You can select which port group or switch the SCMT connect to. Then click Import.
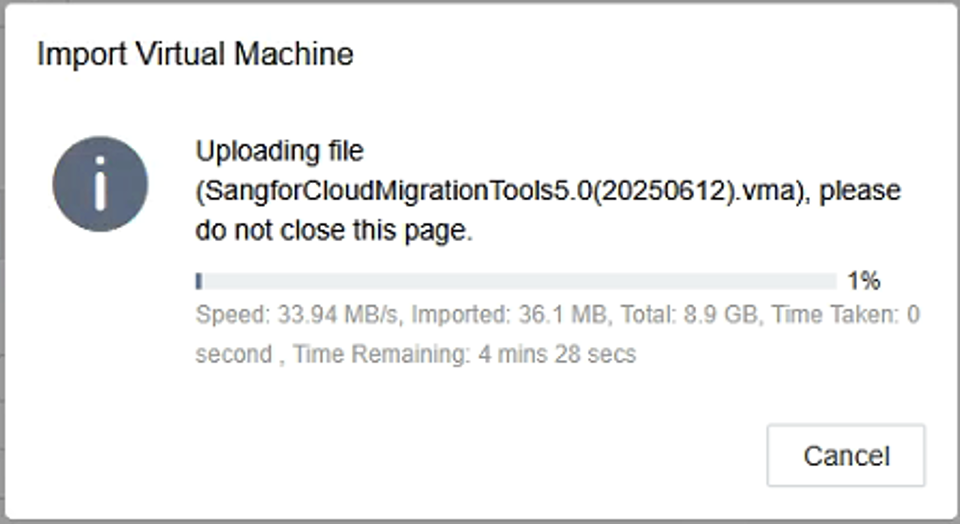
Wait for the VMA file to be uploaded successfully.
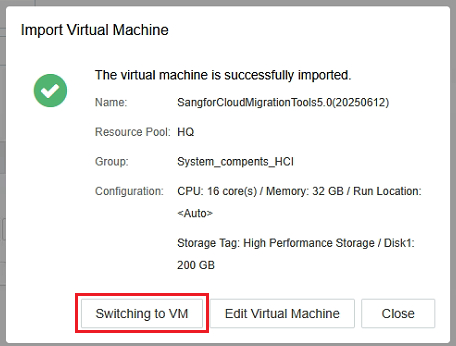
Step 4.After the VMA file is uploaded successfully and the SCMT VM is created successfully you will get the prompt like the following picture then click Switching to VM.
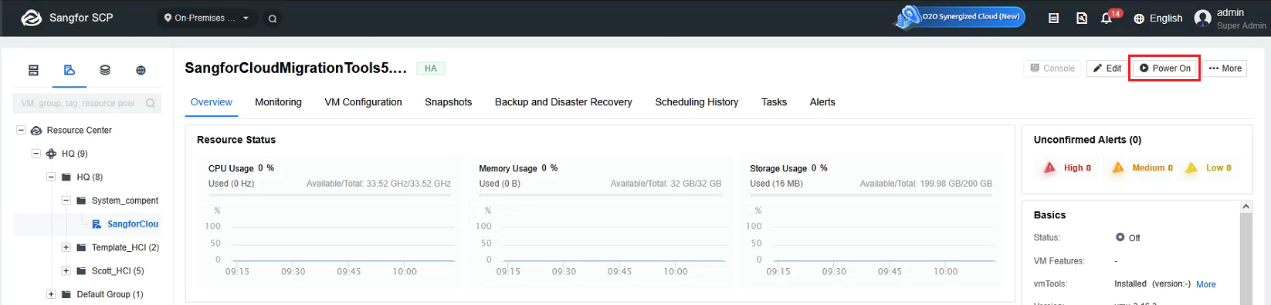
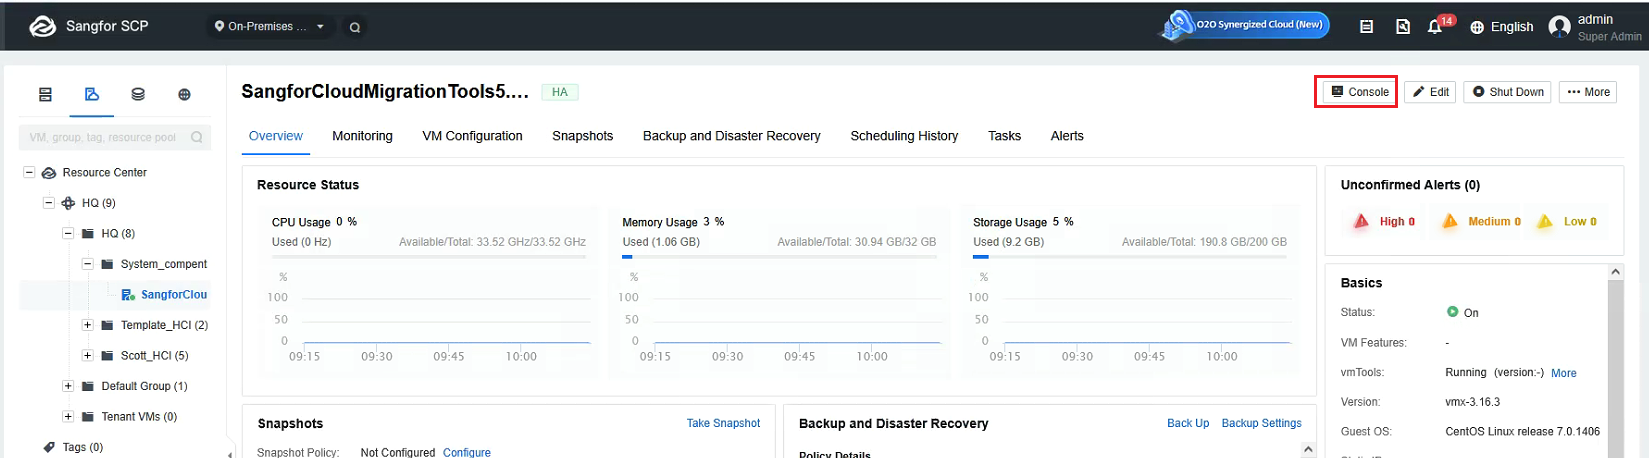
Step 5.Click the Power On button to power on the VM, wait for the VM power on successfully, then click the Console.
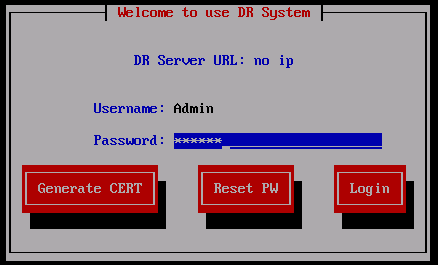
Step 6.After you go to the console page, fill in the password. The password is 123456 then click Log in.
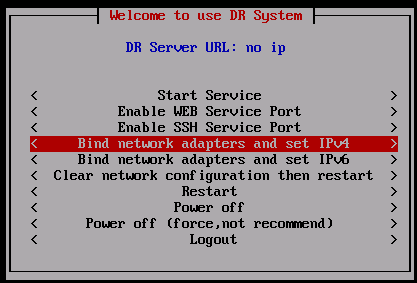
Step 7.Select Bind network adapters and set IPv4.
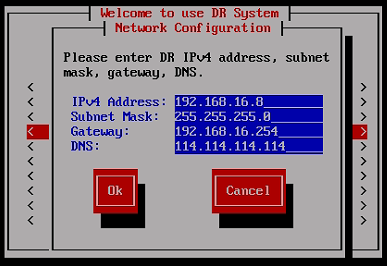
Step 8.Fill in the IP address, subnet mask, gateway and DNS according to the plan, then click OK.
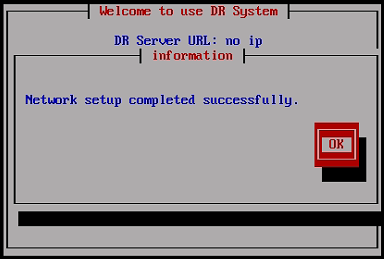
Wait a while it will pop-up the prompt info you the IP address has set successfully then click OK.
Step 1.Access the SCMT with browser by entering the URL https://scmt-ip-address to initiate SCMT.
Step 2.Then you can click the ![]() button after
button after ![]() to change the language.
to change the language.
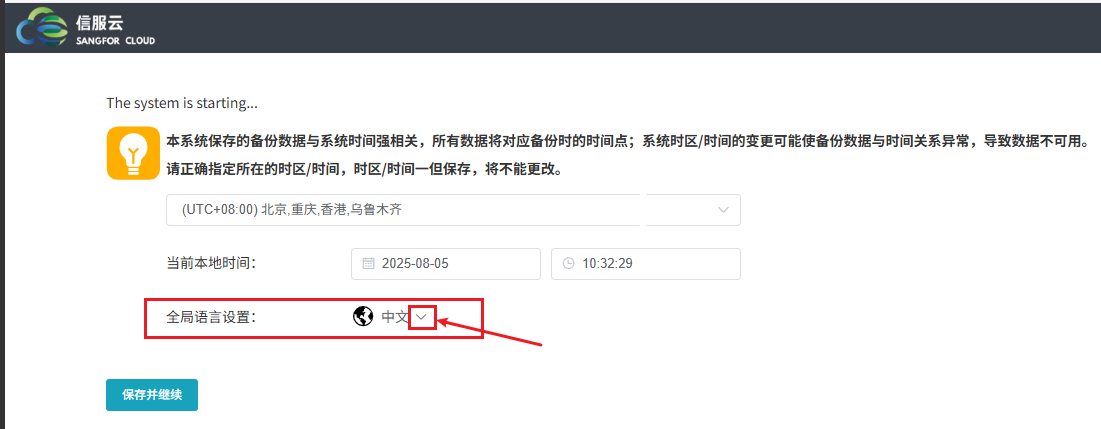
Then confirm the time zone and time is correct you can click the ![]() button to change the time zone and click
button to change the time zone and click ![]() and
and ![]() to change the date and time, then click save and continue.
to change the date and time, then click save and continue.
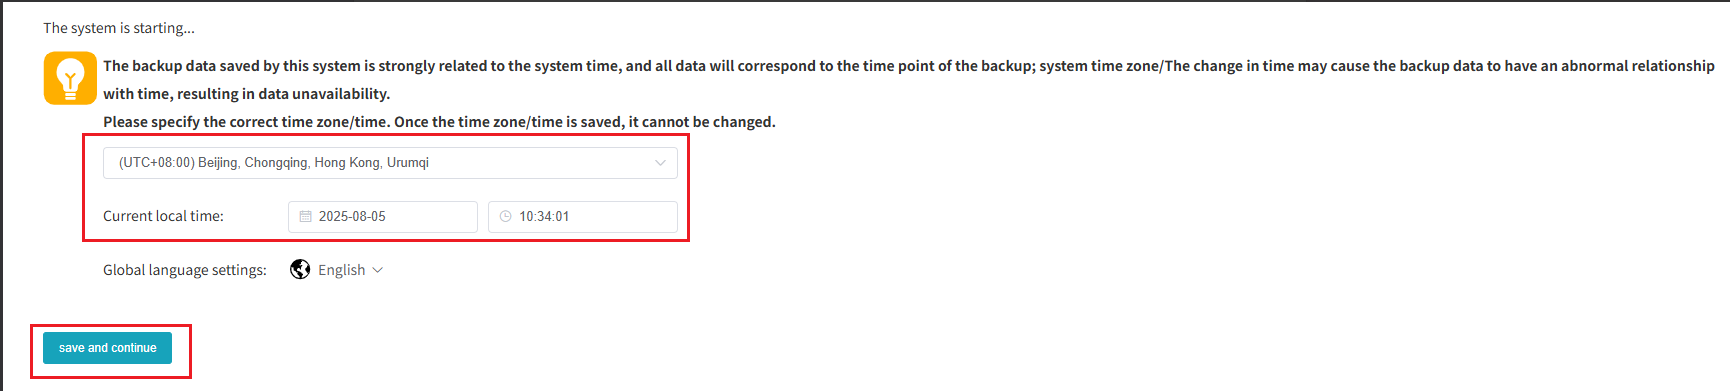
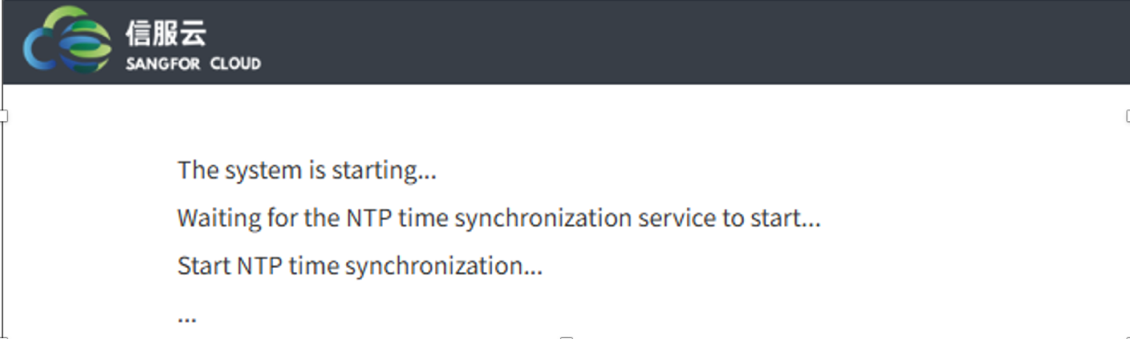
Step 3.Wait the all the service to start successfully. When you find the page show the 404 not Found err, refresh it and you will get the normal login page.

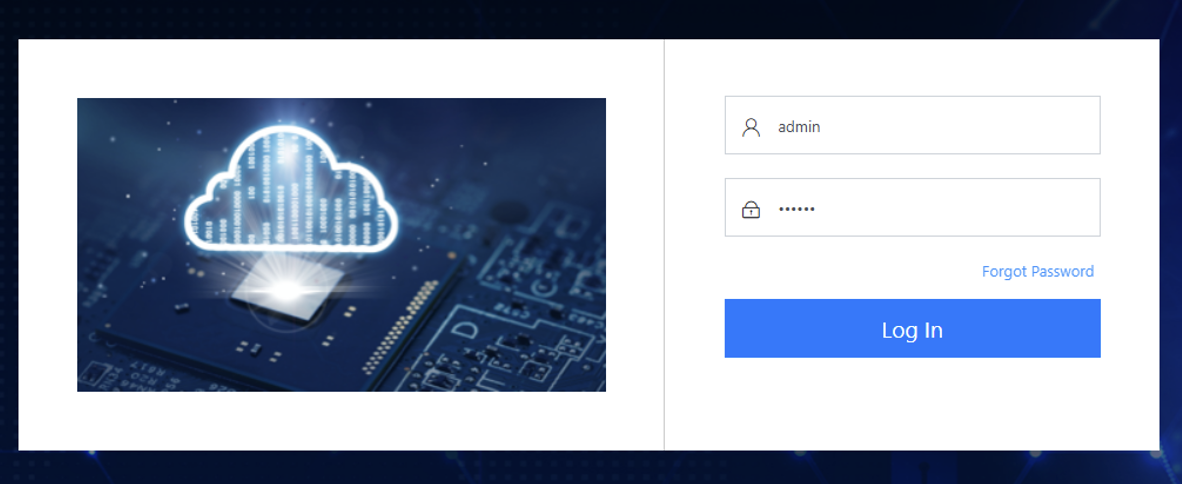
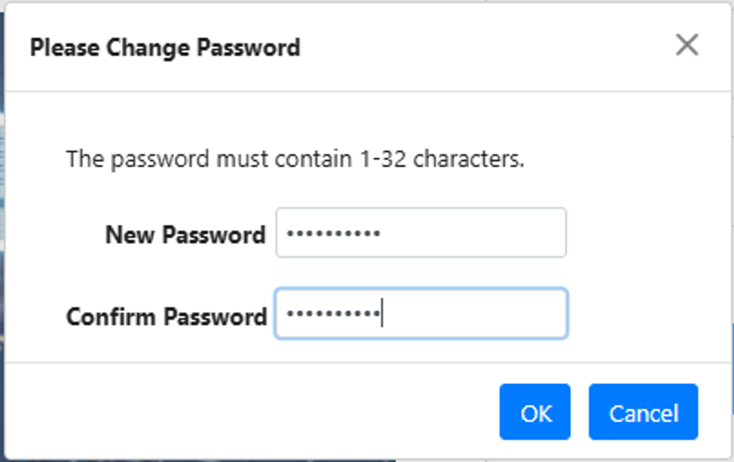
Step 4.The default username is admin, and the default password is 123456. It will pop up as the page to ask you to change the password, fill in your new password and then click ok.
Step 5.The Email address, mobile number and wecom information are the options, you can fill in or ignore it.

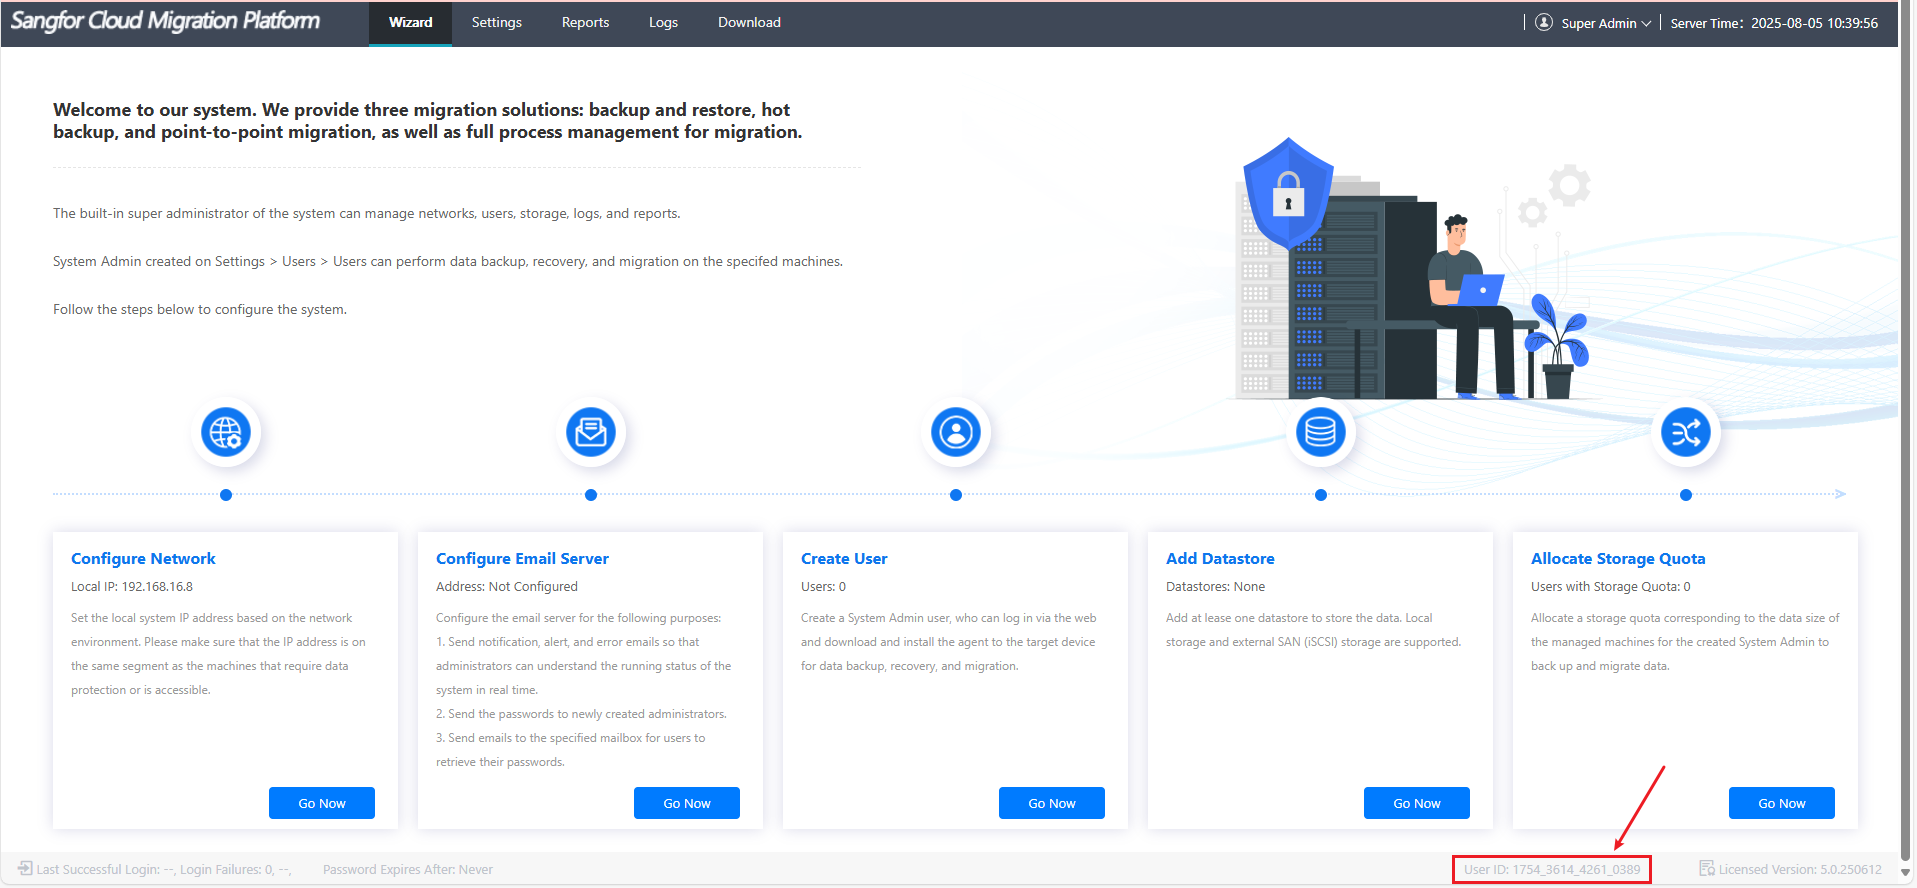
Step 1.After logging into SCMT successfully, in the lower-right corner, there is a user ID. Sent this ID to local Sangfor team to get the license file.
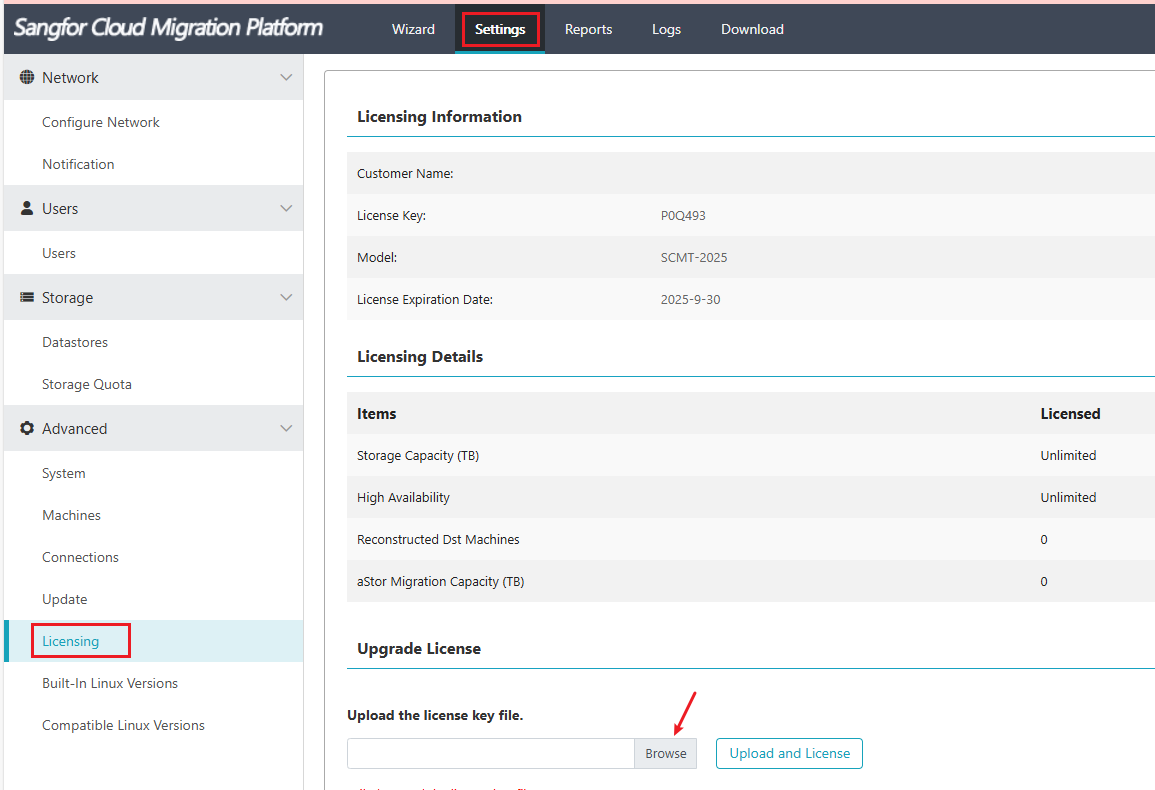
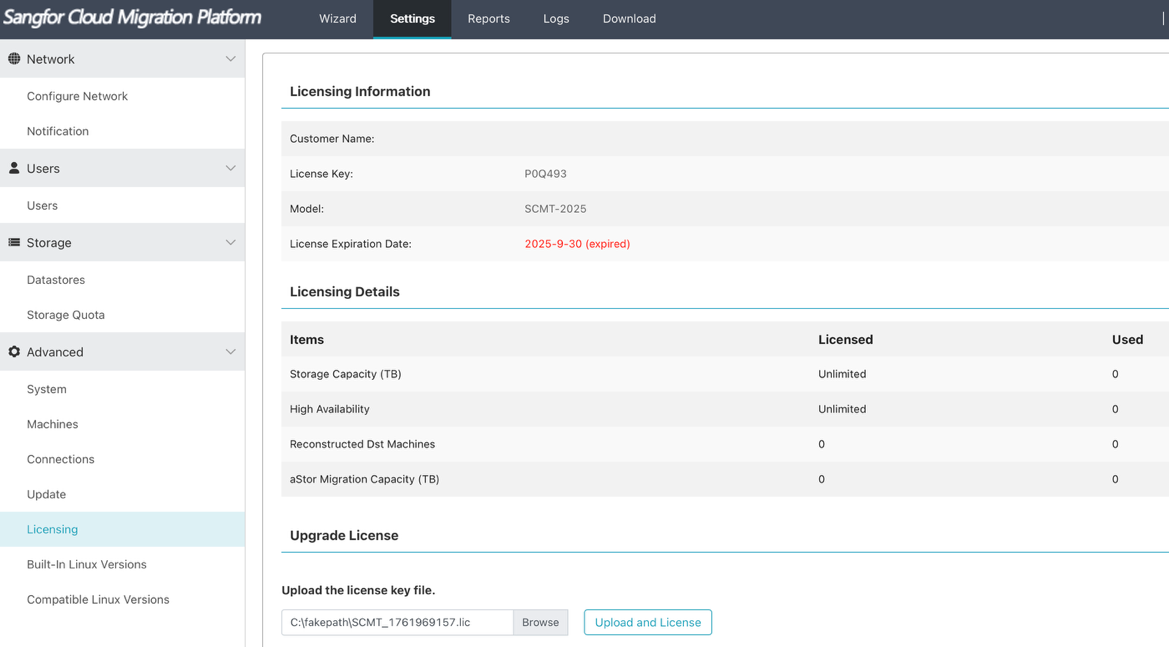
Step 2.After getting the license file, go Settings > Licensing, click Browse, select the license file then click Upload and License.
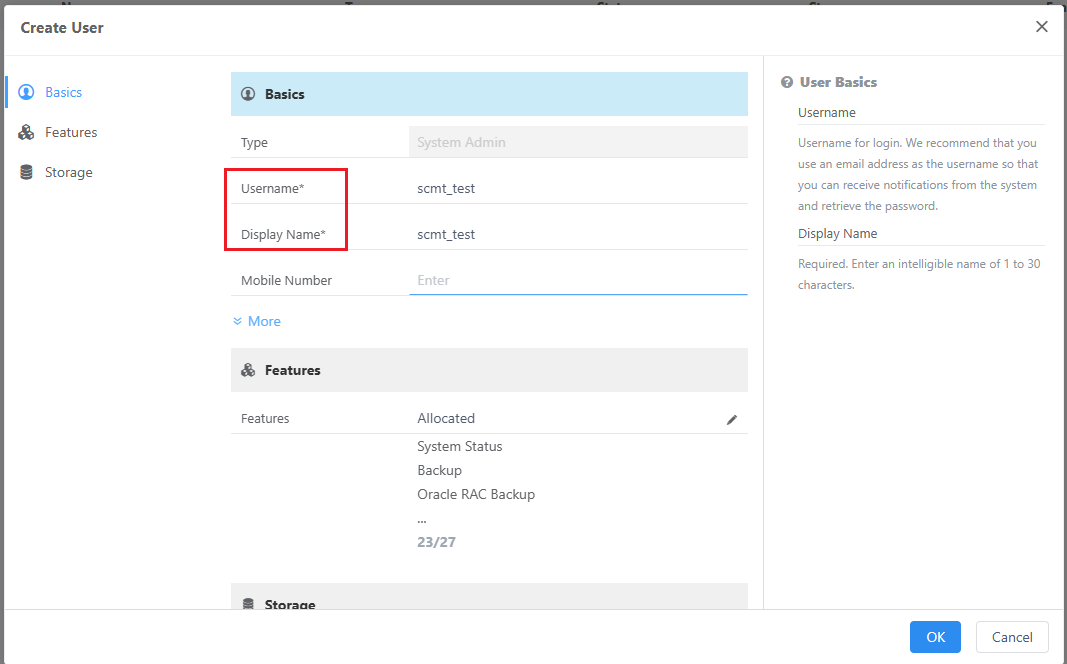
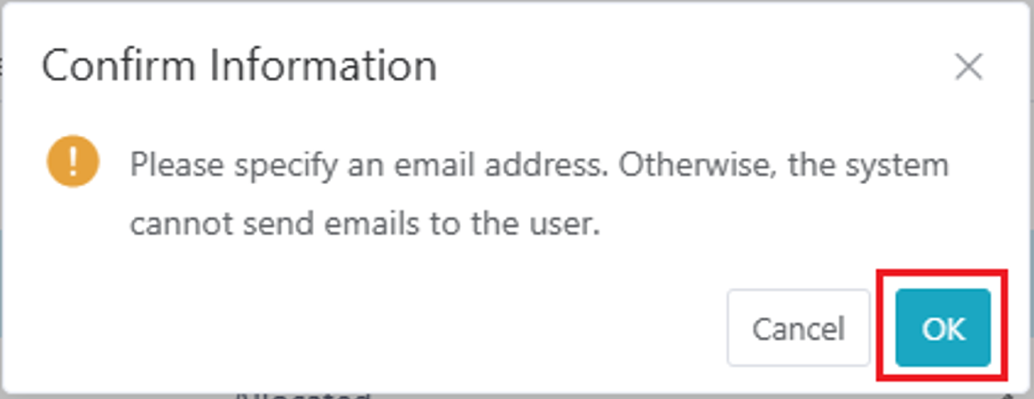
For SCMT the admin account is just used for mange the SCMT and cannot be used for migrating VM, so create an account first before launch the migration process.
Step 1.Go to Setting > Users, click Create.

Step 2.Fill in the Username and Display Name, you can keep these two same, then click OK.
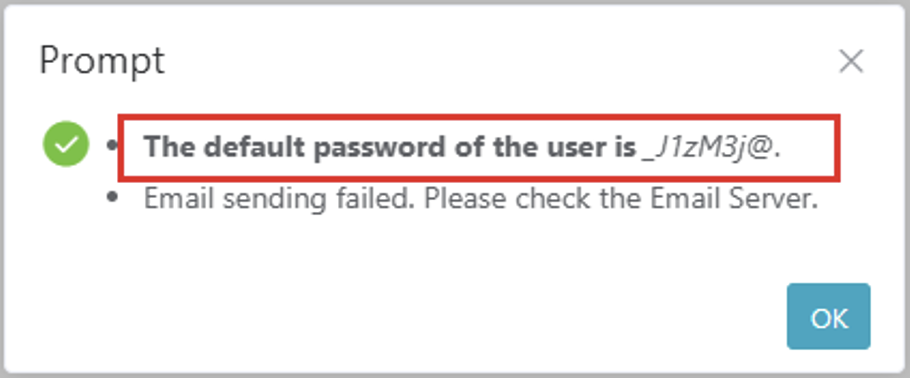
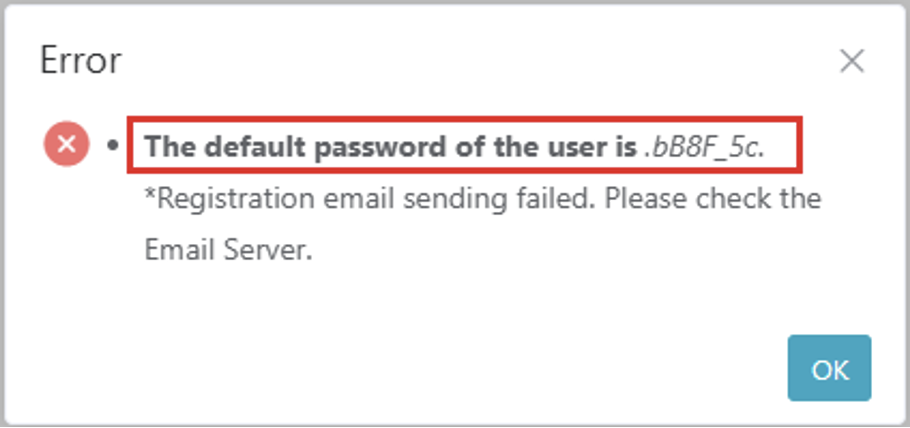
In the pop-up message, it will show the password of the new account.
Please note the last character “.” is not the password.
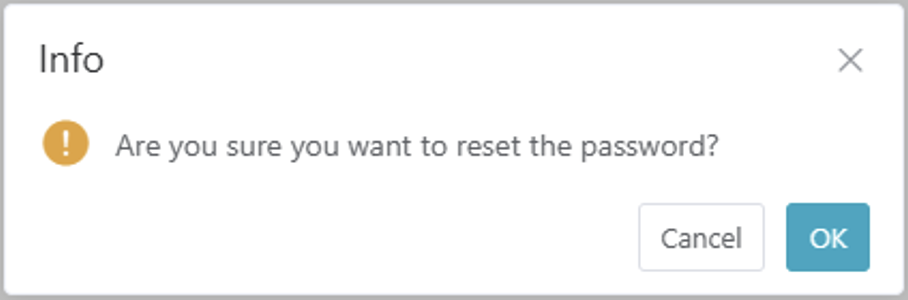
And you can reset your password by clicking Reset Password.

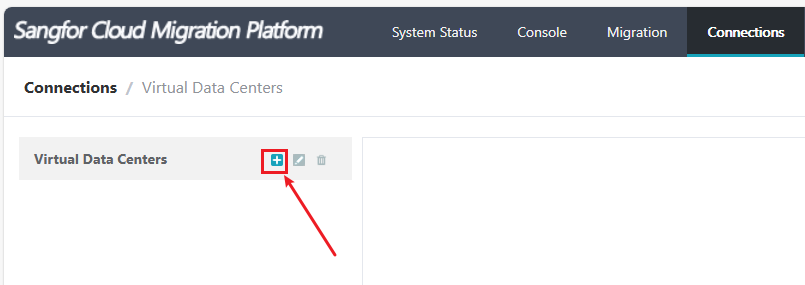
Step 1.Log in to SCMT Using the new created account, go to Connections, click Virtual Data Centers.

Step 2.Click the ![]() button.
button.
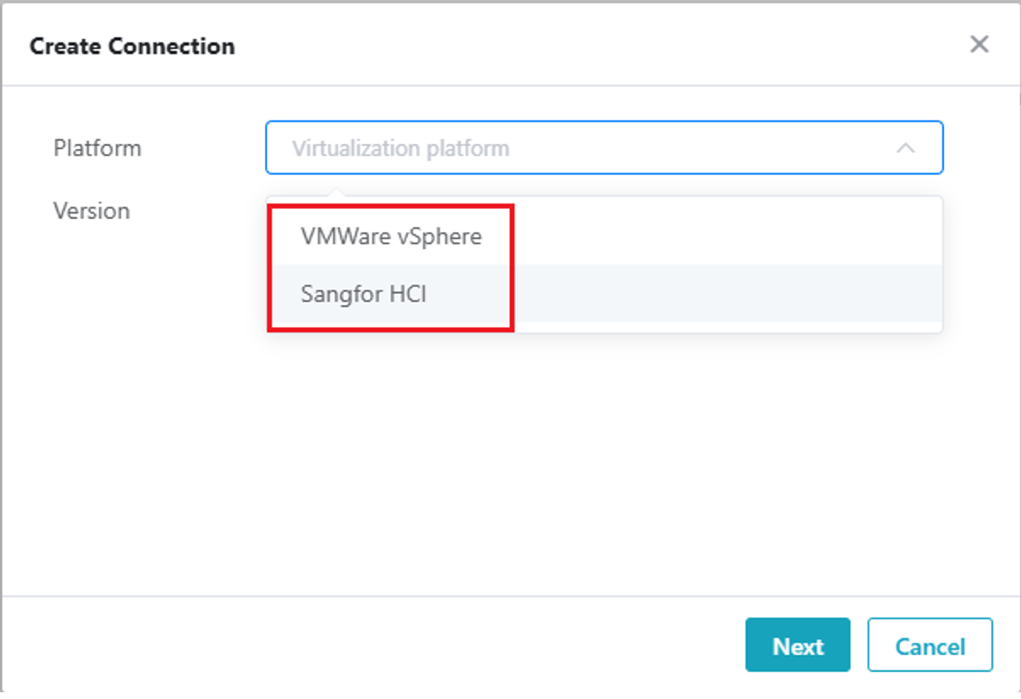
Step 3.Select Sangfor HCI for Platform. Version select Sangfor HCI 6.10-6.11, then click Next.
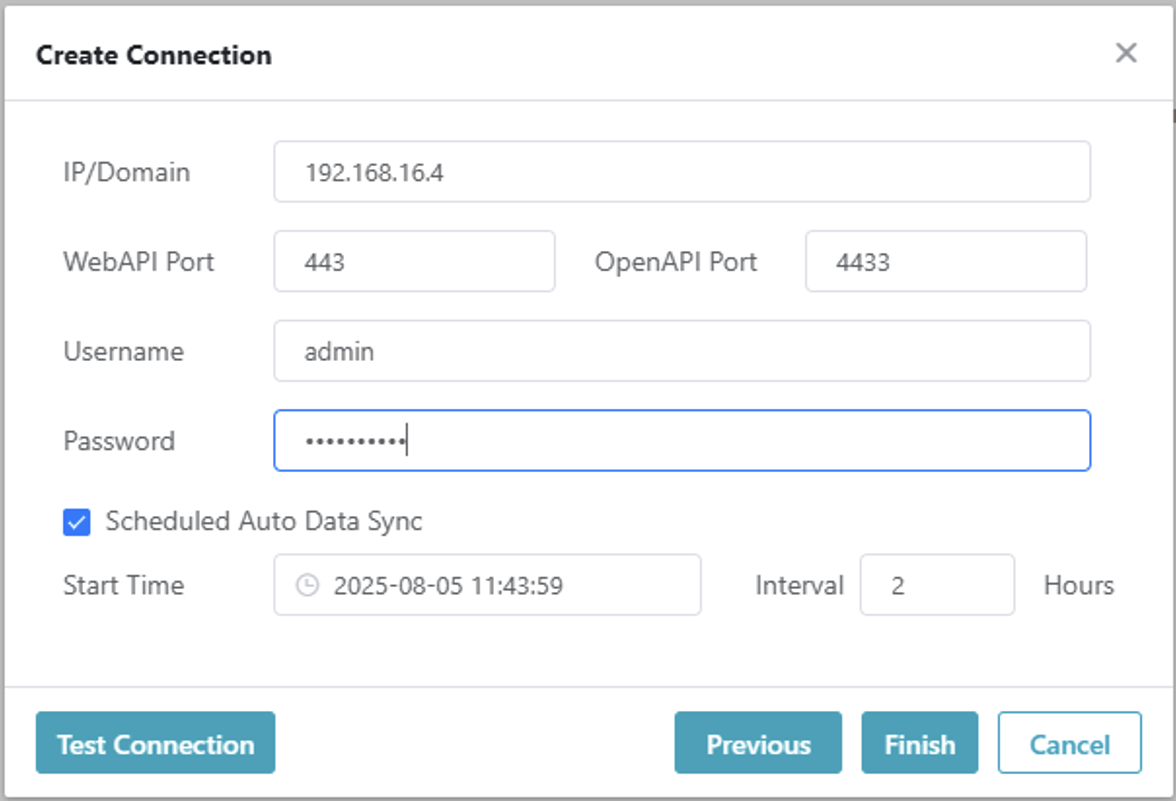
Step 4.Fill the Sangfor HCI cluster IP Address in IP/Domain, keep the default for WebAPI Port and OpenAPI Port. Fill the admin and password of HCI cluster in Username and Password. You can configure the Scheduled Auto Data Sync time as you want, then click Finish.
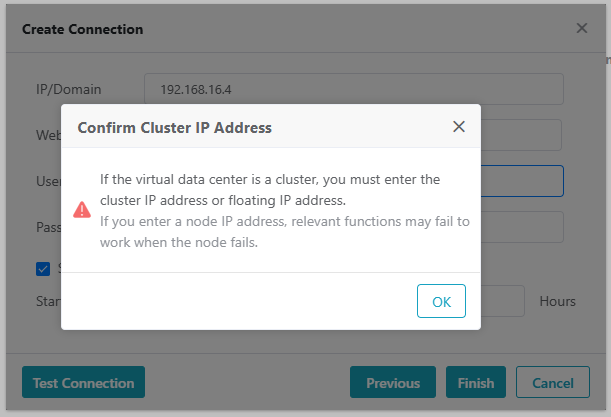
It will also pop-up a message to double confirm the Cluster IP is correct.
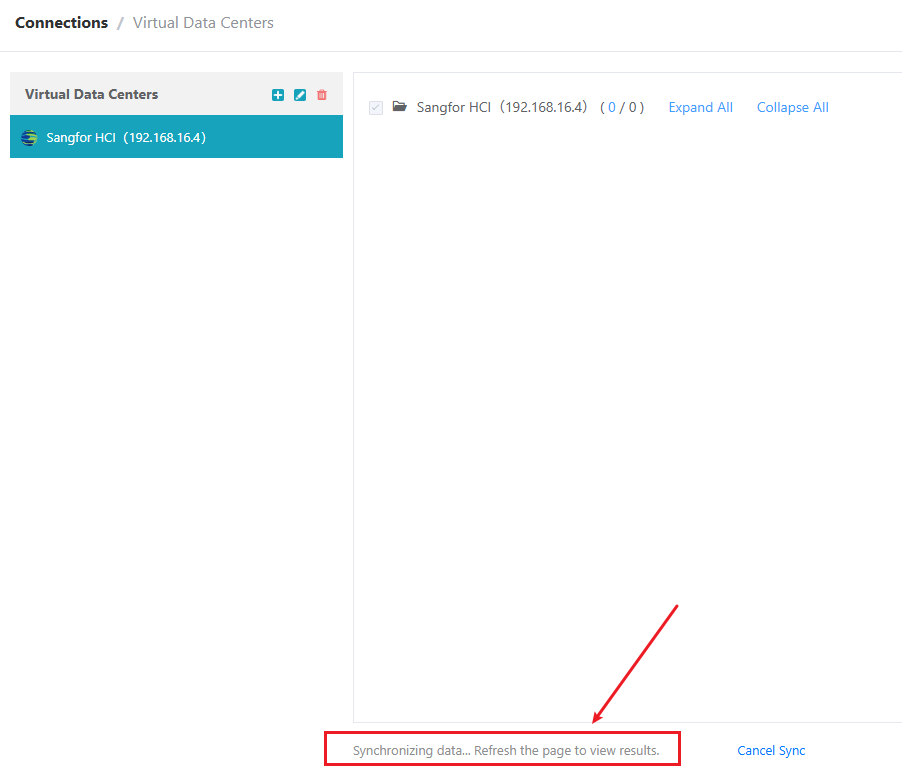
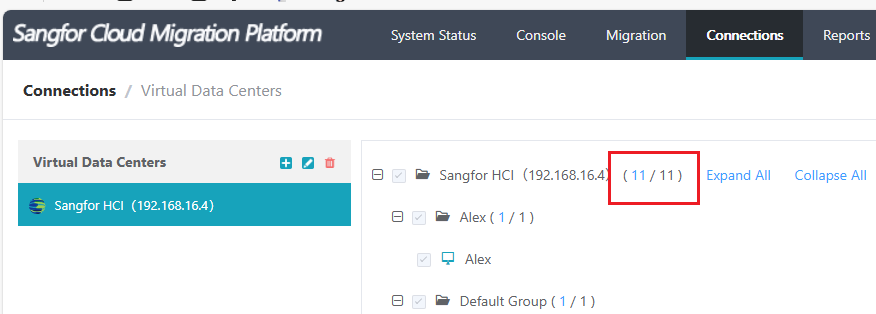
Step 5.After wait for a short while, refresh the page to get the latest HCI information, then you can see the HCI VM information.
After you complete the above steps the SCMT is deployed successfully.

 {{ $t('index.defaultHeader.chromeBrowserTip') }}