For more information, see section 2.2.3 "Witness Node Configuration Requirements."
1.5.1.2aServer
aServer comes with a preinstalled witness node operating system, with the eth0 as the management interface and the default IP address of 10.250.0.7/24. To log in to the console of aServer with a preinstalled witness node, configure an IP address in the same segment as the appliance, connect to eth0, and visit https://10.250.0.7/ in your browser.
The default admin account and password are both admin. During your first login, you will be prompted to change the default password. You will be forced to change it if you haven't done so a month later.
After the first successful login, you need to change the default IP address and make sure that the changed IP address and gateway can communicate with HCI clusters.
1.5.1.3Third-Party Servers
Description
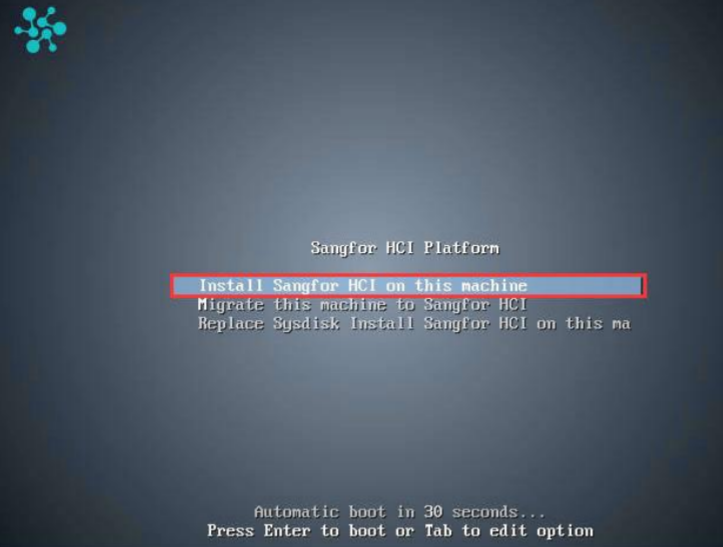
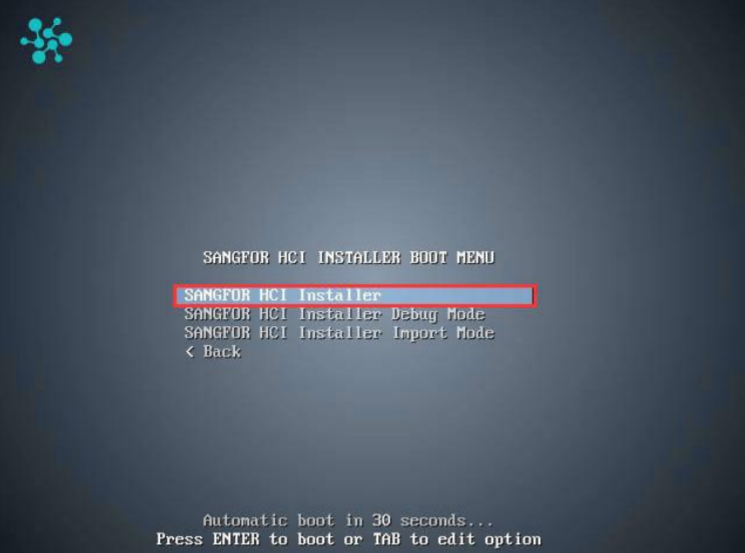
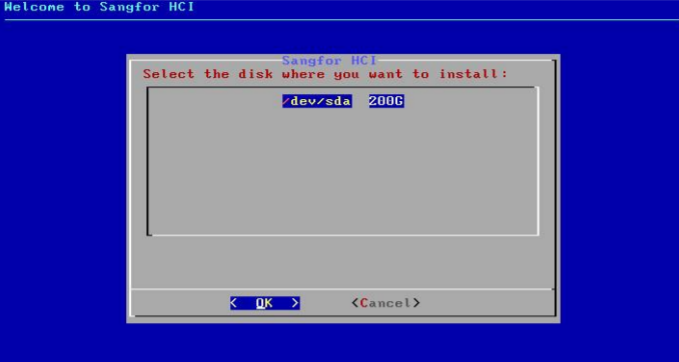
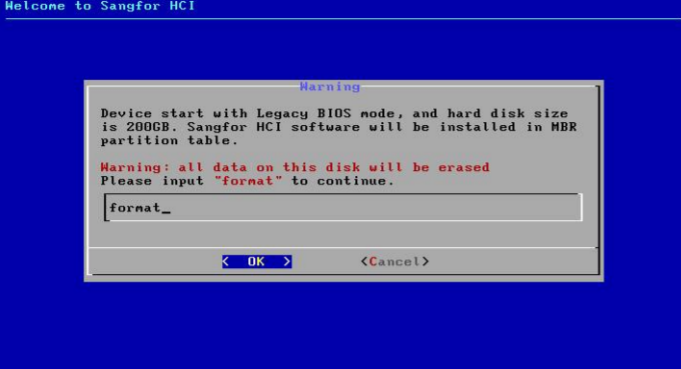
A witness node can either be on an aServer or a third-party server. This section describes how to install a witness node on a third-party server.
Precautions
You can install it with an ISO image or a USB flash drive. For more information on preparations such as burning and intelligent platform management interface (IPMI) settings, see section 2.4.2.2 "Installation with an ISO Image."
To expand the cluster, you can adjust the configuration of the witness node accordingly.
Prerequisites
For more information on the hardware requirement of witness nodes, see section 2.2.3 "Witness Node Configuration Requirements."
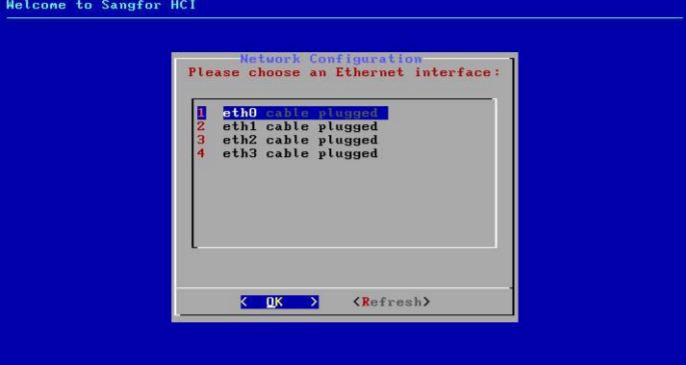
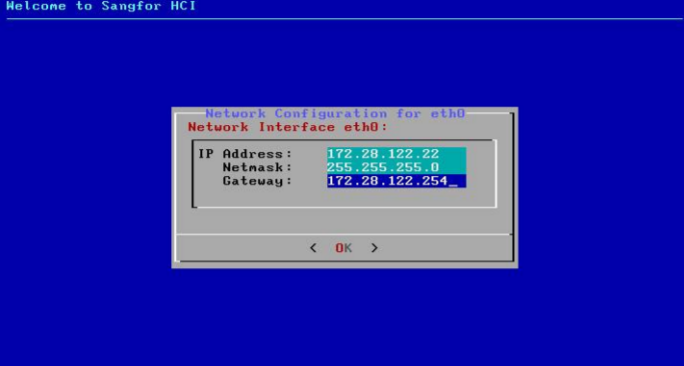
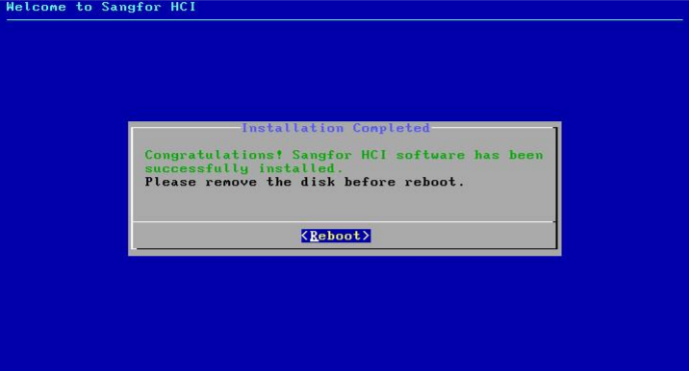
Steps
For installation from an ISO image, load the installer and choose to boot from IPMI. For installation from a USB flash drive, boot from the prepared flash drive. Then, the following page is displayed. Select Install Sangfor HCI on this machine and press Enter.
Select Sangfor HCI Installer and press Enter.
Select a disk where you want to install Sangfor HCI software and select OK.
Then, you will be prompted that this operation will format the disk. Enter "format" in the input box and select OK. If you don't need the disk speed test, select No in the pop-up dialog box.
After the system is installed, select the NIC as prompted and select OK. Then, press Enter to go to the settings page.
Configure the IP address, subnet mask, and gateway, and then click OK. Make sure that the address can communicate properly with the target HCI cluster.
Then, select Yes to go back to the NIC selection page and set other NICs, or select No to complete the installation.
Remove the USB flash drive or ISO image file and select Reboot to complete installation.
After a restart, you can log in to the witness node console through https://configured IP address in your browser.
VMware vCenter
Description
This section describes how to deploy a witness node and run it as a VM on an existing VMware environment, for example, VMware vCenter.
Precautions
You can deploy a witness node on VMware vCenter but not HCI.
VMware vCenter deployment is not recommended for mid-sized or large-scale scenarios. For more information on the hardware requirements of witness nodes, see section 2.2.3 "Witness Node Configuration Requirements."
To expand the cluster, you need to adjust the configuration of the witness node on VMware vCenter.
Prerequisites
VMware vCenter must be on 5.5 or later versions.
Steps
Go to Actions > Deploy OVF Template.
Select Local File and click Browse to select the OVF file of the witness node.
Keep the default options for the name, location, and resource, and then go to the configuration page.
Select an option based on the cluster scale. For more information, see section 2.2.2 "HCI Cluster Configuration Requirements." Here, Tiny HCI Server indicates a configuration of 6 vCPUs + 8 GB RAM, Middle HCI Server indicates 8 vCPUs + 16 GB RAM, and Larger HCI Server indicates 10 vCPUs + 24 GB RAM.
Confirm your option and click Finish.
After the VM is imported, modify the settings.
Click VM Options and expand Advanced. Under Configuration Parameters, click Edit Configuration.
Enter "disk.enableuuid" for Name and "true" for Value, and then click OK.