{{ secondMenu.name }}


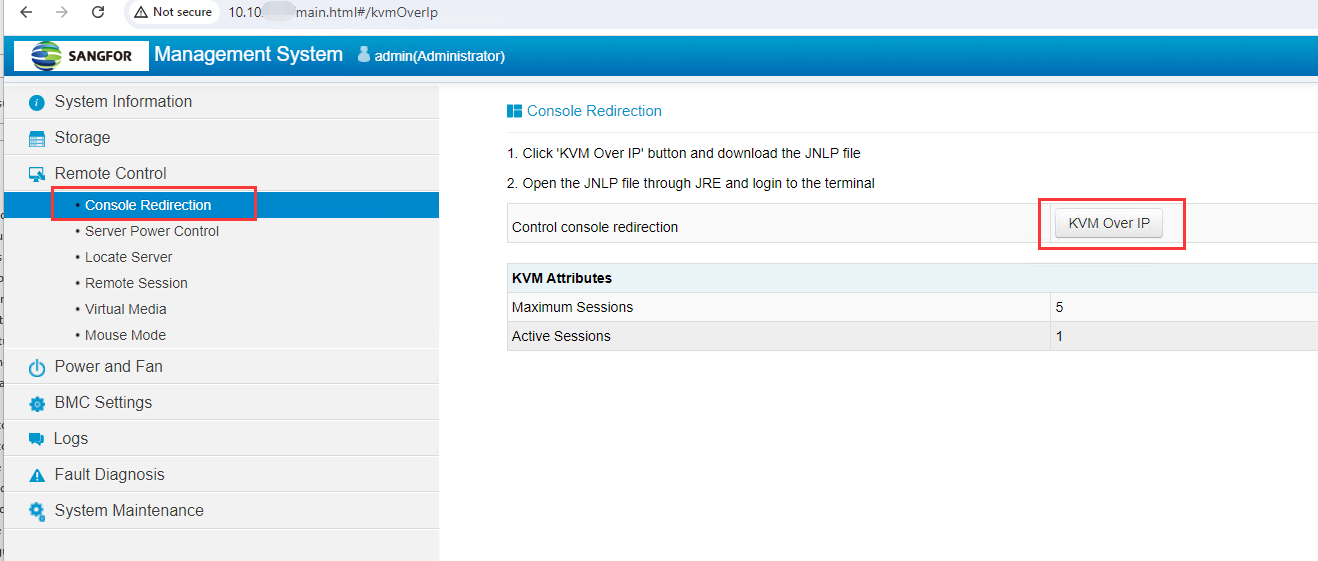
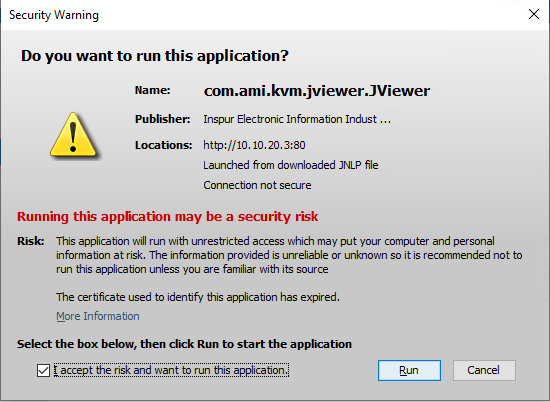
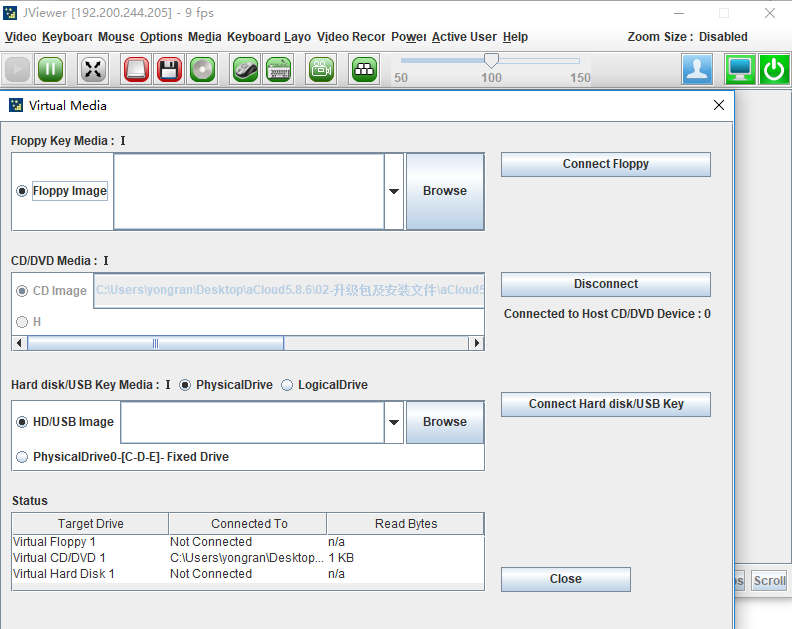
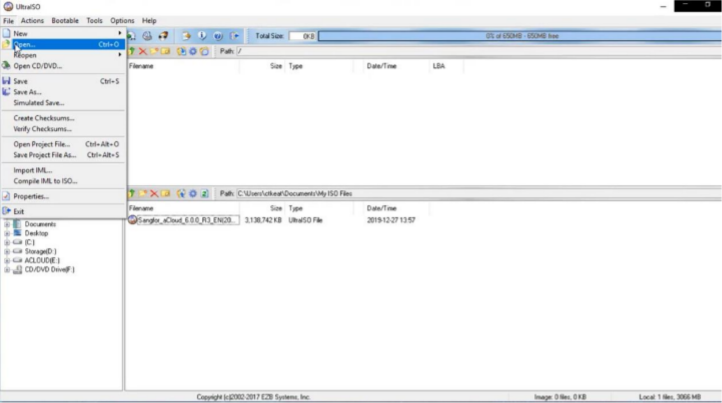
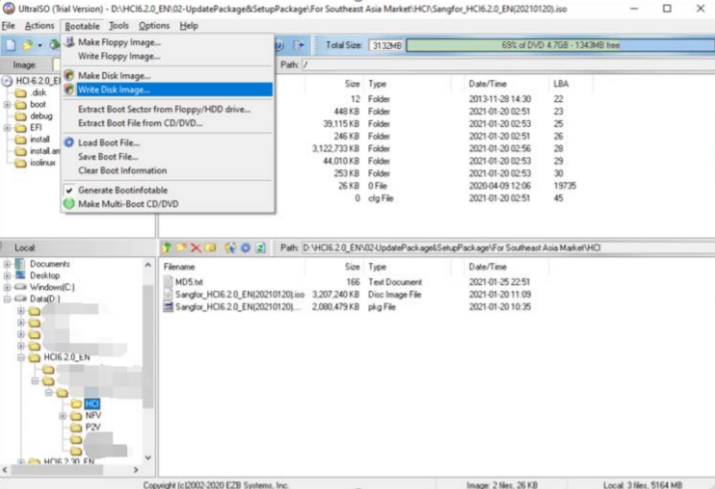
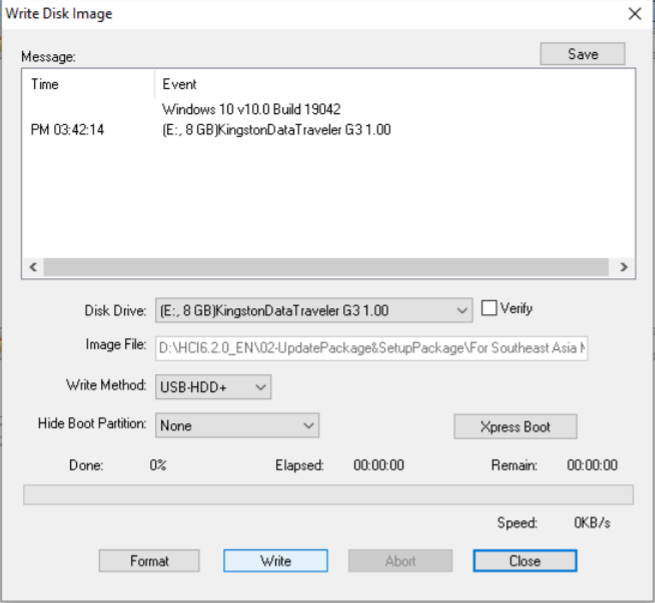
The third-party server installation system can use IPMI for ISO and USB flash disk installation. The main difference between the two methods is in the image mounting. The installation part is the same.
Hardware configuration requirements
When installing HCI using a third-party server, each host hardware must meet the following minimum configuration requirements. Selecting the server hardware according to the recommended configuration is recommended to ensure the best effect.
![]()
Suppose you need to use the virtual storage function and the system disk. Each node must also be configured with at least one 240GB enterprise SSD (must support TRIM/Discard instructions) as the cache disk and several 1TB enterprise HDDs (RPM greater than or equal to 7200rpm) as the data disk.
The ratio of SSDs to HDDs shall not be less than 1:6, and the minimum ratio shall not be less than 1:25. If it is a read-intensive SSD, the ratio of SSD cache disk/HDD capacity shall not be less than 7%.
RAID Card Configuration Requirements
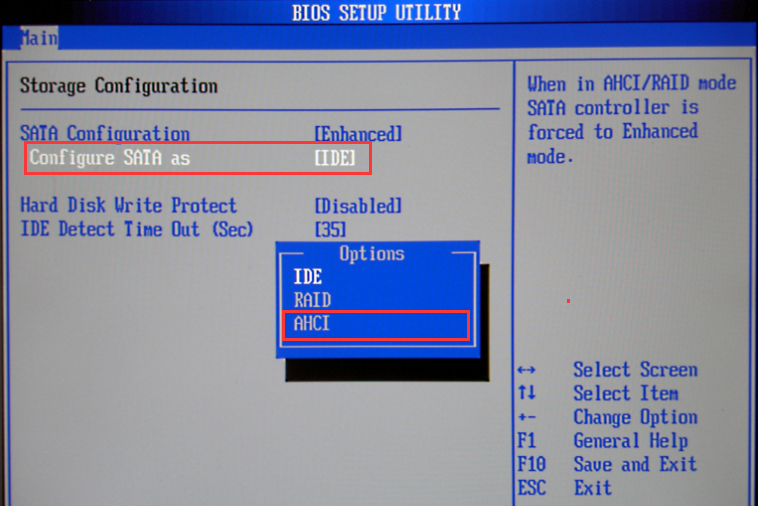
If there is a raid card, it is recommended to select a RAID card that supports JBOD / non-RAID passthrough and supports transparent transmission of trim instructions. If the RAID card does not support JBOD / Non-RAID, disable the raid card directly and enable normal disk mode (AHCI / IDE).
BIOS Configuration Requirement
When using a third-party server, you need to modify some BIOS options to ensure the efficient operation of the HCI platform. BIOS configuration requirements:
• BIOS time synchronization
• Enable VT-x or VMX
• Turn Off Energy Saving Mode
• Turn on power on self start
• Configure IPMI address (optional)
Specific Configuration Examples
The method of entering BIOS is defined by the BIOS vendor. Usually, when the server is powered on and started, the screen will prompt to press del, ESC, F10, F11, and other keys to enter the BIOS Setup interface.
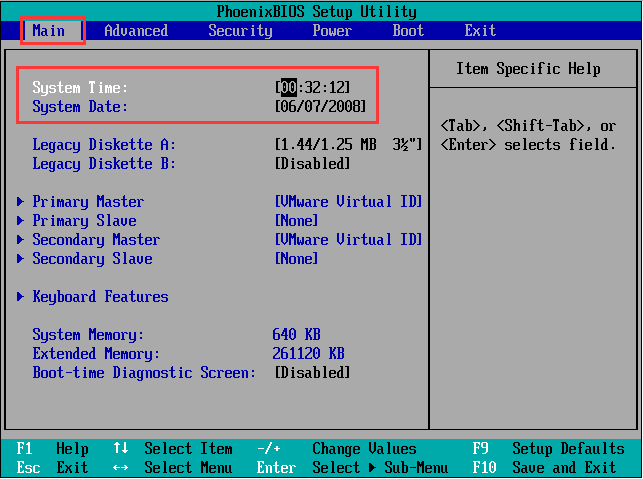
The BIOS time of the server will be read as the system time when installing the hyper fusion platform. If the system time is inaccurate, the operation of some services may be affected. Therefore, you first need to modify the BIOS time to the current time.
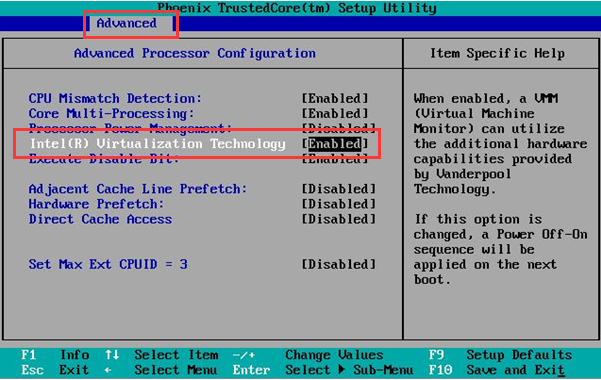
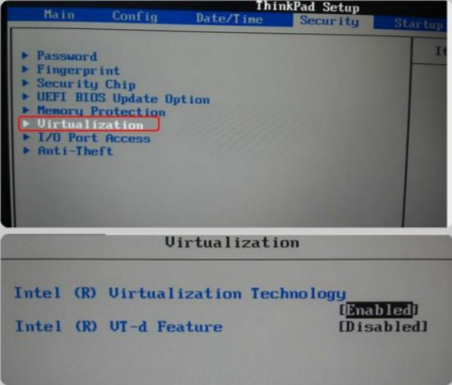
When the HCI runs the virtual machine, the host is required to support the hardware-assisted virtualization technology of Intel VT-x. Therefore, in addition to the CPU supporting VT-x technology, you also need to enable this function in BIOS. If the CPU does not support VT-x, or VT-x is not enabled in the BIOS, the hyper fusion platform cannot be successfully installed.
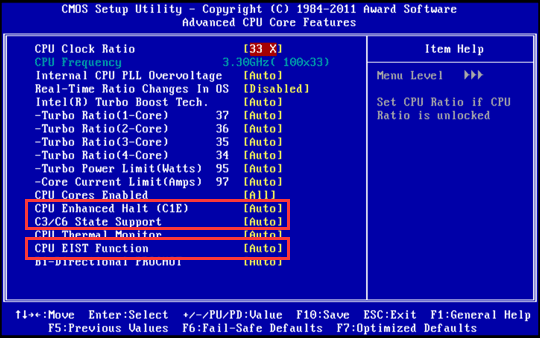
Turn off the CPU energy-saving mode (disable EIST, CPU Status, and other options).\ The names may differ according to the hardware (such as PowerPperformance).
| CPU Status |
Status interpretation |
Status type |
Use suggestions |
| C0 |
Operating State |
The normal working state of CPU. |
---- |
| C1 |
Halt |
It is recommended to disable CPU sleep states at different levels and depths.
|
Disable |
| C1E |
Enhanced Halt |
Disable |
|
| C2 |
Stop Grant/Clock |
Disable |
|
| C2E |
Extended Stop Grant |
Disable |
|
| C3 |
Sleep |
Disable |
|
| C4 |
Deeper Sleep |
Disable |
|
| C4E/C5 |
Enhanced Deeper Sleep |
Disable |
|
| C6 |
Deep Power Down |
Disable |
|
| EIST |
Enhanced Intel SpeedStep Technology |
Automatically adjust the voltage and frequency of the processor. |
Disable |
Table 5:CPU Energy Saving Mode
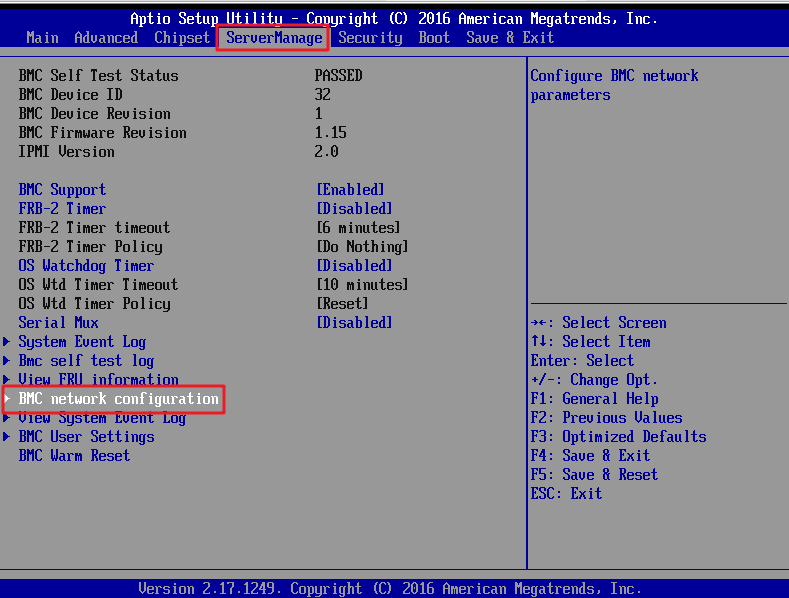
Log in to the BIOS interface, select Server MGMT > BMC Network Configuration > BMC IPv4 network configuration / BMC IPv6 network configuration, and press enter to view the configuration of current BMC IPv4 and BMC IPv6 network parameters.
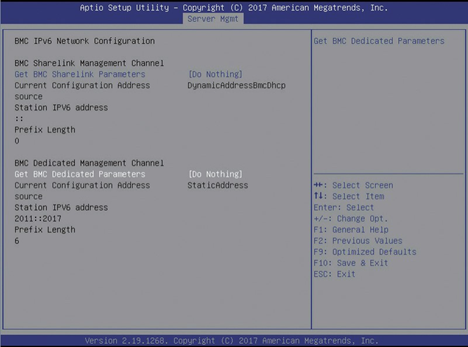
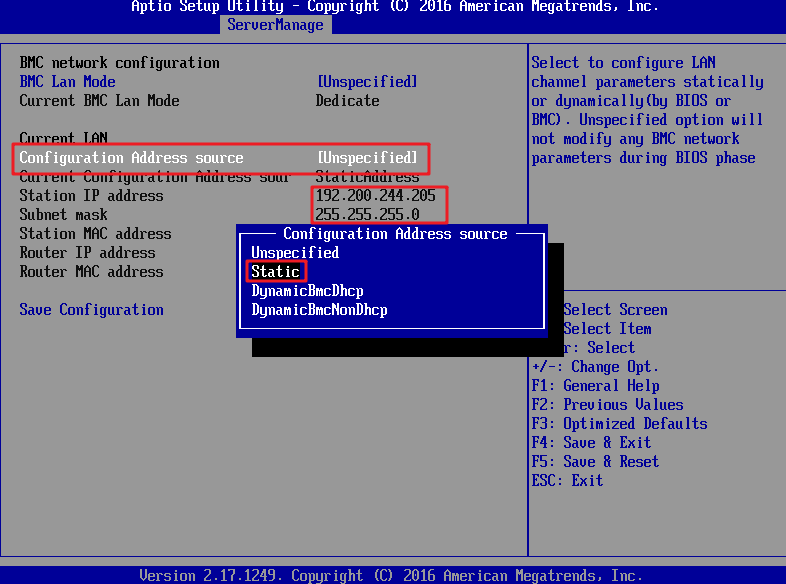
BMC Sharelink is the first interface that multiplexes IPMI addresses on the NIC. BMC dedicated is the address configured for a separate IPMI interface. When configuring the out-of-band management network, modify BMC dedicated and select manual to write the static address manually.
Precautions
Procedure

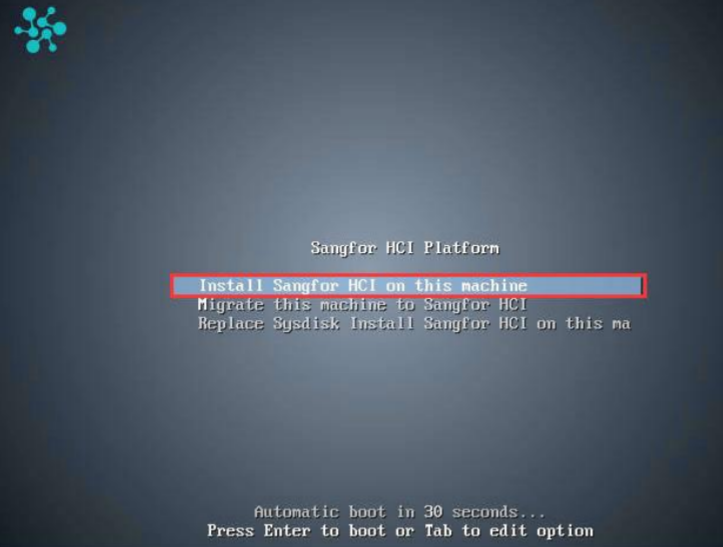
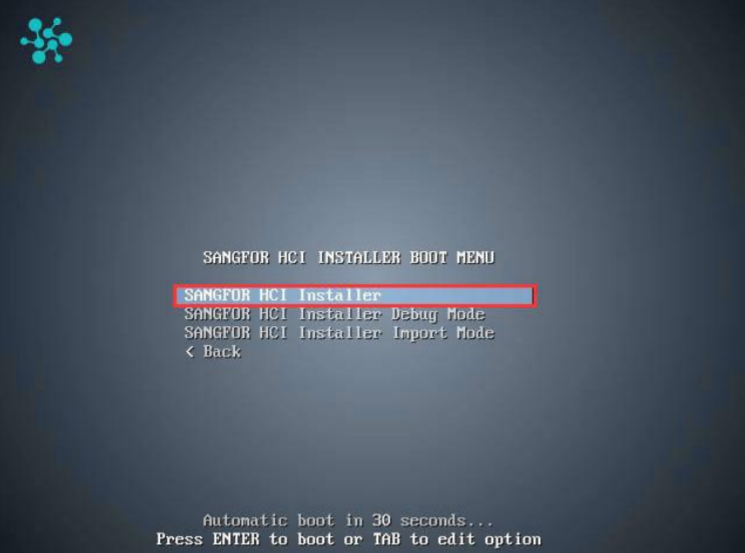
![]() :
:
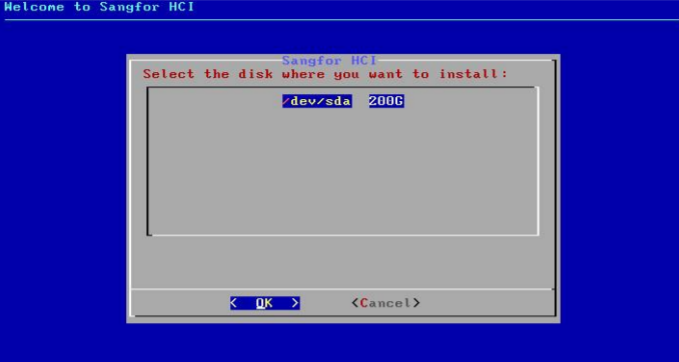
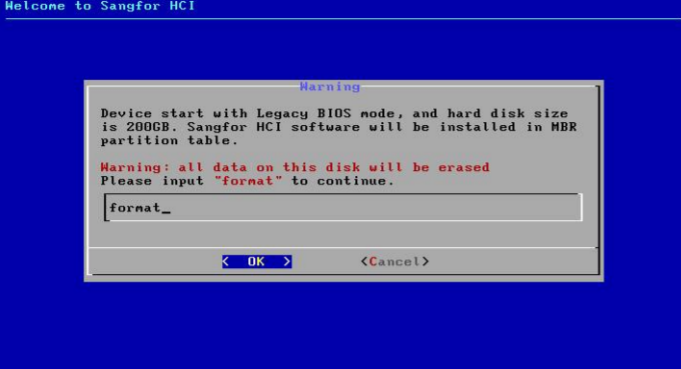
HCI needs to be installed on a disk with a storage capacity of more than 2 TB and an available capacity of more than 60 GB. You are advised to use the UEFI mode for installation.
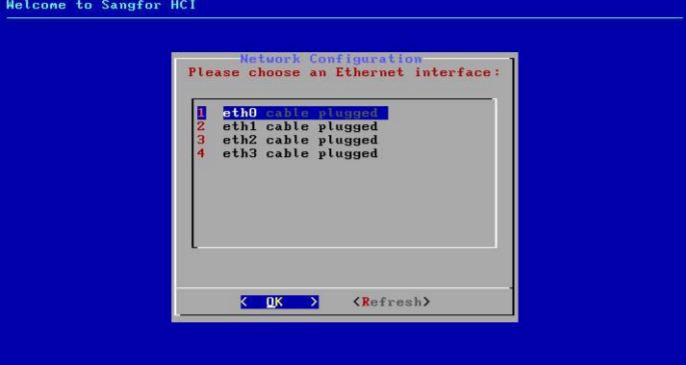
![]()
If you skip NIC configuration, the default IP address 10.250.0.7 and netmask 255.255.255.0 will be configured for the management interface eth0. If you skip NIC configuration for multiple devices, an IP address conflict will occur because the same default IP address is configured for them.
• NIC aggregation:
• Select the network interfaces comprising the aggregate interface.
• Select the aggregation mode.
• Configure the VLAN.
• Configure the name, IP address, netmask, default gateway, MTU, and VLAN ID for the aggregate interface.
• Single-NIC configuration:
• Select an interface.
• Configure the IP address, netmask, and default gateway for the interface.
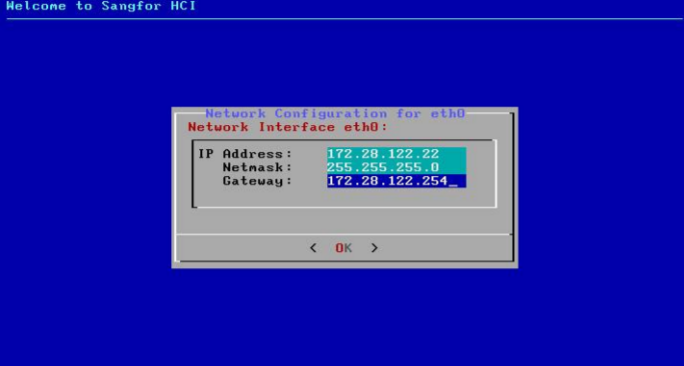
• Specify whether to configure the VLAN.
Precautions
Steps

 {{ $t('index.defaultHeader.chromeBrowserTip') }}