Hyper Converged Infrastructure (HCI/aSV)

Sangfor HCI and aSV provide a unified infrastructure combining compute, storage, networking, and built-in security to simplify deployment, operations, and services.
{{ $t('productDocDetail.guideClickSwitch') }}
{{ $t('productDocDetail.know') }}
{{ $t('productDocDetail.dontRemind') }}
6.11.1R1
{{sendMatomoQuery("Hyper Converged Infrastructure (HCI/aSV)","HCI Upgrade")}}

HCI Upgrade

{{ $t('productDocDetail.updateTime') }}: 2026-01-15
  1. Use aDeploy to perform the pre-upgrade check and install the pre-upgrade check package (see Chapter 2.4.3 HCI Pre-Upgrade Check), then go to System > Upgrade and click Start Upgrade. The cluster will enter Maintenance Mode and run the environment check.

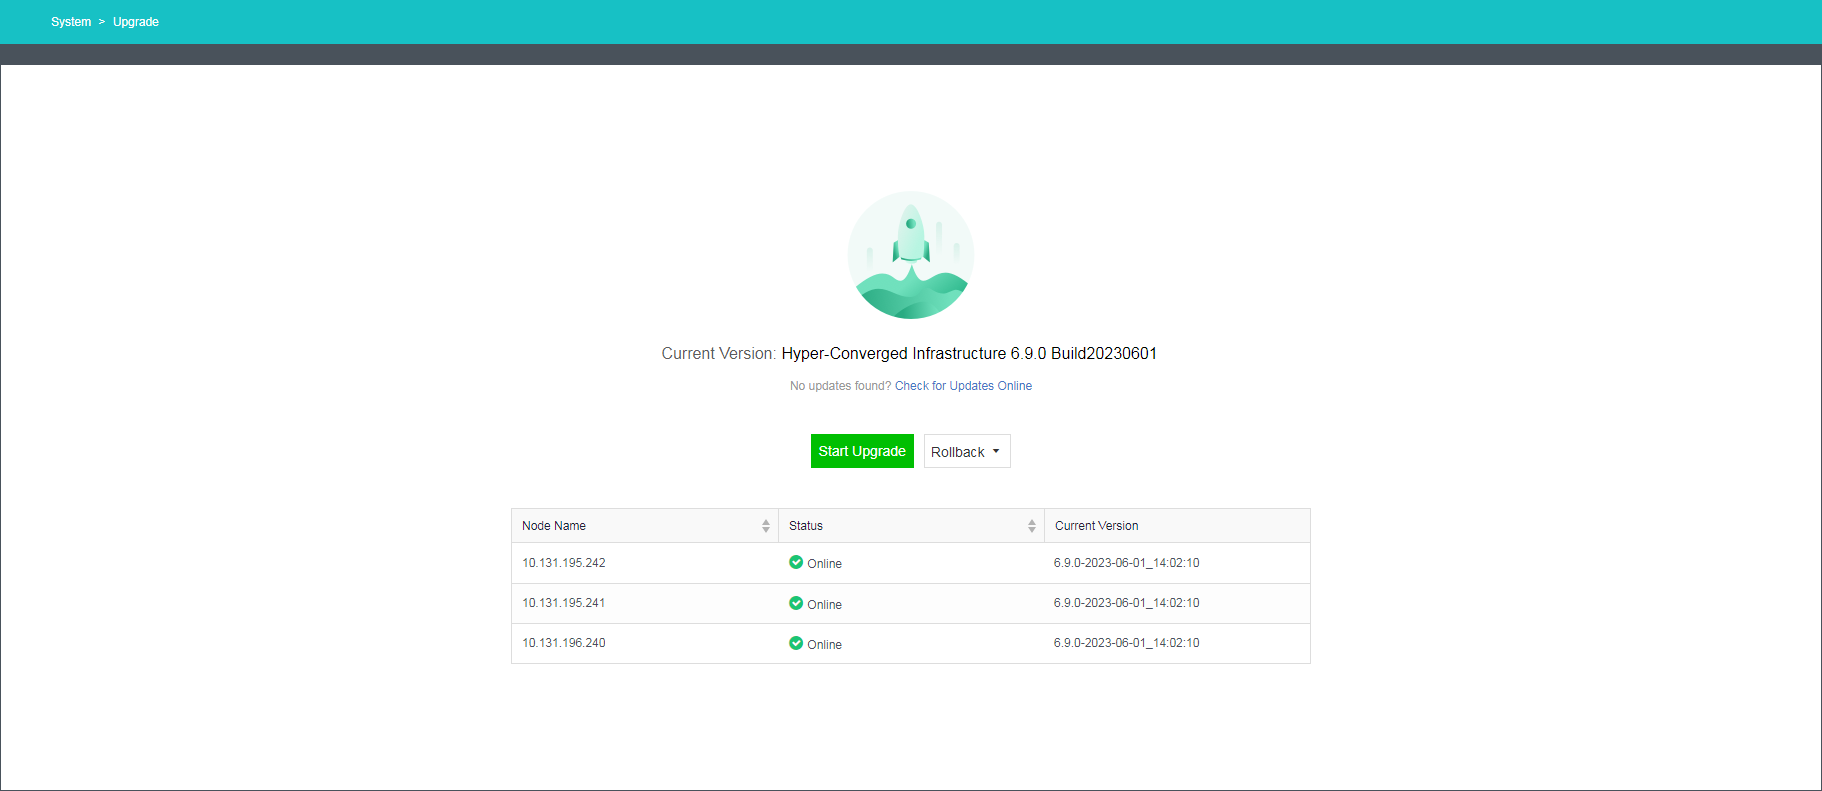
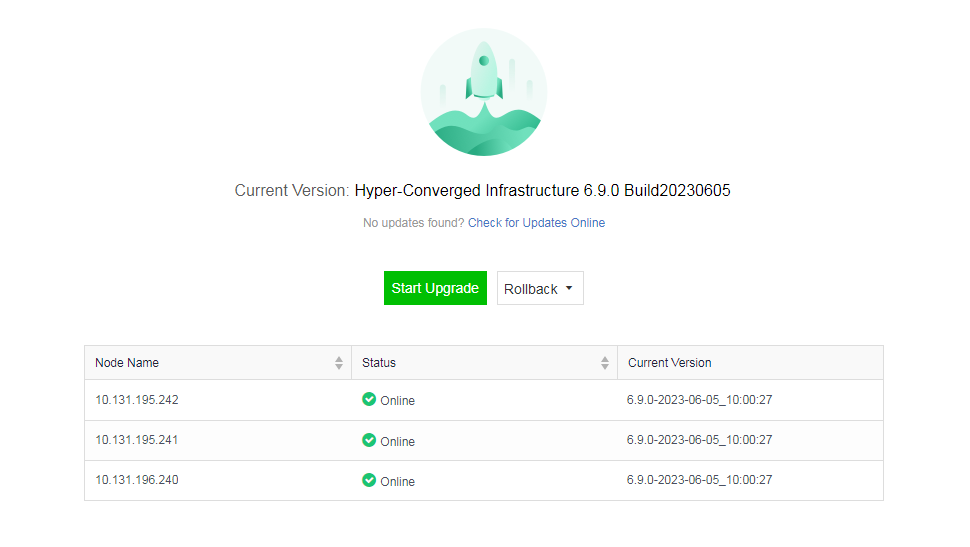
After the pre-upgrade check package is installed, a suffix will be displayed in Current Version, as shown in the figure above.

  1. Click Start Upgrade. The environment check starts.
  2. After the environment passes the check, upload the HCI update package. A screenshot of a computer

Description automatically generated
  3. The update package passes the check. A screenshot of a computer

Description automatically generated

Quick Upgrade

  1. Select Quick Upgrade for Upgrade Method and click Next. A screenshot of a computer

Description automatically generated

  1. The quick upgrade starts. A screenshot of a computer

Description automatically generated
  2. The upgrade tasks at each stage are shown during the upgrade process. A screenshot of a computer

Description automatically generated
  3. After the upgrade, the system will ask whether to perform live migration for VMs and NFV devices. VMs not installed with vmTools need to be migrated to complete the upgrade. A screenshot of a computer

Description automatically generated
  4. The upgrade is complete.

Rolling Upgrade

  1. Select Rolling Upgrade for Upgrade Method and click Next. A screenshot of a computer

Description automatically generated
  1. Select Manual Adjustment for Upgrade Sequence to adjust the sequence of nodes for the upgrade, or select Auto Adjustment. After the upgrade sequence adjustment is complete, click Next.
  2. During the Rolling upgrade, all the nodes' control planes will upgrade first, followed by the data plane upgrade (one node each time). Before the data plane upgrade starts, the running VMs will be migrated to a node that is not in the upgrading state. During the control plane upgrade, you will be logged out. Please wait about 1 minute and then reload the page to log in again. A screenshot of a computer

Description automatically generated
  3. The upgrade is complete.

Offline Upgrade

  1. Shut down all VMs.

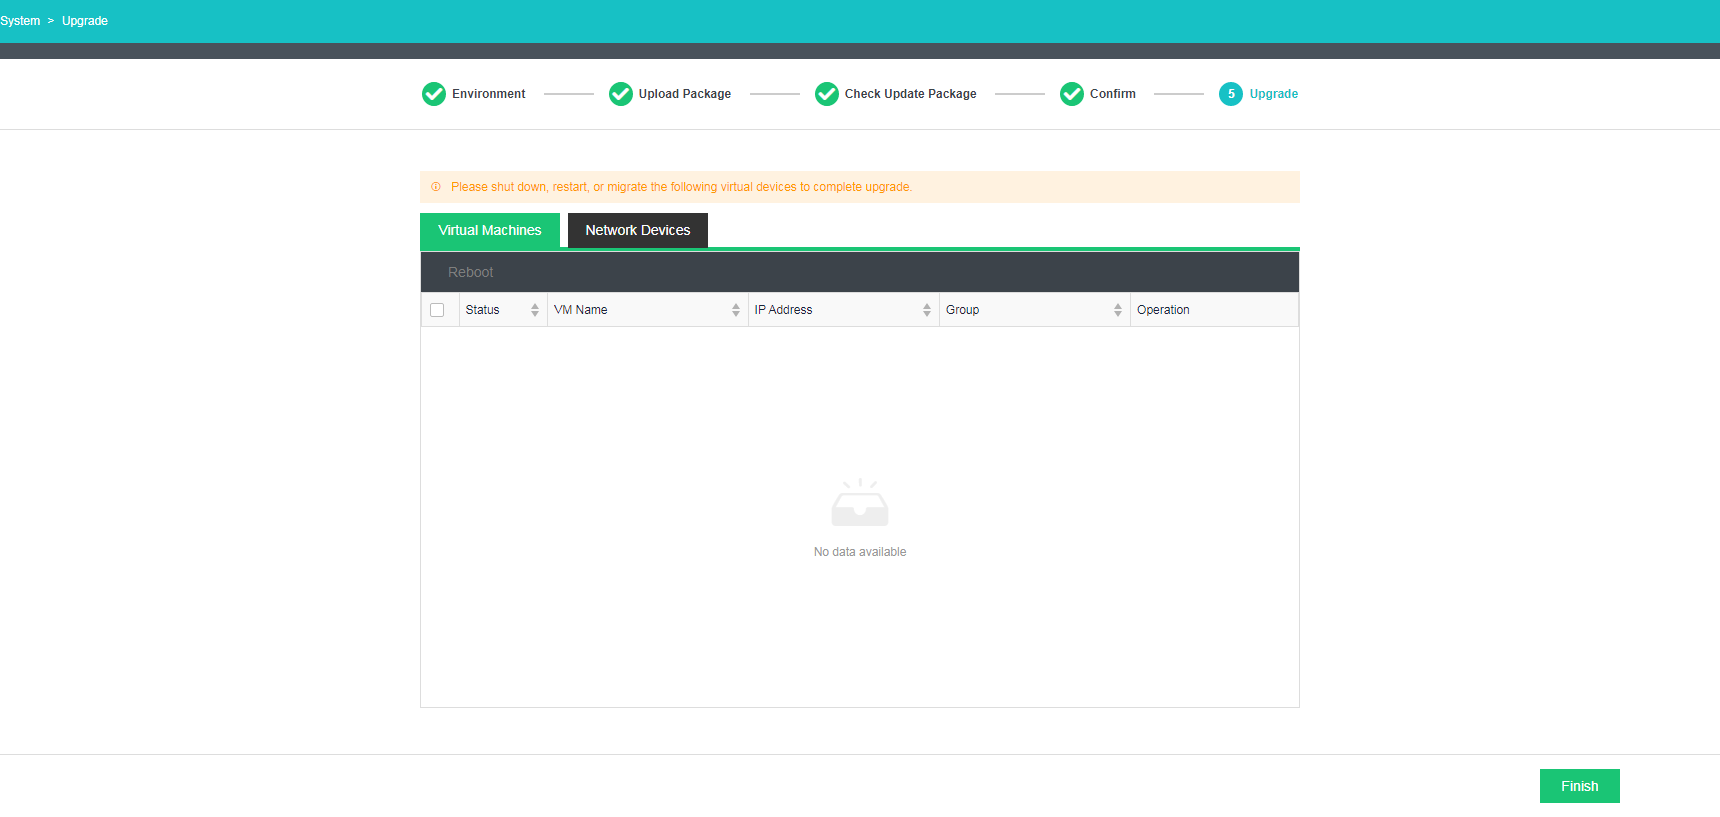
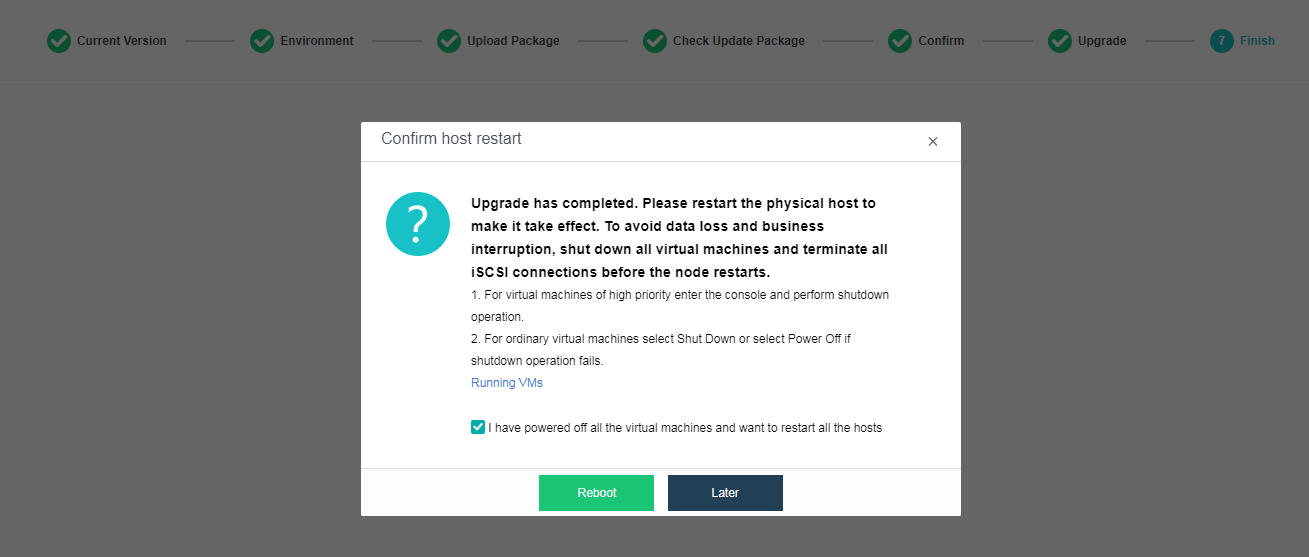
Select all VMs and shut them down. If the operation fails, go to their consoles to shut them (including suspended VMs) down separately. A screenshot of a computer

Description automatically generated

  1. Shut down all NFV devices.

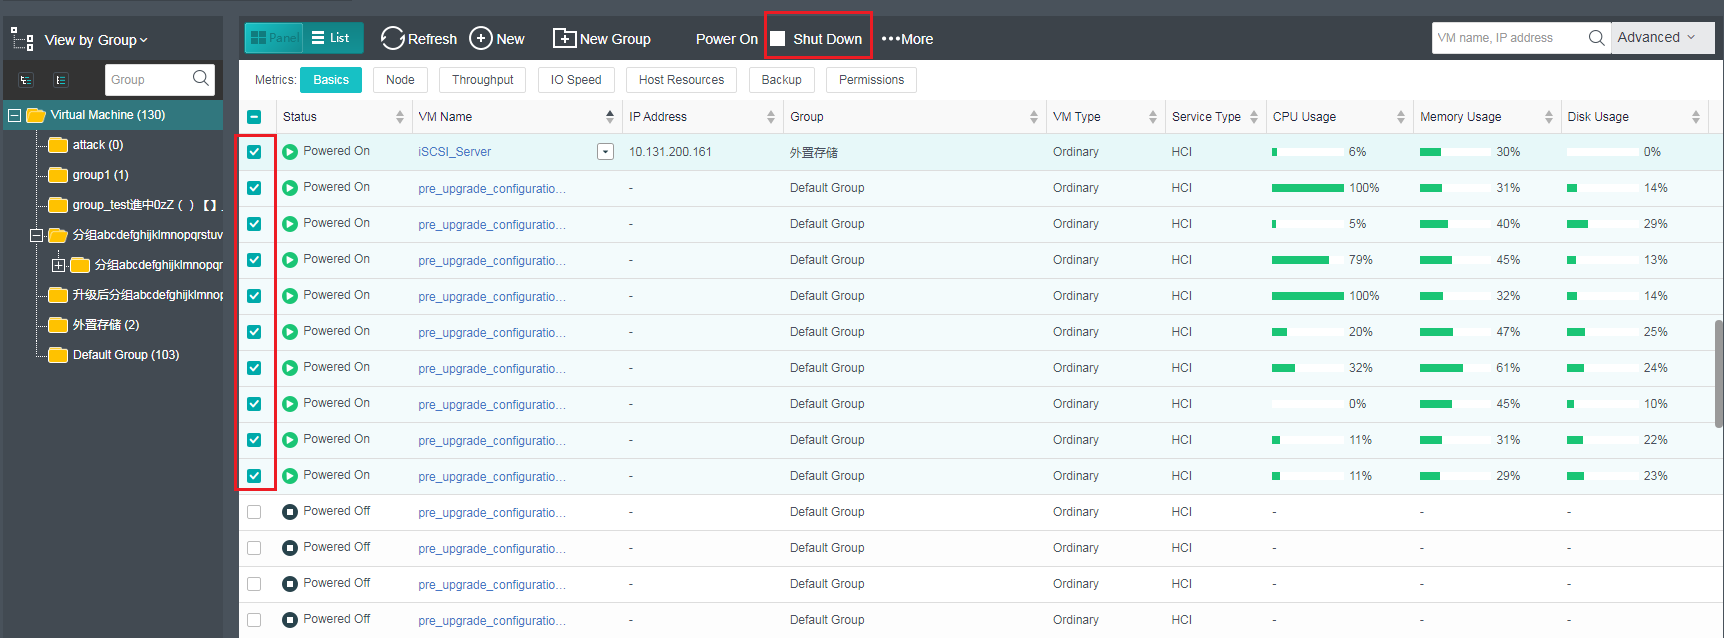
Go to Networking > Topology, click Running to view all NFV devices (excluding routers and switches), and shut them down.
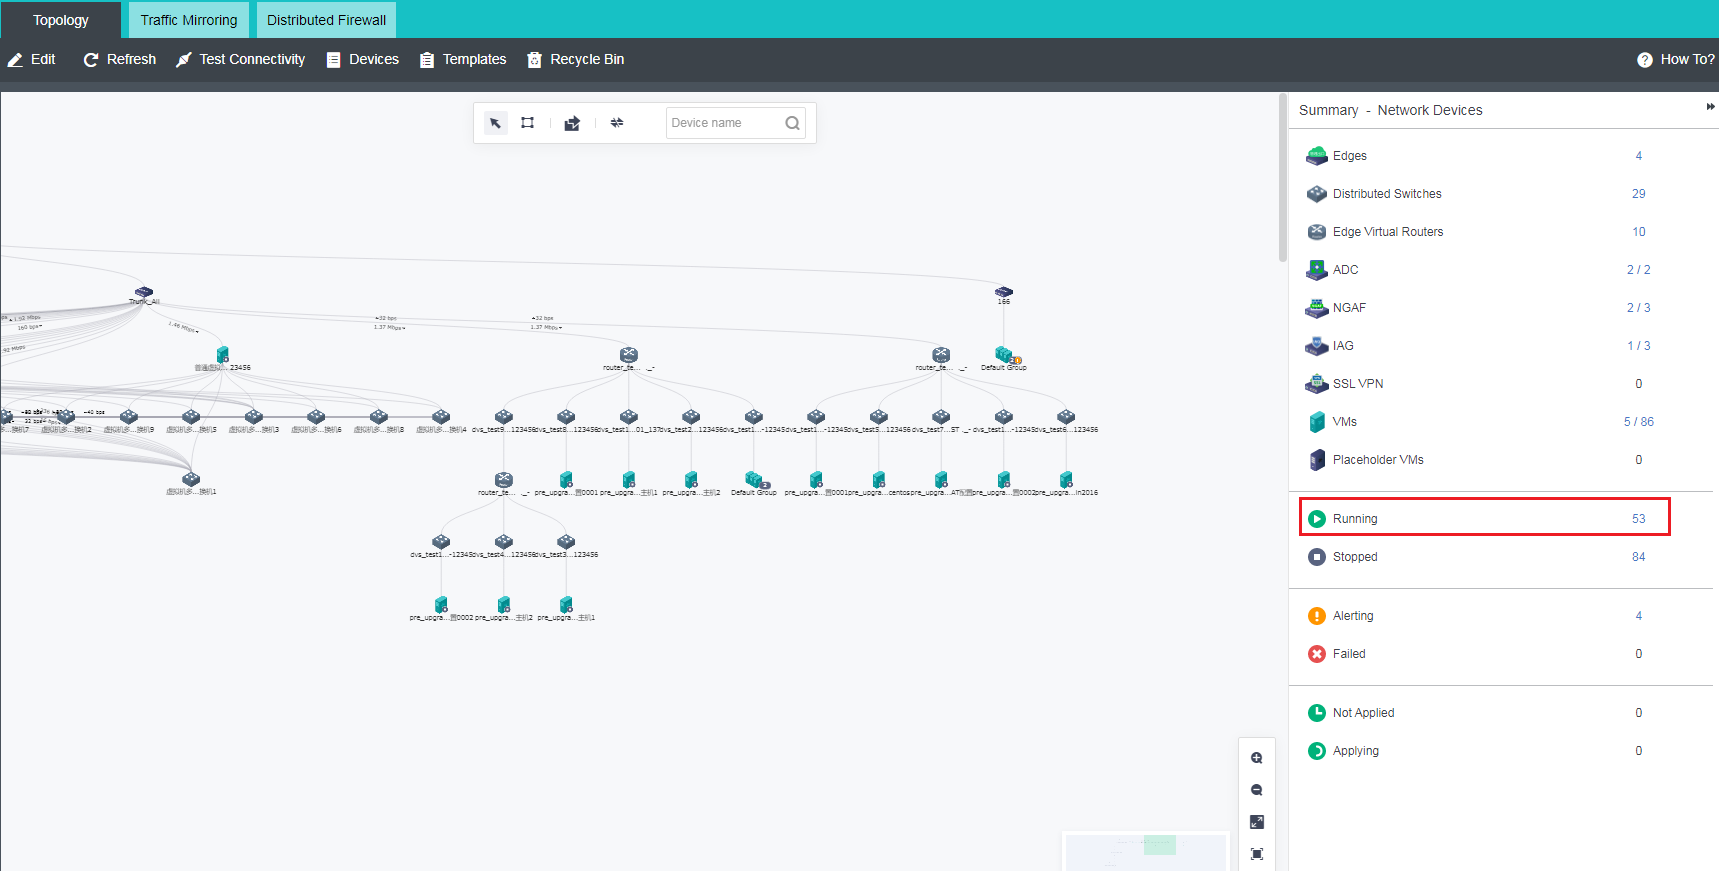
  1. Run the pre-check, and the system advises to perform an offline upgrade. Click Next to proceed.
  2. You can start the offline upgrade after all NFV devices are shut down and require all nodes to be restarted, which will cause business service interruption.
  3. Click Next to start the upgrade. A screenshot of a computer

Description automatically generated
  4. The upgrade progress is shown in the figure below. A screenshot of a computer

Description automatically generated
  5. The upgrade is complete. A screenshot of a computer

Description automatically generated
  6. Restart the nodes. A screenshot of a computer

Description automatically generated