{{ secondMenu.name }}


Virtual machines in VMware vCenter can be backed up to Sangfor HCI platform without installing any third-party software or plugin and purchasing backup storage. Virtual machine can be recovered on HCI platfrom or recovered to VMware vCenter.
On the toolbar, there are Enable/Disable backup, New, Delete, Enable, Disable and Backup as shown below: ![]()
Enable: To enable or disable backup, click Enable backup to enable backup or Disable backup to disable backup.
To add a new VMware backup policy, you may click New.
To delete the selected backup policy, you may click Delete.
![]() To enable the backup policy, you may click Enable or click on the icon.
To enable the backup policy, you may click Enable or click on the icon.
![]() To disable the backup policy, you may click Disable or click the icon.
To disable the backup policy, you may click Disable or click the icon.
To execute the selected backup policy, you may click Backup.
To search for a VMware backup policy, enter the policy name in the search box ![]()
On the VMware Backup Policy tab, it displays policy name, description, the number of virtual machines, backup repository, backup periodic, status and operation, as shown below: 
![]()
![]() Policy Name: Displays name of the new VMware backup policy.
Policy Name: Displays name of the new VMware backup policy.
Description: Displays descriptive information of the new VMware backup policy.
VM(s): It displays the number of virtual machines to be backed up. To view virtual machines, click on the number under VM(s) Backup Repository: It displays backup repository.
Periodic: It displays backup periodic.
Status: It displays status of the backup policy, enabled or disabled. To enable backup policy, click on the icon. To disable backup policy, click on the icon.
Operation: To edit or delete a backup policy, click Edit or Delete under Operation. The default scheduled backup policy cannot be deleted.
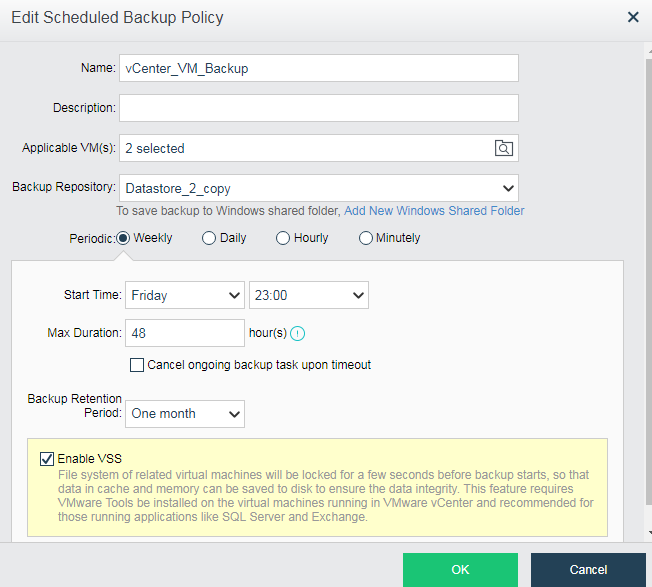
To edit a backup policy, click Edit and enter the following page:
Adding VMware Backup Policy
To add a new VMware backup policy, do as follows:

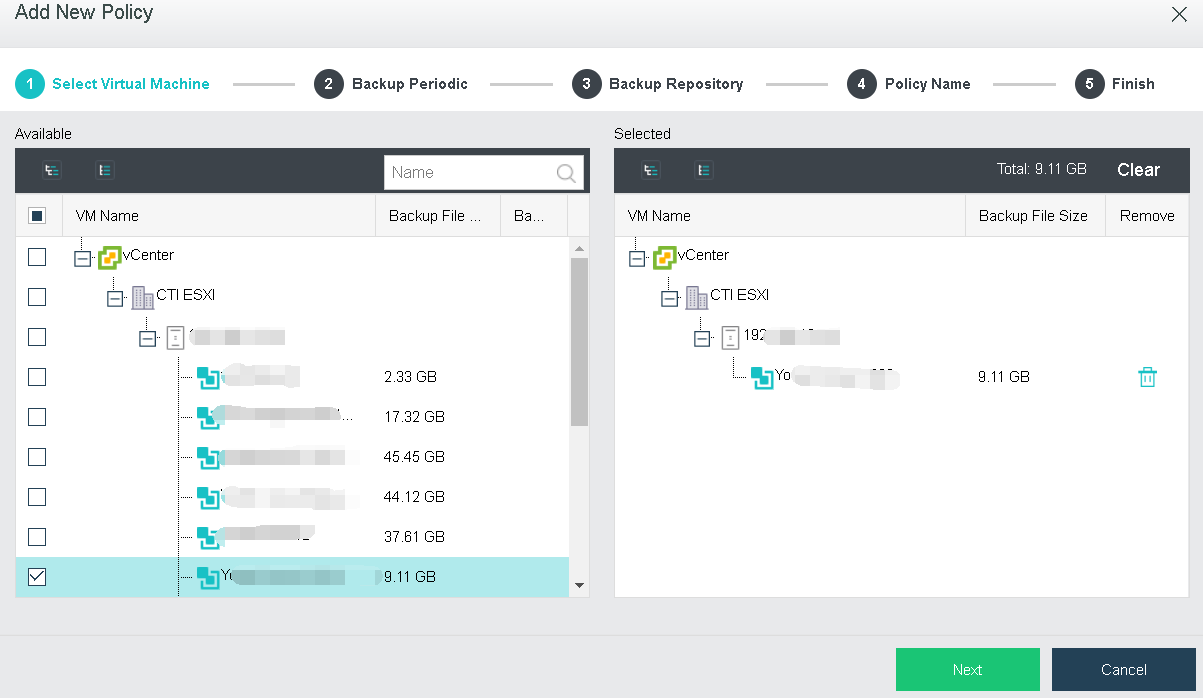
![]() Clear: To clear the selected virtual machines, click Clear.
Clear: To clear the selected virtual machines, click Clear.
To remove a virtual machine from the Selected, click
Backup periodic can be on weekly basis, daily basis, hourly basis and minutely basis. There are another two options: Cancel ongoing backup task upon timeout, Enable VSS. You may enable those options based on your own needs. 
On weekly basis: Options are from Sunday to Saturday.
Start Time: It specifies time to start backup. Since backup may bring impacts to system service, select a period that service is not busy.
Max Duration: It specifies the longest period that the backup operation can last. New backups only occur within this time range and will not stop once starts. However, the backup tasks having not started yet will resume when the time range arrives again. You may select Cancel ongoing backup task upon timeout based on your own needs.
Backup Retention Period: It specifies the longest period that backups will be kept. The longest period is three months.
![]()
You may select the option Enable VSS based on your own needs. Once that option is selected, file system of related virtual machines will be locked for a few seconds before backup starts, so that data in cache and memory can be saved to disk to ensure the data integrity. This feature requires VMware Tools to be installed on the virtual machines running in VMware vCenter and is recommended for those running applications like SQL Server and Exchange.
Daily: To have VM(s) backed up on daily basis, select Daily for Periodic and configure the related fields, as shown below: 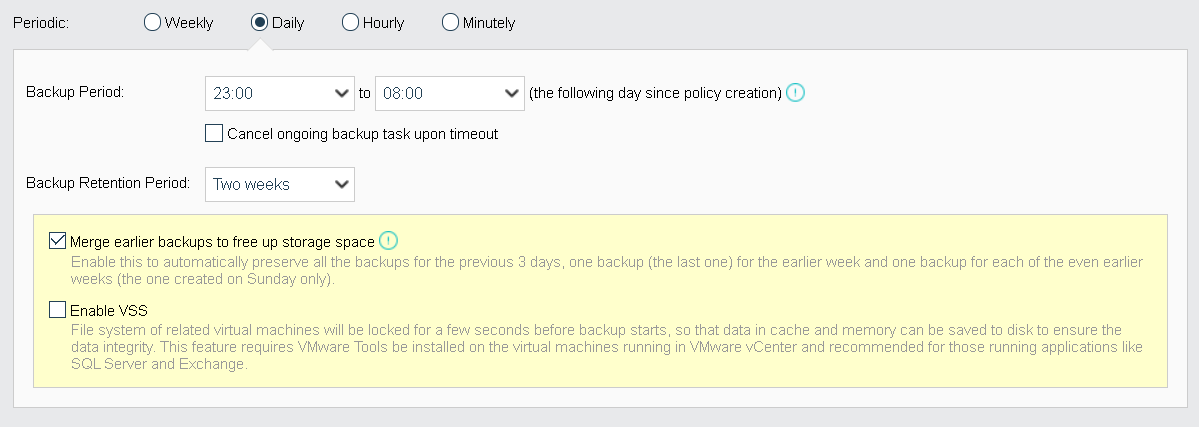
Backup Period: It specifies the longest period that the backup operation can last. New backups only occur within this time range and will not stop once starts. However, the backup tasks having not started yet will resume when the time range arrives again. You may select Cancel ongoing backup task upon timeout based on your own needs.
Backup Retention Period: It specifies the longest period that backups will be kept. The longest period is three months.
Hourly: To have VM(s) backed up on hourly basis, select Hourly for Periodic and configure the related fields, as shown below: 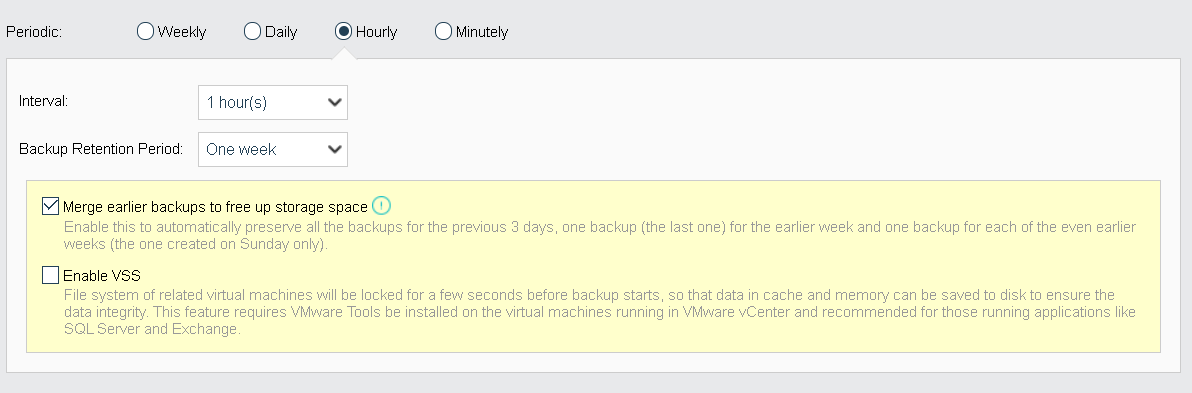
Interval: Specifies the interval of backup occurs. The minimum interval is 1 hour.
Backup Retention Period: It specifies the longest period that backups will be kept. The longest period is three months.
![]()
You may select Merge earlier backups to free up storage space to automatically
preserve all the backups for the previous 3 days, one backup (the last one) for the earlier week and one backup for each of the even earlier weeks (the one created on Sunday only).
You may select the option Enable VSS based on your own needs. Once that is selected, file system of related virtual machines will be locked for a few seconds before backup starts, so that data in cache and memory can be saved to disk to ensure the data integrity. This feature requires VMware Tools to be installed on the virtual machines running in VMware vCenter and is recommended for those running applications like SQL Server and Exchange.
Minutely: To have VM(s) backed up on minutely basis, select Minutely for Periodic and confiudre the related fields, as shown below: 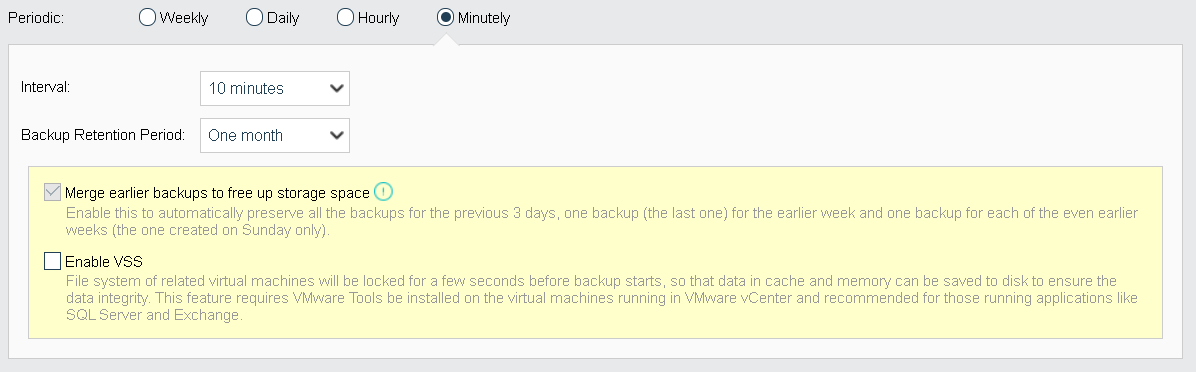
Interval: Specifies the interval of backup occurs. The minimum interval is 10 minutes.
Backup Retention Period: It specifies the longest period that backups will be kept. The longest period is three months.
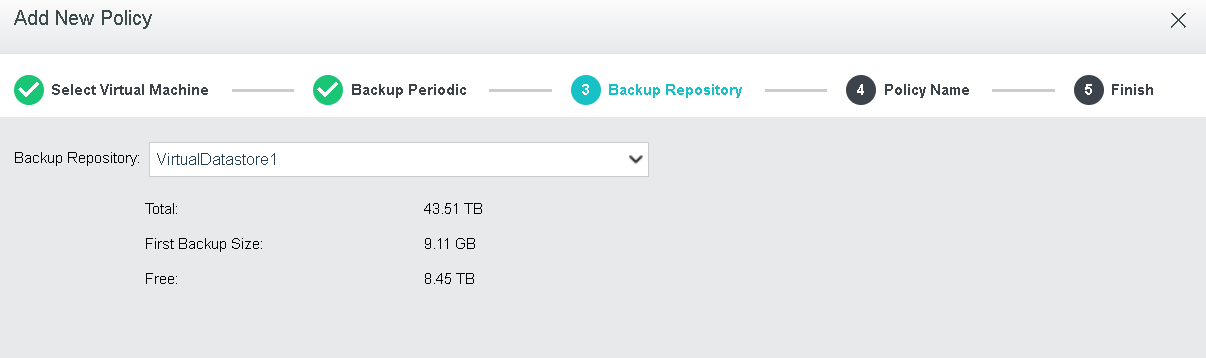
Backup Repository: It specifies backup repository, you may select an existing datastore. Once the backup repository is specified, total capacity, available backup repository size and first backup size of the selected datastore will be displayed.
![]()
Once backup respository is changed, the first backup will be full backup and all the data will be backed up.
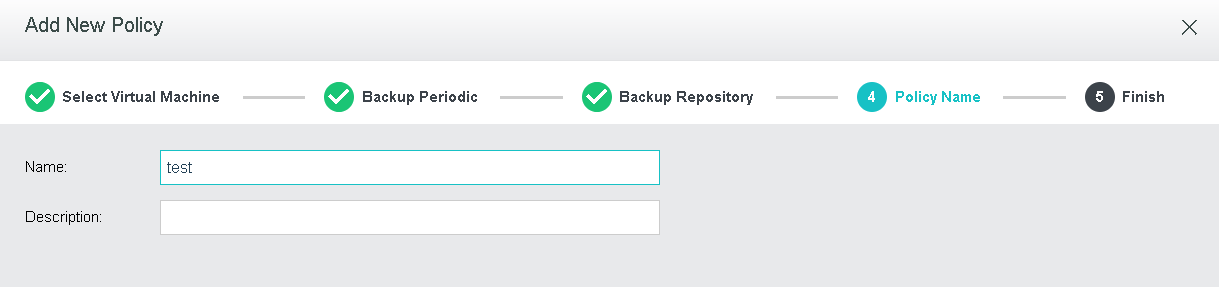
Name: Specifies name of the new backup policy.
Description: Specifies description of the new backup policy
It displays the basic settings of the backup policy, such as Name, Periodic Incremental Backup, Backup Repository and First Backup Size. To have VM(s) backed up upon completion of backup policy creation, you may select Back up now option, as shown below: 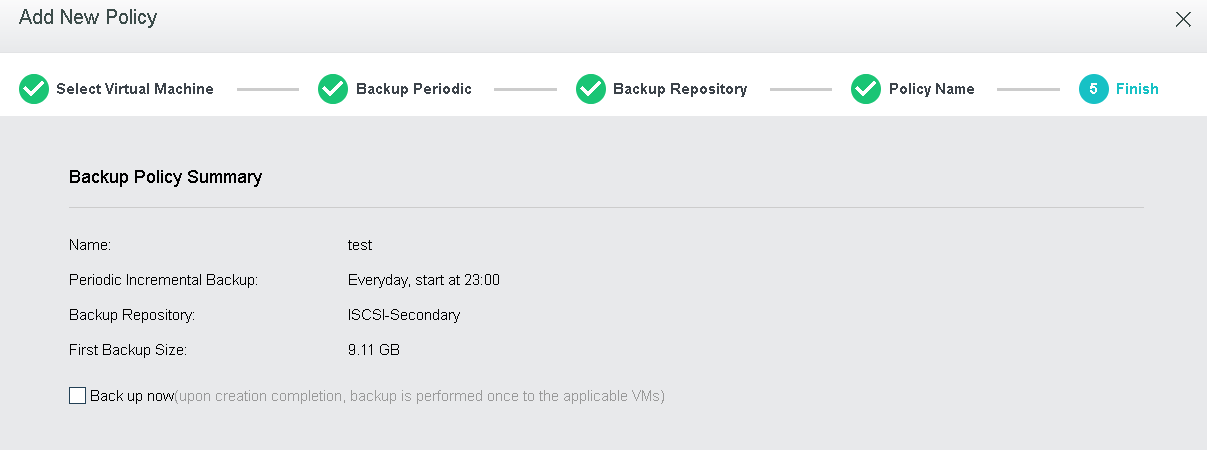

 {{ $t('index.defaultHeader.chromeBrowserTip') }}