{{ secondMenu.name }}


A virtual machine can be migrated to another node or another datastore. 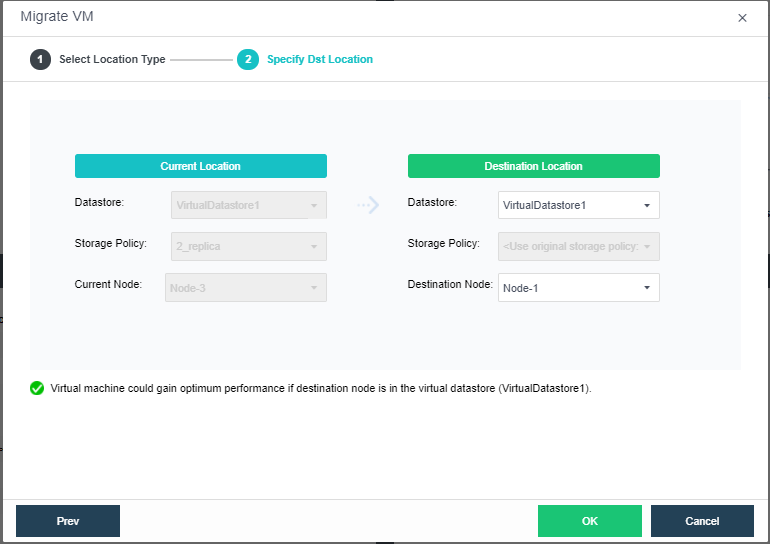
Current Location: Displays the current datastore and node of the virtual machine.
Datastore: Indicates the datastore where virtual machines is stored.
Storage Policy: Indicates the number of replication.
Current Node: Indicates the node where virtual machine resides.
Destination Location: Displays the destination datastore and node.
Destination Node: Indicates the node where virtual machine resides.
Datastore: Indicates the destination datastore. For virtual machines that have been mounted any physical disk, migration to another datastore is not allowed before the physical disk is removed.
The destination datastore can be chosen depends on destination node. If the destination node is Auto, destination datastore can only be a shared datastore. If the destination node is specified, destination datastore can only be a local disk on that node, or a shared datastore.
Sangfor Converter is designed for easy and quick migration of physical machines along with their operating systems and business to virtual machines managed by Sangfor HCI platform. 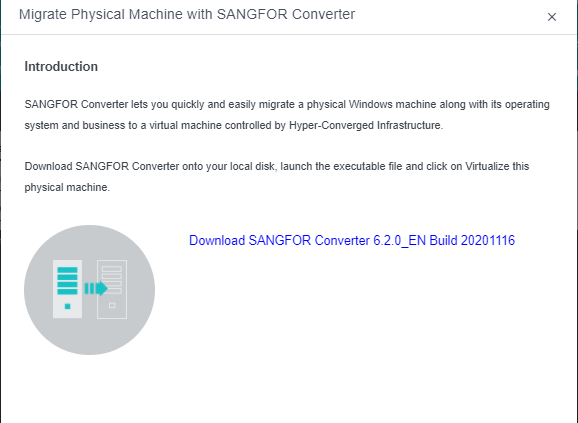
To download Sangfor converter, click Download Sangfor Converter and you will be redirected to the following page:
Requirements for physical servers: 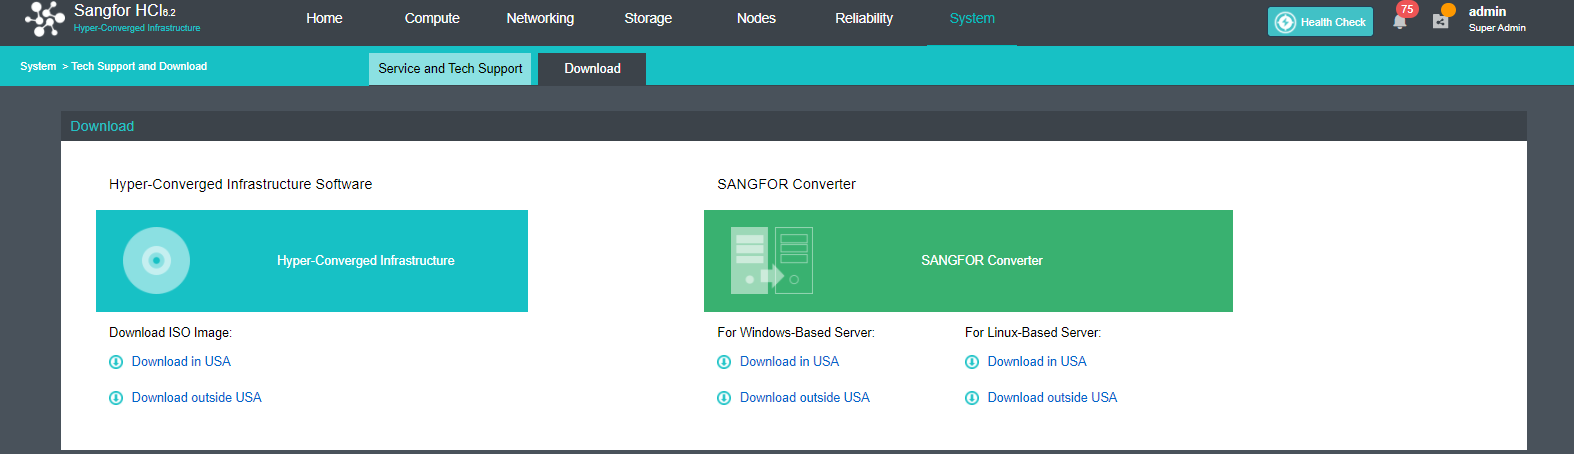
• CPU: 64bits
• Memory: >=2GB
• Disk: All supported except for dynamic disks
• NICs: >=1
• OS: 32-bit or 64-bit Windows XP/7/2003/2008/2012, Linux (Kernel version 2.6.18 and later)
Download and install Sangfor Converter on Windows system, and then launch it. Select Virtualize this physical machine and click Start Now. 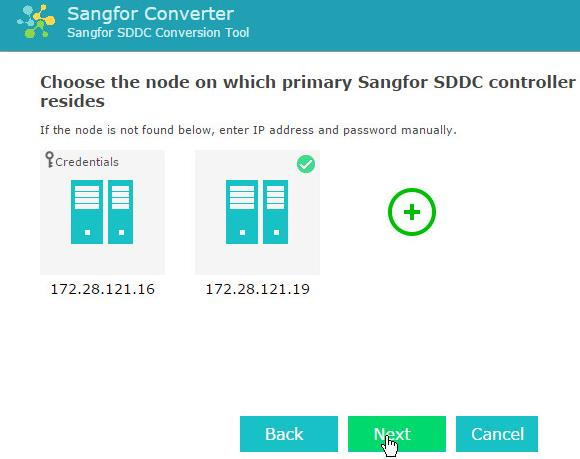
On the following page, select Cold migration or Live migration 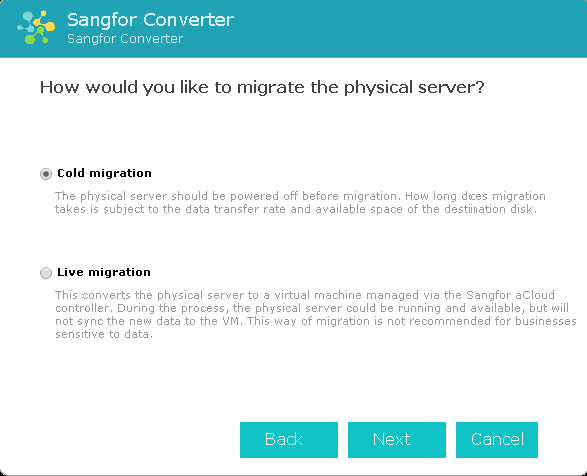
Select a target node. Target nodes on a same subnet as the physical server to be migrated will be discovered automatically, To migrate physical server to a node which resides on a different subnet, you need to add that node first by clicking + and entering username and password.
![]()
The target node must be reachable from the physical server to be migrated. If there is a firewall appliance between them, access to that target node from that physical server must be allowed. Only the cluster controllers residing on a same subnet as a physical server to be migrated will be discovered.
Configure the virtual machine to which the physical machine is converted, as shown below: 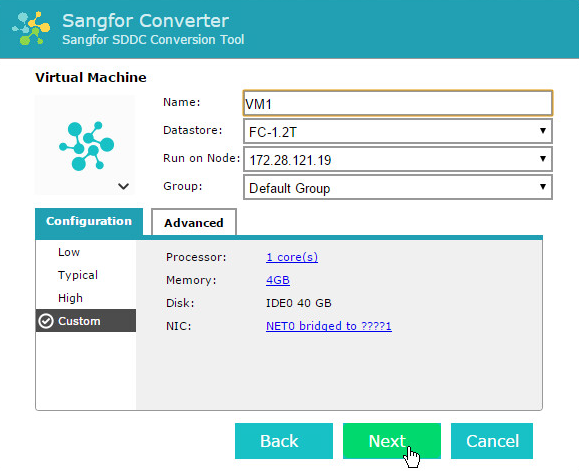
![]()
-Configure processor and memory according to the need for your business system.
-Disk cannot be configured. System will assign disks and disk size according to business system.
-You can add or delete NIC according to the need for your business system, and select a virtual switch to connect
After the virtual machine is configured, you will enter the following page to confirm configurations. Then, click Install. 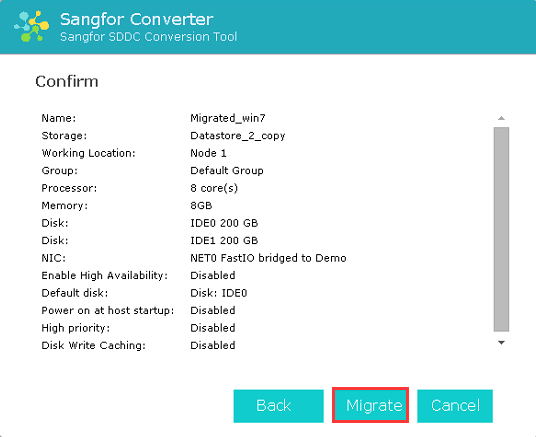
After installation of Sangfor Converter completes, you need to select an operation which will be performed upon migration completion. To see the migration process, log in to Web admin console of Sangfor HCI platform. 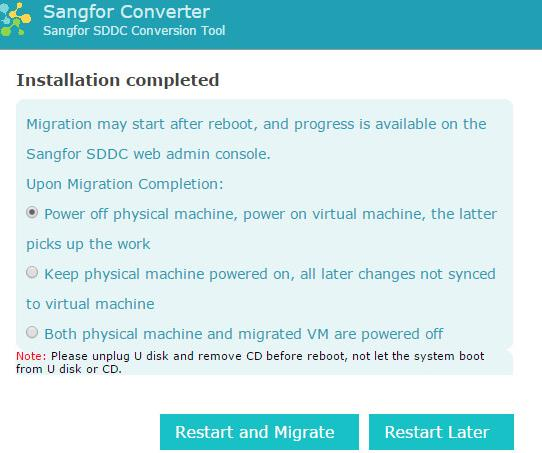
![]()
-Make sure that only one of the physical server and virtual machine is powered on and NCI address of that virtual machine is modified after migration is successful.
-Intermittent lose of network connection during migration is allowed, but not supported if the corresponding program on client and server side is closed.
-If migration fails due to uncertain factors (e.g,, power outage, etc.), physical server being migrated can go back to its operating system by restarting it.
Insert the USB drive that Sangfor HCI software image file is written to, into a physical server running Linux, boot the system from that USB drive, and select Migrate physical server to VM with P2V. 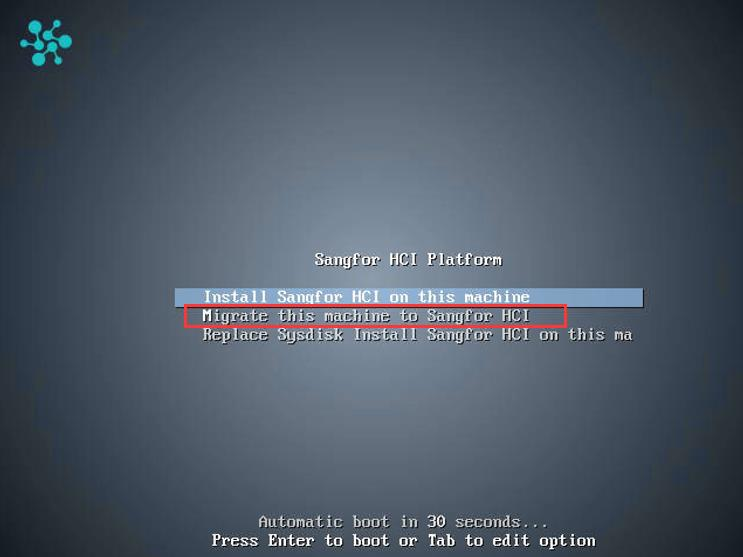
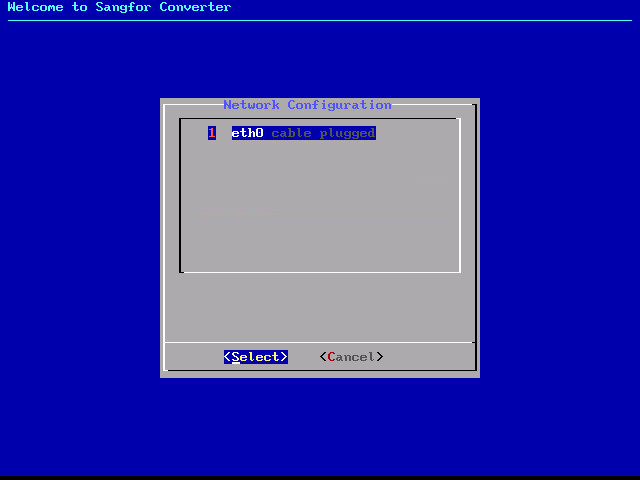
Network configuration is required before performing migration. Select a physical network adapter for the current node, for the purpose of communication with the destination node.
Configure an available local IP address, netmask and gateway for the physical network adapter, and enter IP address of the destination node. Make sure the server to be migrated can access that destination node. 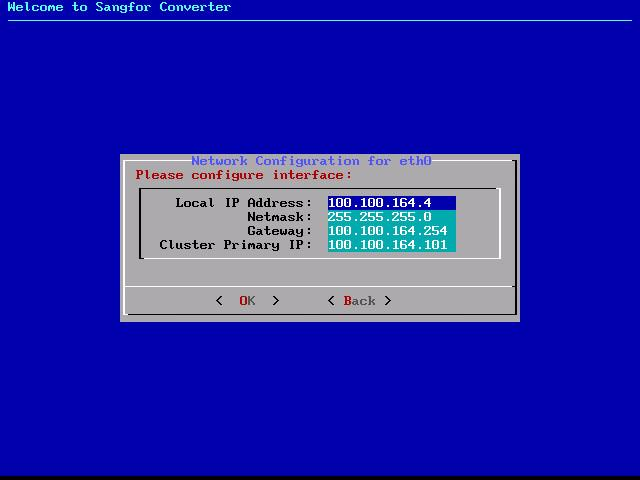
After specifying the above fields, the migration program will verify whether the current node and the destination node can communicate with each other. If not, it will be redirected to the network configuration page for you to make some changes, if so, click OK to proceed.
The following page will display if network communication succeeds, indicating that the node gets ready for migration. (The Installer login is for the purpose of debugging in case of migration failure) 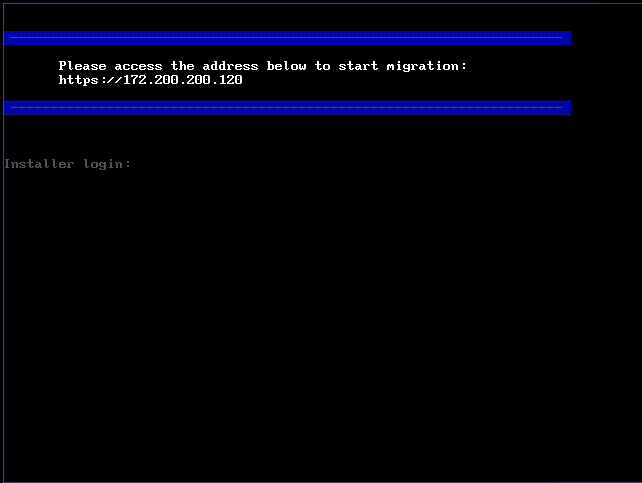
To view migration tasks, log in to Web admin console of Sangfor HCI platform and click Convert to VM in Home. 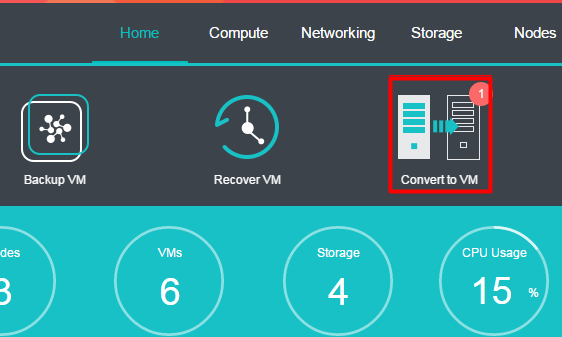
On the following page, you will see migration tasks and physical machines waiting for migration. To migrate a physical machine, you need to click Migrate to enter the Destination VM page and configure destination virtual machine. 
Make relevant configurations, including VM name, datastore, run on node, hardware configurations, etc, as shown below: 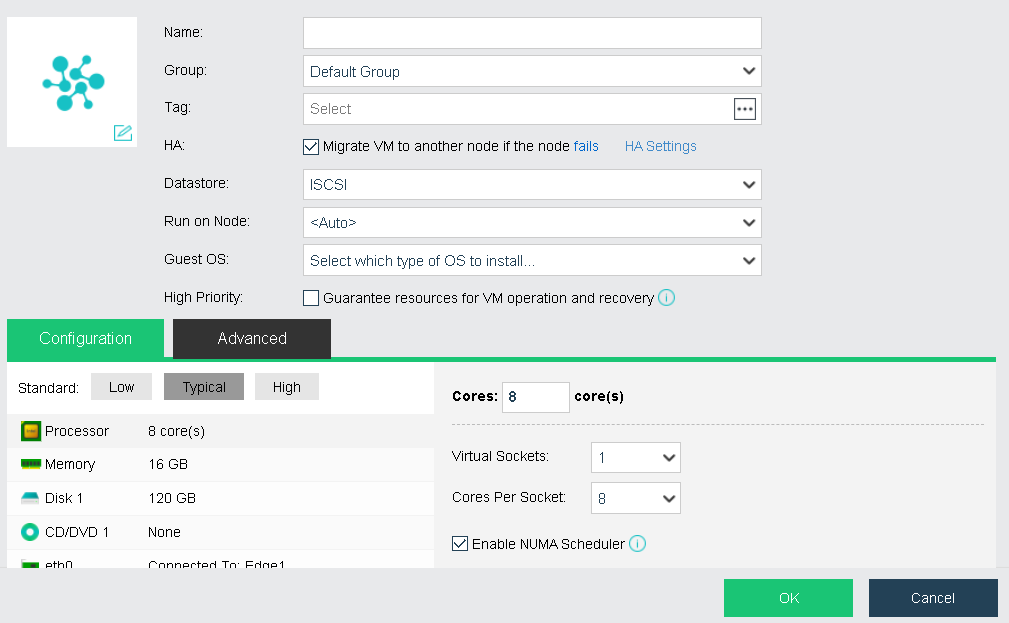
After making the above configurations, start migration.
![]()
-Conversion of physical machine is supported by Sangfor HCI3.3 and later versions. Sangfor conversion tool for Windows based server is a separate .exe file; for Linux based server, that tool is integrated into Sangfor HCI software.
-The progress of migration depends on physical network bandwidth and disk IO performance of the host having Sangfor HCI software installed.
-It is recommended that physical network bandwidth should be 1 GBps at least.
-Since migration will affect disk performance of the host having Sangfor HCI software installed, it is recommended to perform migration when business system is not busy and ensure that number of migration tasks is less than 3.
-Storage capability of Sangfor HCI platform should be larger than the used space of disk of the physical machine to be migrated, or else migration will fail.
Powered-on virtual machines on Sangfor HCI platform can be migrated to VMware vCenter 
Before migration, you need to specify the fields under Current Location and Destination Location. Whether to select the options Auto shut down the migrated virtual machine in Sangfor HCI to complete migration or Auto power on the virtual machine in VMware vCenter upon migration completion depends on your own needs.
Auto shut down the migrated virtual machine in SANGFOR HCI to complete migration: This will have the virtual machine power off automatically before migration completes to have the new changes synced to the destination location. If you do not want the virtual machine to power off at unexpected time and interrupt the services being offered via that virtual machine, do not select this option. You may power off the virtual machine manually when migration completes.
After configuring relevant fields, click OK to start migrating virtual machine and you will see the migration process. You can also view migration progress and more details in tasks, as shown below: 
This feature enables virtual machine to be migrated to a different cluster.
Live Migration 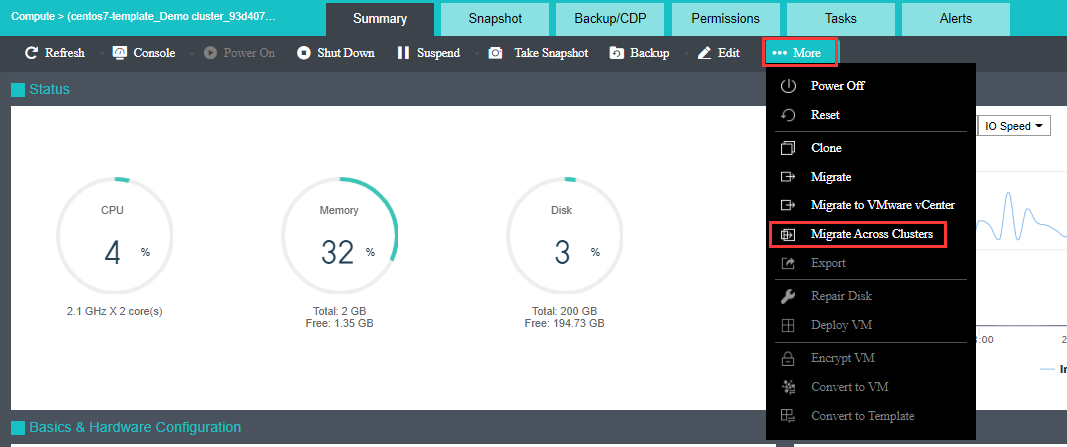

Cluster IP: Specifies IP address of destination cluster.
Password: Specifies admin password. 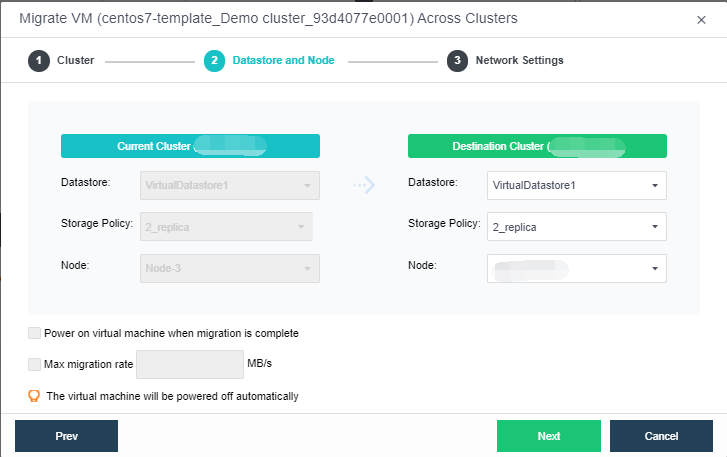
Reboot upon migration completion: It is applicable to cold migration only.
Max migration rate: Specifies the maximum migration speed. The minimum is 5MB/s and the maximum is 1000MB/s. After specifying destination datastore and node, click Next to configure network. 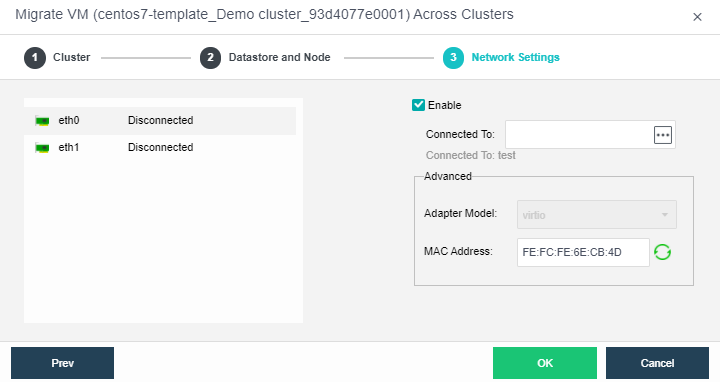
Enabled: If it is selected, it indicates that the specified virtual network adapter is enabled.
Connected To: Specifies an edge or a virtual switch to be connected to the virtual machine.
Adapter Model: Specifies the adapter model. Options are Realtek RTL8139 and Intel E1000.
MAC Address: MAC address can be automatically generated or manually specified. MAC address examples: 00-11-22-33-44-55, 00:11:22:33:44:55. MAC address will be changed after the migration operation completes and you may edit the MAC address if you do not want the MAC address to be changed.
![]()
The virtual machine will be powered off automatically and added into the default VM group.
Cold Migration 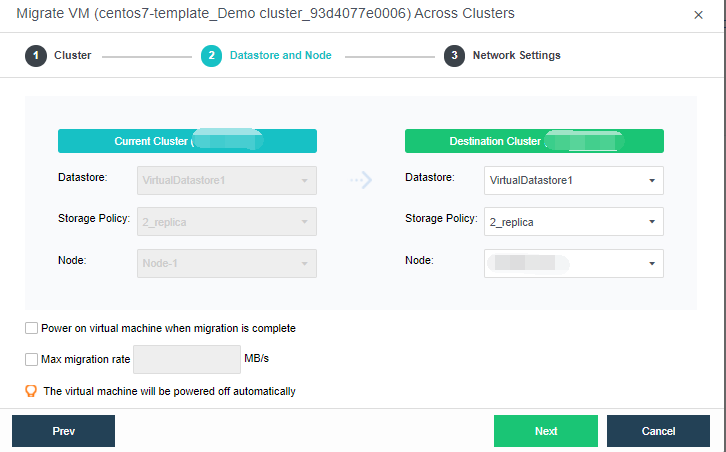
Configurations are the same with that of live migration. You may refer to the Live Migration section.

 {{ $t('index.defaultHeader.chromeBrowserTip') }}