{{ secondMenu.name }}


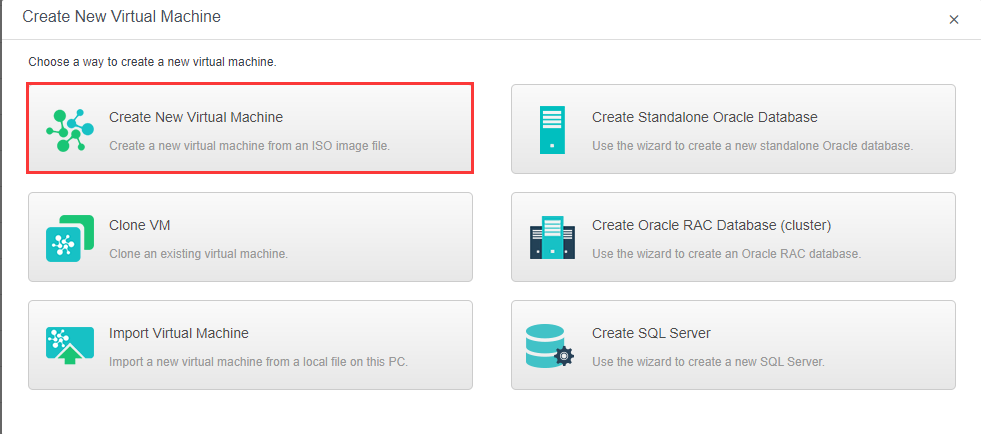
To create a new virtual machine, click New in Compute and then select Create New Virtual Machine to enter the following page. 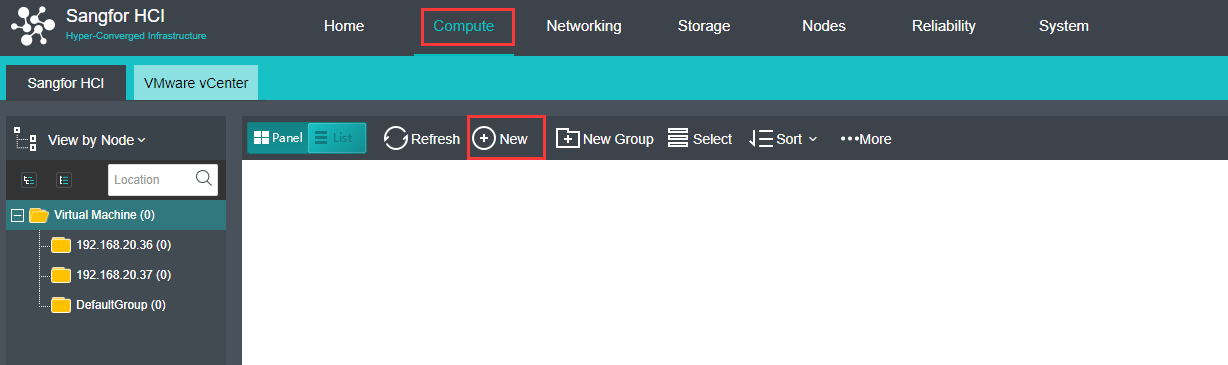
Name: Specifies a distinguishable name for the virtual machine.
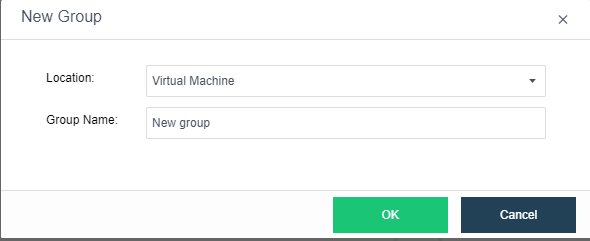
Group: Specifies a group to which this virtual machine belongs. 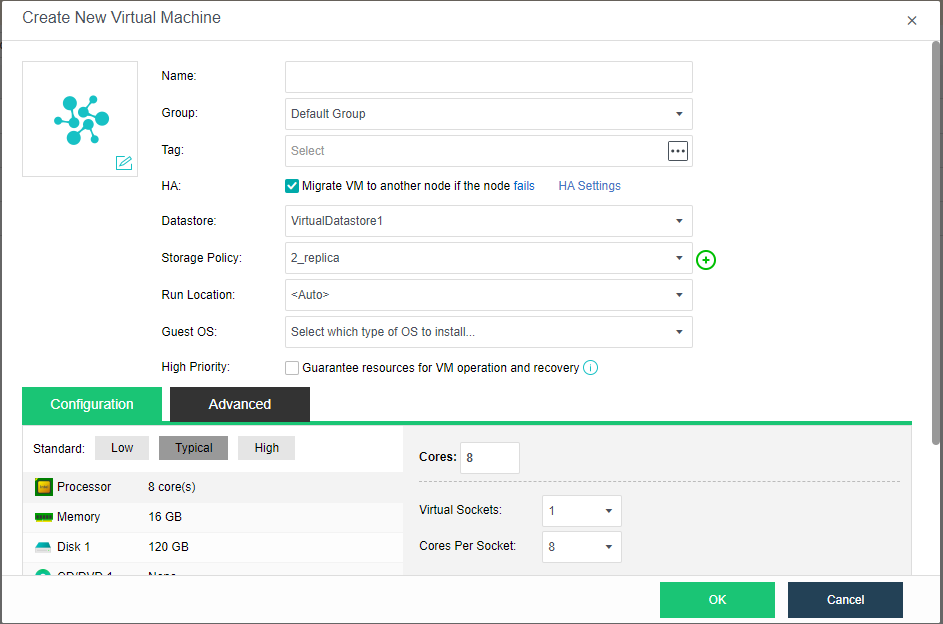
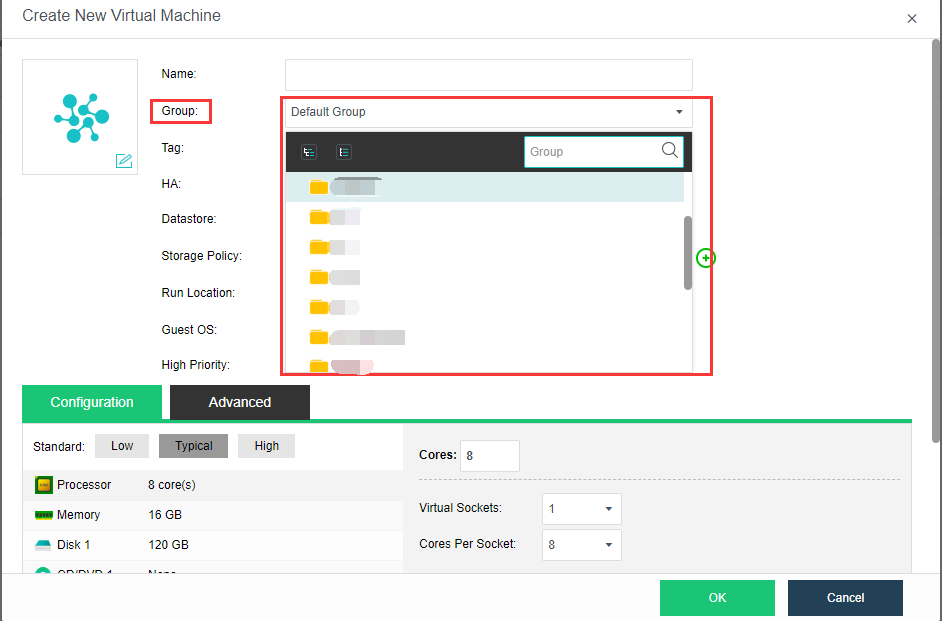
To add a new group, click add new group. 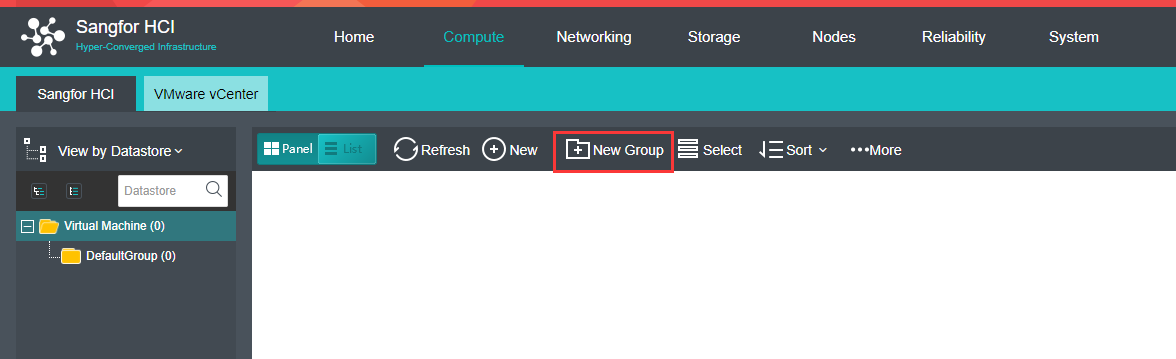
Tag: Specifies one or more than one tags for the virtual machine. 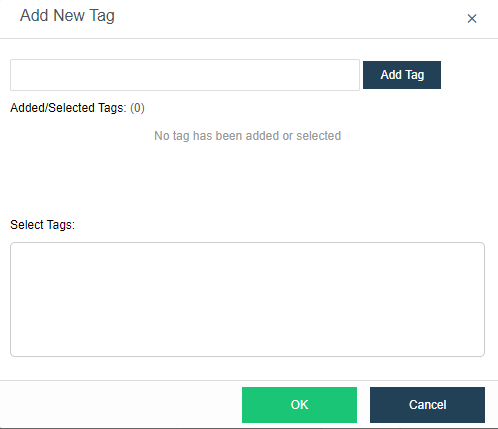
HA: If the option Migrate to another node if the node fails is selected, virtual machine will be recovered onto another node in case the node running the VM fails. 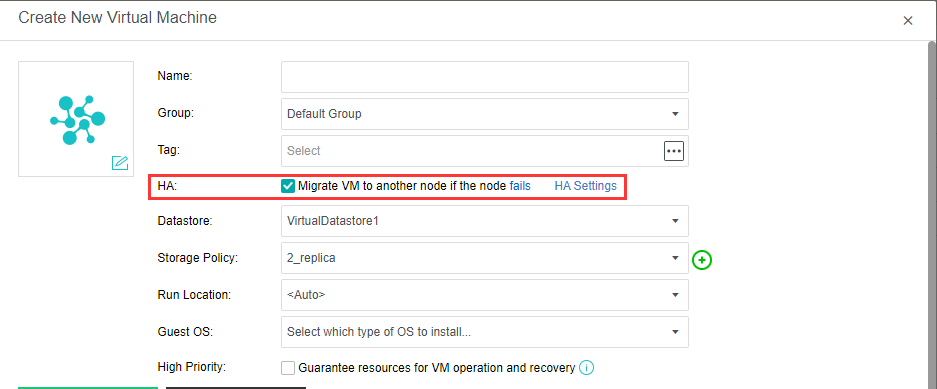
Datastore: Specifies a datastore to store virtual machine. HA is configurable only when a shared datastore is selected 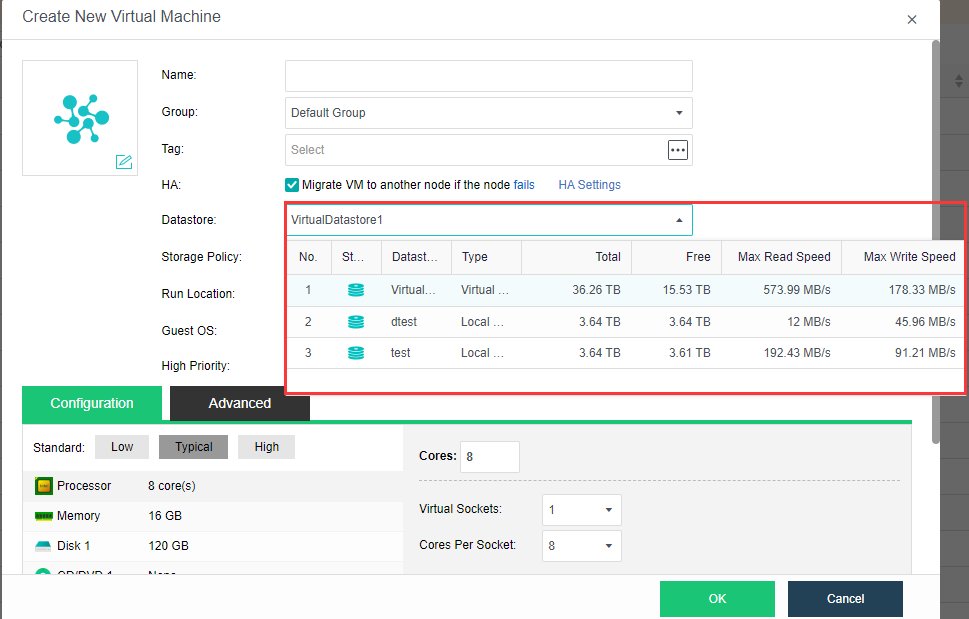
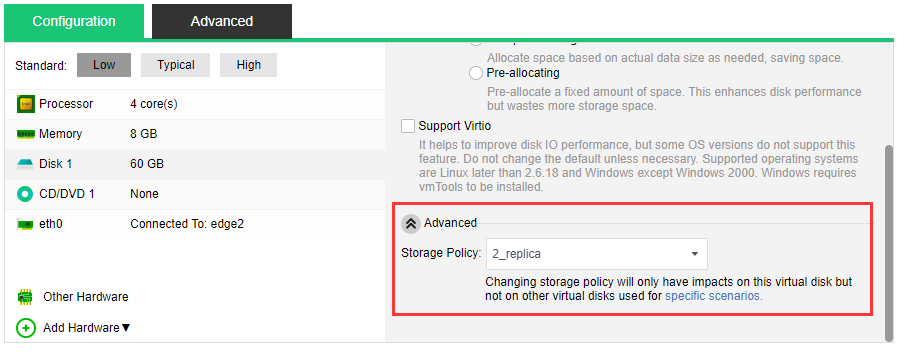
Storage Policy: Specifies the number of replication and performances. 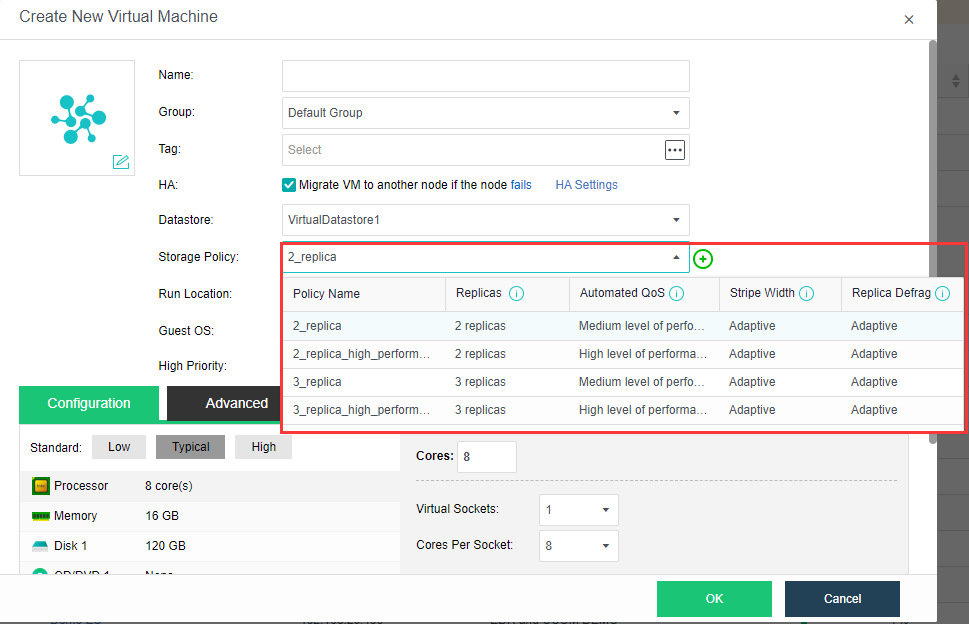
Run on Node: Specifies a node on which the virtual machine runs. 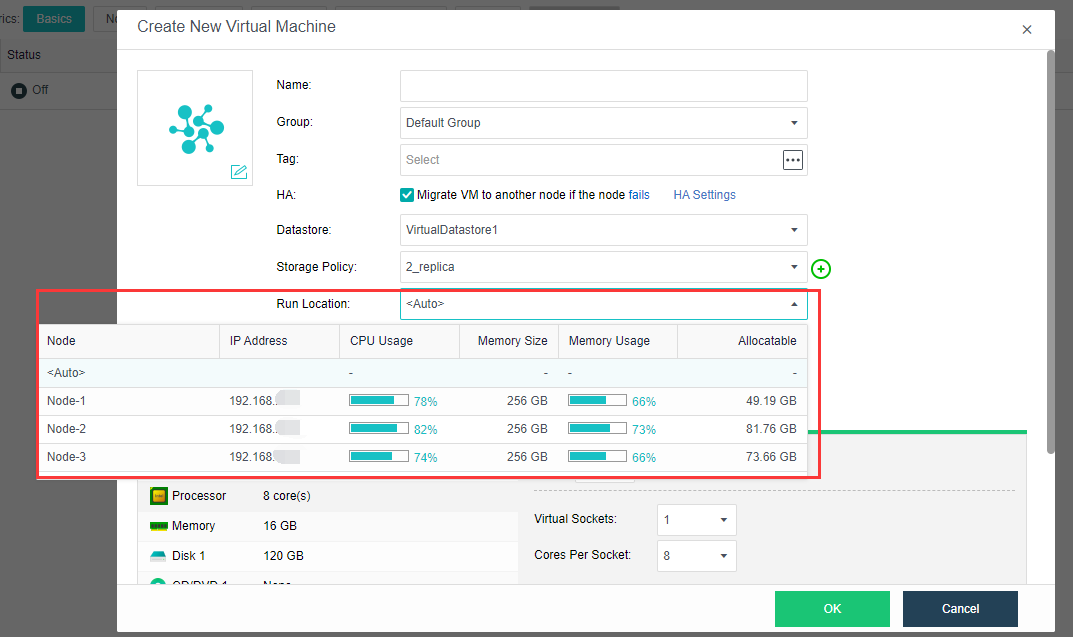
Guest OS: Specifies an operating system for the virtual machine. The following types of guest OSes are supported: Sangfor, Windows, Linux, Linux distributions and others. Sangfor operating system is mainly for software aCenter 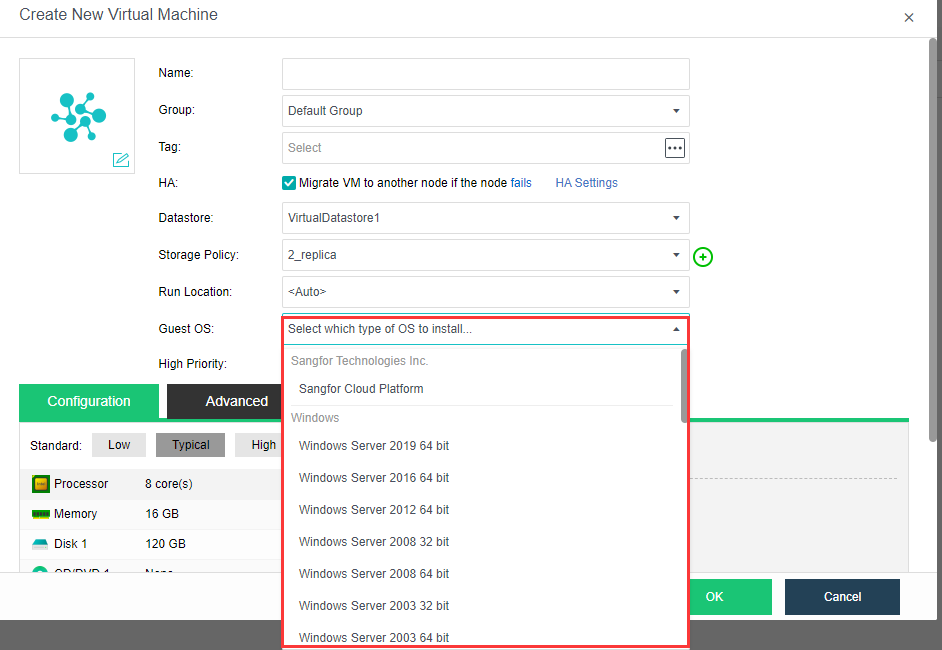
High priority: Once it is selected, resources will be preferentially allocated to virtual machine if overall resources are inadequate. 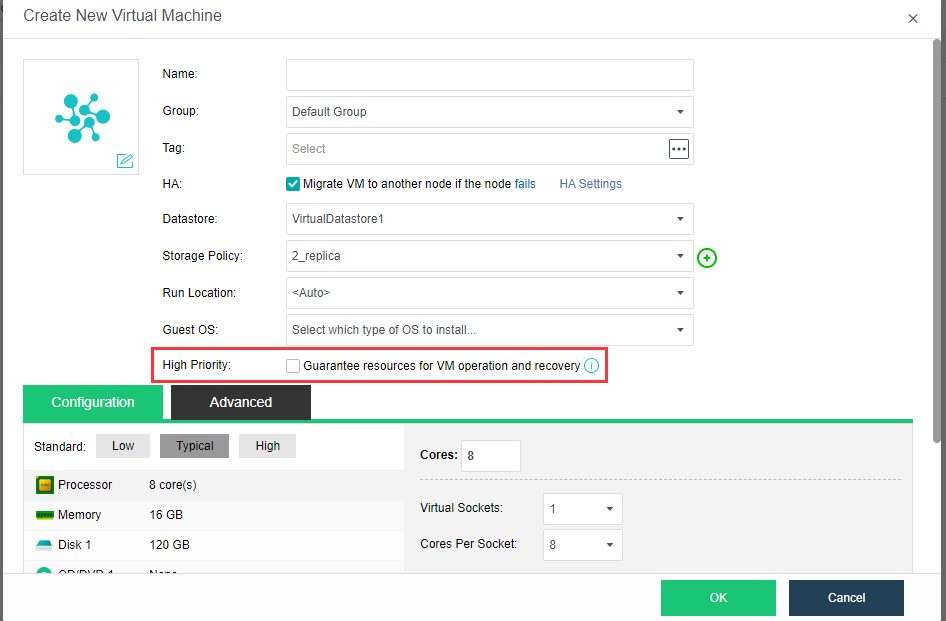
Configuration: It allows you to configure hardware resources, such as Processor, Memory, Disk, CD/DVD and NIC, etc. Configuration falls into Low configuration, Typical configuration and High configuration. If the current configuration fails to meet business requirements, you can configure the corresponding hardware resource as required, as shown below: 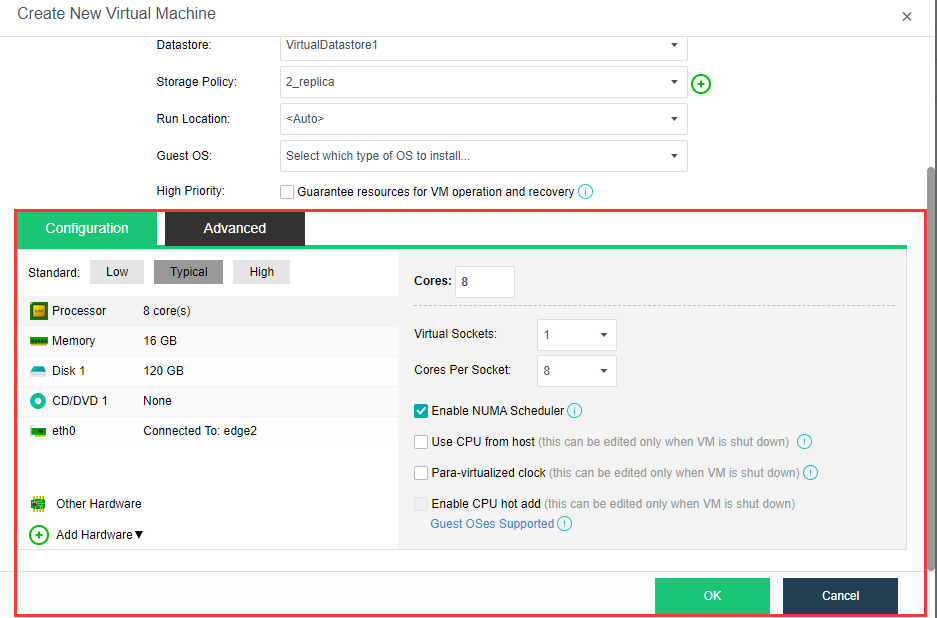
Default Low Configuration: 4 processor, 8 GB memory, 60 GB disk, one CD/DVD, one NIC.
Default Typical Configuration: 8 processor, 16 GB memory, 120 GB disk, one
CD/DVD, one NIC.
Default High Configuration: 16 processor, 32 GB memory, 120 GB disk, one CD/DVD, one NIC.
Processor: Specifies the number of virtual sockets and cores per socket for the virtual machine respectively. Once Cores field is configured, Virtual Sockets and Cores Per Socket fields will be automatically filled with optimum values, so as to achieve best VM performance.
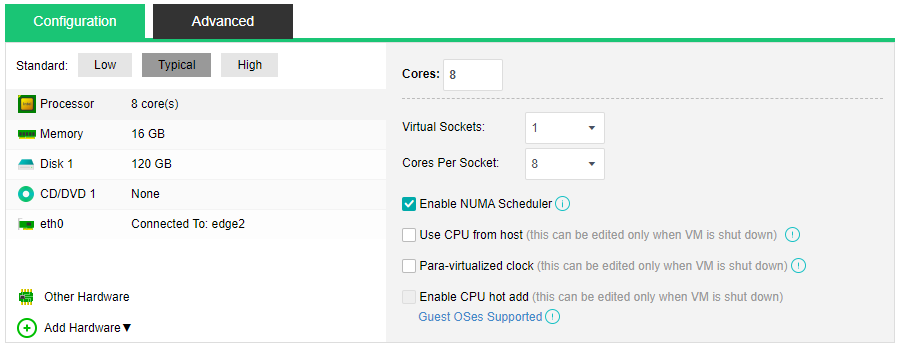
Enable NUMA Scheduler: Once enabled, memory access and VM performance will be enhanced. To enable NUMA scheduler for VM, go to System > Advanced Settings to enable NUMA scheduler first. To enable NUMA topology into a virtual machine, make sure that virtual machine has more than 8 cores and vmTools have been installed.
Use CPU from host: Live migration might be affected because of the tight association between the virtual machine and the host CPU.
Para-virtualized clock: It is applicable to Windows virtual machines only. It can improve performance of Windows virtual machines running database but requires the option Use CPU from host to be enabled.
Enable CPU hot add: Once CPU hot-add is enabled, CPU resources can be hot-added manually for the virtual machine.
Memory: Specifies the memory size for the virtual machine. The minimum is 1 GB, and the maximum is 4 TB.

Enable memory hot add: Once memory hot-add is enabled, memory resources can be hotadded manually for the virtual machine.
Disk: Specifies the disk for the virtual machine.
![]()
To specify a disk for a virtual machine that is not stored on local storage, make sure the disk is on a NFS, iSCSI or FC storage can be accessed by virtual machine. 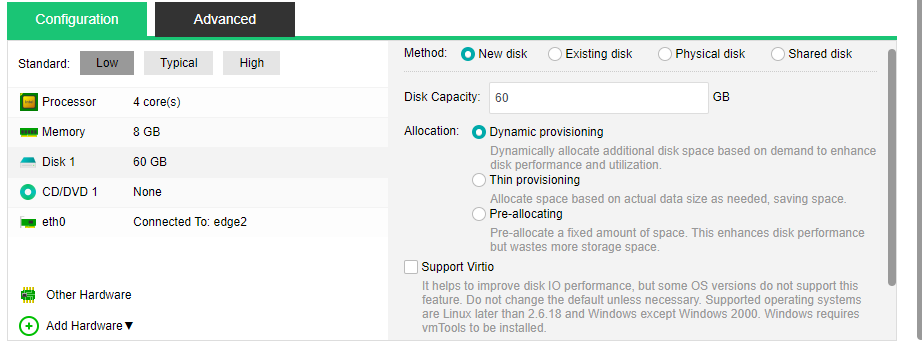
New disk: You may choose to create a new disk or use an existing disk. If you like to create a new disk, configure related fields on the following page: 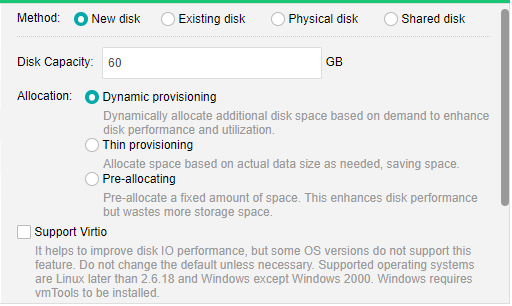
Disk Capacity: Specifies the capacity (GB) of the virtual disk.
Dynamic provisioning : Allocate space based on pre-allocated space and actual demands, to enhance disk performance and utilization.
Thin Provisioning: Allocate space based on actual data size as needed, saving space.
Pre-allocating: Pre-allocate a fixed amount of space, enhancing disk performance but wasting more storage space.
Support Virtio : It helps to improve Disk IO performance, but some versions does not support this feature. Do not change the default unless necessary. 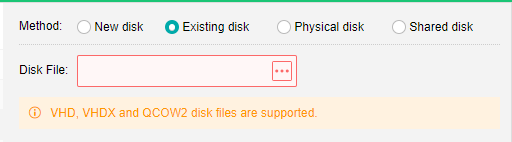
Existing disk: To use an existing disk, select the option Existing disk and then select the corresponding disk file.
Physical disk: To use a physical disk, select the option Physical disk and choose a physical disk which will be mapped to the virtual machine. 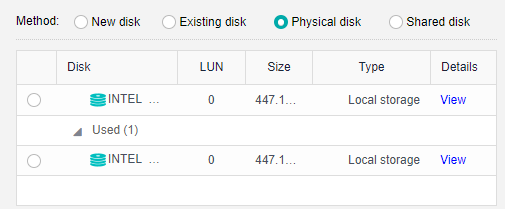
Shared disk: To use a shared disk, select the option Shared disk. 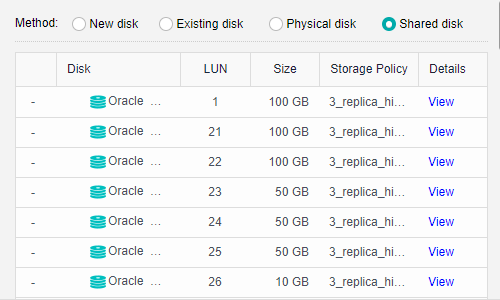
To allow more than one virtual machines mount a same disk, be sure that those virtual machines support mutex during write operation (such as in Oracle RAC environment), or else, data on the disk will get damage. 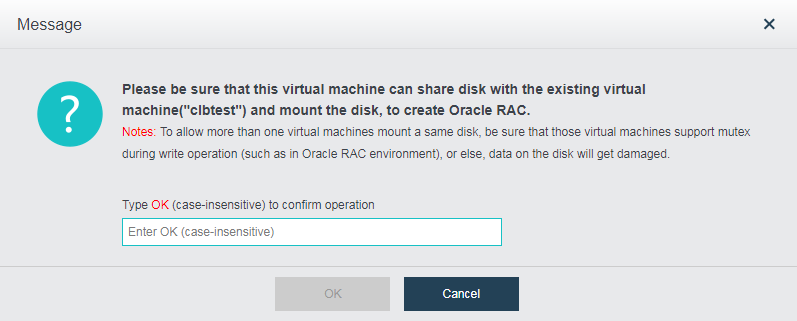
CD/DVD 1: Specifies an ISO image file of CD/DVD drive to be used by the virtual machine. You may also select None, which indicates that the virtual machine does not use CD/DVD drive. 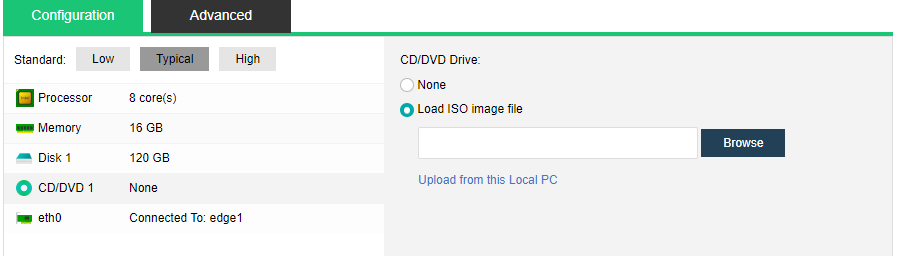
If the option Load ISO image file is selected, you need to select the corresponding ISO image file. If there is no ISO image file, you may upload an image file to the datastore from local disk. Click Upload from this Local Disk, select an ISO image file and upload it. 
eth0: Specifies what the virtual machine is connected to 
Enabled: If it is selected, it indicates that the specified virtual network adapter is enabled.
Connected To: Specifies an edge or a virtual switch to be connected to the virtual machine.
Adapter Model: Specifies the adapter model: Realtek RTL8139 or Intel E1000.
MAC Address: It can be automatically generated or manually specified. MAC address examples: 00-11-22-33-44-55, 00:11:22:33:44:55.
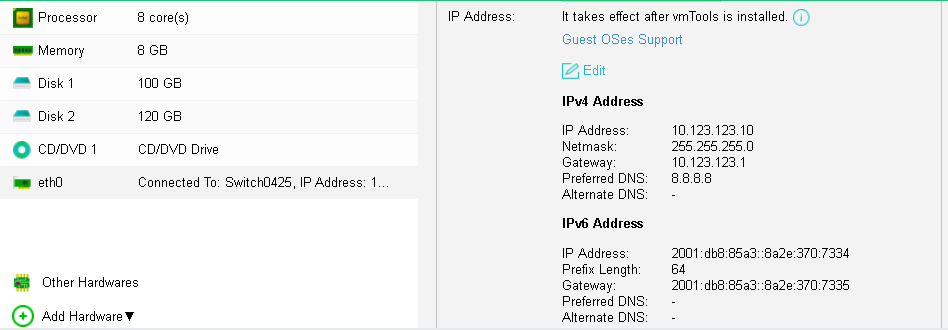
Support IPv4 and IPv6 address: Support IPv4 and IPv6 address: It can set IPv4 and IPv6 addresses on the network card. It only supports certain Guest OS and required to install the VM tools as well.
Other Hardwares: Includes Graphics Adapter, Mouse Type and BIOS Option. 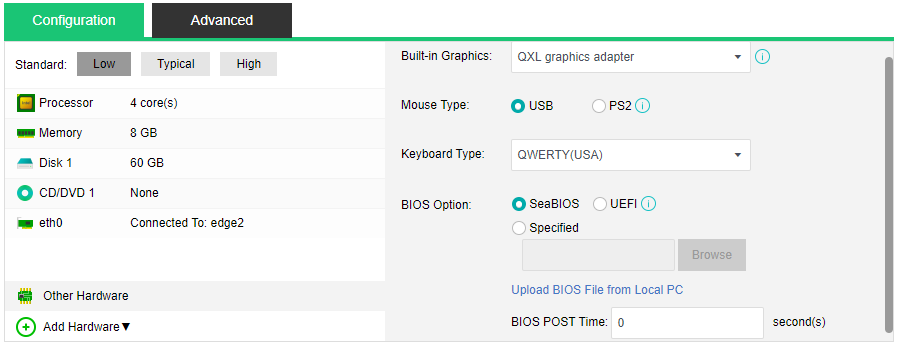
Built-in Graphics: Options are Standard VGA graphics adapter, VMWare compatible graphics adapter, QXL graphics adapter and Cirrus graphics adapter. Graphics adapter has close relation with desktop display. If selected graphics adapter is not supported by guest OS or display error exists, try another type of graphics adapter.
Mouse Type: Options are USB and PS2.
![]()
It’s not recommended to change mouse type unless the virtual mouse does not work properly or USB mouse refuses to work for some reason. It takes effect after the console is re-opened. Mouse type can be changed to PS2 if USB mouse refuses to work for some reason.
Keyboard Type: QWERTY (USA) and QERTY (Italy)
BIOS Option: Options are SeaBIOS, UEFI BIOS and Custom. You can also specify BIOS POST Time.
To add more hardwares, click Add Hardware. Then, you can add disk, CD/DVD, serial port, NIC and USB as per your need. 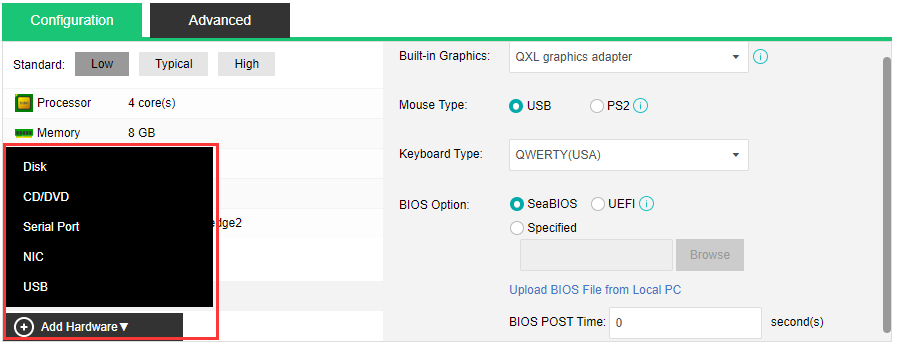
For example, click Add Hardware and select Disk. Then, disk 2 will be added to the configuration (as shown in following figure). You can add that disk by creating a new disk or using an existing disk. To delete a disk, click on X icon. 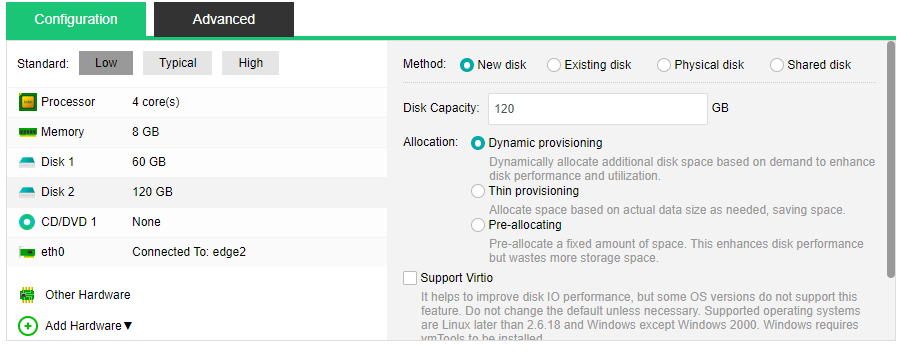
On the Advanced tab, you can configure more, such as Boot Order, Lifecycle, Others and Debugging. 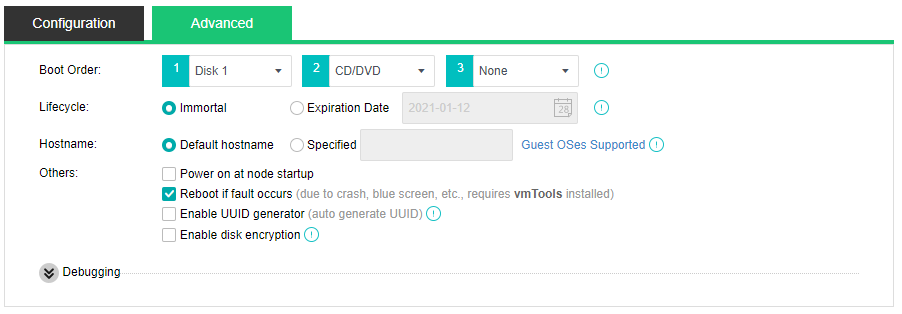
Boot Order: Specifies the boot order for the virtual machine. You can choose an item (disk or CD/DVD) from the pull-down list. 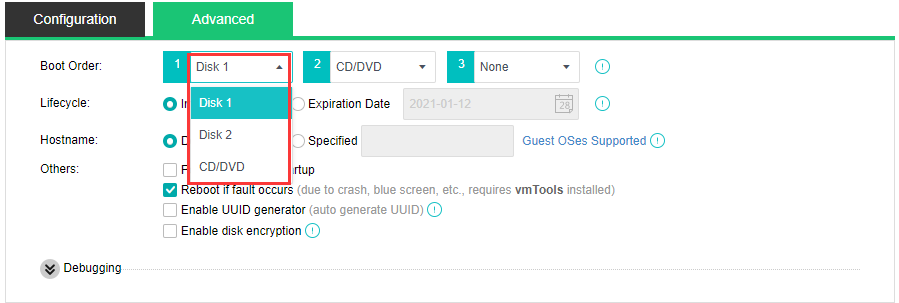
Lifecycle: Specifies virtual machine’s lifecycle. It can be immortal or a specified expiration date. A powered-on virtual machine will occupy CPU and memory resources if it has not been used for a long period of time, while a powered-off virtual machine will occupy disk space if it has not been used for a long period of time. You can specify Expiration Date for Lifecycle so that you may delete the expired virtual machine when the end of its lifecycle is reached. 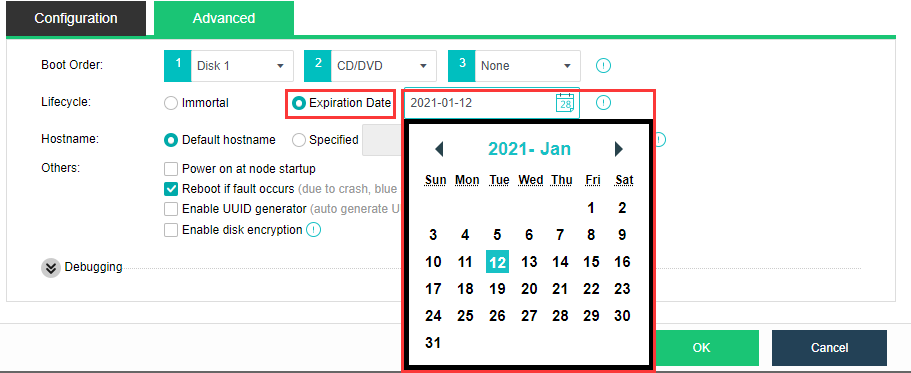
Others includes the following options:
Power on at node startup: Once it is selected, virtual machine will be automatically powered on once the node starts up.
Reboot if fault occurs: Once it is selected, virtual machine will be automatically restarted in case of stuck, blue screen. To make thhis option take effect, vmTools should be installed.
Enable UUID generator: Every time UUID generator is enabled, a new UUID will be generated. Universally Unique Identifier, UUID in short, is an identifier of a virtual machine. Certain software running on the VM need the UUID to work properly. Please do not change this at will, since changes of UUID may cause some functionalities to be invalid. You may choose to re-generate UUID for the new virtual machine while cloning virtual machine or deploying virtual machine from a template.
To show more options, click on Debugging and you will see the following options: 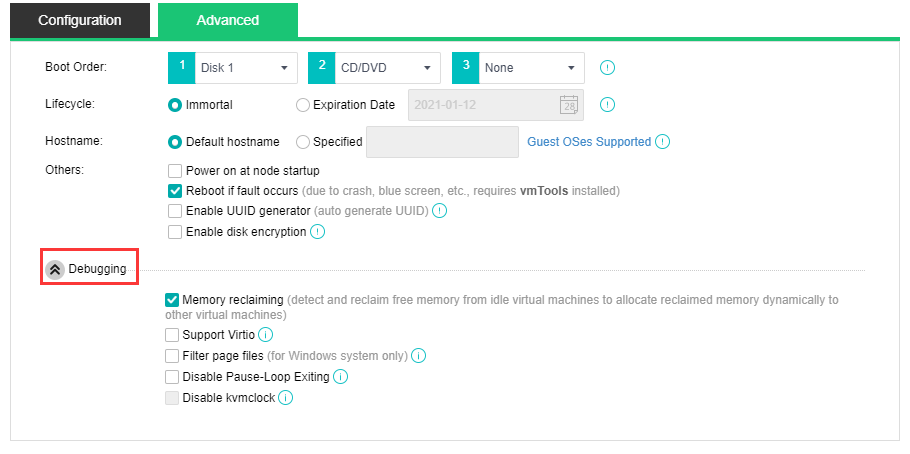
Enable memory reclaiming: Once it is enabled, free memory of idle virtual machines will be detected and reclaimed for other virtual machines.
Support Virtio: Once it is enabled, all disks associated with this virtual machine will support Virtio, to improve IO performance, but some software versions do not support this feature. Please do not change the default setting unless necessary.
Filter page files: Once it is enabled, it helps to save backup storage and time. Page files will not be filtered when a virtual machine is backed up during powered-off status. It takes effect after vmTools are installed. This debugging option is for Windows system only.
Disable Pause-Loop Exiting: Once it is selected, Pause-Loop Exiting will be disabled. Select this option to avoid VM EXIT caused by PAUSE instruction of VM, which improves adaptive spinning performance of multi-core VM (more than 16 cores) to some extend but requires extra costs of physical CPU. The default is disabled and recommended to keep default settings unless required.
Disable kvmclock: Once it is selected, kvmclock will be disabled. On Linux kernel 2.6.32 or earlier version, you may disable kvmclock to improve system stability.

 {{ $t('index.defaultHeader.chromeBrowserTip') }}