{{ secondMenu.name }}


The virtual machine is one of the essential modules of Sangfor SCP to deliver services. Tenants can manage the validity of the virtual machine.
Features:
Guide tenants to create and delete virtual machines.
Precautions:
N/A.
Prerequisite
Steps:
Step 1.In the tenant portal, navigate to Compute > Virtual Machine. Click New to create virtual machine.
Step 2.Select the Resource Pool and Image for the virtual machine.
Step 3.Configure the Number of Virtual Machines, Compute, Storage, Networking, and other parameters according to actual requirements, then click Next. Parameters configuration can refer to chapter 4.1.5.1 Create Virtual Machine.
Step 4.Fill up the Virtual Machine's name, Description, Group, administrator's password, Hostname, and Expiration Date according to actual requirements, then click Next.
Step 5.After confirming the information, click OK to start creating the virtual machine.
Step 6.After creating the virtual machine, you can click the Console to enter the virtual machine, or click More to Shut Down, Suspend, Restart, Power Off, and Bind Key Pair, Snapshots/Backups Management, Clone, Create Image, Export, Delete, and other operations.
Features:
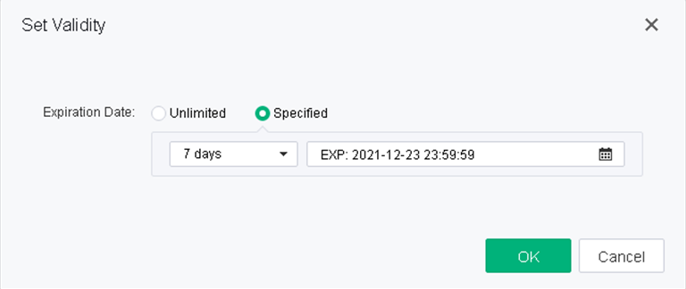
The SCP platform supports setting an expiration date for the virtual machines, and virtual machines that exceed the service validity will generate alert messages.
Precautions:
Prerequisite
N/A.
Steps:
Login to the SCP, navigate to Compute > Virtual Machine, select the particular virtual machine, click More, look for Set Validity, change the Expiration Date from Unlimited to Specified, and set the expiration date of the virtual machine.
Features:
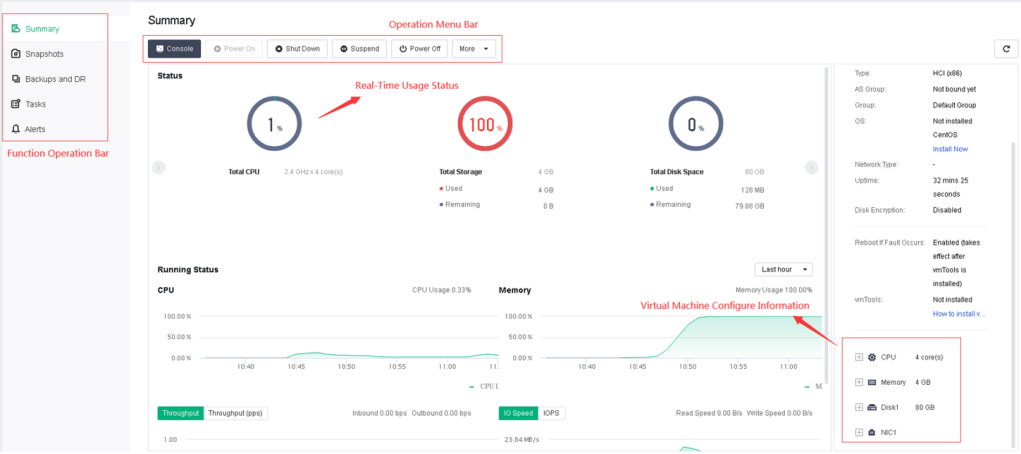
Click the corresponding virtual machine name redirecting to the virtual machine summary interface. This interface provides multiple functions such as reviewing virtual machine information, snapshots, backups, operation audits, Alerts, consoles, etc.
For the virtual machine summary, you can view the Running Status information (CPU, memory, hard disk) and the trend chart of the corresponding virtual machine. You can also perform other operations such as shutdown, restart, snapshot, backup disaster recovery, operation audit, and view alerts log of the virtual machine.
Features:
Instruct tenants to create virtual machine snapshots.
Precautions:
Snapshots are often used in scenarios where original data needs to be protected before virtual machine patches or upgrades, software updates, and other high-risk operations. If data backup is required, it is recommended to use the backup function.
Prerequisite
N/A.
Steps:
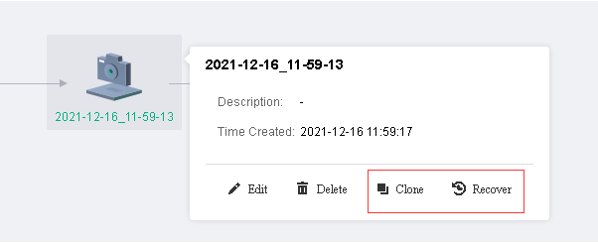
Step 1.In the virtual machine summary, select Snapshots, and click the Take Snapshot button to create a snapshot of the current virtual machine.

Step 2.After creating a snapshot, you can use the snapshot to recover the virtual machine or clone a new virtual machine.
Features:
Tenants can perform backup operations on the virtual machine to protect data.
Precautions:
N/A.
Prerequisite
The tenant has a sufficient backup repository quota.
Steps:
Step 1.
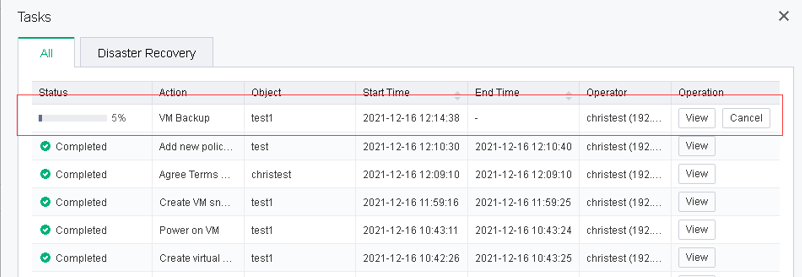
Manual Backup: In the virtual machine summary, select Backups and DR, and click the Backup button to back up the current virtual machine. A tenant can monitor the backup progress in the task list.
Step 2.
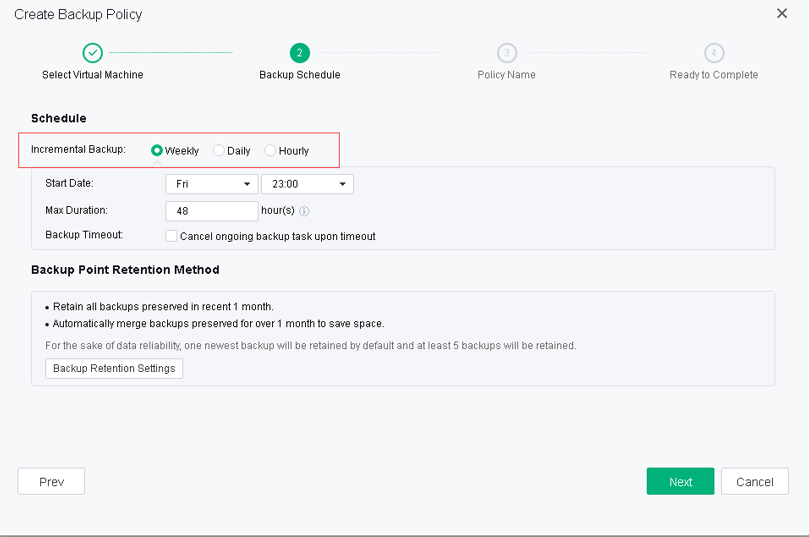
Auto Backup: In the virtual machine summary, select Backup and DR, click the Setting button, add a Scheduled Backup policy, and click Create Backup Policy. You can adjust the backup schedule according to the requirements and follow the steps to associate the virtual machine with policy.
Feature Description:
When files in the virtual machine are deleted or damaged by mistake, the tenants can recover important files of the virtual machine through the backed-up files, and file recovery is supported for Windows and Linux operating systems.
Precautions:
Prerequisite
The virtual machine has backup files that exist already.
Steps:
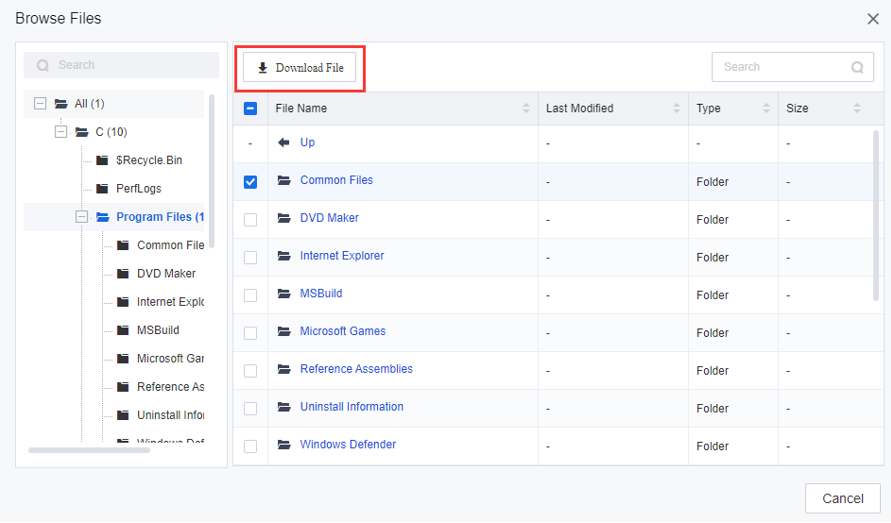
Step 1.Go to the virtual machine summary, select Backup and DR, then click Browse Files.

Step 2.Select the files to be recovered, then click Download File for file recovery.

 {{ $t('index.defaultHeader.chromeBrowserTip') }}