{{ secondMenu.name }}


Function Description:
Sangfor SCP supports SAML 2.0-based SSO (Single Sign-On) federal identity authentication.
• Identity Provider (IdP for short): Provides user authentication to ensure that users are who they claim to be.
• Service Provider (SP for short): An entity that provides formal services to users and usually needs to authenticate the identity of a user.
• Assertions: A collection of user authentication information, including when and how a user is recognized, and can also include some extended information, such as the user's email address and phone number.
• MetaData: SAML metadata is configuration data, which contains information about the parties involved in SAML communication, such as the ID of the other party in the communication, the IP address of the Web Service, the supported binding types, and the passwords used in the communication key, etc.
Precautions:
The federal identity authentication function requires that the Sangfor SCP can connect with enterprise identity providers or third-party service providers. The local data center information needs to be configured before connecting. For detailed configuration, kindly refer to Chapter 4.11.5.5 Data Center Settings.
![]()
The SCP cloud computing platform federal identity authentication is implemented based on the service port. Please ensure that the platform service port configuration is stable. Please update the data center configuration in time if there is any change.
Function Description:
SCP supports service providers configuring the SAML 2.0 protocol, where SCP acts as an identity provider. Once configured, tenants and tenant subaccounts can access third-party services through single sign-on.
Precautions:
Prerequisite
Steps: (We take AWS as the service provider SP as an example)
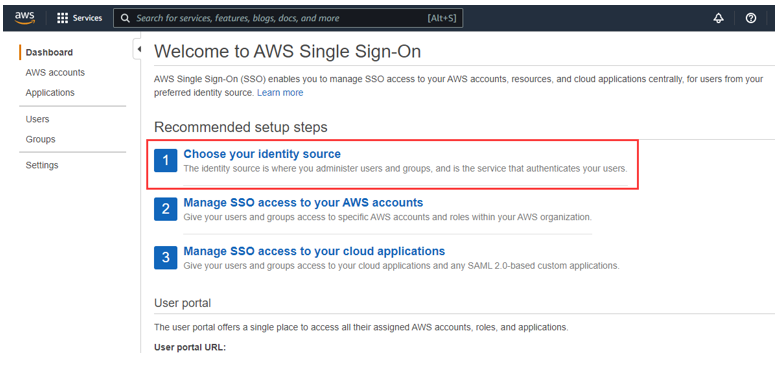
Step 1.Log in to the AWS SSO portal and click Choose your Identity Source.
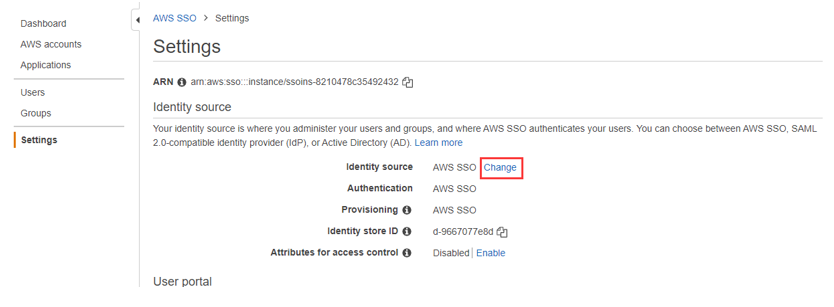
Step 2.Under Settings, click the Change button to change the Identity source.
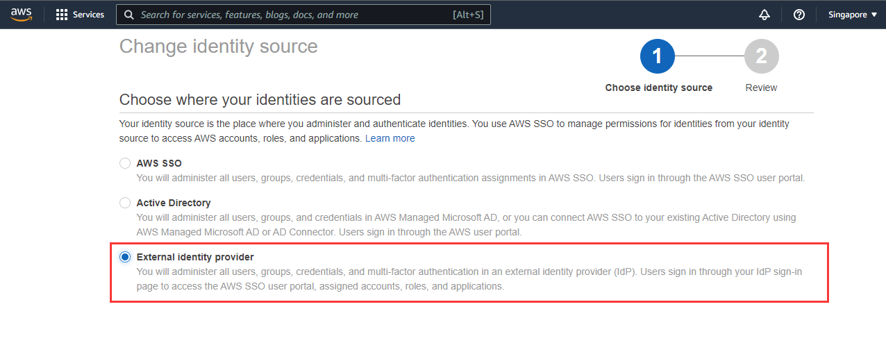
Step 3.Select External Identity provider and click Download metadata file.

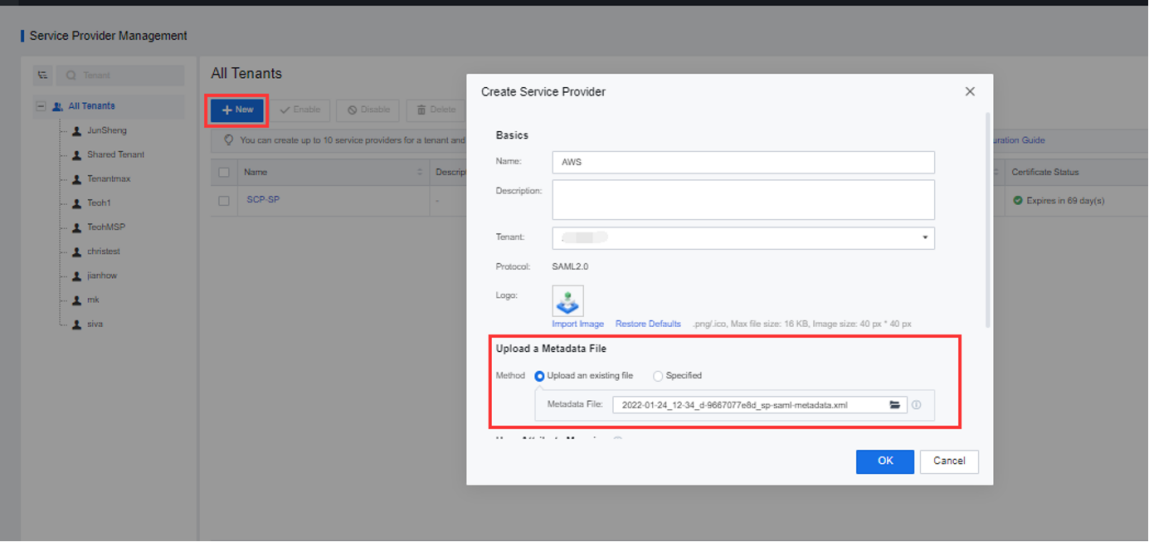
Step 4.The administrator logs in to the SCP, then navigate to the Application Identity Service > Service Provider Management page and create a service provider for AWS Cloud. Click the New button, and on the pop-up page, enter the name and select the tenant to which it belongs.
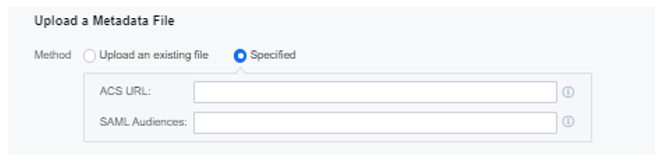
Step 5.Select Upload an existing file in Upload a Metadata File to upload the metadata file obtained from AWS.
![]()
For third-party service providers, select Upload an existing file if a metadata file is provided. Otherwise, you need to select Specified and manually fill in the service provider's SAML Audiences and ACS URL.
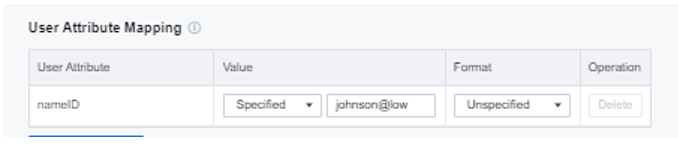
Step 6.Configure the User Attribute Mapping, connect the service provider User Attribute, select Specified for Value, and fill in the User Login Name of AWS.
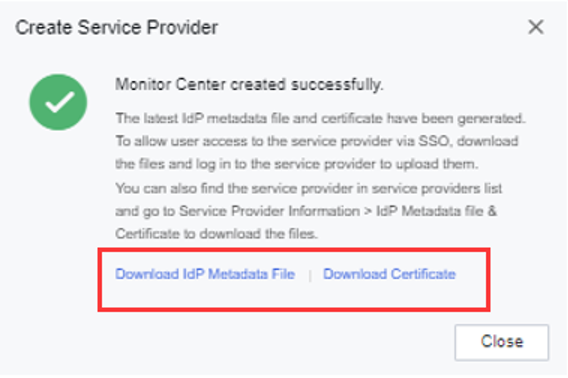
Step 7.Download Metafile from SCP and upload it to AWS.
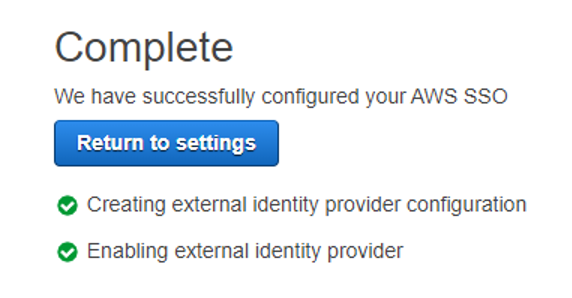
Step 8.Go back to the AWS web console, upload the Idp metadata document, and add SCP as the identity provider.

Step 9.Type ACCEPT to confirm to change identity source.

Step 10.Set up access authorization.
• The SCP administrator logs in to the User and Access Management > User interface to create tenants and tenant users that require single sign-on.
• Create a user group (optional), add multiple tenants or tenant sub-accounts to the user group, and implement batch authorization for users in the user group.
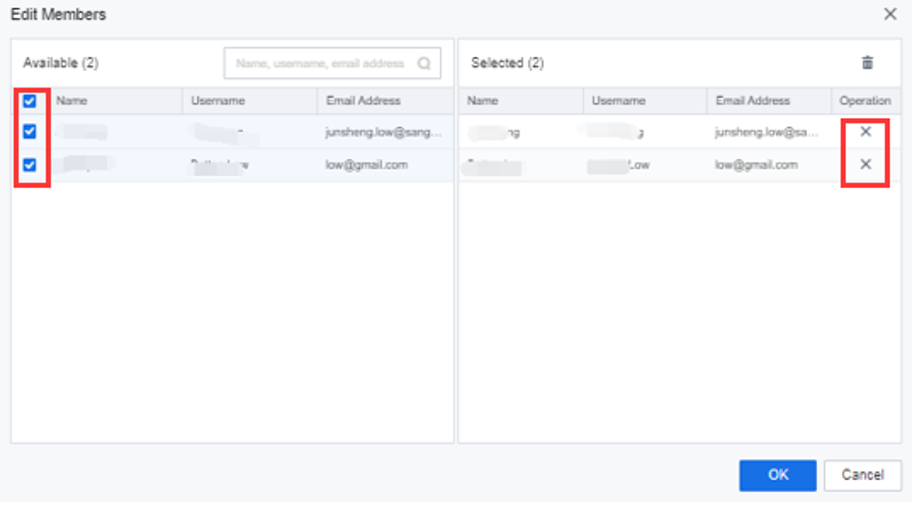
Enter User and Access Management > User Group to create a user group. After completing the creation, click Edit group members to add or delete user group members.
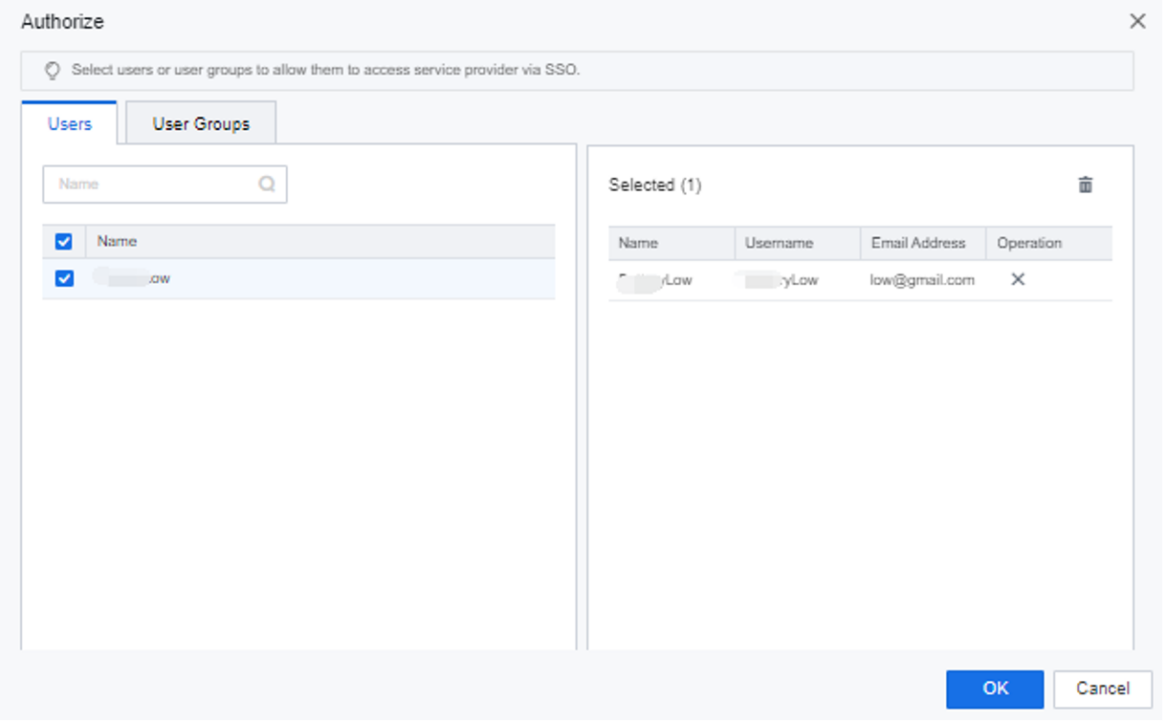
• Enter the Service Provider interface, find the record of AWS, click Authorize, and select the users and user groups to be authorized.

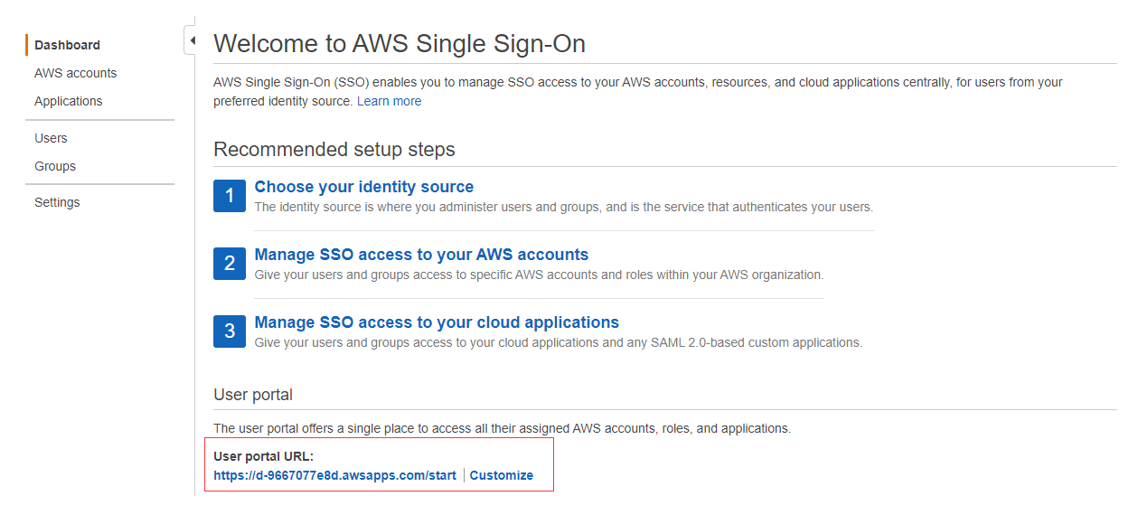
Step 11.After the configuration is complete, on the Dashboard page of the AWS Web Console, obtain the user login address, copy it to the browser, and redirect to the SCP to implement single sign-on.
Function Description:
The SCP platform supports the creation of identity providers of the SAML2 protocol, where SCP acts as a service provider. Due to the nature of the SAML2 protocol, no network connection is required between the SCP and the target identity provider.
![]()
Be sure to confirm the legitimacy of the identity provider. SCP will recognize the legitimacy of the identity provider site user. Illegal identity providers may log in to SCP through illegal accounts, resulting in loss of platform resources! Please carefully check the contents of the identity provider metadata document before proceeding.
Precautions:
Prerequisite
Steps:
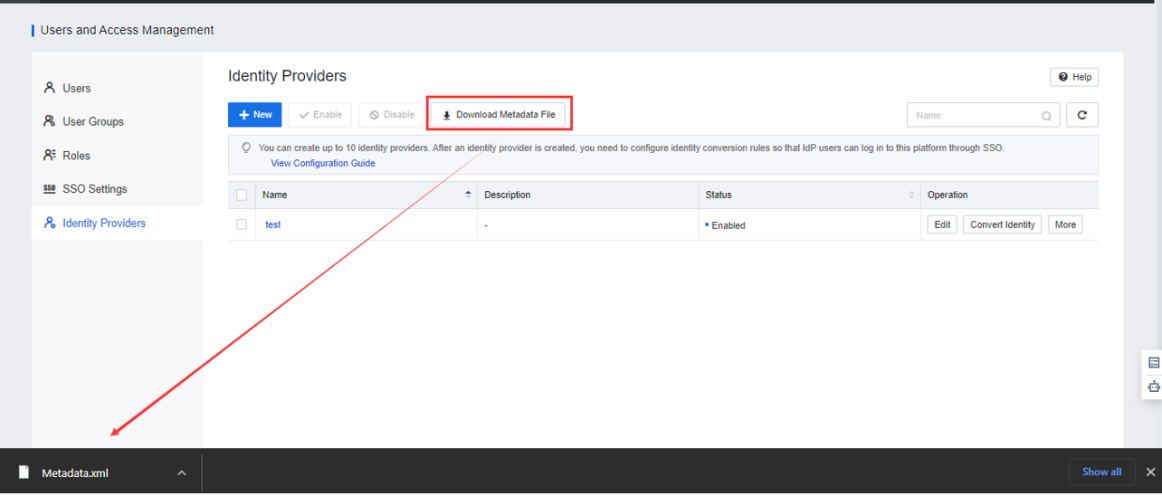
Step 1.The administrator logs in to the SCP platform and selects User and Access Management from the drop-down box in the upper right corner. Select External Identity provider and click Download metadata file.
Step 2.Log in to the target identity provider site, upload the metadata document, and add SCP as its service provider. Once done, get the metadata document provided by the identity provider for the SCP.
Step 3.Go back to the Identity Provider page of SCP, click New, fill in the basic information of the target identity provider, upload the metadata document obtained in the previous step, and click OK.
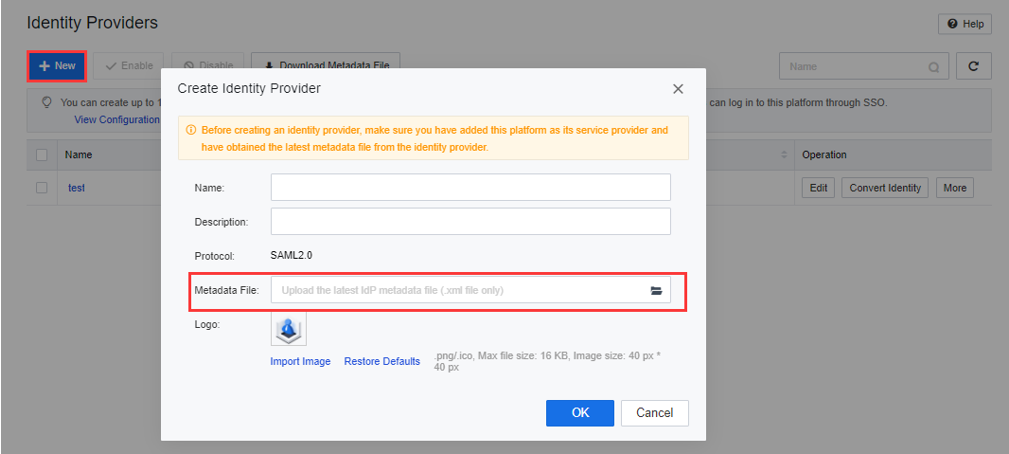
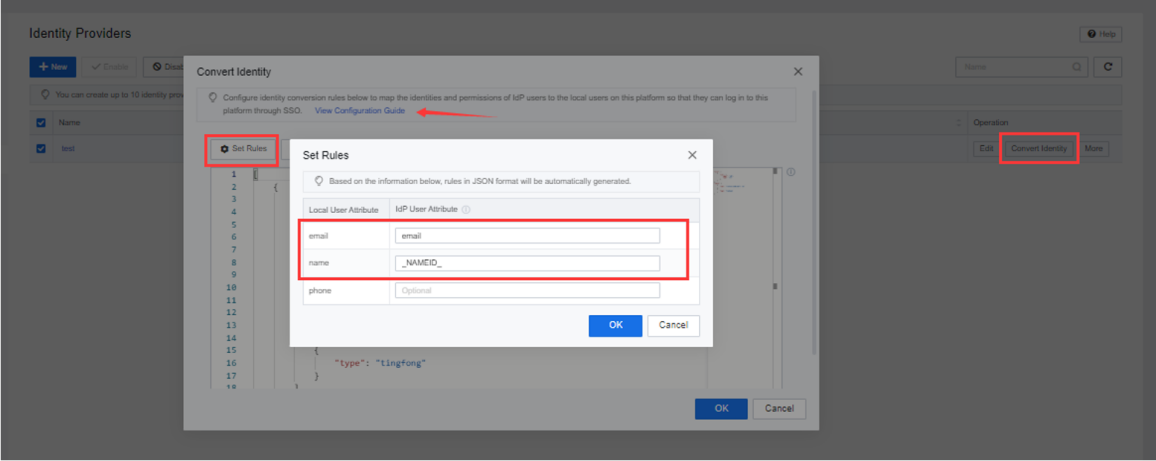
Step 4.Configure the identity conversion policy and fill in the user attributes of the identity provider corresponding to the local user attributes.
![]()
Name is the default attribute value, and the fixed format is __NAMEID__ (two underscores before and after). Otherwise, it will not be recognized. Otherwise, it will not be recognized. For details, see the interface configuration document.
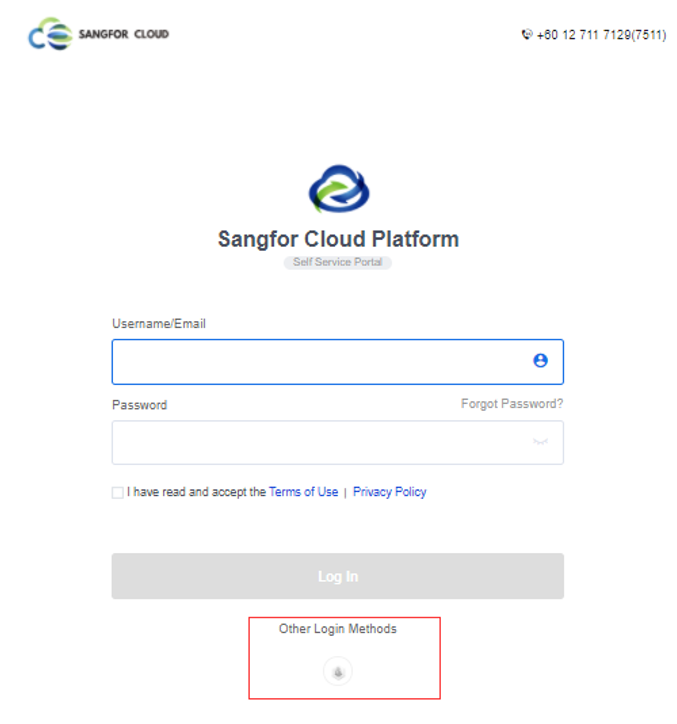
Step 5.After completing the configuration, enter the SCP login interface. You can see Other Login Methods at the bottom. Click it to enter the identity provider page for single sign-on.

 {{ $t('index.defaultHeader.chromeBrowserTip') }}