{{ secondMenu.name }}


• aSecurity displays all HCI VMs and their basic and security information for asset management in an easy and unified manner.
• aSecurity allows you to deliver security scan tasks to specific VMs and provides virus fixing solutions to fix, trust, recover, untrust, or ignore security events.
• aSecurity supports one-click fixing of security events with a full-stack guide covering network isolation and snapshot fallback.
• aSecurity features the ransomware recovery capability based on a full-process guide covering emergency isolation and recovery without expert intervention.
• aSecurity provides cyber attack protection capability and Layer 7 network protection for business systems within the cloud.
Function Description
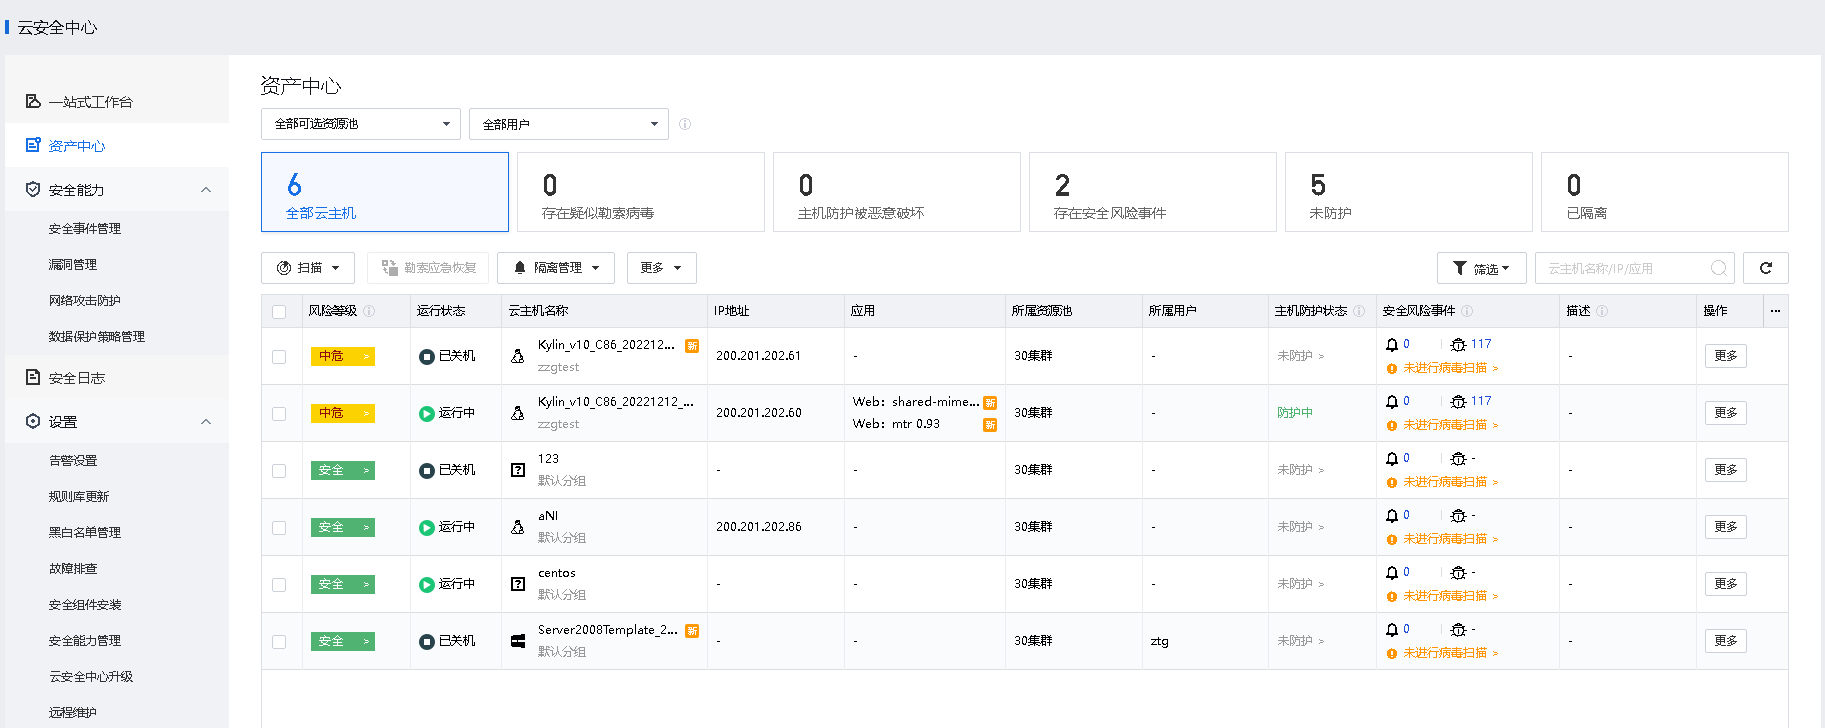
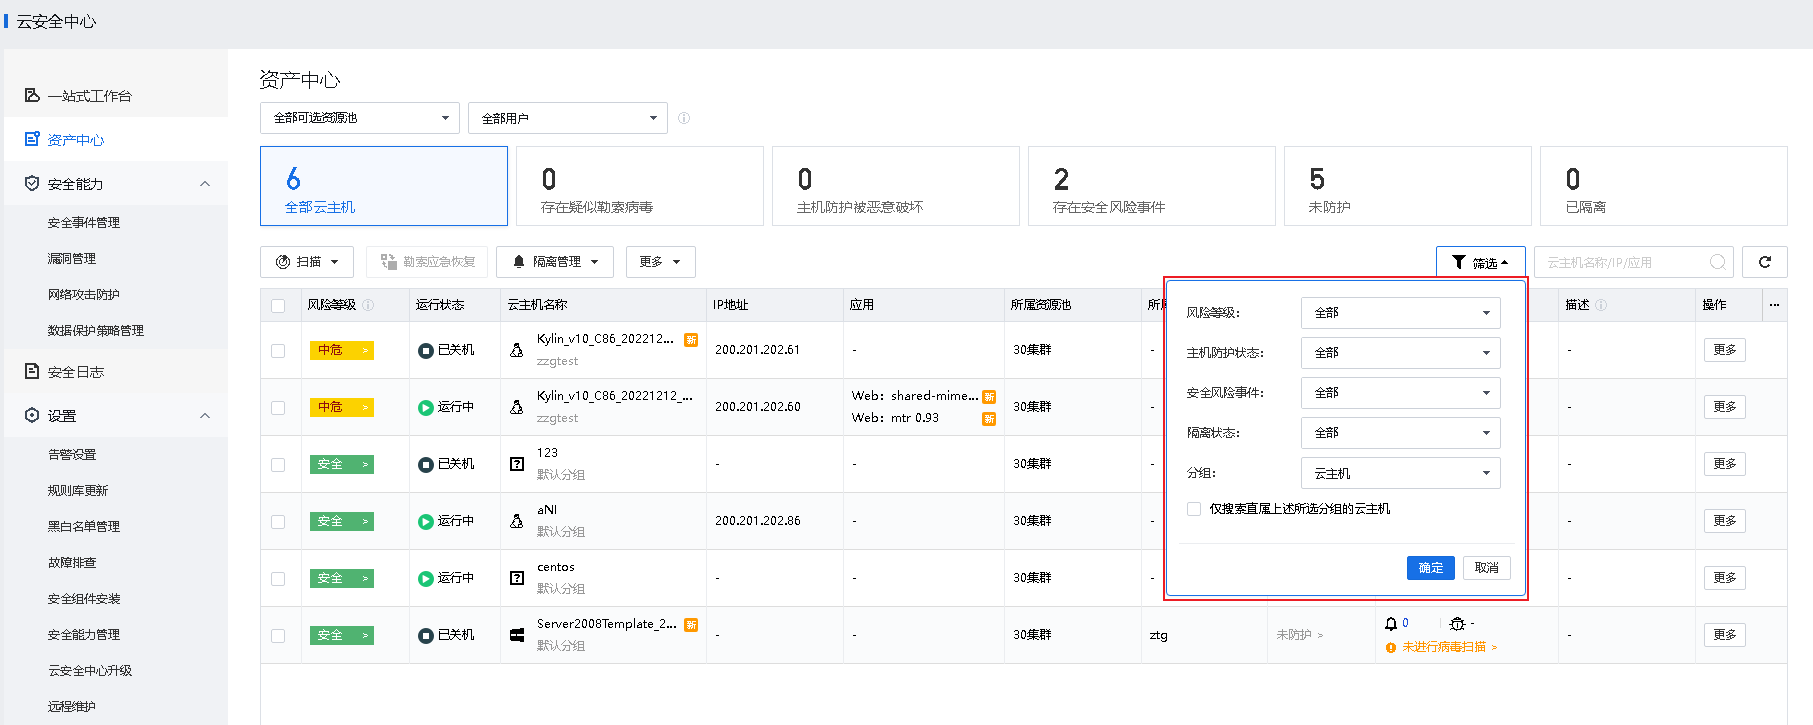
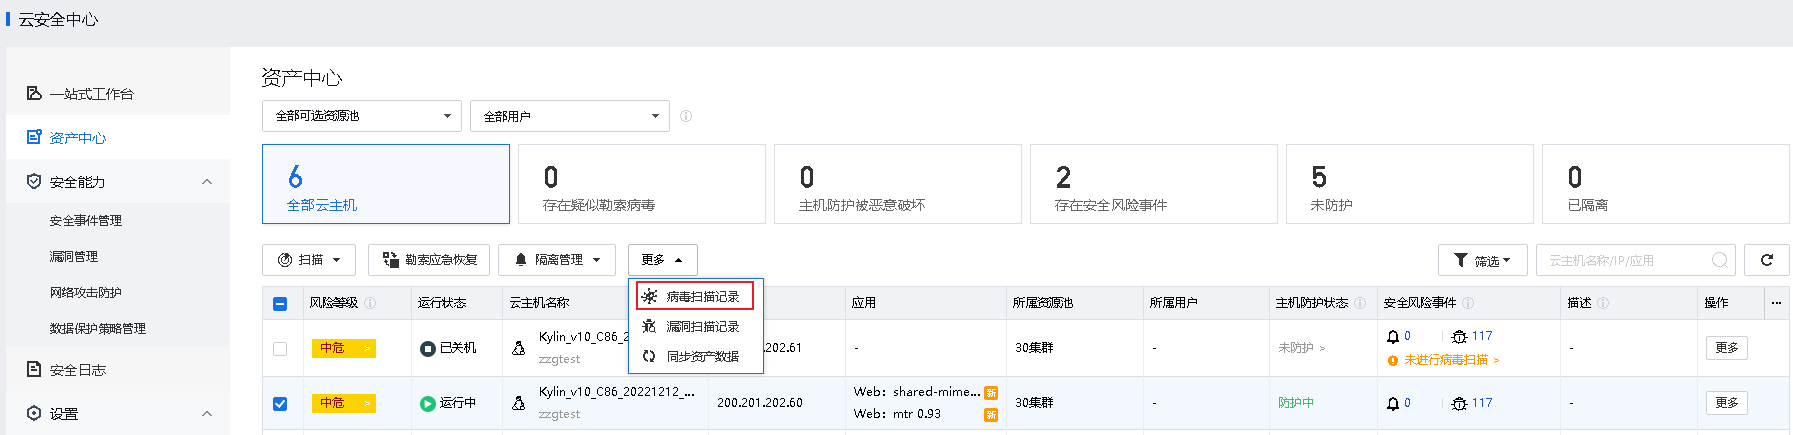
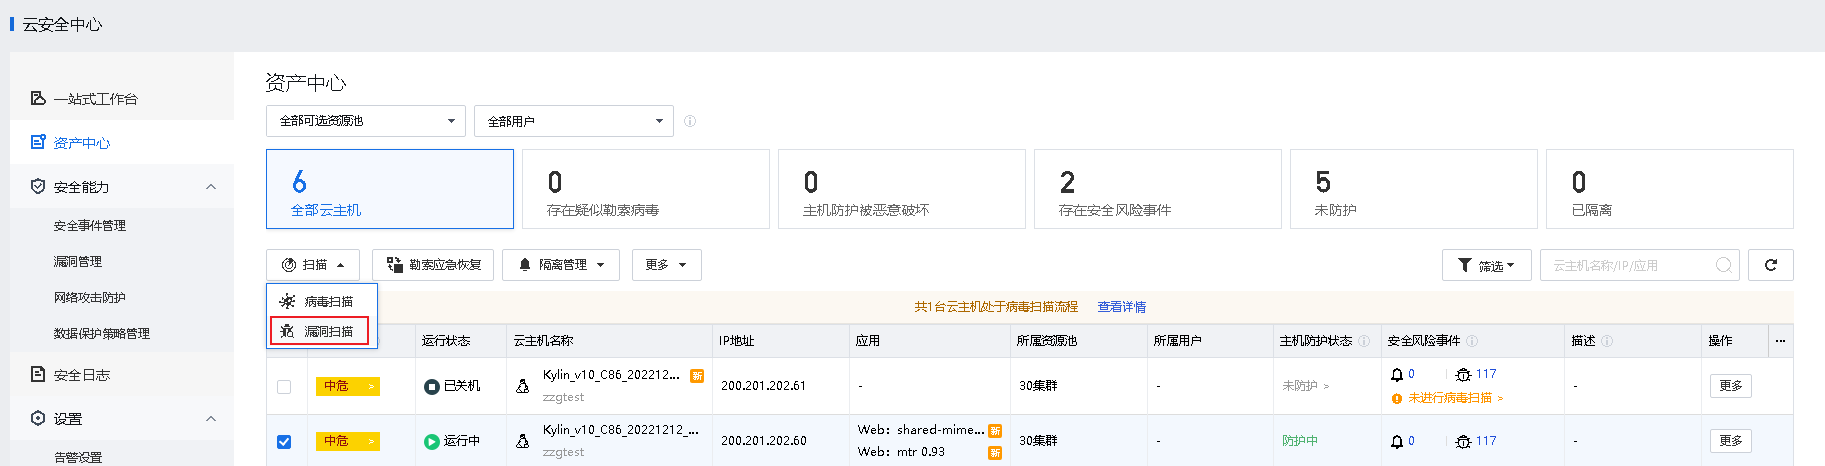
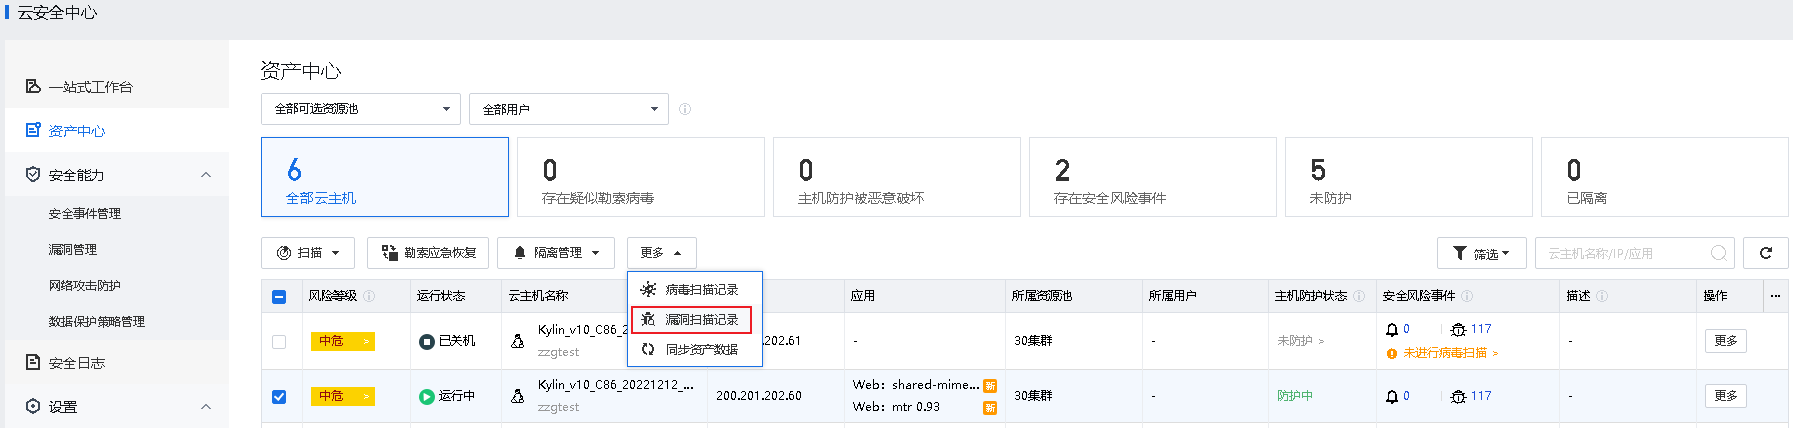
The asset management feature automatically obtains the basic and security information of VMs, including risk level, running status, VM name, IP address, operating system, application, VM protection status, and security events.
Prerequisites
N/A
Precautions
The intervals for reporting basic, security, and application information are 1 minute, 5 minutes, and 4 hours, respectively.
Steps
• Ransomware Detected: Display the list of VMs with pending suspected ransomware events.
• Protection Compromised: Display the list of compromised VMs. When the security component of a VM is compromised, the security status of the VM is displayed as Protection Compromised.
• Security Events Detected: Display the list of VMs with pending security events.
• Unprotected: Display the list of unprotected VMs.
• Quarantined: View the list of quarantined VMs.

• Risk levels include Protection Compromised, High, Medium, Low, and Protected.
Protection Compromised: Indicate that ransomware exists or the VM has been compromised. Immediate fixing is required.
High: Indicate that a high-threat virus or a critical, high-severity attack event exists. Immediate fixing is required.
Medium: Indicate that a medium-threat virus, a low or medium-severity attack event, a brute-force attack, or a high-risk vulnerability exists. Related fixing is recommended.
Low: Indicate that a low-threat virus or a low or medium-severity vulnerability exists. Fixing based on actual situations is recommended.
Protected: Indicate that no security risks exist.
• Running status includes On, Suspended, and Off.
• Security risk events include security events and vulnerabilities.
Function Description
aSecurity leverages Sangfor Engine Zero, Gene Analysis Engine, Behavioral Analysis Engine, and Cloud-Based Engine to issue virus or vulnerability scan tasks to VMs and perform fixing.
Prerequisites
N/A
Precautions
Steps
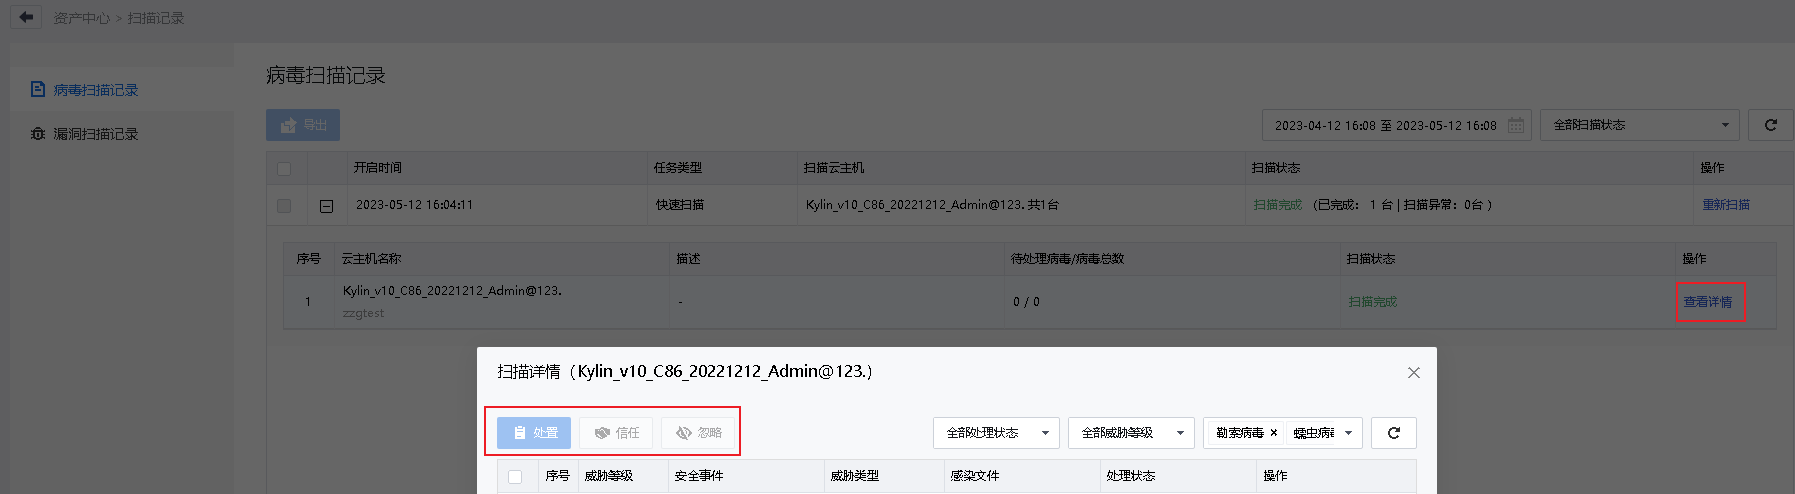
I. Virus Scan
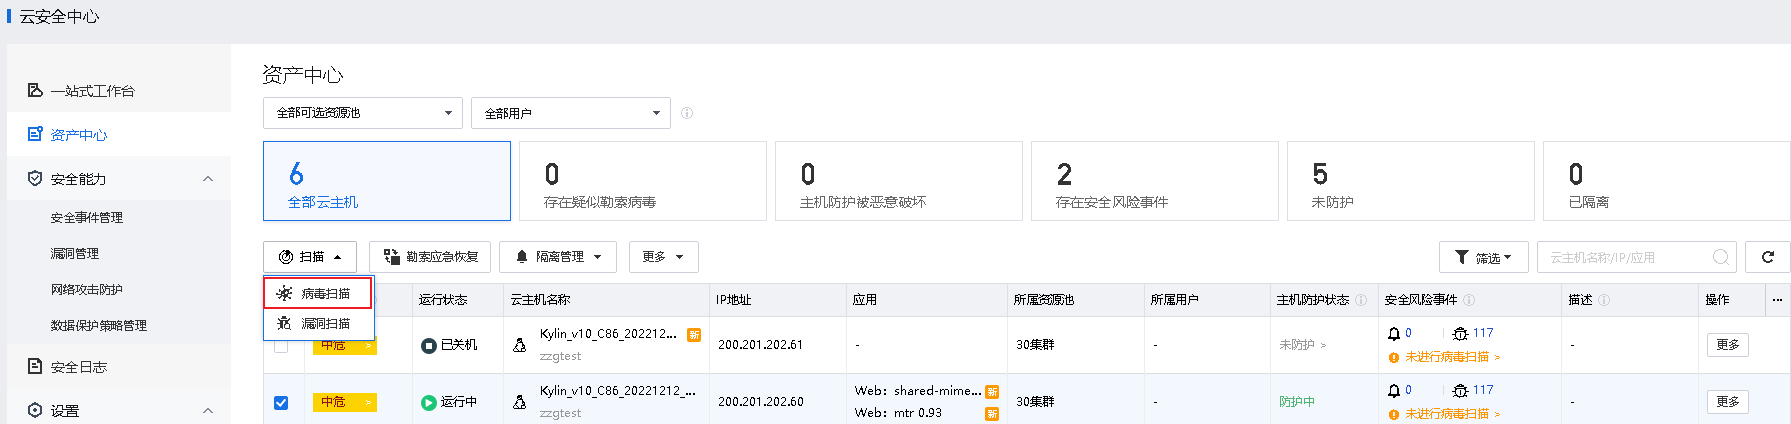
• Quick Scan: Scan critical system directories and registry items, memory, and running system processes, which takes a short period of time.
• Full Scan: Scan system memory, running system processes, critical registry items, and all disk partitions, which take a long period of time.
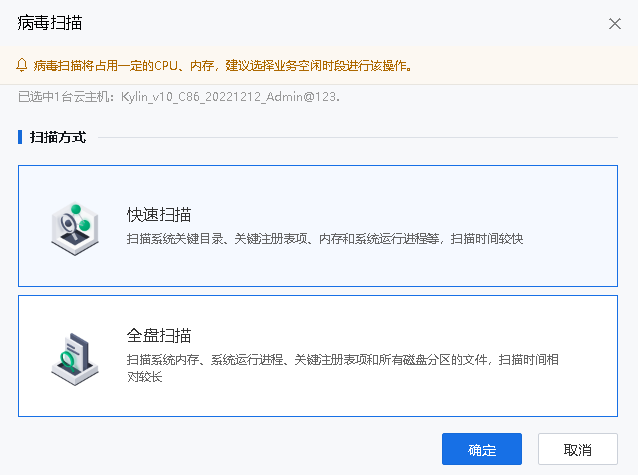
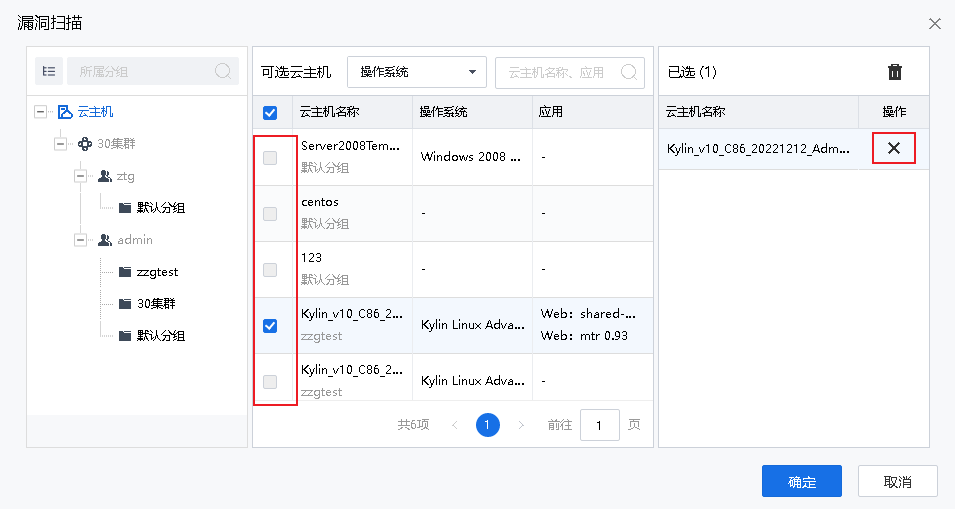
II. Vulnerability Scan

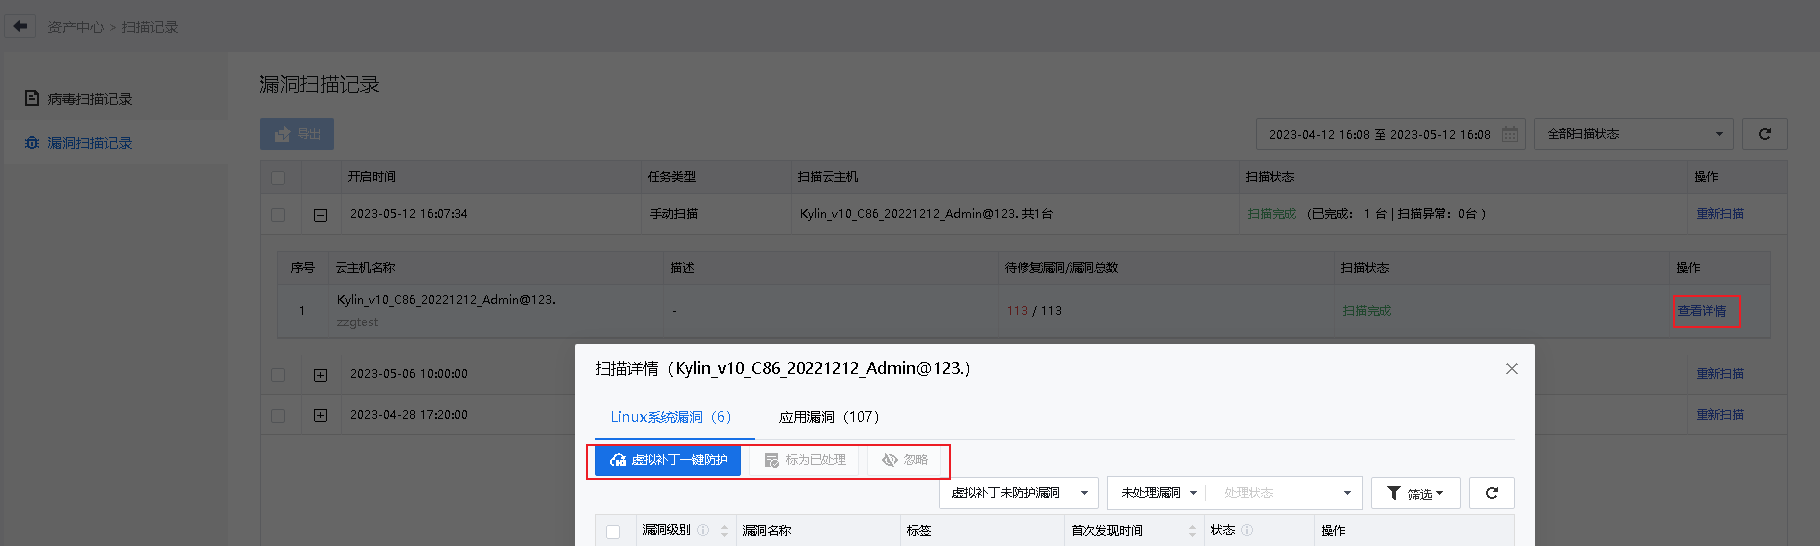
Function Description:
When virus damage occurs, the aSecurity center provides the ability to quarantine to prevent the virus from spreading. For assets that have been encrypted, the quarantine can be completed in seconds to ensure that the virus will not spread again.
Prerequisite
None.
Precautions:
Steps:
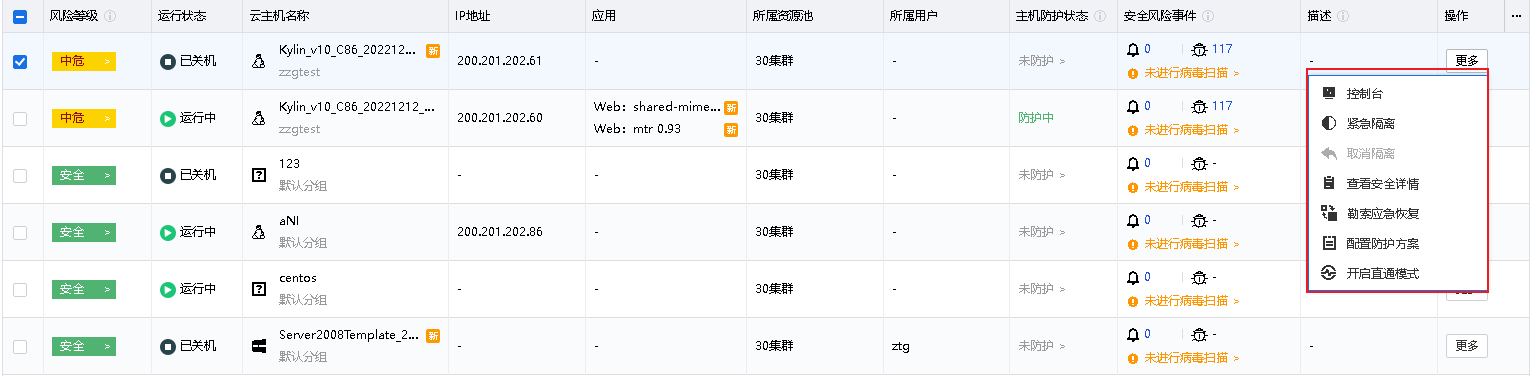
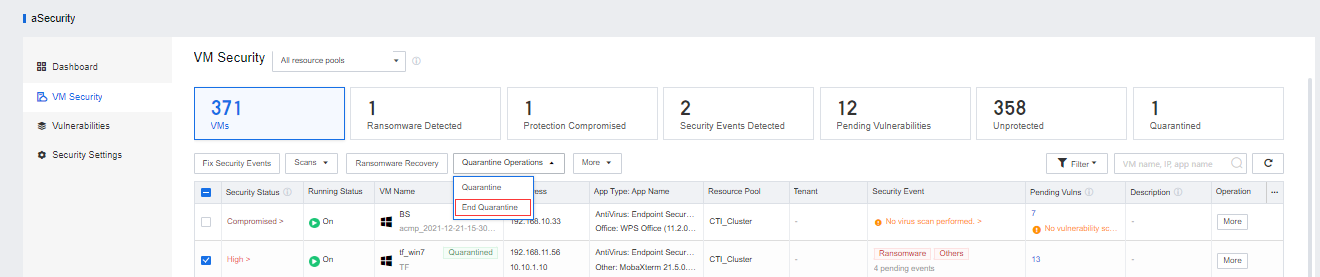
Step 1.In the VM Security list, select the virtual machines at risk of spreading the virus, and click Quarantine Operations > Quarantine. 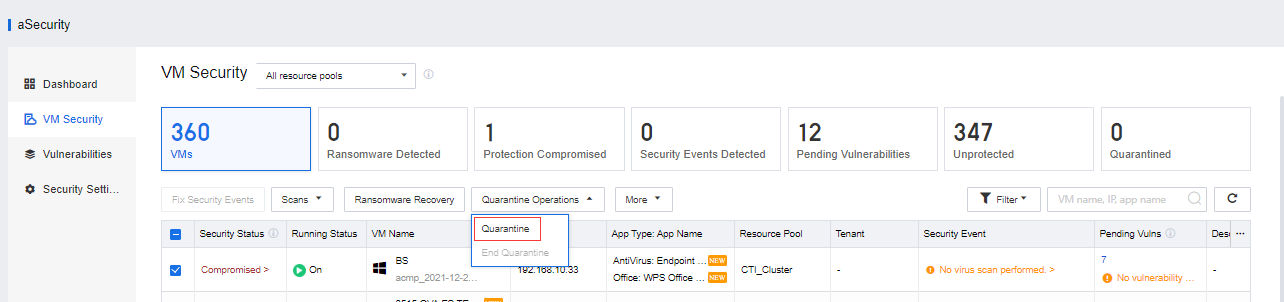
Step 2.After the quarantine is complete, the virtual machine will be in the Quarantined state. ![]()
Step 3.When the isolated virtual machine eliminates the risk and can be released from isolation, click Quarantine Operations > End Quarantine.
Function Description:
Prerequisite
None.
Precautions:
There is a time difference between the snapshot data of the recovery from ransomware and the current data. Rolling back the snapshot will cause data loss. In an actual business scenario, please evaluate the impact of ransomware and decide whether to roll back the snapshot.
Steps:
Step 1.In the VM Security list, select the virtual machine with ransomware virus, and click Ransomware Recovery. 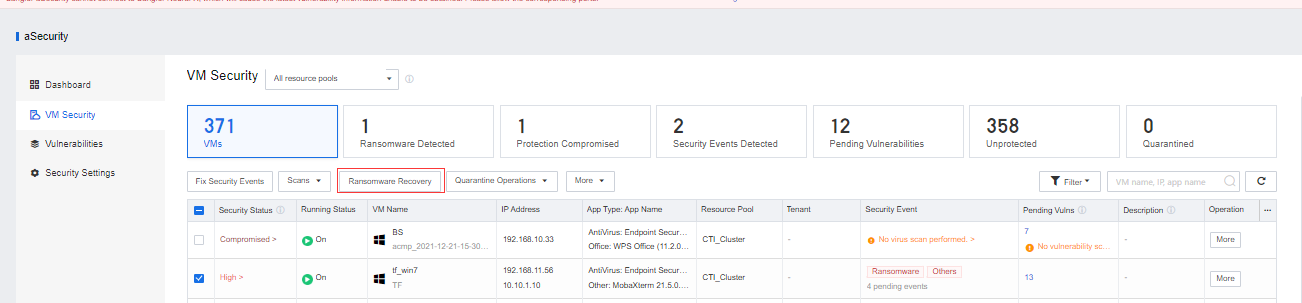
Step 2.First, it is necessary to conduct quarantine operations on the virtual machine to prevent the further spread of ransomware. Click the Quarantine button, and after completing the isolation, click Next. 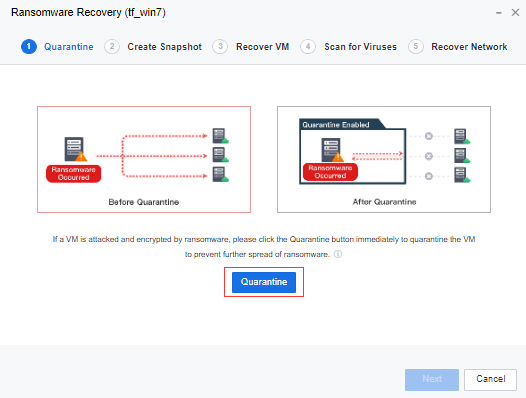
Step 3.Before performing ransomware recovery, click the Create Snapshot button to take a snapshot of the virtual machine. After the recovery is complete, you can try to retrieve the encrypted data through this snapshot. 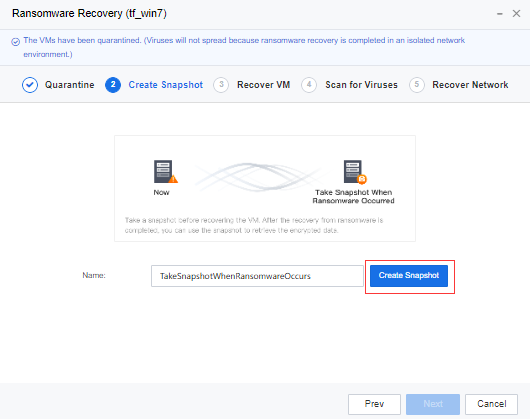
Step 4.After the snapshot is created, click Next to restore the virtual machine. All snapshots of the virtual machine will be shown here. When the platform detects that the asset security protection component is abnormal and is suspected of being ransomware, it will automatically trigger a snapshot, creates a snapshot named TakeSnapshotWhenRansomwareOccurs, click the Preview button, and the platform will create a new linked-clone virtual machine. After cloning is complete, click the Console button to enter the virtual machine, and you can check whether the virtual machine is encrypted. If it is not encrypted, click Start Recovery and enter the admin password to recover.
Step 5.After clicking the OK button, the platform will automatically delete all linked-clone virtual machines created in the previous preview and restore the selected virtual machine snapshot.
Step 6.After restoring the snapshot, click Next to enter the virus scanning page. It is recommended to perform a full scan on the restored virtual machine again. If a security event is found, it can be dealt with immediately.
Step 7.You can click the Fix/Trust/Ignore buttons for the scanned security events to handle the security events. After all security events have been dealt with, click Next to enter network recovery.
Step 8.Before restoring the network, since the current virtual machine data has been restored, it is recommended to check and confirm the security status of other connected virtual machines and then click the Restore Network button to avoid secondary infection. After the network is restored, the virtual machine will exit the isolation mode.

 {{ $t('index.defaultHeader.chromeBrowserTip') }}