{{ secondMenu.name }}


Function Description:
Precautions:
Prerequisite
The platform administrator has successfully created the tenant.
Steps:
VPC subnet
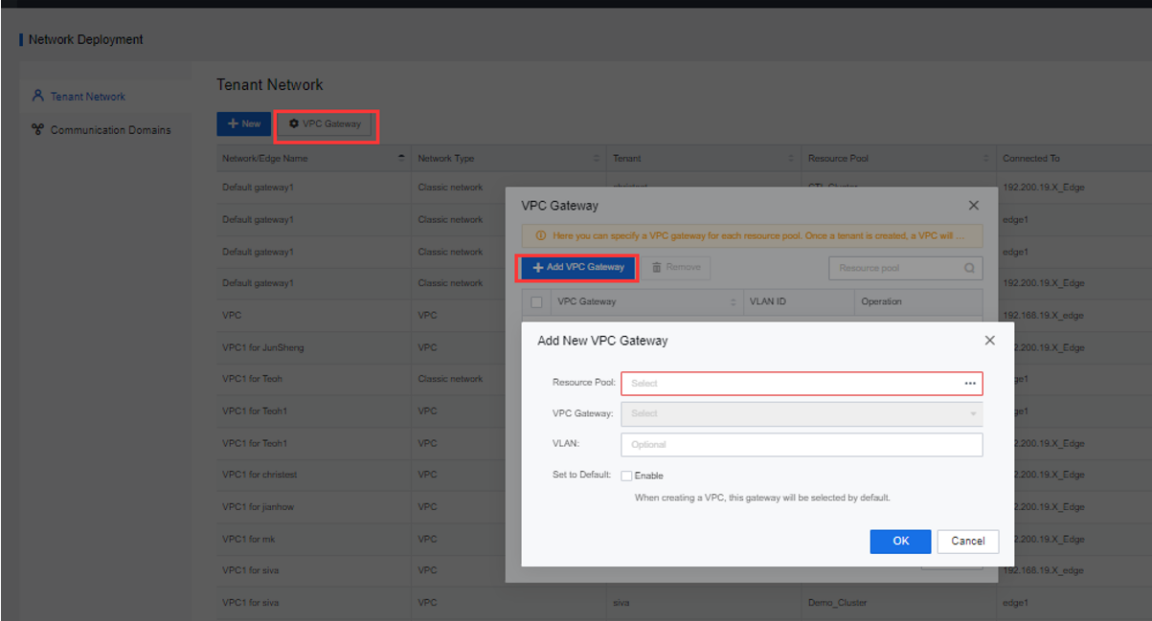
Step 1.Create a VPC gateway by clicking VPC Gateway, click the Add VPC Gateway button on the pop-up page, select a resource pool or VPC gateway, and check the Enable checkbox to set the default VPC gateway.
Step 2.Click New to create a tenant VPC.
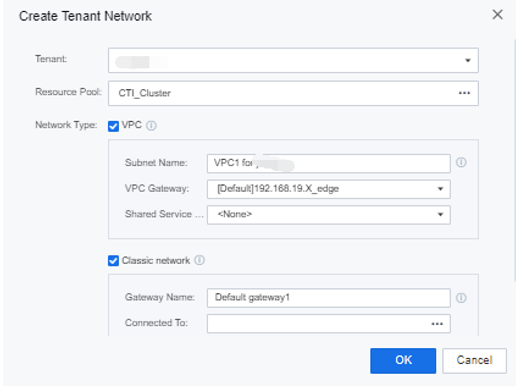
Step 3.Click OK to complete the creation.
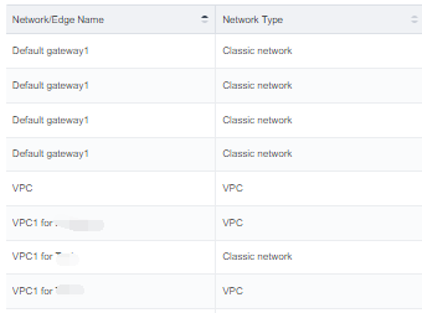
Step 4.Once created, you can view all network types in the list.
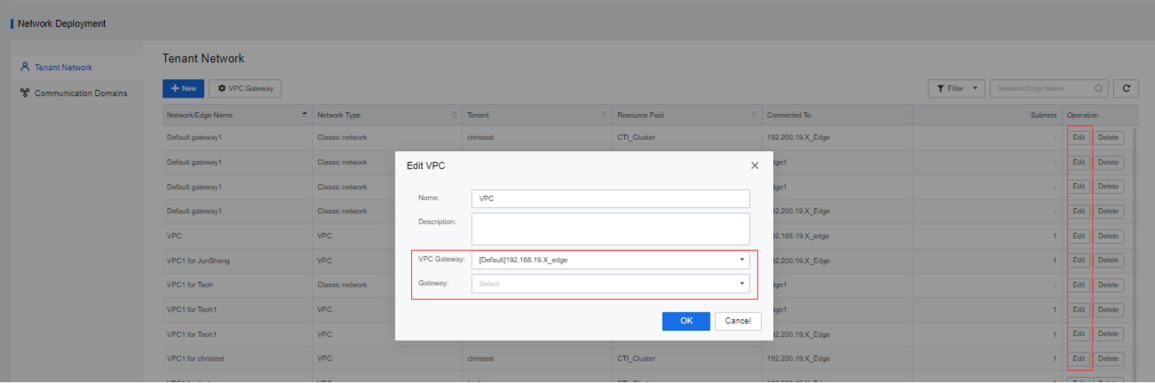
Step 5.Click the Edit button to edit the VPC gateway and public service gateway of the VPC subnet.
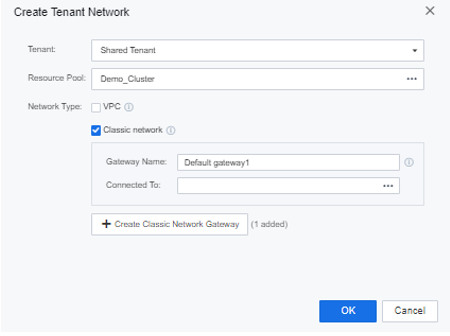
Classic Network
Click New to start creating the tenant classic network. Select the connected device as Physical egress. If the tenant's classic network requires VLAN isolation, you can select different port groups in the physical egress.
Function Description:
By forming a communication domain, the resource pool network within a communication domain can be connected at Layer 2, enabling the cross-cluster deployment of large-scale services and cross-regional multi-cluster management. It supports multi-cluster and multi-data center networks to form a network connectivity domain to achieve unified network orchestration. Ensure that a single cluster's physical network level isolation between clusters and network failures (such as broadcast storms and loops) will not extend to other sites.
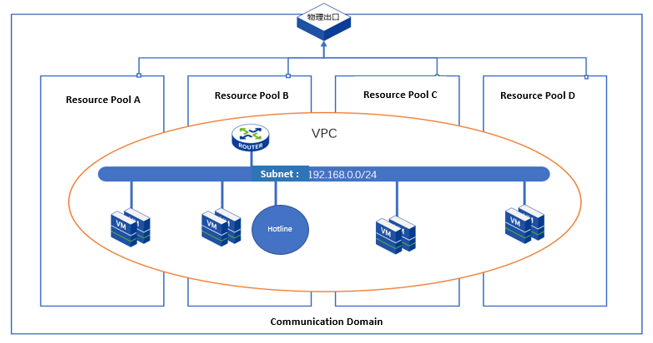
A complete communication domain consists of the primary controller, backup locations, and several common resource pools:
• Main controller: The main controller manages network resources in the connected domain.
• Backup location: The backup location backs up the network resource configuration information on the main controller to realize the disaster recovery function for the main controller.
Precautions:
Prerequisite
The cluster to be added to the communication domain has been added as a resource pool.
Steps:
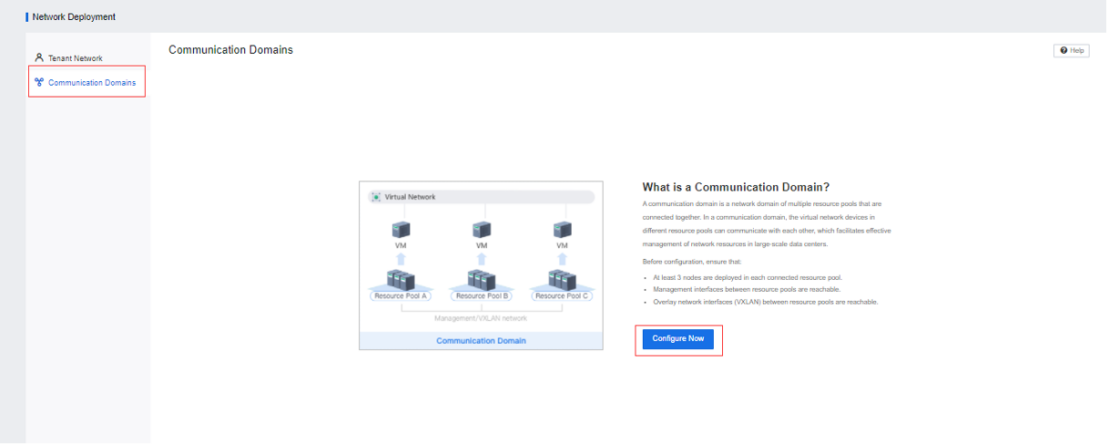
Step 1.Log in to the SCP platform, select Networking > Network Deployment > Communication Domains, and click Configure Now.
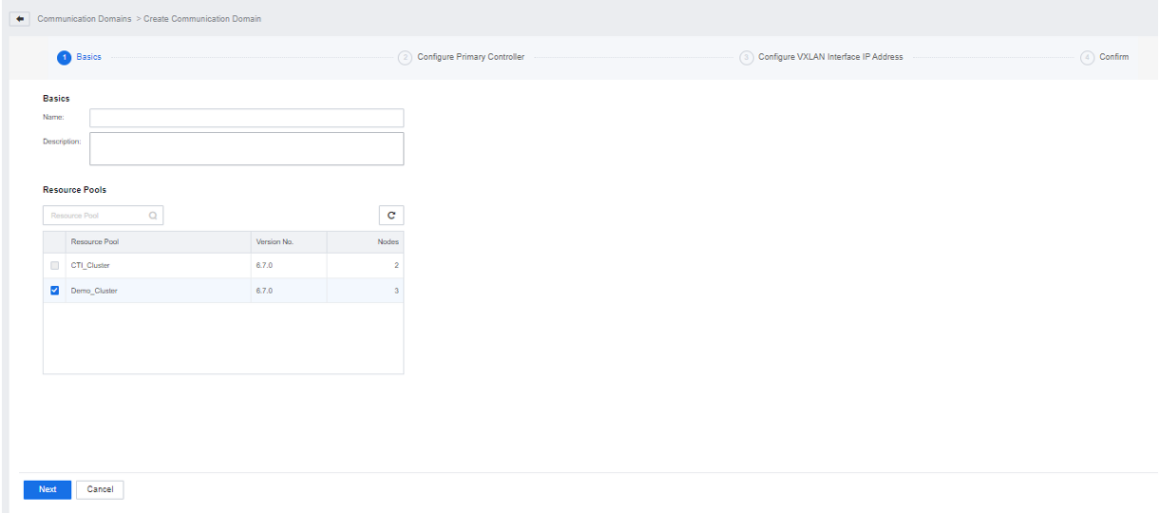
Step 2.Fill in the basic information of the communication domain, select the resource pool to be added to the connected domain, and click Next.
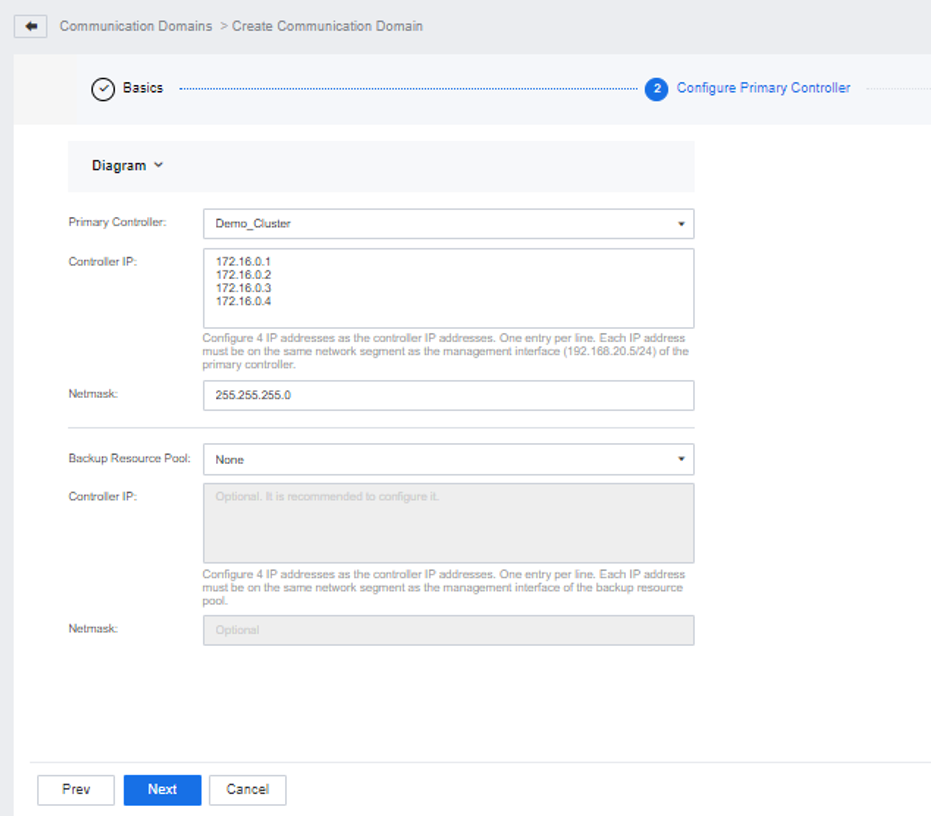
Step 3.For the resource pool to be added to the Communication Domain, you need to designate one as the primary controller and the other as the backup repository and set the controller IP. Here, 4 IPs need to be configured as controller IPs, the first 3 are the IPs of the 3 network control nodes of the controller, and the last one is a virtual IP. It is necessary to ensure that the controller IP and the management interface of the main controller/backup repository are in the same network segment.
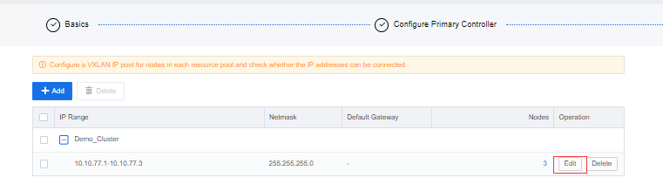
Step 4.Click Next to see the current resource pool's existing data communication IP pools. Currently, it is not supported to form a communication domain by combining two data communication IP pools as resource pools on the same network segment:
• If the data communication IP pools of the two resource pools are in different network segments, click Next directly.
• If the data communication IP pools of the two resource pools are the same network segment, click the Edit button, and after modifying one of the resource pools to be a different network segment, click Next.
![]()
Modifying the data communication IP here will affect the east-west traffic of the platform virtual machine.
Step 5.Click OK after the connected domain configuration is completed, enter the communication domain list, and click Edit to configure the data communication IP pool of the communication domain. The following two methods are available:
• If the data communication IP pool is the same network segment: Click the Delete button. After deleting all the original configurations, click Add IP Pool to reconfigure the IP pool for the connected domain.
• If the data communication IP pools are in different network segments: delete one of the IP pools, select another IP pool, and click the Edit button to expand the IP pool to ensure that all physical nodes in the connected domain can communicate.

Step 6.After completing the communication domain configuration, go back to the communication domain list and click More to perform operations such as New Resource Pool, Advanced, and Delete.
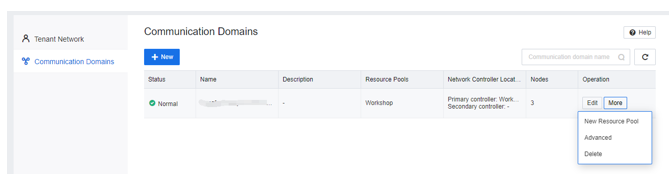
• New Resource Pool: You can add an independent resource pool to the communication domain.
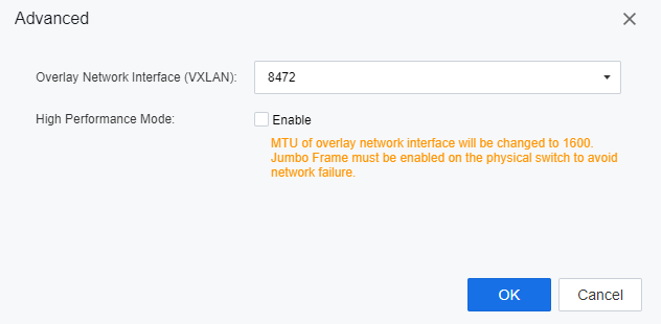
• Advanced: support to modify the data communication port of the communication domain and support to enable the high-performance mode of the network port.
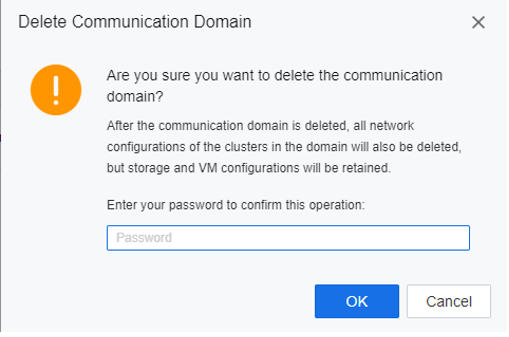
• Delete: When only the main controller is left in the communication domain, the user can delete the communication domain. After the communication domain is deleted, the main controller will continue to be used as an independent resource pool.
Step 7.When an exception occurs in the resource pool in the communication domain, place the mouse on the exception symbol to see the exception prompt, click Repair Now, and the system will retry and continue execution from the point of the last failure. The repaired scenarios include failure to switch between active and standby, failure to modify controller IP, and failure to add resource pool.

 {{ $t('index.defaultHeader.chromeBrowserTip') }}