


{{ secondMenu.name }}






To manage login usernames and admin roles in the web console. By default, the account and password of the admin account are admin and admin. On the Navigation Menu page, choose System > System Configuration > Admin Account to go to the Administrator page. Then, you can add, edit, delete, enable, and disable the admin account.
On the Administrator page, you can specify the logged-in users who can manage the device through the console.
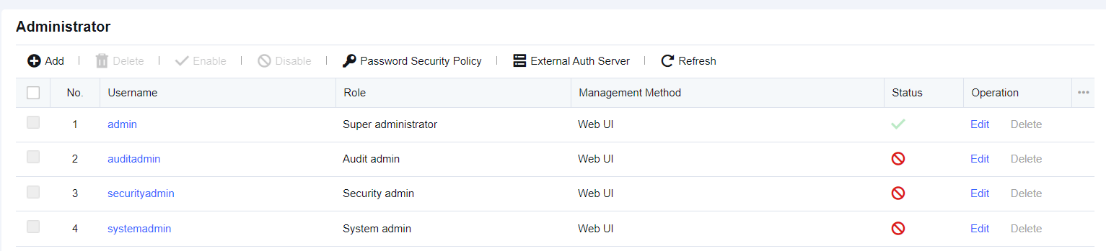
By default, four admin roles are available, including Super administrator, Security admin, Audit admin, and System admin.
Click Add. Then, the Add Administrator dialog box appears. See the figure below.
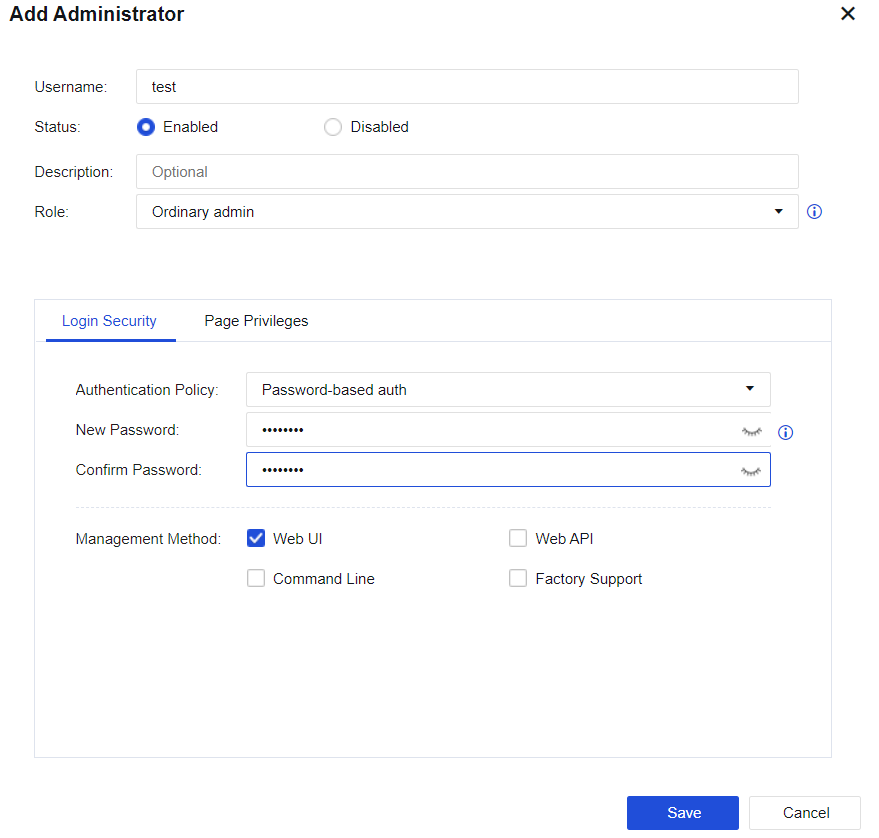
Username: Specify the name of the admin account.
Status: Specify whether the admin account is enabled or disabled.
Description: Specify the description of the account.
Role: Specify the role of the admin account. You can select one of the five roles from the drop-down list, in which the system administrator, audit administrator, and security administrator are three separate accounts.
• Ordinary admin: Indicates an ordinary admin account that is granted permissions to manage all modules.
• System admin: Responsible for the management and maintenance of daily running environments of software. This account is granted permission to configure basic network environments and other management permissions irrelevant to security policies.
• Security admin: Has the permissions to view and modify modules related to security policies.
• Audit admin: Only has the permission to view the built-in data center.
• Remote authentication user: You can select a user account on the external server as an admin account.
Login Security: Specify the authentication policy and management method of the admin account.
Authentication Policy: Specify the authentication policy of the admin account. You can select Password-based auth and Password- and USB-KEY-based auth from the drop-down list.
Management Method: Specify the method for managing the device by the admin account. You can select one of the following four management methods:
Web UI: This allows you to log in to the management device using the admin account via web UI or webpage.
Web API: Allows the third-party platform to log in to the management device by performing web API operations.
Command-Line: This allows you to log in to the CLI using the SSH protocol.
Factory Support: This allows the original manufacturer's technical personnel to log in to the device’s backend using the SSH protocol.

1. You can select only one of Command-Line and Factory Support for the Management Method parameter.
2. If you select Factory Support, the management method you specify will automatically become invalid one day after you select this option.
3. If you select only Factory Support, the admin account will be automatically deleted one day after you select this option.
Page Privileges: Specify whether the account has permission to view or edit modules in the console or data center.
Click Password Security Policy to set the security policy by which the console manages the admin password. You can set whether the password must be changed for the next-time login and the maximum number of days during which the password is available. Note: Only the admin account is granted this permission.
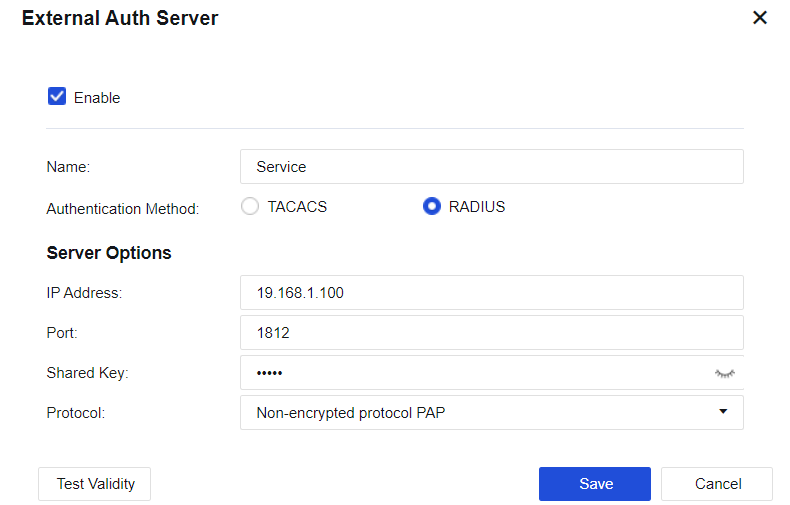
Click External Auth Server to authenticate the admin account of the external server. You can select TACACS or RADIUS for the Authentication Method parameter. See the figure below.


 {{ $t('index.defaultHeader.chromeBrowserTip') }}