


{{ secondMenu.name }}






Click Sangfor VPN and select a device deployment scenario. The options are Headquarters or Branch. For example, if you select Headquarters, the system automatically proceeds to the next step.
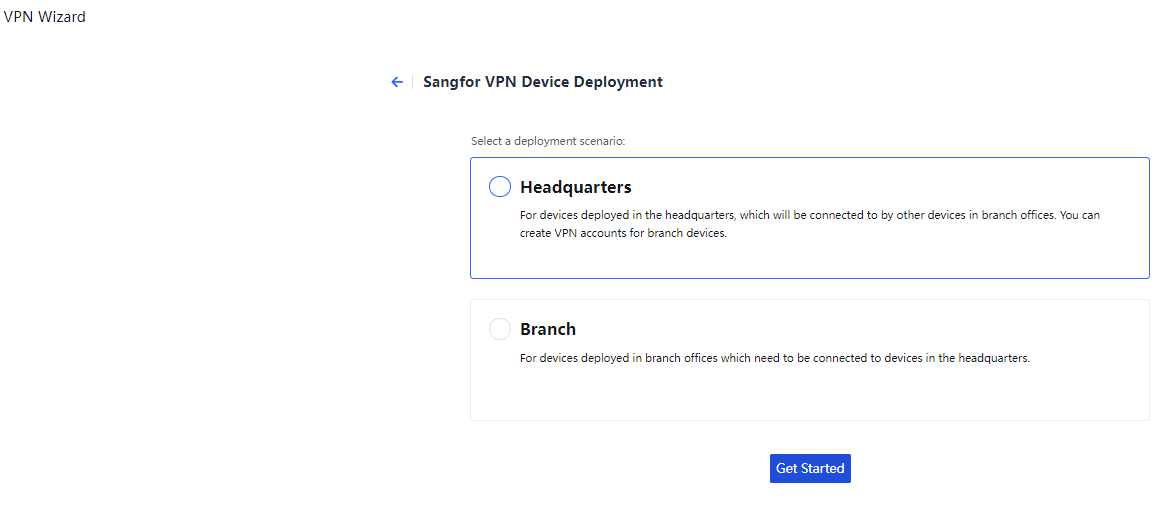
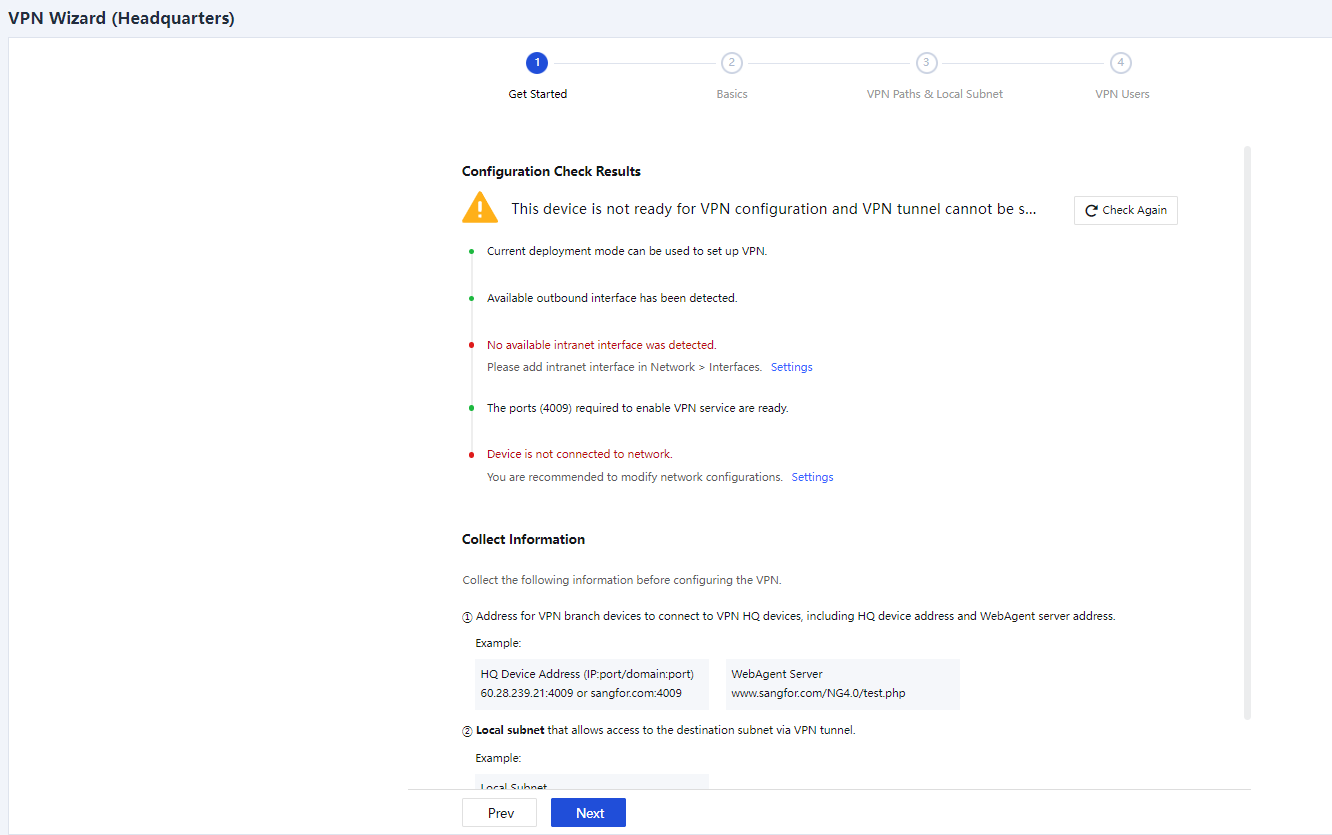
Configuration Check Results: Show the check results for the current deployment mode, available outbound interfaces, available intranet interfaces, VPN service port, and network connection status. If the status changes, you can click Check Again on the right to refresh the check results.
Collect Information: Show the information required for configuring the VPN for the device. For example, the HQ access address, local subnet, and certificate used for authentication.
Confirm the information and click Next.
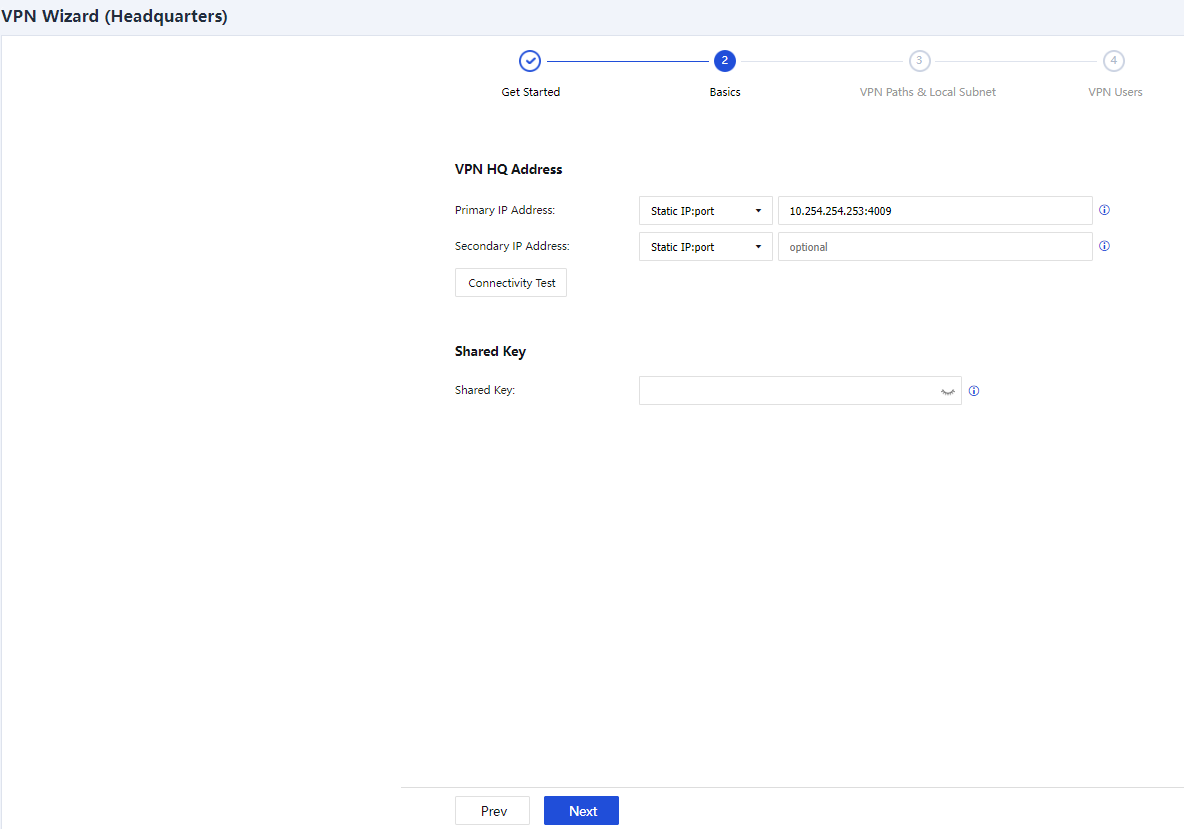
VPN HQ Address: Enter the VPN access address provided by the current device as the VPN HQ device, in the format of IP address:Port number. Separate multiple IP addresses with the pound sign (#), for example, 202.102.2.35#60.25.5.36:4009.
Shared Key (Optional): The authentication password for a branch device to access the VPN HQ device. If this field is specified, you must enter the same password on the branch device to establish a VPN connection.
Confirm the information and click Next.
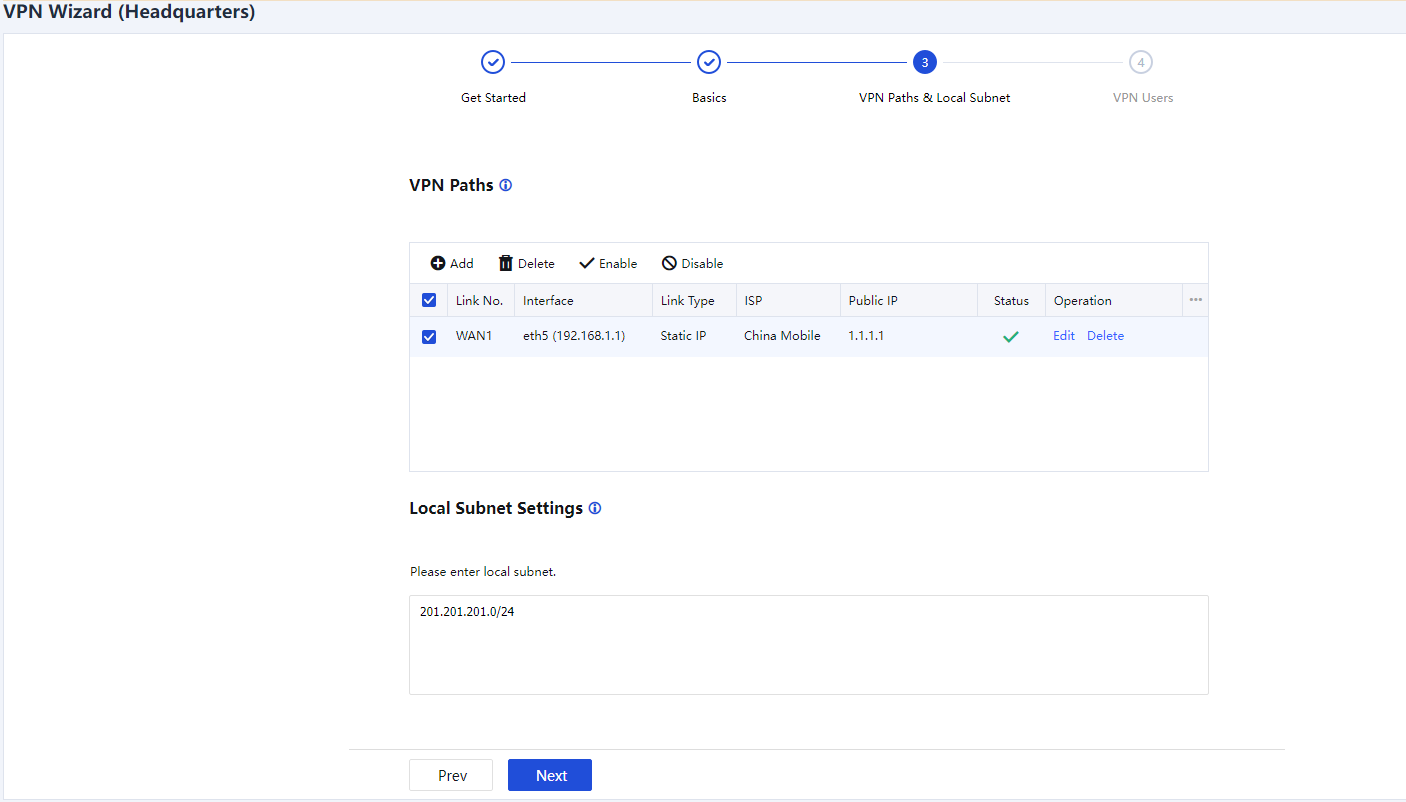
VPN Paths: Add a WAN link for establishing the Sangfor VPN. You can also delete, enable, or disable a link by clicking Delete, Enable, or Disable.
Local Subnet Settings: Enter a local subnet to access the LAN of the peer device through the Sangfor VPN.
Confirm the information and click Next.
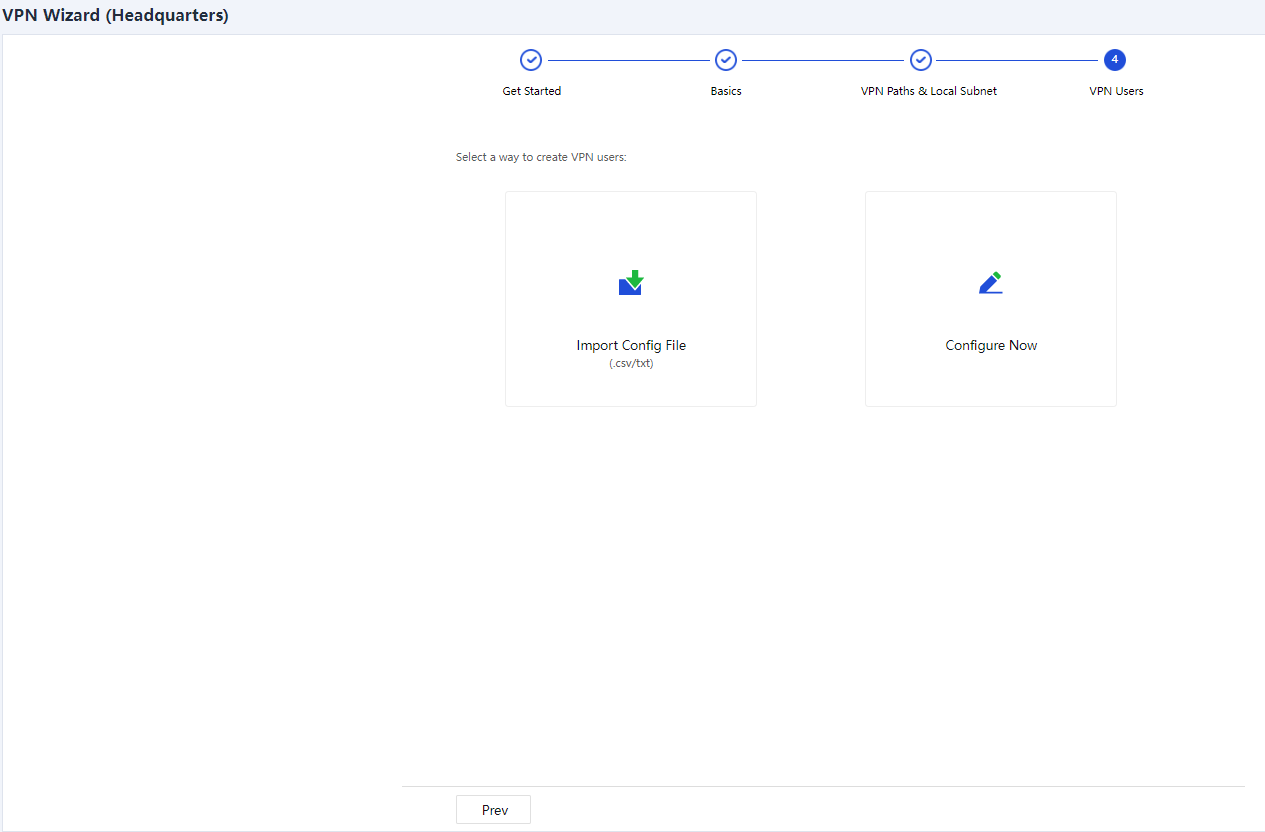
You can create VPN users in either of the following ways:
Import Config File: Import the VPN usernames and passwords for branch devices from a CSV or TXT file.
Configure Now: Enter the VPN usernames and passwords for branch devices. For example, if you click Configure Now, the system automatically proceeds to the next step.
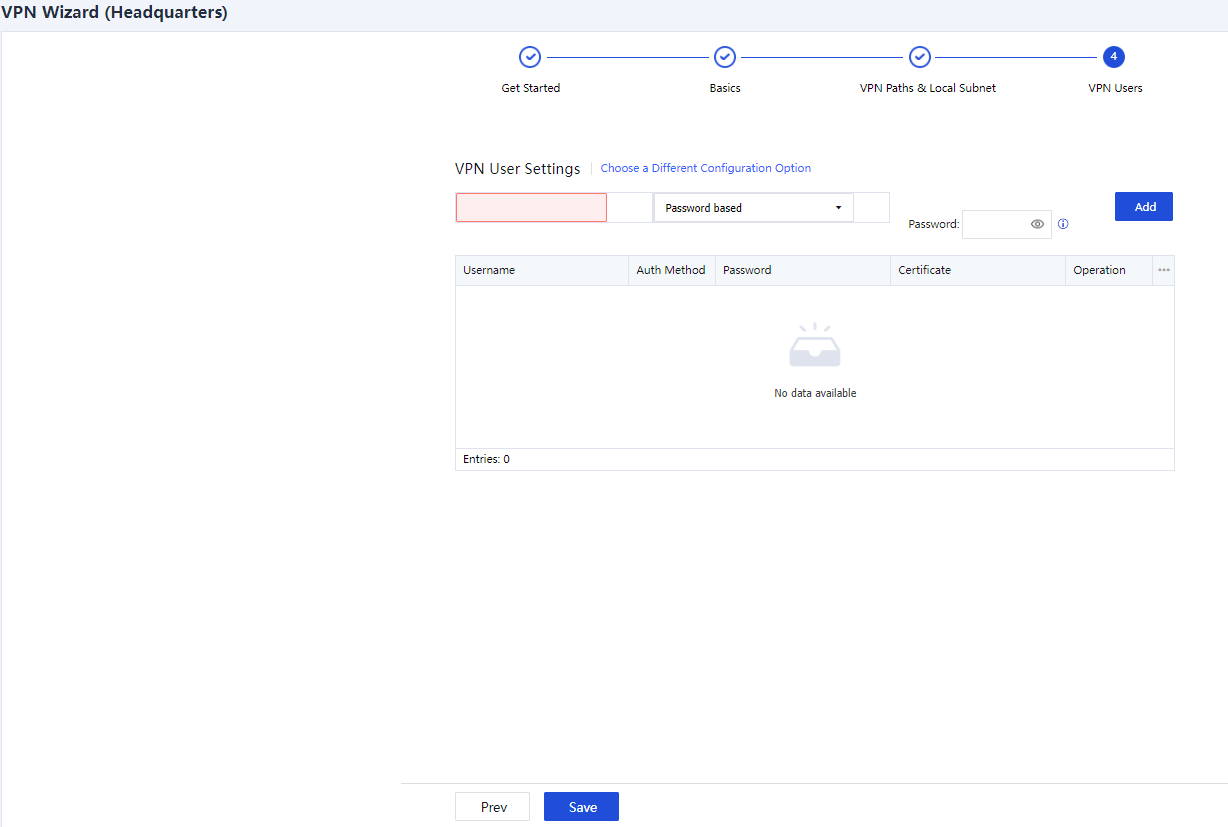
Set the VPN username and authentication method for each branch device. If you select Password based, enter a password for the branch device and click Add, as shown in the following figure.


 {{ $t('index.defaultHeader.chromeBrowserTip') }}