


{{ secondMenu.name }}






Step 1.Click Add > Group to enter the Add User Group page, as shown in the figure below:
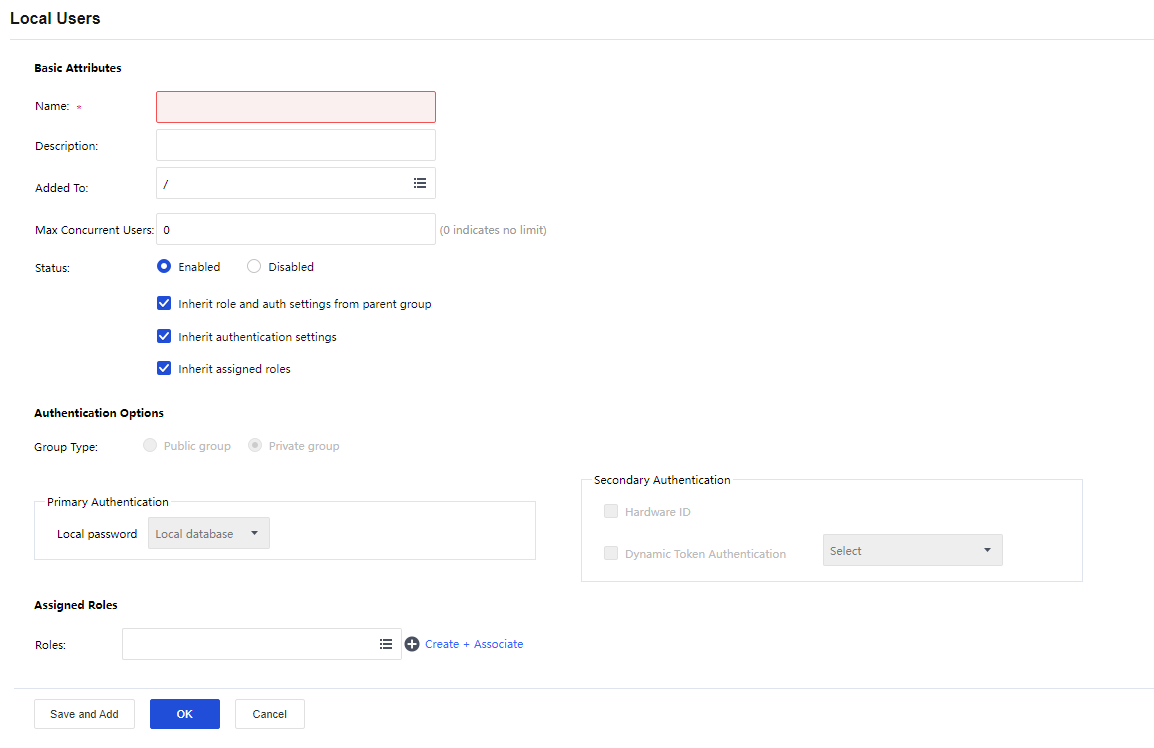
Step 2.Configure the Basic Attributes of the user group. The following are the basic attributes:
Name: Enter a name for this user group. This field is required.
Description: Enter a brief description for this user group.
Added To: Select the user group to which this user group is added.
Max Concurrent Users: Indicate the maximum number of users in this group that can concurrently access SSL VPN.
Status: Indicate whether this user group is enabled or not. Select Enabled to enable this group; otherwise, select Disabled.
Inherit role and auth settings from parent group: Select the checkbox next to it, and this user group will inherit the attributes such as the roles and authentication settings.
Inherit authentication settings: Select the checkbox next to it, and this user group will inherit the authentication settings of its parent group.
Inherit assigned roles: Select the checkbox next to it, and the current user group will inherit the assigned roles of its parent group.
Step 3.Configure Authentication Options:
Group Type: Specify the type of this user group. Public group or Private group.
Public group: Indicate that multiple users can use any user account in this group to log in to the SSL VPN concurrently.
Private group: Indicate that multiple users who log in to the SSL VPN concurrently can use none of the user accounts. If a second user uses a user account to connect to SSL VPN, the previous user will be forced to log out.
Primary Authentication: Indicate the authentication method(s) that is (are) first applied to verify users when they log in to the SSL VPN. If any secondary authentication method is selected, primary authentication will be followed by secondary authentication when the users log in to the SSL VPN. By default is a Local password.
Local password: The connecting users need to pass local password-based authentication using the SSL VPN account in this user group.
Secondary Authentication: Secondary authentication is an optional and supplementary authentication method. Select it to require the connecting users to submit the corresponding credentials after passing the primary authentication(s), enhancing the security of SSL VPN access.
Hardware ID: This is the unique identifier of a client-end computer. Each computer is composed of some hardware components, such as NIC, hard disk, etc., which are unquestionably identified by their features that cannot be forged. SSL VPN client software can extract the features of some terminal hardware components and generate the hardware ID consequently. This hardware ID should be submitted to the Sangfor device and bound to the corresponding user account. Once the administrator approves the submitted hardware ID, the user will be able to pass hardware ID-based authentication when accessing SSL VPN through a specified terminal(s). This authentication method helps to eliminate potential unauthorized access. As mentioned above, multiple users could use the same user account (public user account) to access SSL VPN concurrently. It is reasonable that a user account may bind to more than one hardware ID. That also means an end-user can use one account to log in to SSL VPN through different endpoints, as long as the user account is binding to the hardware IDs submitted by the user from those endpoints.
Step 4.Assign Roles to a user group.
Click the Roles field to enter the Assigned Roles page, as shown below:
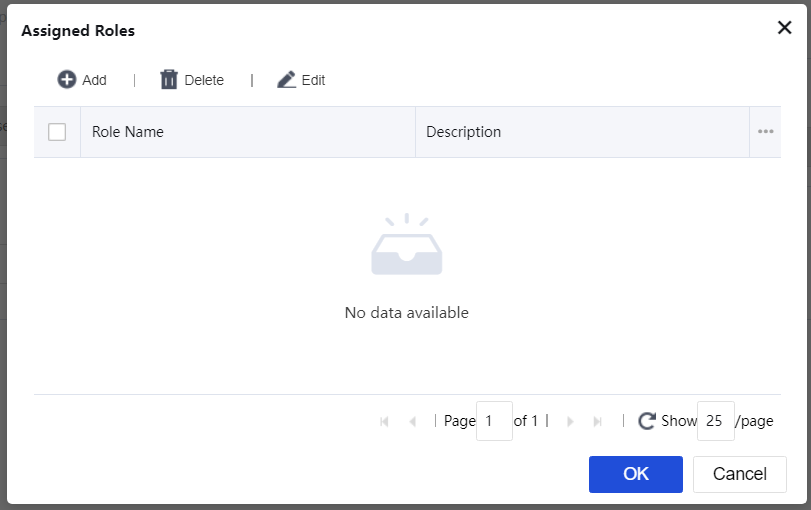
Click Add to enter the Select Role page, as shown below:
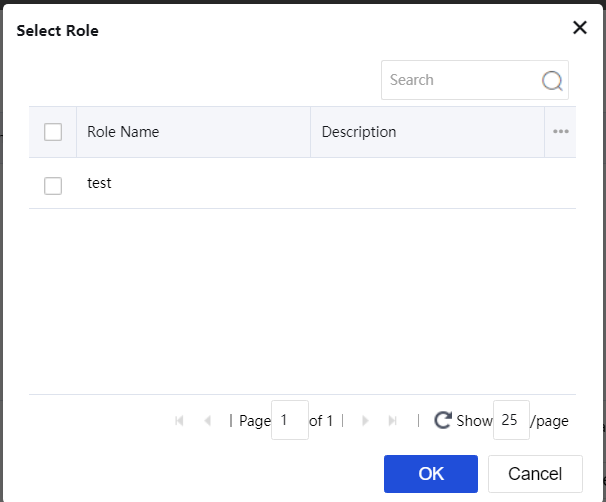
Select the checkbox next to the desired roles and click the OK button. The roles are added to the Assigned Roles page.
Click the OK button and name the assigned roles filled in the Roles field.
If the desired role is not found in the list, click Create + Associate to create a new role and associate with the user group. (The procedures of creating a role are the same as that in the Roles Adding section).
To remove a role from the list, select the role and click Delete.
To edit a role, select the role and click Edit.


 {{ $t('index.defaultHeader.chromeBrowserTip') }}