


{{ secondMenu.name }}






To realize user-based management, it is necessary to authenticate users who access the network to manage all users' online behaviors.
User Type
• Automatically discovered and created by the device.
• Manually created by the administrator.
• Imported from the CSV file.
• Imported from the external LDAP server.
• Imported after scanning the computer on the network.
2. Based on the authentication method, the users can be classified into the following types:
• Open authentication (binding IP/MAC).
• Local password authentication.
• External password authentication.
• Single sign-on (combined with the external authentication system for authentication).
Group/User
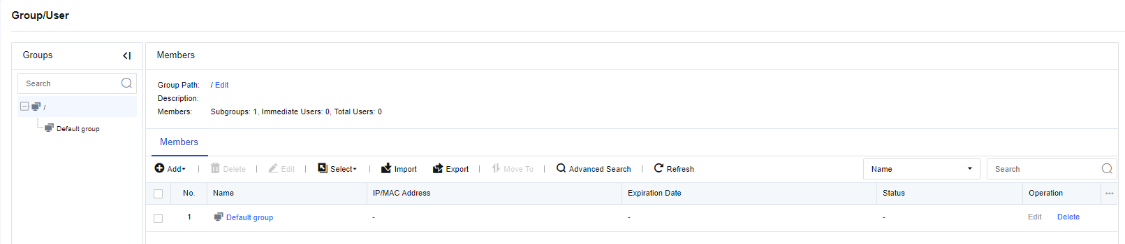
To view users or groups that already exist on the device, select the user group to be viewed in the Groups pane. The Members page on the right shows the user group's information, including the group path, description, group information, etc.
Members: On this page, you can view the details of all subgroups and users, including the group path, binding information (IP and MAC addresses bound to the user), expiration date (user), description, status (enabled or disabled), etc. You can also decide the information to be displayed by selecting the columns.
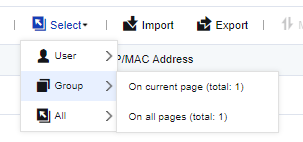
Select: To quickly select the users and user groups on the current page or all pages. Click Select. Then, the following options appears.
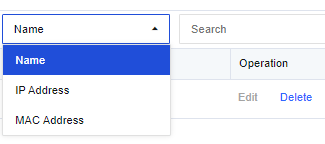
Search: To quickly find a user or user group. Click Search and select Name, IP Address, or MAC Address. Enter the content in the search box and press Enter to search.
Advanced Search: Click Advanced Search, which is only applicable to search users. When you need to query a user through multiple search terms, you can select Advanced Search. The search terms include Basic Search Terms and Other. When you set multiple search terms, the terms follow the AND relation, which means all the terms shall be met.
The Basic Search Terms section includes Username, IP, and MAC address. These parameters are optional.
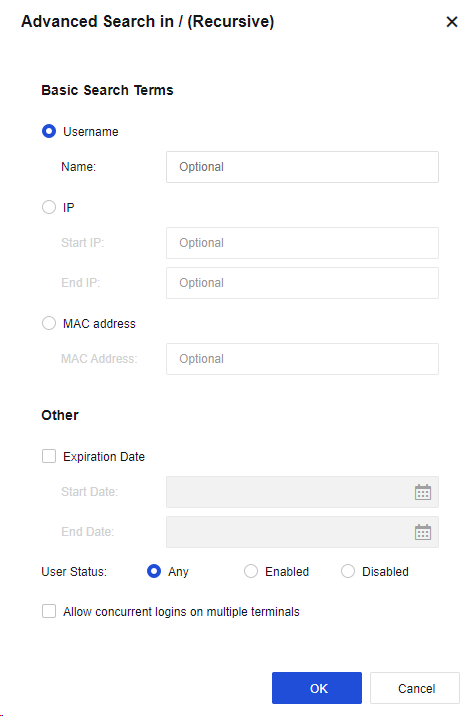
The Other section includes Expiration Date, User Status, and Allow concurrent logins on multiple terminals.
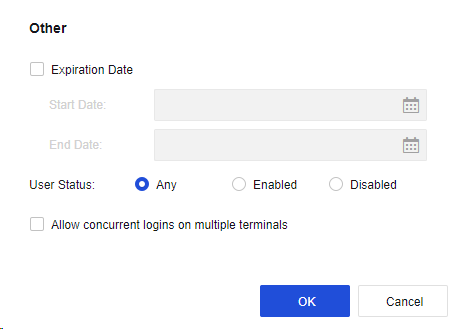
The administrator can add, delete, batch edit, import, or export user groups and users.
| Function |
Note |
| Delete |
If you need to delete the unnecessary group or user, select the group or user to be deleted on the Group/User page and select Delete. If you associated the user or group, the user or group cannot be deleted directly. The user or group can be deleted only after the reference relationship is removed. |
| Edit |
Batch edit differs from single-user edit in the editable attributes. Batch edit can be used to edit multiple users or groups. When editing users in batch, you cannot set the endpoint binding in the advanced attribute, i.e., IP and MAC binding, because this option is unique and cannot be set when you edit multiple users. |
| Import/Export |
It can be used to import or export the data of a group or user to (from) the device. You can import users from a CSV file, and import display name, group, password, IP address range allowed to log in, public account, a custom attribute, etc. at the same time. A user group will be created automatically if the specified group to which the user is imported does not exist. Select the groups and users to be exported. The user group containing no user cannot be exported alone. |
| Advanced Search |
Search terms and ranges: IP and MAC address can be set for filtering. Other can be customized for searching. |
| Move To |
You can move local users and user groups to change their positions. The existing users or groups can be moved to another group. After a successful move, the users are moved from the original group to the destination group and use the internet access policy of the destination group. Common administrators may only have administrative permission for part of the groups. Therefore, they cannot move the users or groups to a user group beyond their administrative permission. |
Table 18:Description of Group/User Management Functions
Add User
When you add a user, you can select Single User and Multiple Users.
To add a user, set the username, group, password, IP/MAC address, and other attributes, but not the authentication method. The authentication method of LAN users is set by going to Policies > Authentication > User Authentication > Authentication Policy and setting the IP or MAC address. The authentication method is used by the device to identify users.
Add Subgroup
The default group is the root group, and cannot be deleted or edited. All new groups are subgroups of the root group. The root group is the first level group, the new group under the root group is the second level group, and so on. The local group supports an organizational structure with up to 16 groups, including the root group. Such design is more consistent with the organizational structure of the Company and is convenient for management. For example, add an engineering group under the root group by performing the following steps:
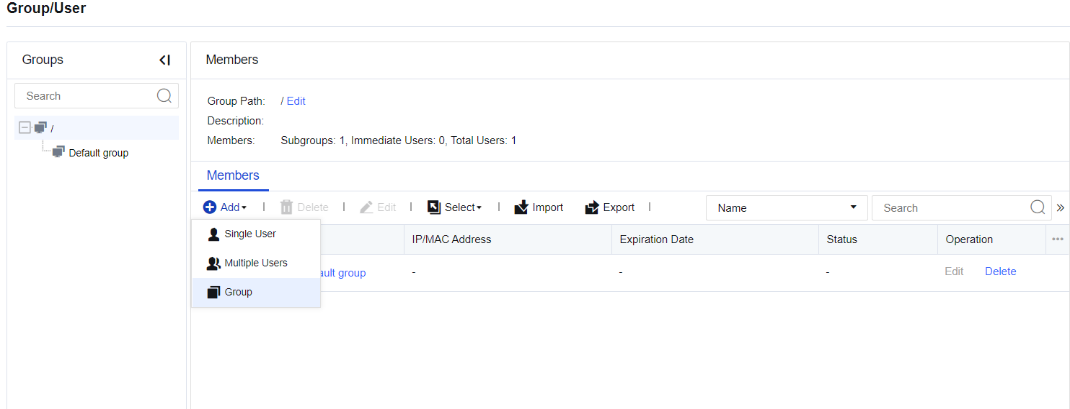
Step 1.In the Groups pane, select the user group to which the subgroup will be added, and go to the management page on the right. On the Members page, click Add and select the type of group to be added.
Step 2.In the Add dialog box, enter the name of the user group in the Group Name field. Specify the description of the user group in the Description field.
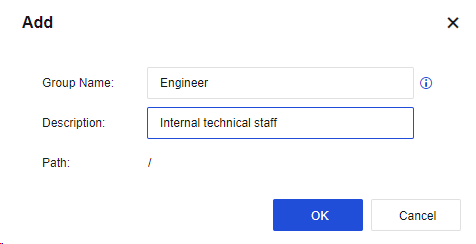
Step 3.Click OK. The subgroup is added.
Example 1
All PCs in the enterprise LAN 192.168.1.0/255.255.255.0 network segment use the username and password authentication method. A new user (common user) is added to the engineering group, authenticated based on username and password, bind unidirectionally to the IP range (i.e., the IP range that limits login) 192.168.1.2–192.168.1.100, and allowed concurrent logins on multiple terminals.
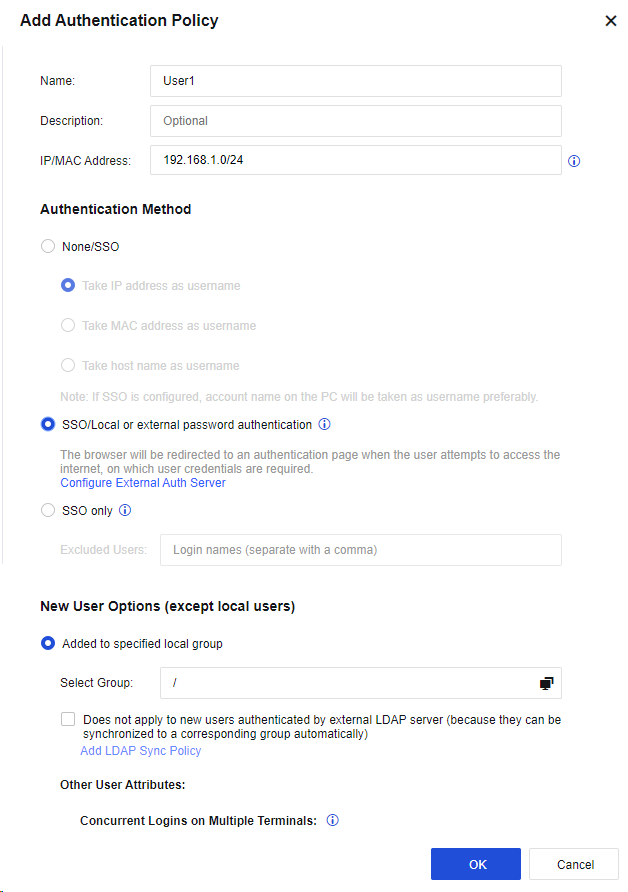
Step 1.The enterprise requires that all PCs in the 192.168.1.0/255.255.255.0 segment shall be authenticated based on username and password. Therefore, the first thing to do is to set the authentication method of users in this network segment.
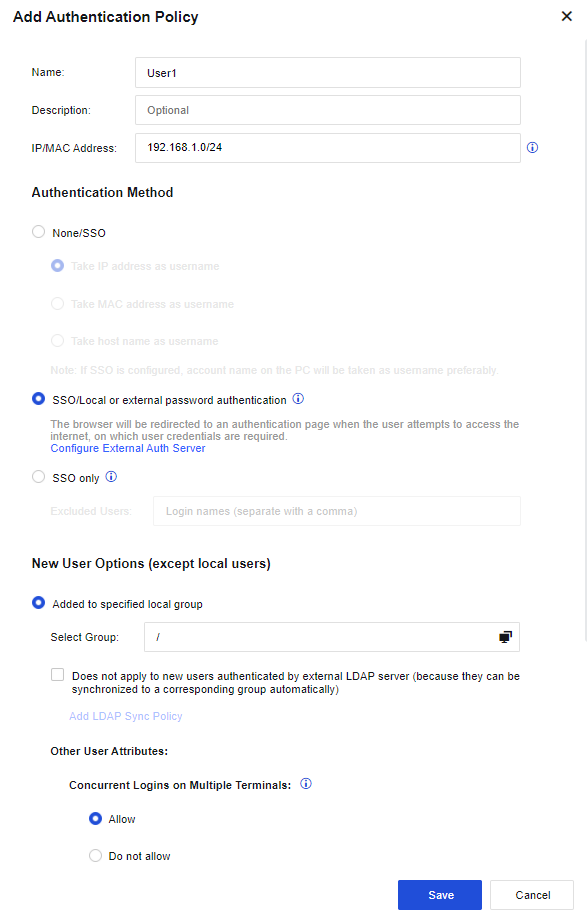
Go to Policies > Authentication > User Authentication > Authentication Policy, and set the authentication policy. Set the IP or MAC address range of this user. Select SSO/Local or external password authentication in the Authentication Method section. Before setting the authentication policy, set the authentication zone. This example shows you how to select the authentication zone of LAN, as shown in the following figure. For more information about the zone, see Chapter 5.2 Zones.

Step 2.In the Groups pane, select the user group to which the user will be added, and go to the management page on the right. On the Members page, click Add and select Single User.
Step 3.In the Add Single User dialog box, select Enable and set the Name, Description, Display Name and Add to Group parameters.
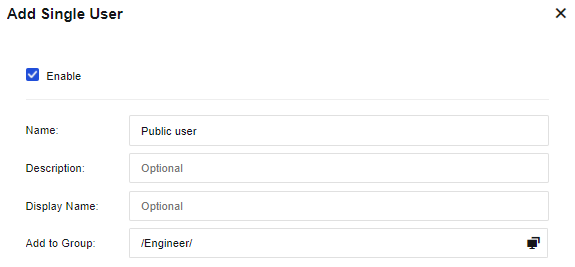
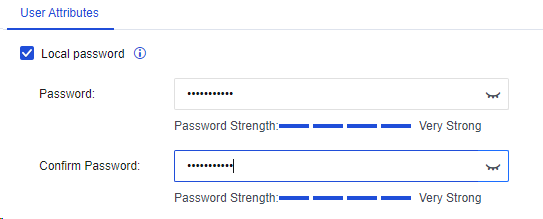
Step 4.On the User Attributes tab, set the user authentication method, public account, and expiration date. Select Local password and enter the user login authentication password in the Password field.
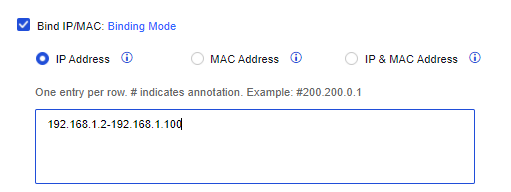
Bind IP/MAC: Bind the user to an IP/MAC address. In this example, the unidirectional binding IP range (i.e., the IP range that limits login) is 192.168.1.2–192.168.1.100.
Click Binding Mode. Select Unidirectional binding between a user and an address in the Binding Mode dialog box.
Select IP Address and enter 192.168.1.2-192.168.1.100 in the field.
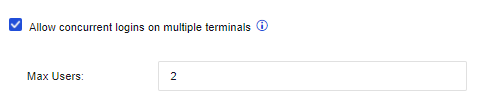
Allow concurrent logins on multiple terminals: Set whether concurrent logins on multiple terminals are allowed for the user authenticated based on username and password. If this option is selected, concurrent logins on multiple terminals are allowed. In this example, this option is selected as two users are allowed to log in concurrently.
Select Show logout page if users are authenticated based on password. This option is for the users authenticated based on username and password, and a logout page appears after the users logged in.

Select Auto-log out users who are idle for a specified period of time to set an idle time so that users who are idle beyond this period will be logged out automatically.

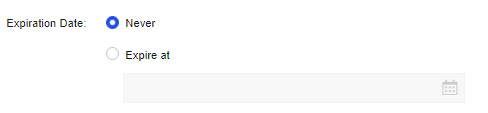
Expiration Date: Set the expiration date of the user.
Step 5.After editing user attributes, click OK. Then, the user is added.
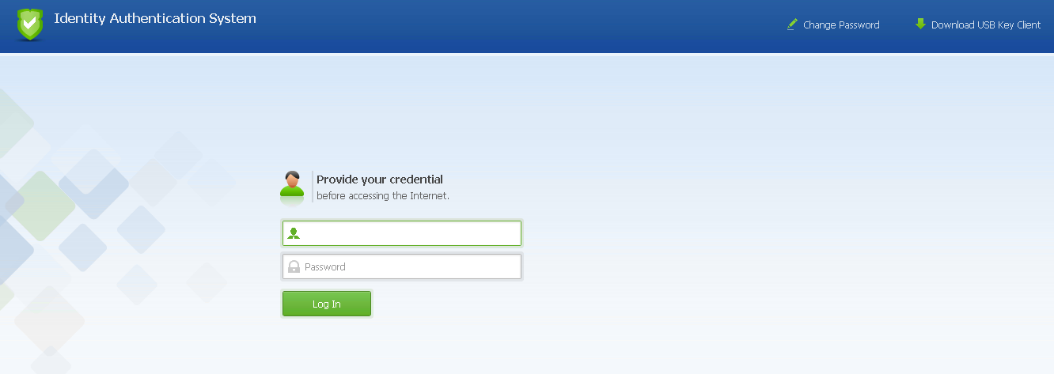
Step 6.When a user in the corresponding network segment opens a webpage, the webpage is redirected to the authentication page of the device. Enter your username and password and click Log In. If the username and password are authenticated to be valid and conform to the rule of bound IP addresses, the authentication is successful.
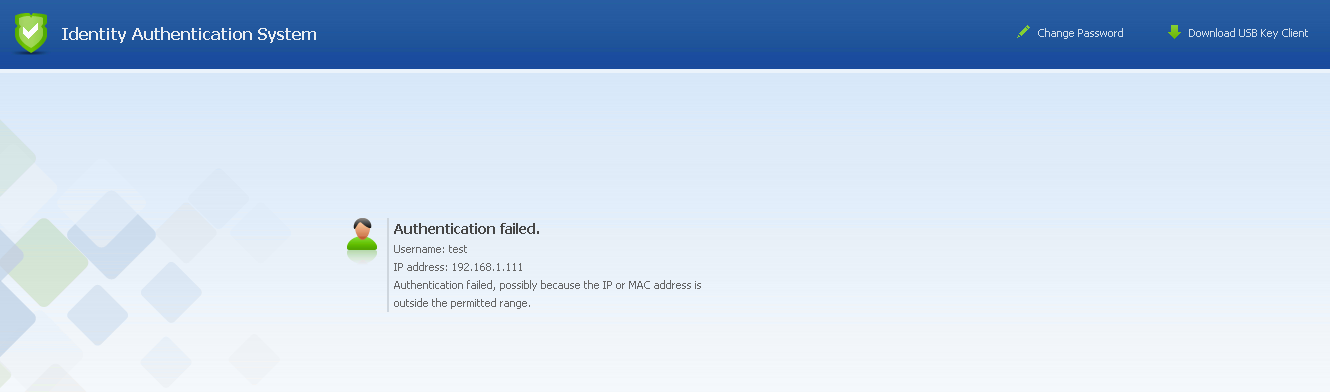
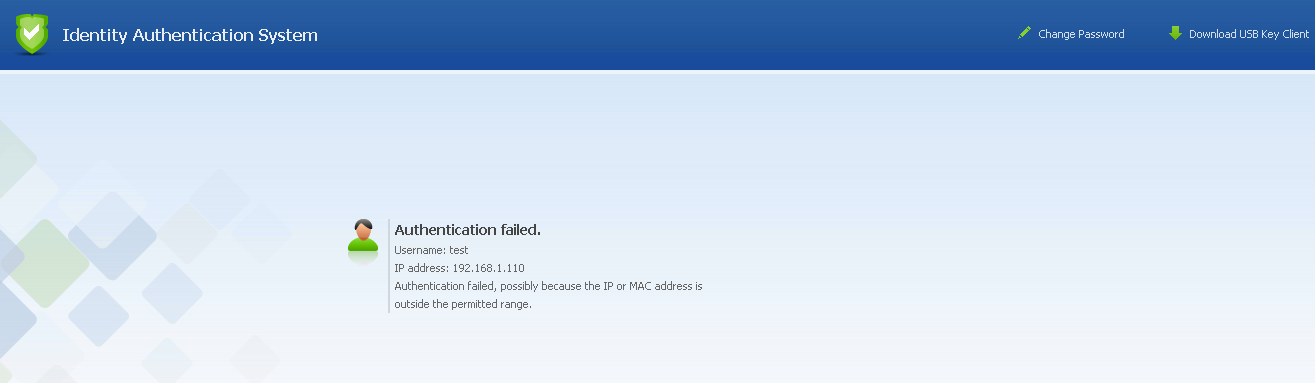
If the username and password are valid but the IP address for login is not in the bind IP address range, the authentication fails.

Bind IP/MAC: Two binding modes include unidirectional binding and bidirectional binding.
Bidirectional binding between a user and an address: The user can only use the specified address for authentication, and this user can only use this address.
Unidirectional binding between a user and an address: The user can only use the specified address for authentication, but other users can also use this address for authentication.
Example 2
All PCs in the enterprise LAN 192.168.1.0/255.255.255.0 network segment use the username and password authentication method. A new user (Lee Engineer) is added to the engineering group, authenticated based on username and password, bound bidirectionally to the IP/MAC address 192.168.1.117/00-0C-29-7F-0B-47. (This user must use this IP/MAC address for authentication, while other users cannot.)
The enterprise requires that all PCs in the 192.168.1.0/255.255.255.0 segment shall be authenticated based on username and password authentication. Therefore, the first thing to do is to set the authentication method of users in this network segment.
Step 1.Go to Policies > Authentication > User Authentication > Authentication Policy, and set the authentication policy. Set the IP or MAC address range of this user. Select SSO/Local or external password authentication in the Authentication Method section. Before setting the authentication policy, set the authentication zone. This example shows you how to select the authentication zone of LAN, as shown in the following figure.
Step 2.In the Groups pane, select the user group to which the user will be added, and go to the management page on the right. On the Members page, click Add and select Single User.
Step 3.In the Add Single User dialog box, select Enable and set the Name, Description, Display Name, and Add to Group parameters.
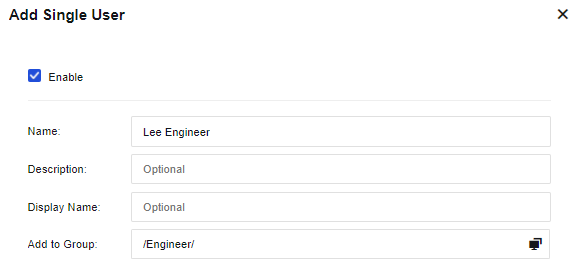
Step 4.On the User Attributes tab, Select Local password and enter the user login authentication password in the Password field.
Bind IP/MAC: Bind the user to an IP/MAC address. In this example, the IP/MAC address of bidirectional binding is 192.168.1.117/ 00-0C-29-7F-0B-47. (This user must use this IP/MAC address for authentication, while other users cannot).
Step 5.Click Binding Mode and select Bidirectional binding between a user and an address in the Binding Mode dialog box. Select IP & MAC Address, and enter 192.168.1.117 (00-0C-29-7F-0B-47) in the field.
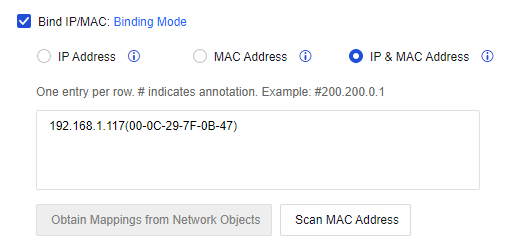
The user is considered a private account by default because it is only bound to a single IP/MAC address.
Select Show logout page if users are authenticated based on password. This option is for the users authenticated based on username and password, and a logout page appears after the users logged in.

Select Auto-log out users who are idle for a specified period of time to set an idle time so that users who are idle beyond this period will be logged out automatically.

Expiration Date: Set the expiration date of the user.
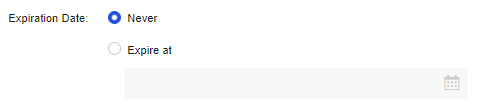
Step 6.After editing user attributes, click OK. Then, the user is added.
Step 7.When a user in the corresponding network segment opens a webpage, the webpage is redirected to the authentication page of the device. Enter your username and password and click Log In. If the username and password are authenticated to be valid and conform to the rule of bound IP addresses, the authentication is successful.
If the username and password are valid but the IP/MAC address for login is not the bound IP/MAC address, the authentication fails. The prompt message is as follows.
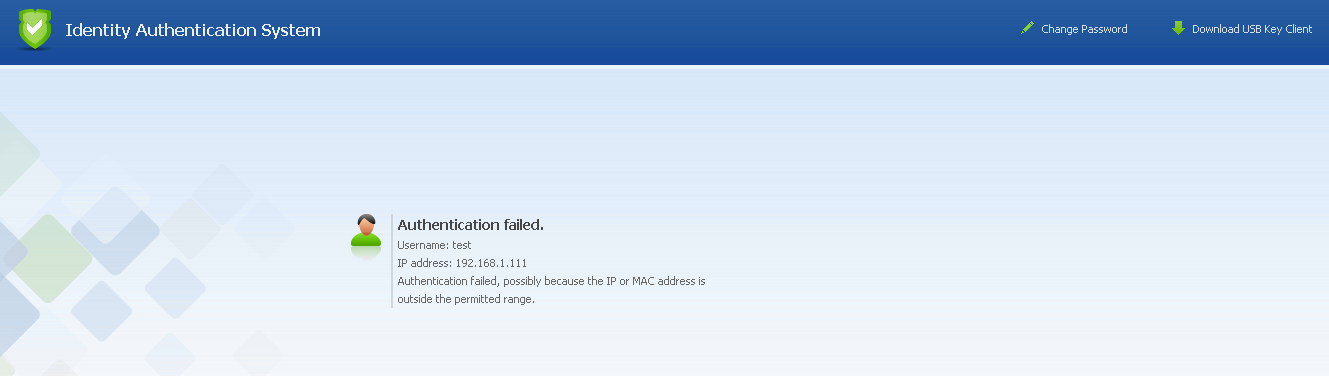
If other users use this IP/MAC address to authenticate, the Authentication Failed page will also appear.
If users from the addresses that require no authentication are set under Policies > Authentication > User Authentication > Authentication Policy, the users can directly access the internet without entering the username and password. In this case, the device identifies the user based on the IP address, MAC address, or hostname. The common settings are:
1. When creating a user, bidirectionally bind the user to an IP/MAC address. Because there is a one-to-one correspondence between the IP/MAC address and user during the bidirectional binding, the user can be identified based on the IP/MAC address.
2. Go to Policies > Authentication > User Authentication > Authentication Policy, set Authentication Zone to None, and take the IP address, MAC address, or hostname as the username. For authentication of LAN users, their usernames are matched based on the IP address, MAC address, or hostname.
Example 3
Set a user as the supervisor in the "/Engineer" group. This user requires no authentication. Bidirectionally bind the user and the IP/MAC address of the supervisor's PC. In this way, only the supervisor's PC can use this account to access the Internet. The IP/MAC address of the supervisor's PC is 192.168.1.117 (00-0C-29-7F-0B-47).
Step 1.Go to Policies > Authentication > User Authentication > Authentication Policy, set the authentication policy. Set the IP or MAC address range of this user. Select None/SSO in the Authentication Method section. Before setting the authentication policy, set the authentication zone. This example shows you how to select the authentication zone of LAN, as shown in the following figure.

Step 2.In the Groups pane, select the user group to which the user will be added, and go to the management page on the right. On the Members page, click Add and select Single User.
Step 3.In the Add Single User dialog box, select Enable and set the Name, Description, Display Name, and Add to Group parameters.
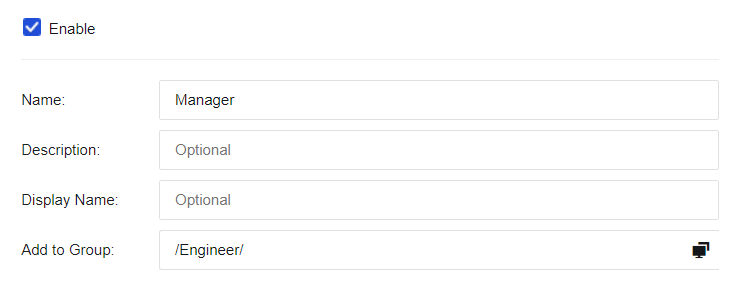
Step 4.Select Bind IP/MAC to bind the user to an IP/MAC address. In this example, the IP/MAC address of bidirectional binding is 192.168.1.117/ 00-0C-29-7F-0B-47. (This user must use this IP/MAC address for authentication, while other users cannot).
Step 5.Click Binding Mode and select Bidirectional binding between a user and an address in the Binding Mode dialog box. Select IP & MAC Address, and enter 192.168.1.117 (00-0C-29-7F-0B-47) in the field.
The user is considered a private account by default because it is only bound to a single IP/MAC address.
Expiration Date: Set the expiration date of the user.
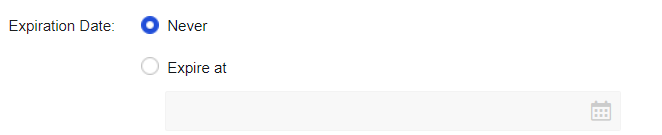
Step 6.After editing user attributes, click OK. Then, the user is added.
Step 7.When accessing the internet through the device, verify whether the IP and MAC addresses are valid. If so, the authentication is successful, and no authentication page appears on the client. If the IP/MAC address is not the bound one, the authentication fails. No prompt message appears, but the client cannot access the internet.


 {{ $t('index.defaultHeader.chromeBrowserTip') }}