


{{ secondMenu.name }}






To translate the destination IP address of data passing through the device. Destination NAT is often used to publish servers by mapping the services of LAN servers to the internet so that internet users can access internal servers through the public IP address.
IPv6 DNAT supports the LAN zone and enables you to configure the destination IPv6 address and its prefix. The prefix value ranges from 4 to 128.
Both LAN and WAN segments of an enterprise are IPv6 network segments, the IP address of the LAN server is 2001::1/128, Network Secure is deployed at the internet egress as a gateway, the IP address of ETH1 interface is 2003::1/128, and the IP address of ETH2 interface is 2001::2/128. If you need to use the LAN server to publish web services to the internet, internet users can access the LAN server through the IP address of the ETH1 interface in Network Secure for internet access.
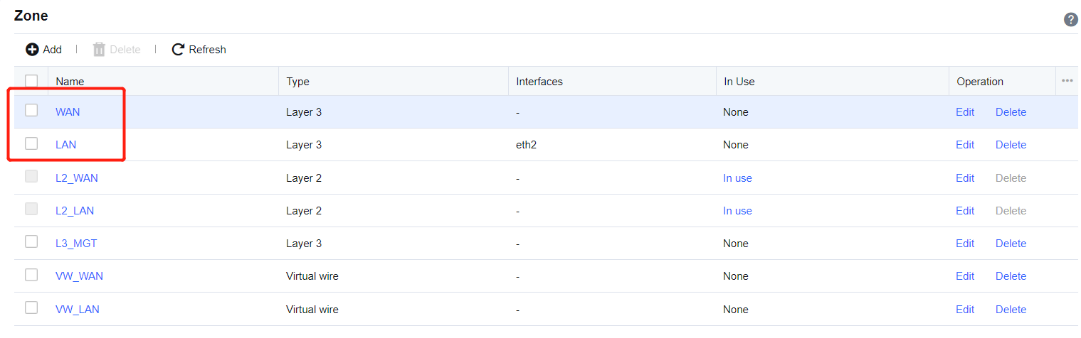
Step 1.Define LAN and WAN zones. Before you add an SNAT policy, navigate to Network > Zones and select the zone to which the interface belongs on the Zones page. The following figure shows the specific configuration. In this example, select WAN for the ETH1 interface and LAN for the ETH2 interface. See the figure below.
Step 2.Add a DNAT policy. Navigate to Policies > NAT > IPv6 NAT, click Add to enter the Add IPv6 NAT Policy dialog box. Select Destination NAT for Type, and then enter the name in the Name field.
Src Zone: Select WAN.
Src Address: Enter 2003::1/128 for the IP address of the ETH1 interface.
Destination: Enter 2002:222:1/128 for the IP address of the LAN server.
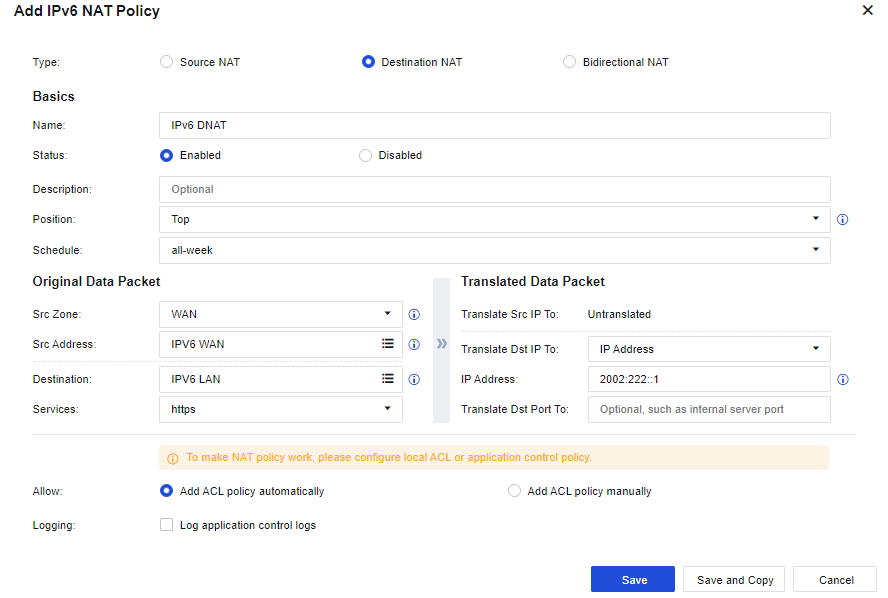
Step 3.Save the configuration. Finally, click Save. Then, the configuration of the DNAT policy is complete. See the figure below.

Step 4.After the application control policy for web services from the WAN to the LAN is allowed, access the LAN server by visiting http:// [2003::1] through WAN.


 {{ $t('index.defaultHeader.chromeBrowserTip') }}