{{ secondMenu.name }}


Description
Precautions
Confirm the server model and RAID card model. It is recommended to replace the RAID card with the same parameters as the original RAID card to ensure compatibility.
Prerequisites
Steps
• After confirming that the device is powered off, unplug the power cable, remove the server, lay it flat on a stable platform, and open the top cover of the chassis.
• Remove the PCI-E converter.
• Unplug the 2 RAID cables connected to the adapter, and remember the wiring sequence (press the tab and pull out).
• Remove the fixing screws of the RAID card, hold the edge of the RAID card, and remove the RAID card.
• Confirm that the adapter model is correct.
• Place the adapter card near the PCI-E slot. Then, carefully press the adapter straight into the slot until it is firmly seated. Make sure the riser bracket secures the adapter bracket.
• Install the fixing screws and connect the RAID cables in sequence.
• Put the converter card back into the chassis,
• Check that no other debris is left in the chassis, and restore the cover.
• After confirming that the device is powered off, unplug the power cable, remove the server, lay it flat on a stable platform, open the top cover of the chassis, and remove the air duct.
• Unplug the two RAID cables connected to the array card. Note that the two cables are in order (press the tabs and pull them out).
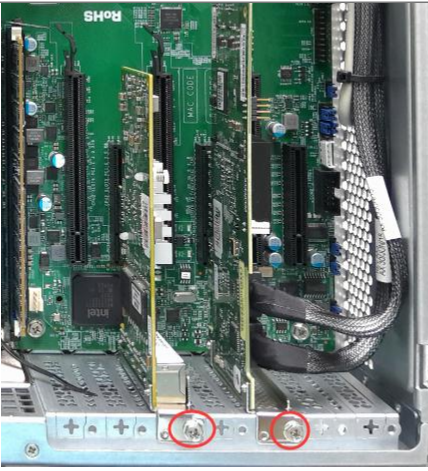
• Remove the fixing screws.
• Hold the two sides of the array card and pull out the array card upwards.
• Confirm the adapter model.
• Hold both sides of the new adapter and insert it into the corresponding slot.
• Fix it with screws, and connect the RAID cable to the interface (note that the two cables need to be inserted back in the original order).
• Check that no other debris is left in the chassis, and restore the cover.
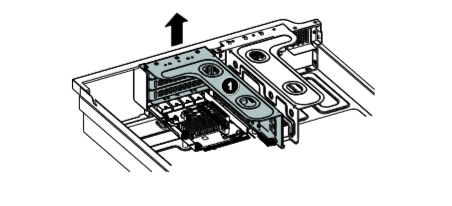
• After confirming that the device is powered off, unplug the power cable, remove the server, lay it flat on a stable platform, and open the top cover of the chassis.
• Loosen the screws that secure the riser card assembly. Then, hold the assembly by the edges and carefully lift the entire cage straight up from the chassis.
![]()
If there are other PCIe cards in this fixing frame, please remove the connection cables first.
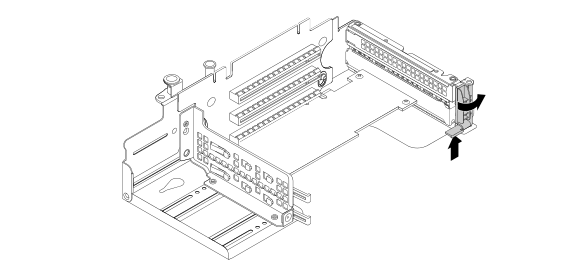
• Unplug the 2 RAID cables connected to the array card (press the tabs and pull them out).
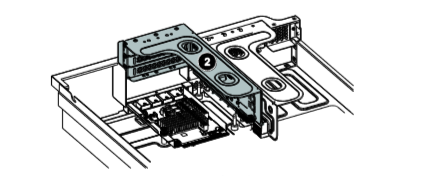
• Locate the PCIe card you want to remove, then press the tab to rotate the latch to the open position.
• 
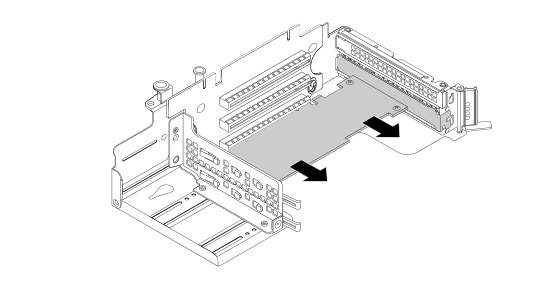
• Holding the adapter by its edges, carefully pull it out of the PCIe slot.
![]()
The adapter card may be firmly seated in the PCIe slot. If necessary, alternately move both sides of the adapter slightly and evenly until it is removed from the slot. The array card can also be pushed out through the 2 round holes of the fixing frame.
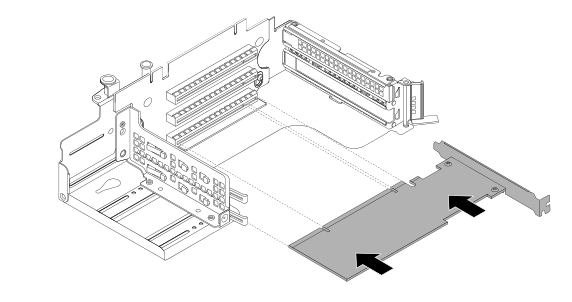
• Confirm that the adapter model is correct.
• Place the array card near the PCIe slot. Then, carefully press the adapter straight into the slot until it is firmly seated, ensuring the adapter bracket is secured by the riser bracket.
• Rotate the latch to the closed position to secure the adapter in place.
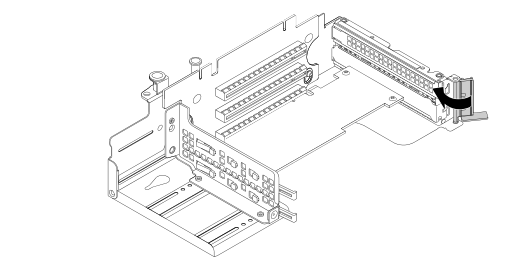
• Connect the RAID cable back to the array card. Note that the two cables are in order. Port 0 on the RAID card is connected to the RAID cable 0-3. One port is connected to the 4-7 RAID cable.
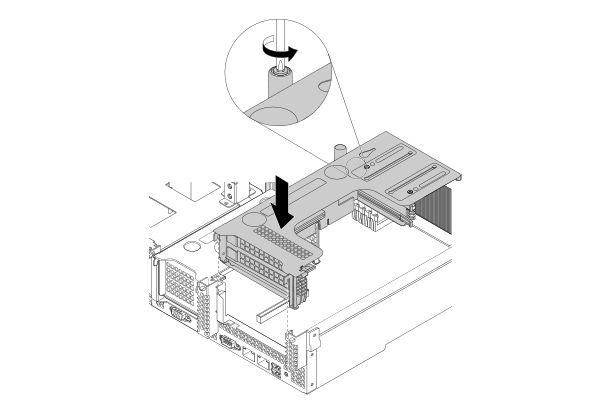
• Put the entire fixing bracket back into the chassis. Select and fix the component screws in the opposite direction.
• Check that no other debris is left in the chassis, and restore the cover.
• Confirm that there is an array card in the bios power on option.
• Confirm that the hard disk in the array card is recognized and the mode is JBOD mode.
• Carry out a key check to confirm that the platform is running normally.

 {{ $t('index.defaultHeader.chromeBrowserTip') }}