Sangfor HCI and aSV provide a unified infrastructure combining compute, storage, networking, and built-in security to simplify deployment, operations, and services.
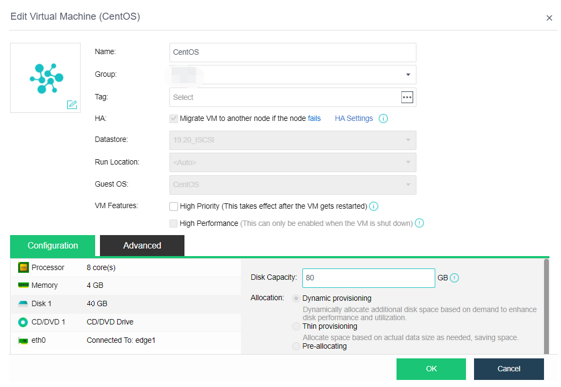
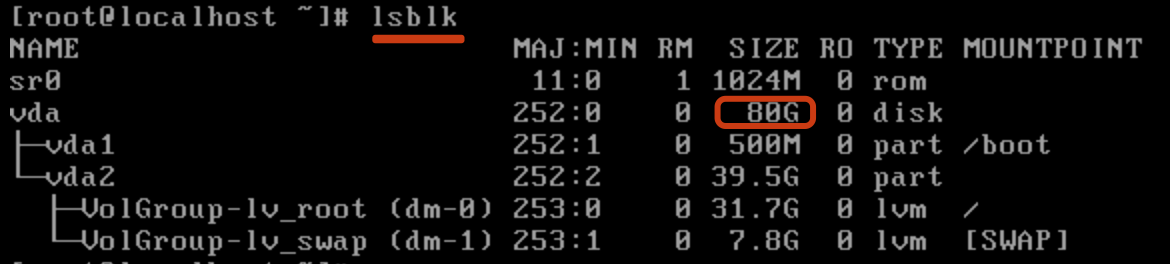
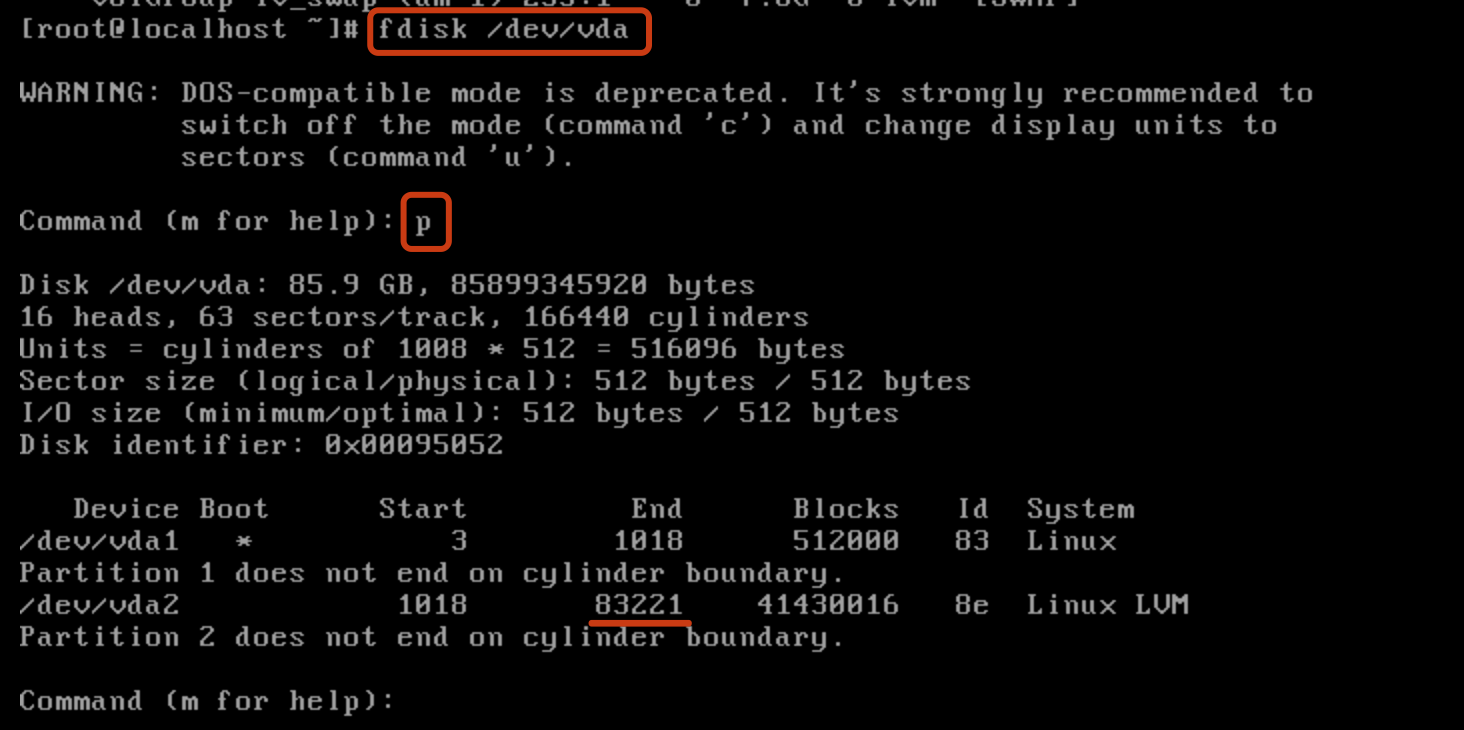
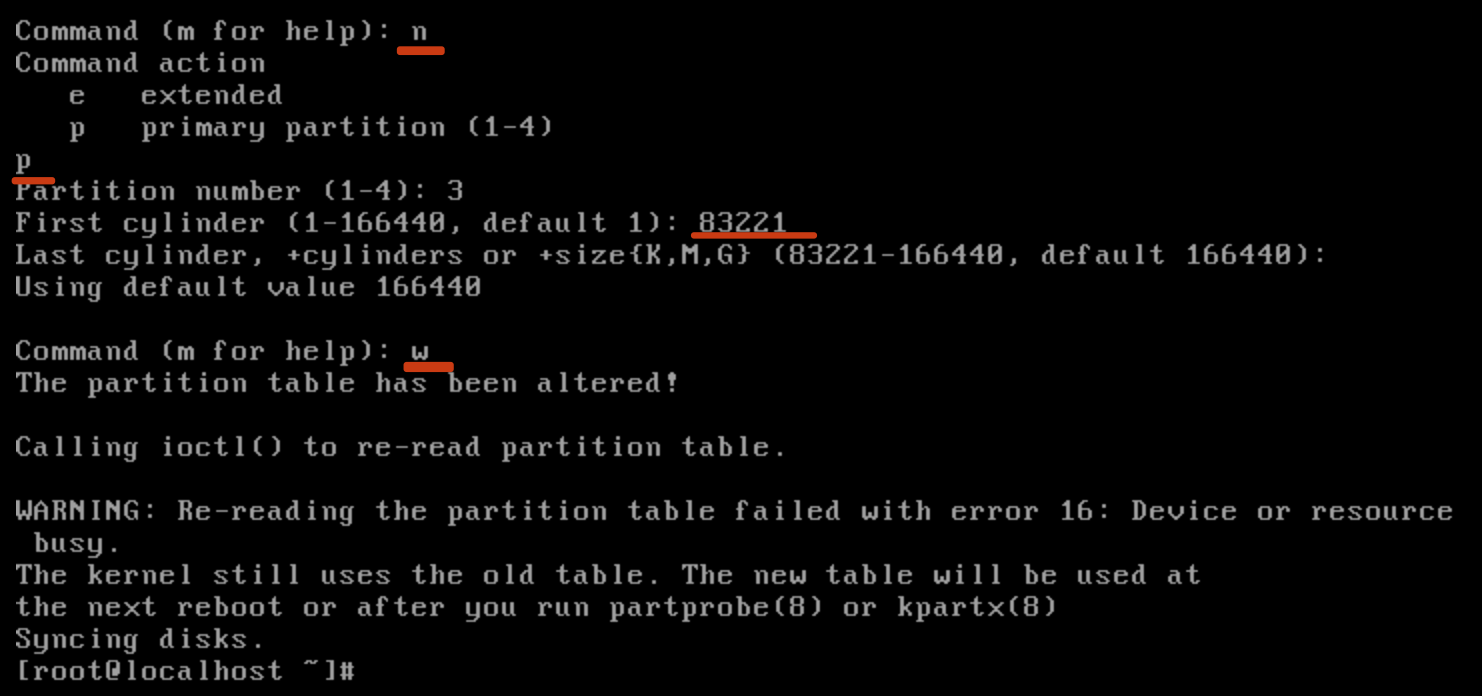
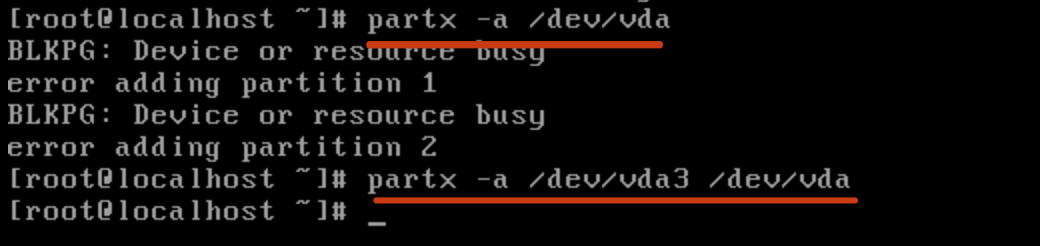
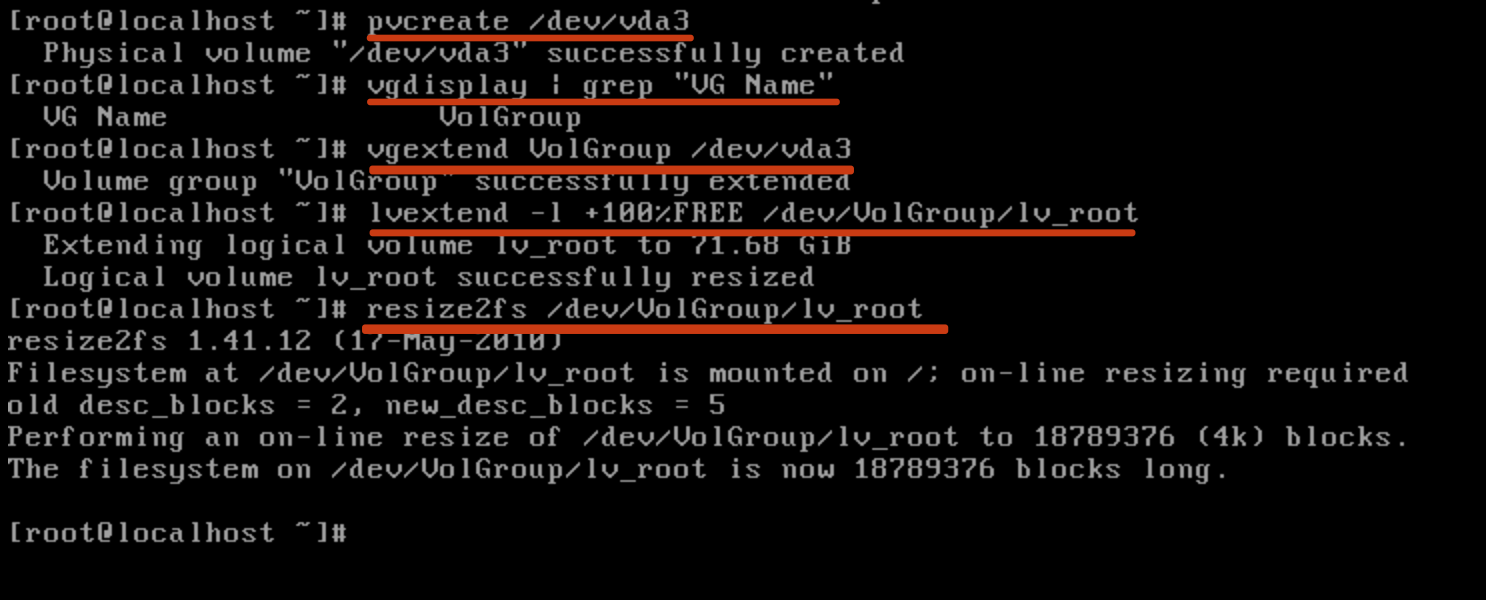
To expand the existing virtual machine disks and add new disks, please refer to Chapter 5.2.7 Virtual Machine Editing of this document.
Precautions
For virtual machines using LVM.
HCI5.8.7 and earlier versions need to turn off the virtual machine operation to expand the size of a single disk of the virtual machine.
HCI5.8.8R1 virtual machine supports power on disk capacity expansion and adding a new disk.
The part of the virtual machine system in this manual is to demonstrate a feasible way of capacity expansion and the process of Linux capacity expansion. It is not the only way of capacity expansion. The operator should fully understand the significance of various commands and parameters in the demonstration and be able to make corresponding adjustments according to actual needs.
IDE disk type does not support disk thermal expansion. Vmtools needs to be installed.
The derived virtual machine does not support expanding the system disk.
When the storage is small, creating a dynamic disk larger than the storage may fail.
Shared virtual disks only support cold capacity expansion. Before expanding the capacity of a shared disk, business services on the VMs using it must be suspended.
Prerequisites
VmTools needs to be installed, and virtio disk needs to be enabled for power on expansion.
The following is a demonstration of using CentOS to expand the capacity of the root directory mount point.
Steps
Edit virtual machine: Click More > Edit.
Adjust disk size: Adjust the disk to the planned size. In this demonstration, adjust the disk from 50GB to 80GB, and click OK after modification. If the virtual machine is turned off, turn on the virtual machine and enter the console.
View current information: View the expanded disk information through the "lsblk" command. The disk is "/dev/vda", vg is "volgroup", and lv is "/dev/ volgroup/lv_root".
Disk partition: Enter the disk partition through "fdisk/dev/vda" and enter "p" to view the current partition. At present, the "/dev/vda" disk in the demonstration environment already has two primary partitions. Add a new partition number of 3, the new partition device name of "/dev/vda3", and the cylinder starts from 83221.
Create new partition: Enter "n" to create a new partition; Enter "p" to create a primary partition. Enter the partition number, First cylinder, Last cylinder, then enter "w" to save the partition information and exit fdisk.
partx: After modifying the disk partition table, you can check whether the partition is recognized through the "lsblk" command. If no new partition is recognized, there is no need to restart. With the "partx" command, the kernel can read the new partition table information.
Check to see if the partition is recognized.
Convert the newly added partition into PV and add it to VG and LV. After expanding the logical volume, use resize2fs to resize the partition to use the expanded space.
View the lv size after capacity expansion: You can see the LV size after capacity expansion through the DF command. The capacity expansion is completed.