Hyper Converged Infrastructure (HCI/aSV)

Sangfor HCI and aSV provide a unified infrastructure combining compute, storage, networking, and built-in security to simplify deployment, operations, and services.
{{ $t('productDocDetail.guideClickSwitch') }}
{{ $t('productDocDetail.know') }}
{{ $t('productDocDetail.dontRemind') }}
6.11.1R1
{{sendMatomoQuery("Hyper Converged Infrastructure (HCI/aSV)","Third-Party Servers")}}

Third-Party Servers

{{ $t('productDocDetail.updateTime') }}: 2026-01-05

Description

A witness node can either be on an aServer or a third-party server. This section describes how to install a witness node on a third-party server.

Precautions

  1. You can install it with an ISO image or a USB flash drive. For more information on preparations such as burning and intelligent platform management interface (IPMI) settings, see section 2.4.2.2 "Installation with an ISO Image."
  2. To expand the cluster, you can adjust the configuration of the witness node accordingly.

Prerequisites

For more information on the hardware requirement of witness nodes, see section 2.2.3 "Witness Node Configuration Requirements."
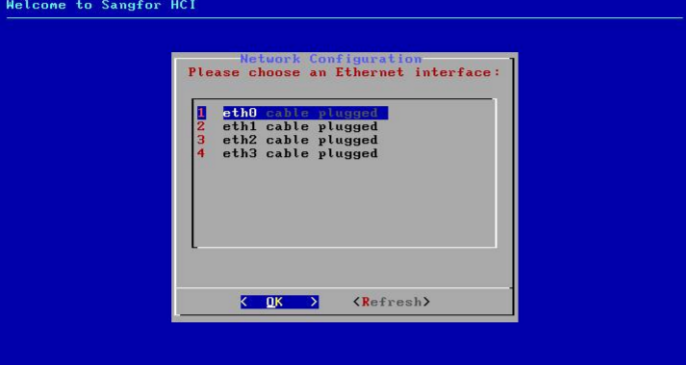
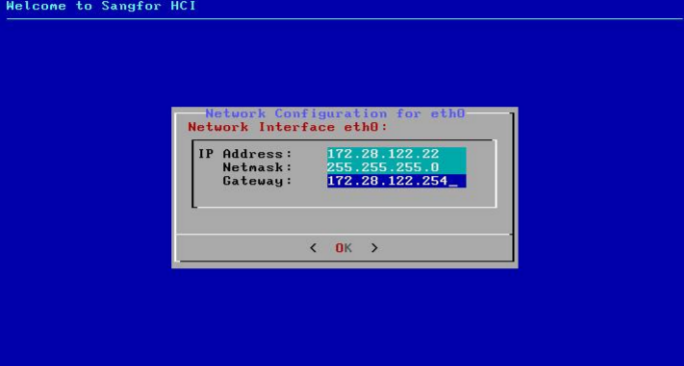
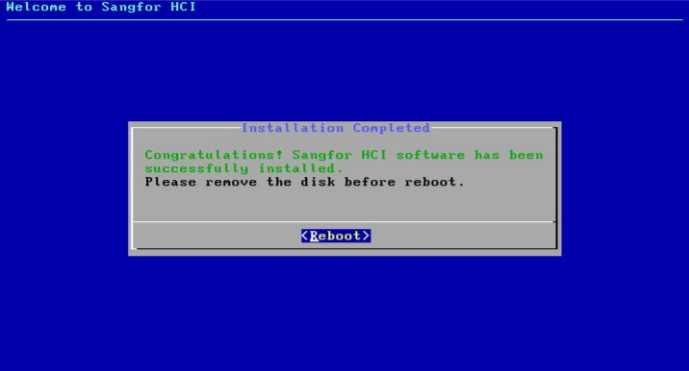
Steps

  1. For installation from an ISO image, load the installer and choose to boot from IPMI. For installation from a USB flash drive, boot from the prepared flash drive. Then, the following page is displayed. Select Install Sangfor HCI on this machine and press Enter.

  1. Select Sangfor HCI Installer and press Enter.

  1. Select a disk where you want to install Sangfor HCI software and select OK.

  1. Then, you will be prompted that this operation will format the disk. Enter "format" in the input box and select OK. If you don't need the disk speed test, select No in the pop-up dialog box.

  1. After the system is installed, select the NIC as prompted and select OK. Then, press Enter to go to the settings page.

  1. Configure the IP address, subnet mask, and gateway, and then click OK. Make sure that the address can communicate properly with the target HCI cluster.

  1. Then, select Yes to go back to the NIC selection page and set other NICs, or select No to complete the installation.
  2. Remove the USB flash drive or ISO image file and select Reboot to complete installation.

  1. After a restart, you can log in to the witness node console through https://configured IP address in your browser.