Sangfor HCI and aSV provide a unified infrastructure combining compute, storage, networking, and built-in security to simplify deployment, operations, and services.
Sangfor aSecurity provides a guided ransomware recovery process, which can quickly and safely restore production or services without needing expert intervention.
Sangfor aSecurity uses the linked clone method for service verification, which can be created in seconds. No additional storage space is required during the process. The environment is completely independent, and the virus will not spread during recovery.
After the recovery point is determined and the recovery is performed, the entire process is strictly isolated from encrypted assets and other assets. The isolation will be released after the recovery is completed and the virus is confirmed to be safe.
Prerequisites
None.
Precautions
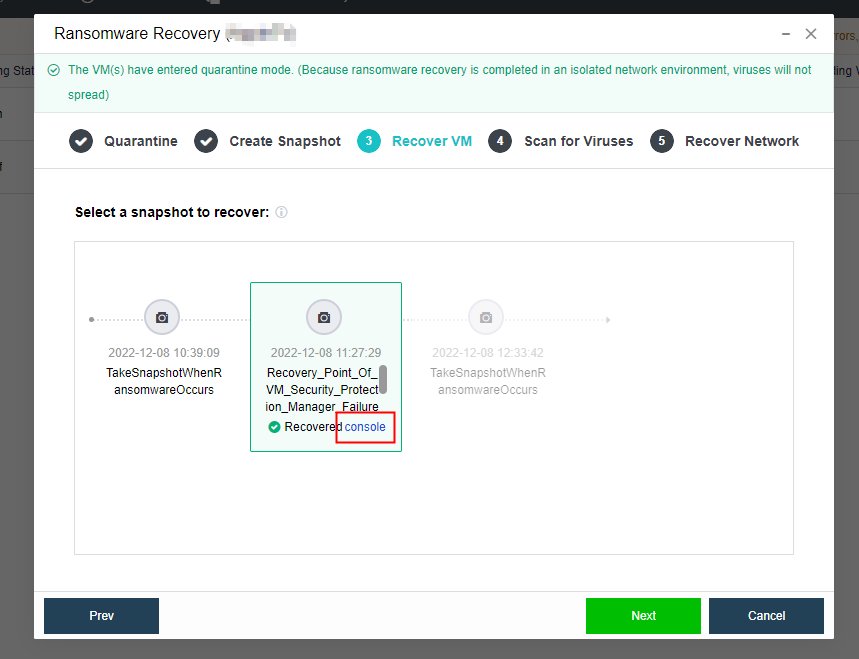
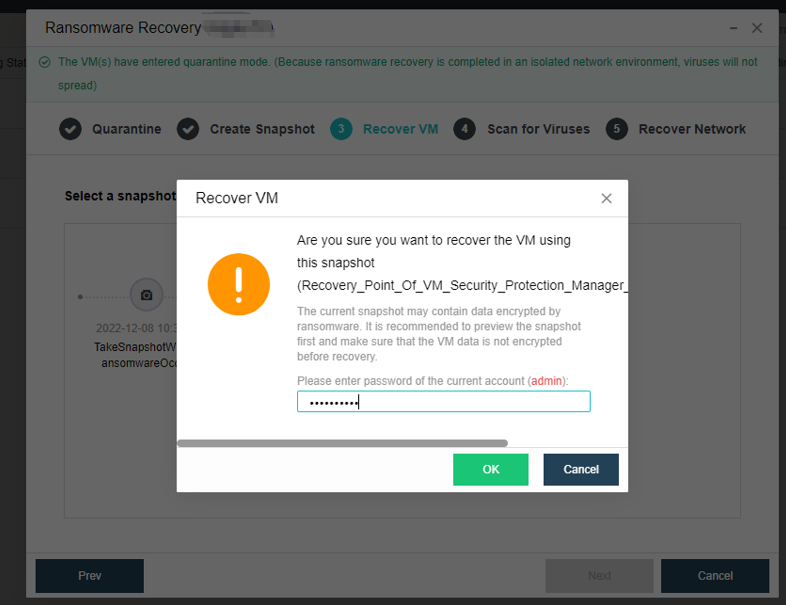
There is a time difference between the snapshot data from the ransomware recovery and the current data. Rolling back the snapshot will cause data loss. In a formal business scenario, please evaluate the impact of ransomware before deciding whether to roll back to the snapshot.
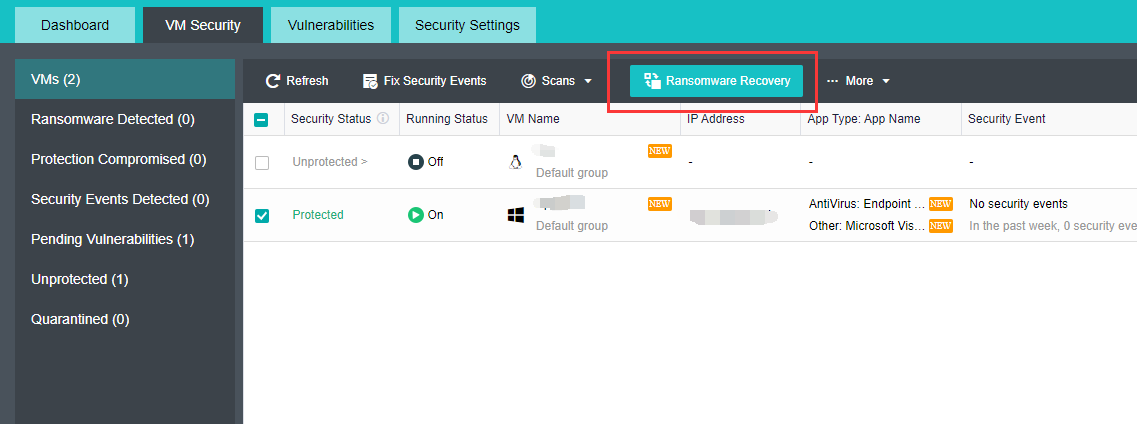
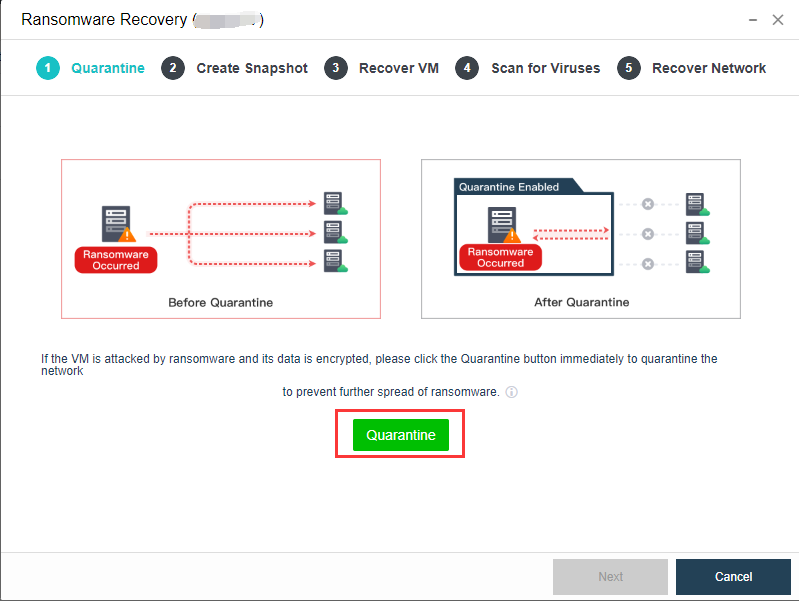
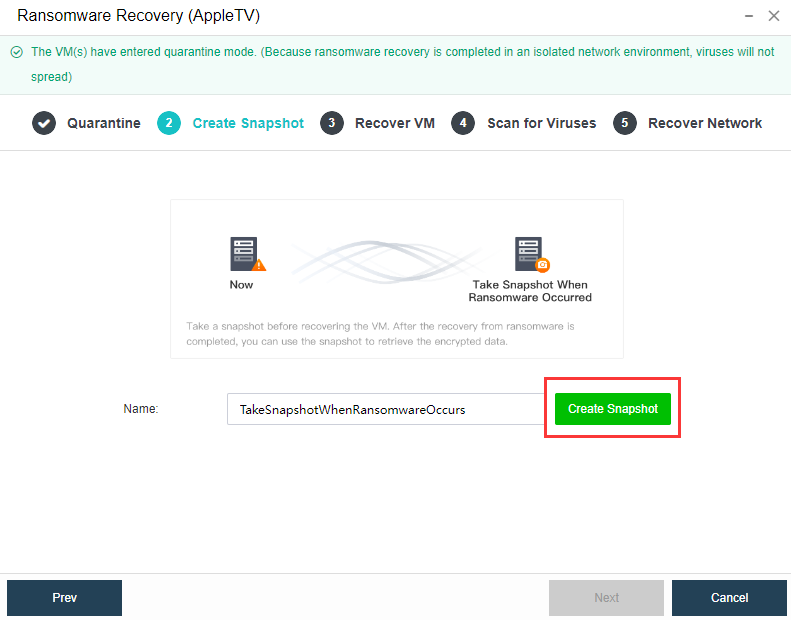
Steps
On the VM Security page, select the target VM and click Ransomware Recovery.
Firstly, it is required to quarantine the virtual machine to prevent the further spread of ransomware to other virtual machines. Click the Quarantine button. After the quarantine is completed, click Next.
Before proceeding to ransomware recovery, click the Create Snapshot button to create a snapshot for the virtual machine. After the recovery from ransomware is completed, you can use the snapshot to retrieve the encrypted data.
After the snapshot is created, click Next to recover the virtual machine. This phase will show all the snapshots of the virtual machine. When the platform has detected the virtual machine’s security agent is abnormal or suspected ransomware virus, a snapshot will automatically create and name SuspectRansomewareSnapshotXXX. Click the Preview button, and the platform will create a new linked clone virtual machine. After the clone is completed, click the Console button to enter the virtual machine to check whether the virtual machine is being encrypted. If the virtual machine isn’t encrypted, click Start Recovery and input the admin password to begin the recovery.
After clicking the OK button, the platform will automatically delete all linked-clone virtual machines created in the previous preview and restores the selected virtual machine snapshot.
After the recovery from the VM snapshot, click Next to enter the Scan for Viruses page. It is recommended to perform a full scan on the recovered virtual machine again. If a security event is detected, it can be dealt with immediately.
For the scanned security events, you can click the Fix, Trust, or Ignore buttons above to handle the security events. After all security events have been addressed, click Next to enter Recover Network.
Before recovering the network, since the current virtual machine data has been restored, to avoid secondary infection, it is recommended to check and confirm the security status of other connected virtual machines is appropriate and then click the Recover Network button. After the network is recovered, the virtual machine will be released from quarantine.