{{ secondMenu.name }}


Description
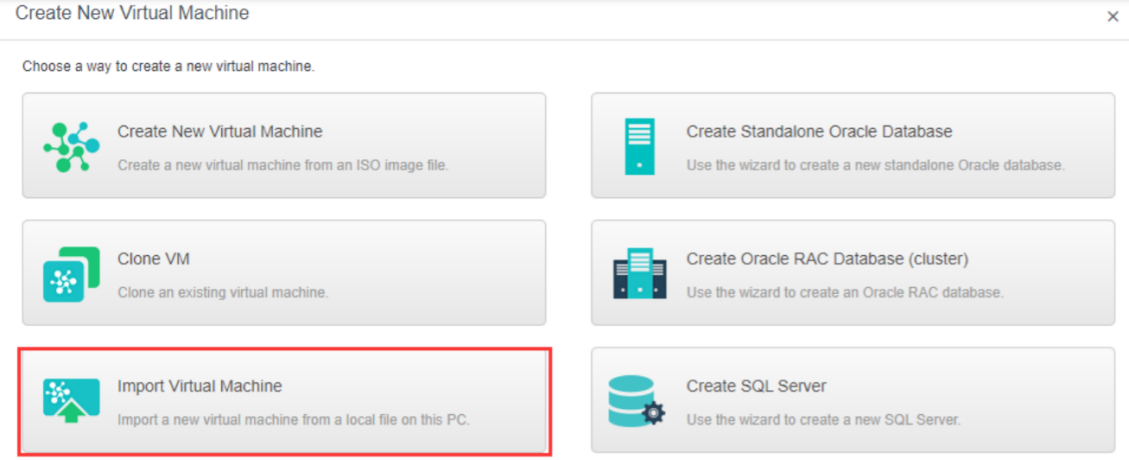
At present, there is a virtualized environment. It is necessary to export the virtual machines in other virtualized platforms into virtual machine files in VMA, OVA, or OVF format and then import them into the HCI platform.
Precautions
Prerequisites
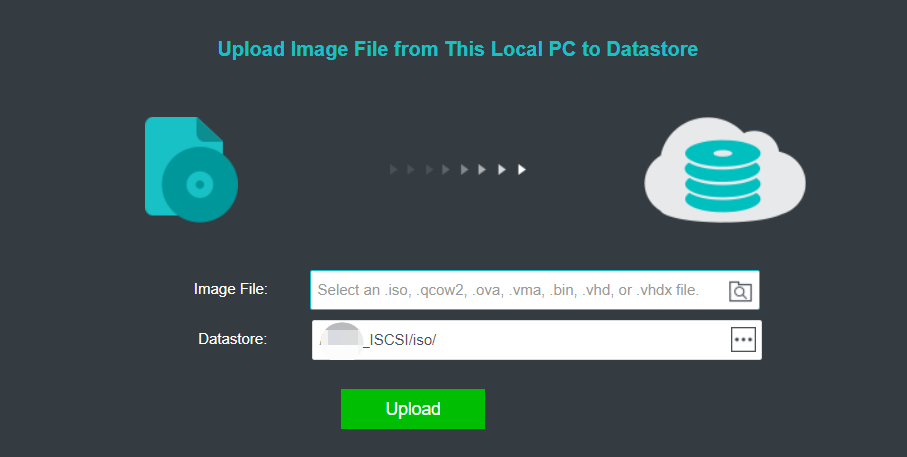
A virtual machine file in VMA, OVA, or OVF format.
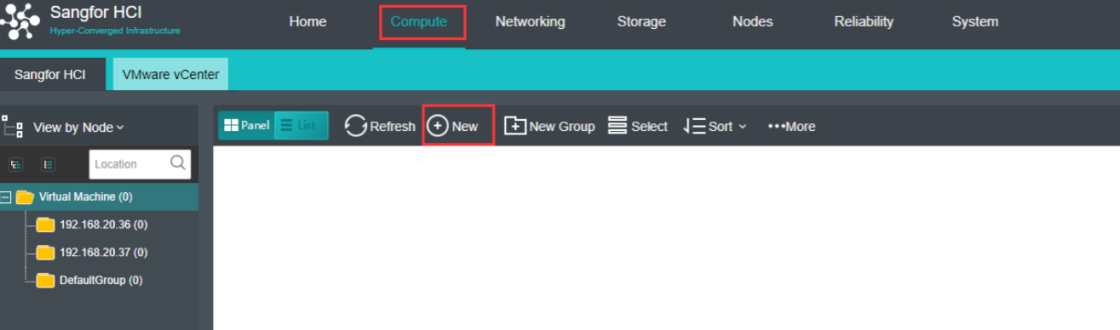
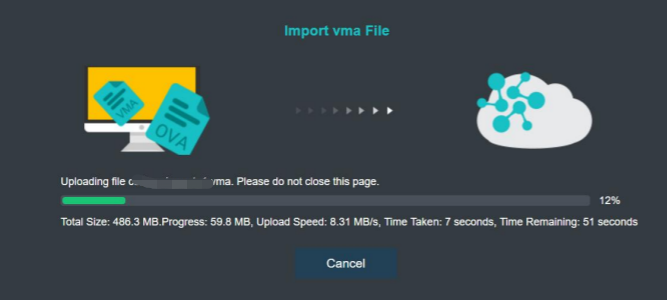
Steps
• Virtual Image Files: Prepared virtual machine images in VMA, OVA, or OVF format.
• Group: Specify a group to which this virtual machine belongs.
• Tag: Specify one or more than one tag for the virtual machine.
• HA: If Migrate to another node if the node fails is selected, the virtual machine will be recovered onto another node in case the node running the VM fails.
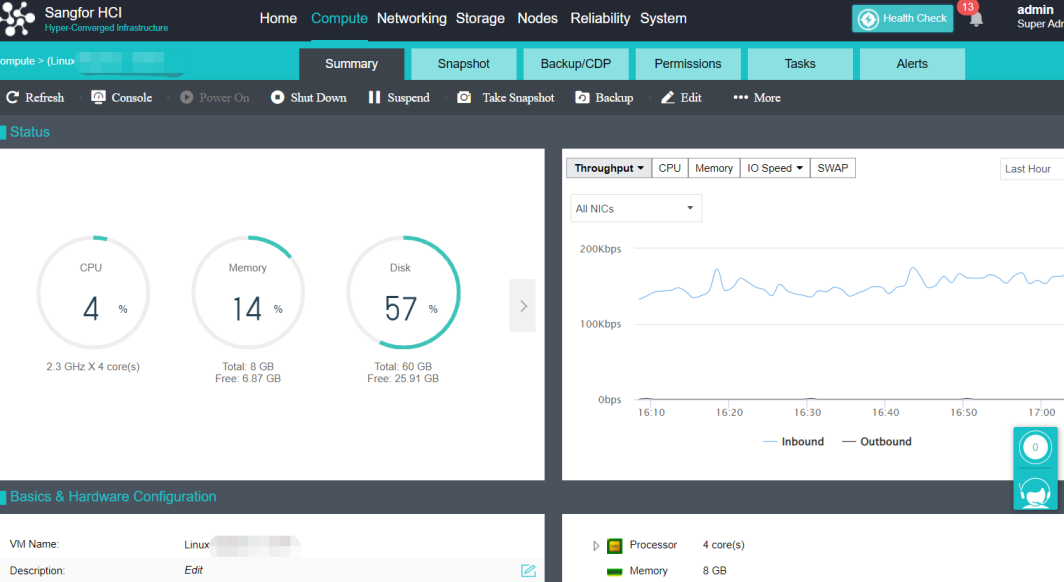
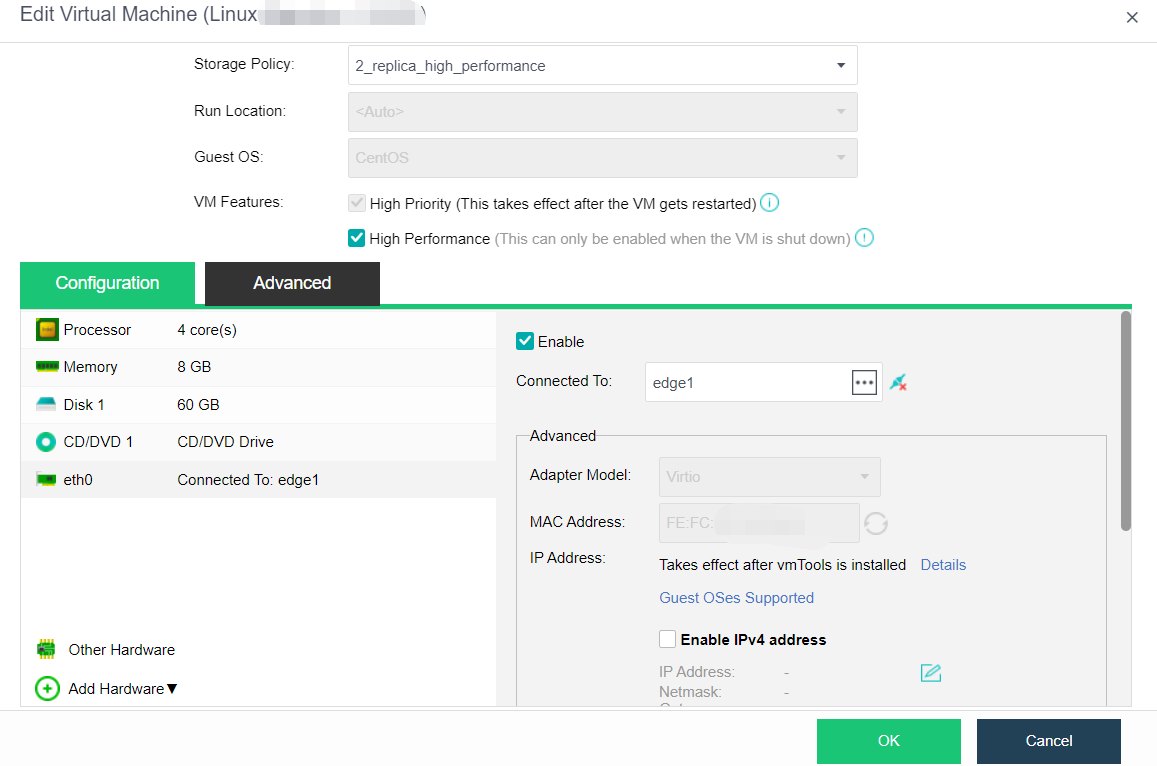
• Datastore: Specifies a datastore to store virtual machines. HA is configurable only when a shared datastore is selected.
• Storage Policy: Specify the number of replication and performances.
• Run Location: The run location specifies which node's CPU and memory resources are used when the virtual machine runs. You can select and specify a host automatically. When the selected storage domain is selected as the run location, or when the selected storage domain is chosen as the run location, it can also be set as the default location.
• OS: Specify an operating system for the virtual machine. The following guest OS is supported: Sangfor, Windows, Linux, Linux distributions, and others. Sangfor operating system is mainly for aCenter software.

 {{ $t('index.defaultHeader.chromeBrowserTip') }}