{{ secondMenu.name }}


Description
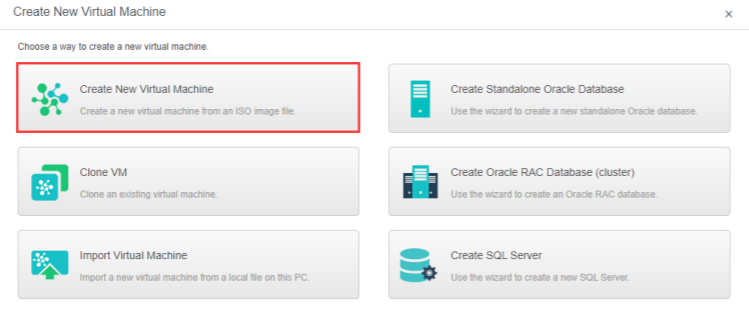
When installing a new business system, you can create a new virtual machine.
Precautions
Prerequisites
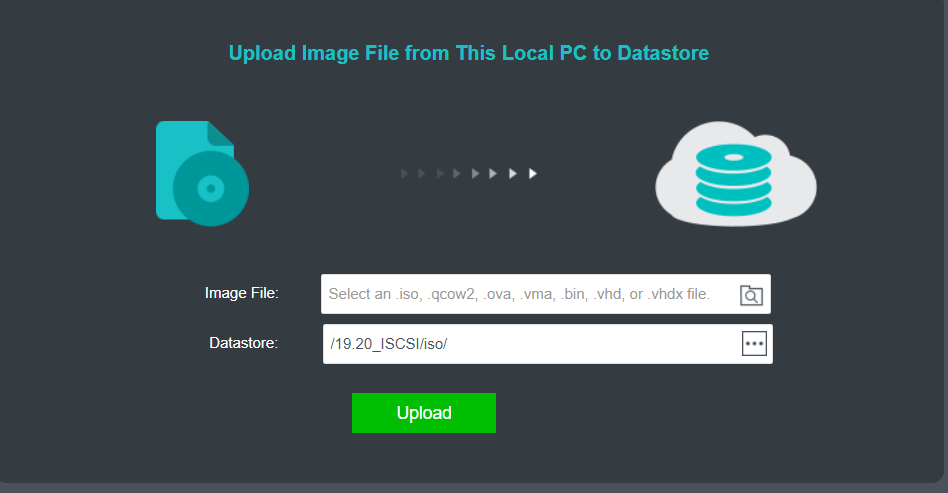
Prepare and upload the operating system image in ISO format to the HCI platform.
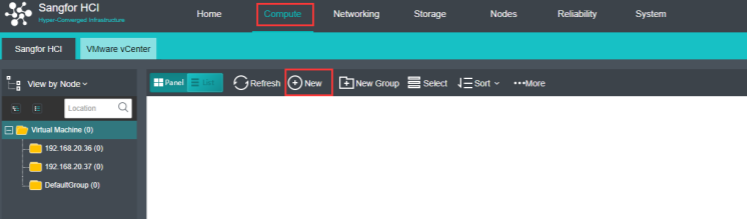
Steps
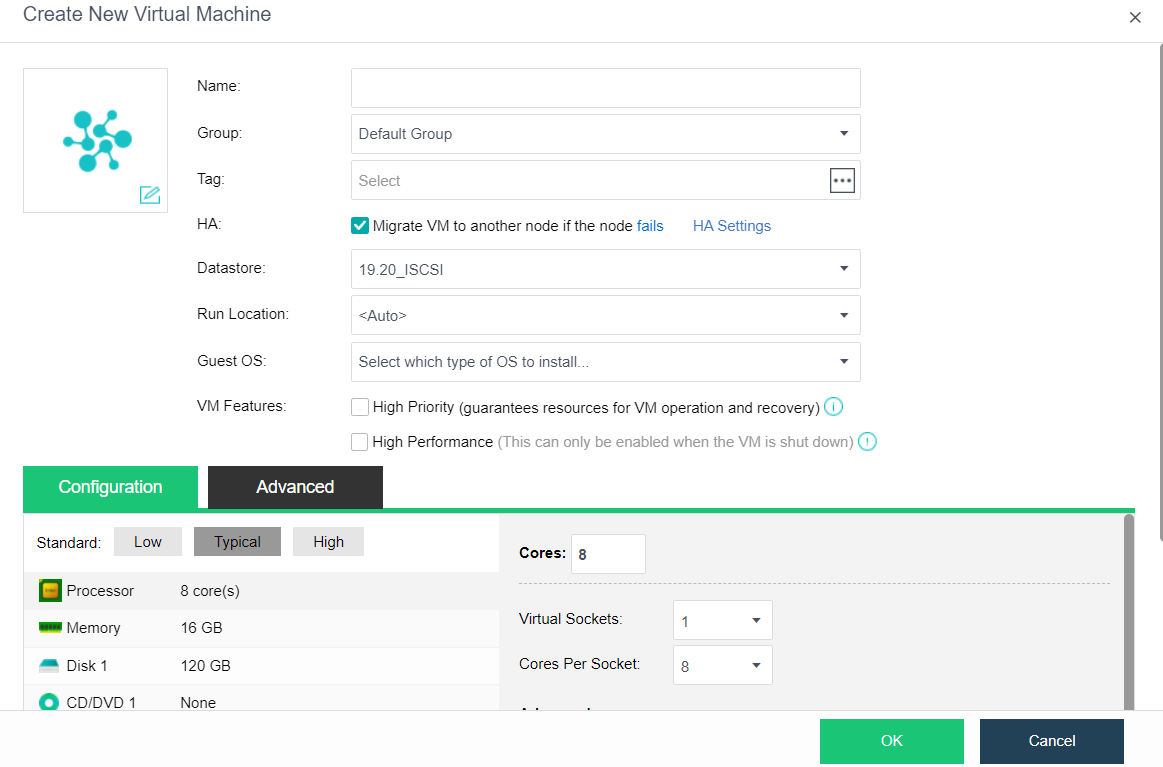
• Name: Specify a distinguishable name for the virtual machine.
• Group: Specify a group to which this virtual machine belongs.
• Tag: Specify one or more than one tag for the virtual machine.
• HA: If Migrate to another node if the node fails is selected, the virtual machine will be recovered onto another node in case the node running the VM fails.
• Datastore: Specifies a datastore to store virtual machines. HA is configurable only when a shared datastore is selected.
• Storage Policy: Specify the number of replication and performances.
• Run Location: The run location specifies which node's CPU and memory resources are used when the virtual machine runs. You can select and specify a host automatically. When the selected storage domain is selected as the run location, or when the selected storage domain is chosen as the run location, it can also be set as the default location.
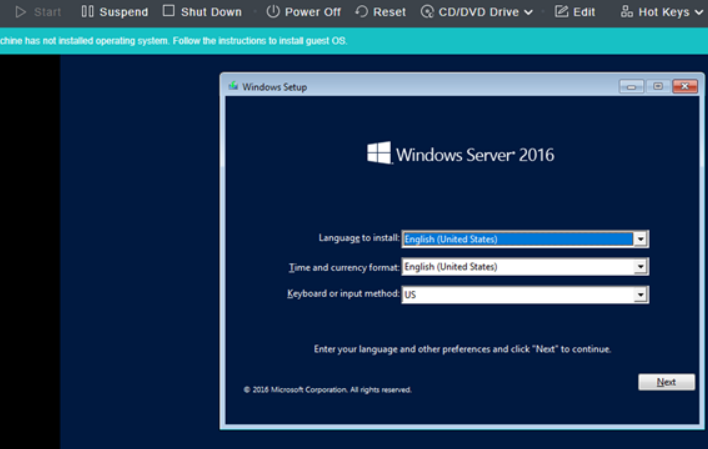
• OS: Specify an operating system for the virtual machine. The following guest OS is supported: Sangfor, Windows, Linux, Linux distributions, and others. Sangfor operating system is mainly for aCenter software.
• High Priority: Once selected, resources will be preferentially allocated to the virtual machine if overall resources are inadequate.
• High Performance: When selected, it is marked as an important virtual machine by default. It enables huge-page memory, uses Host CPU and Para-virtualized clock, and pre-allocating. When deselecting the High Performance, the above-enabled functions need to be turned off manually.
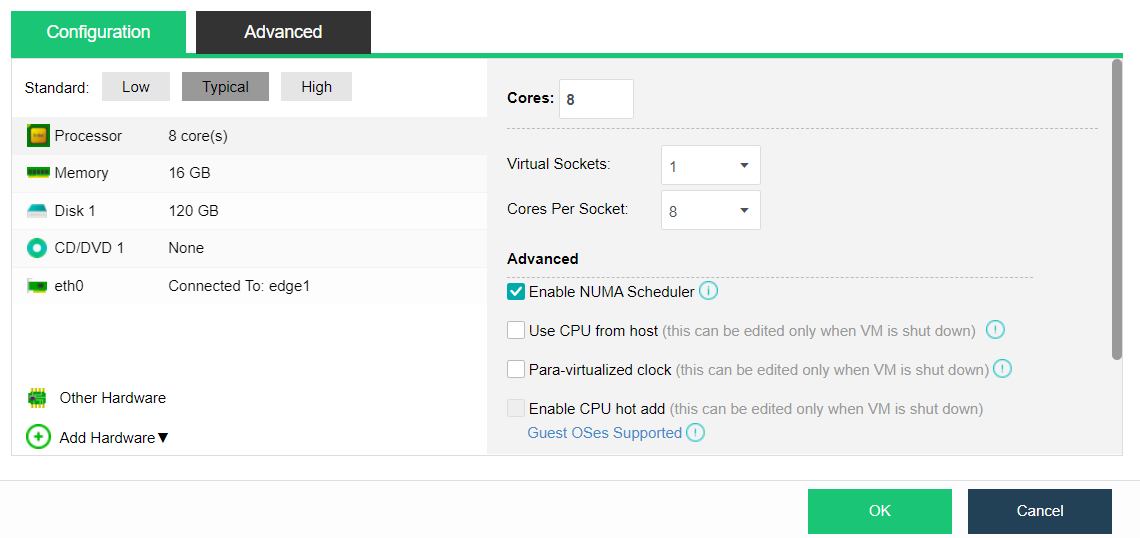
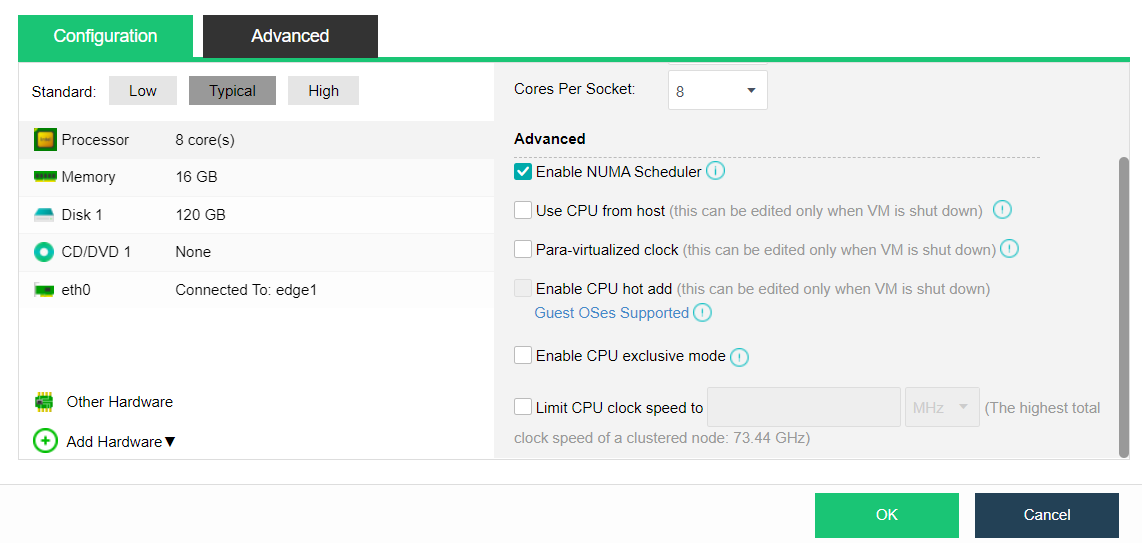
• Total cores = number of virtual slots * number of cores per slot.
• Enable NUMA Scheduler: Once enabled, memory access and VM performance will be enhanced. Navigate to System > Advanced to enable the NUMA scheduler. To project NUMA topology into a virtual machine, ensure that the virtual machine has more than 8 cores and vmTools installed.
• Use CPU from host: Live migration might be affected because of the tight association between the virtual machine and the host CPU.
• Para-virtualized clock: It applies to Windows virtual machines only. It can improve the performance of Windows virtual machines running databases but requires enabling Use CPU from host.
• Enable CPU hot add: Enterprise license is required, and virtual machine vmTools is installed.
• Enable CPU exclusive mode: Once CPU hot-add is enabled, CPU resources can be hot-added manually for the virtual machine.
• Limit CPU clock speed to: Enable to limit the upper limit clock speed used by the virtual machine vCPU. The limit range is 100mhz to 1000ghz. The recommended value will be displayed in the input box when the virtual machine runs for one week.
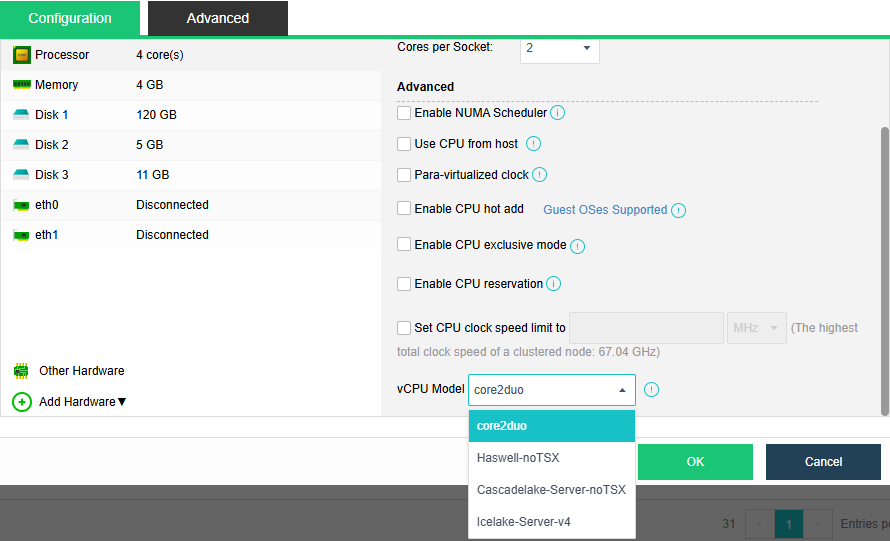
• Enable CPU reservation: VMs with CPU reservation enabled will preferentially get CPU resources when they need them, effectively enhancing their performance during periods of high load. However idle CPU resources of these VMs can also be used by other VMs. 80% of node CPU cores are reserved by default. You can go to System > Cluster Settings to set CPU reservation ratios.
• vCPU Model: Supports selecting core2duo or Haswell, a new instruction set added in HCI 6.10.0 to meet the business needs of users, such as installing the operating system Red Hat Enterprise Linux 9 and higher, or using the application K8s. You can go to System > Advanced > Default CPU Model to select the default instruction set for the cluster to be used by newly created VMs.
• Enable huge-page memory: Turning on huge-page memory for a specific application can improve the virtual machine's performance, but turning on this option will lead to memory pre-allocation of the virtual machine. After enabling huge-page memory, the memory recovery mechanism of the virtual machine will be turned off, prioritizing memory use and improving business performance.
• Enable memory hot add: Once memory hot-add is enabled, memory resources can be hot added manually for the virtual machine.
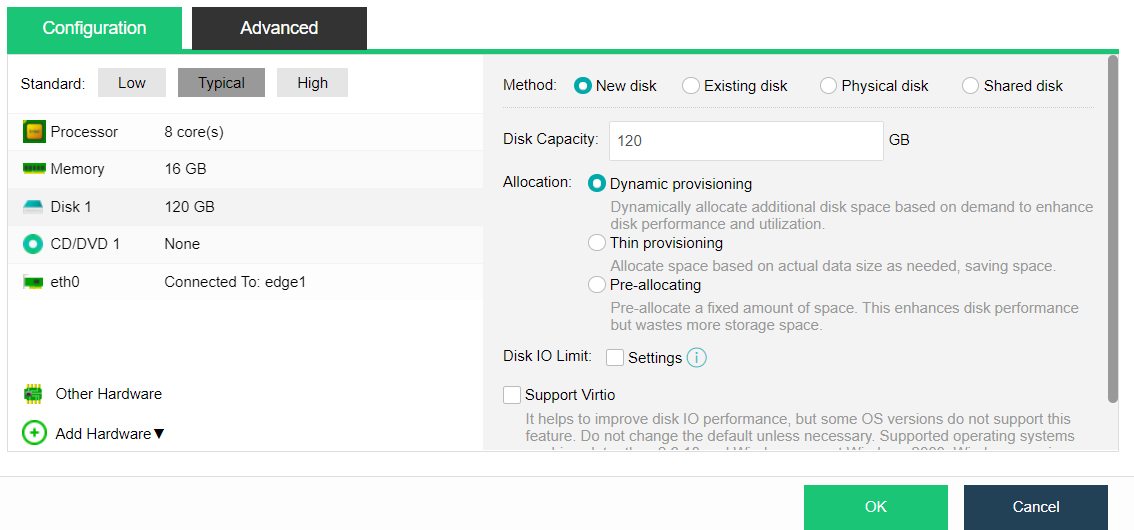
New disk
• Dynamic provisioning: Allocate space based on pre-allocated space and actual demands to enhance disk performance and utilization. The maximum capacity is 8T.
• Thin Provisioning: Allocate space based on actual data size as needed, saving space with a maximum capacity of 63T.
• Pre-allocating: Pre-allocate a fixed amount of space, enhancing disk performance but wasting more storage space., with a maximum capacity of 4T.
• Disk IO limit: This value indicates the upper limit of disk IO that the virtual machine can occupy, configurable read/write speed, and read/write times limit. The maximum read/write speed limit range is 128KB/s-102400mb/s, and the maximum read/write times range is 16 to 2147483647. The recommended value will be displayed in the input box when the virtual machine runs for one week.
• Support Virtio: It helps to improve Disk IO performance, but some versions do not support this feature. Do not change the default unless necessary, which may cause the disk to be missing when installing the system. It is recommended not to change the default setting.
• Space Reclamation: If this option is selected, the occupied storage space will be released immediately when a file is deleted from the disk. This option does not apply to Integrated Drive Electronics (IDE) disks. In addition, this option can be enabled only when the operating system supports the discard function. The following table lists the test results on different operating systems, indicating that the discard function is supported by Windows Server 2012/Windows 8 and later and Linux kernel 4.18 and later.
| Distribution |
System Version |
Kernel Version |
ext3 |
ext4 |
XFS |
JFS2 |
Btrfs |
| CentOS |
CentOS 7.9.2009 (not supported) |
3.10 |
Failed |
Failed |
Failed |
N/A |
N/A |
| CentOS 8.0.1905 |
|
Failed |
Failed |
Failed |
N/A |
N/A |
|
| CentOS 8.1.1911 |
4.18 |
Passed |
Passed |
Passed |
N/A |
N/A |
|
| CentOS 8.2.2004 |
4.18 |
Passed |
Passed |
Passed |
N/A |
N/A |
|
| CentOS Stream 8 |
|
Passed |
Passed |
Passed |
N/A |
N/A |
|
| CentOS 8.3.2011 |
4.18 |
Passed |
Passed |
Passed |
N/A |
N/A |
|
| Red Hat |
RHEL 8.0 |
|
Failed |
Failed |
Failed |
N/A |
N/A |
| RHEL 8.1 |
|
Passed |
Passed |
Passed |
N/A |
N/A |
|
| RHEL 8.2 |
|
Passed |
Passed |
Passed |
N/A |
N/A |
|
| RHEL 8.3 |
|
Passed |
Passed |
Passed |
N/A |
N/A |
|
| RHEL 8.4 |
|
Passed |
Passed |
Passed |
N/A |
N/A |
|
| Ubuntu |
Ubuntu 18.04.6 LTS |
4.15 |
Passed |
Passed |
N/A |
N/A |
N/A |
| Ubuntu-18.04.4-desktop |
2.6.24 |
Failed |
Failed |
N/A |
N/A |
N/A |
|
| Ubuntu-16.10-server |
4.8.0 |
Failed |
Failed |
N/A |
N/A |
N/A |
|
| Ubuntu 20.04 LTS |
5.4 |
Passed |
Passed |
Passed |
N/A |
N/A |
|
| Ubuntu 21.04 |
|
Passed |
Passed |
N/A |
N/A |
N/A |
| Distribution |
System Version |
FAT32 |
NTFS |
HPFS |
ReFS |
| Desktop |
Windows 7 |
Failed |
Failed |
N/A |
N/A |
| Windows 8 |
Failed |
Passed |
N/A |
N/A |
|
| Windows 8.1 |
Failed |
Passed |
N/A |
N/A |
|
| Windows 10 |
Failed |
Passed |
N/A |
N/A |
|
| Windows 10.1909 |
Failed |
Passed |
N/A |
N/A |
|
| Windows 10.2004 |
Failed |
Passed |
N/A |
N/A |
|
| Windows 10.20H2 |
Failed |
Passed |
N/A |
N/A |
|
| Windows 11 |
Failed |
Passed |
N/A |
N/A |
|
| Server |
Windows Server 2008 R2 |
Failed |
Failed |
N/A |
N/A |
| Windows Server 2012 |
Failed |
Passed |
N/A |
N/A |
|
| Windows Server 2012 R2 |
Failed |
Passed |
N/A |
N/A |
|
| Windows Server 2016 |
Failed |
Passed |
N/A |
Failed |
|
| Windows Server 2019 build 17763 |
Failed |
Passed |
N/A |
Failed |
|
| Windows Server 2019 |
Failed |
Passed |
N/A |
Failed |
![]()
1.For Windows VM, support for both the original disk and expanded disk.
2.For Linux VM, the existing disks are prohibited to enable space reclamation. For new disk expansion, discard must be added when mounting the disk:
3.mount -O discard /dev/vdb1 /test (italics are custom variable)
4.For new Linux VM, the system disk is prohibited to enable space reclamation. For data disk, discard must be added when mounting the disk:
5.mount -O discard /dev/vdb1 /test (italics are custom).
6.Only support VM running on virtual storage with 3 nodes and above.
7.Does not support pre-allocation provisioning virtual disk.
• Advanced setting: Stripe Width: refers to the number of stripes that can be read or written simultaneously. This number is equal to the number of physical hard disks used by a virtual machine simultaneously. This is to set the stripe number of a single disk of a single virtual machine. It is recommended to use the default setting.
![]()
After cluster initialization, the striping function is enabled by default. To ensure optimal I/O performance, the default stripe width will not exceed the number of data disks on any physical node in the virtual datastore. When upgrading from version 5.8.6 or below to version 5.8.6 or above, the virtual machine created before upgrading does not have the striping function by default. If you need to use the striping function, you need to clone one of the virtual machines created before upgrading and using the cloned virtual machine.
Existing disk
Use the disk image file of the virtual machine created earlier, such as the qcow2 format file.
Physical Disk
Mount the physical disk directly to the virtual machine to use.
Shared Disk
Select the existing shared disk, which is generally used to deploy Oracle RAC and other applications that need the shared disk.
Shared virtual disks of VMs created through the Oracle RAC Wizard must be on the same LUN. Those on different LUNs can be added when editing VMs.
• Adapter model: Virtio by default.
• MAC address: Set the MAC address of the NIC and keep it automatically obtained or manually specified.
• IPv4 setting: Set the IPv4 address of the NIC. Only some operating systems are supported. The supported operating systems can be viewed on the platform page, and the virtual machine can take effect only after the performance vmToolsis installed. After setting, you need to wait one minute before it takes effect.
• IPv6 setting: Set the IPv6 address of the NIC. Only some operating systems are supported. The supported operating systems can be viewed on the platform page, and the virtual machine can take effect only after the performance vmToolsis installed. After setting, you need to wait one minute before it takes effect.
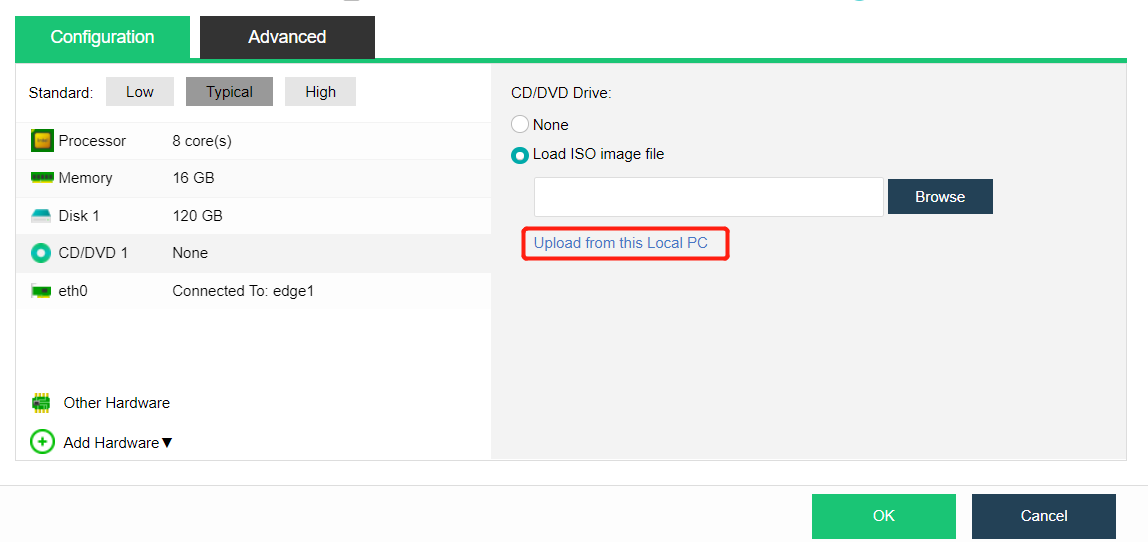
There are two ways to enter the upload interface, Image File and Datastore.
• Image File: An ISO format image prepared in advance.
• Datastore: The datastore where the image is stored.

 {{ $t('index.defaultHeader.chromeBrowserTip') }}