{{ secondMenu.name }}


Description
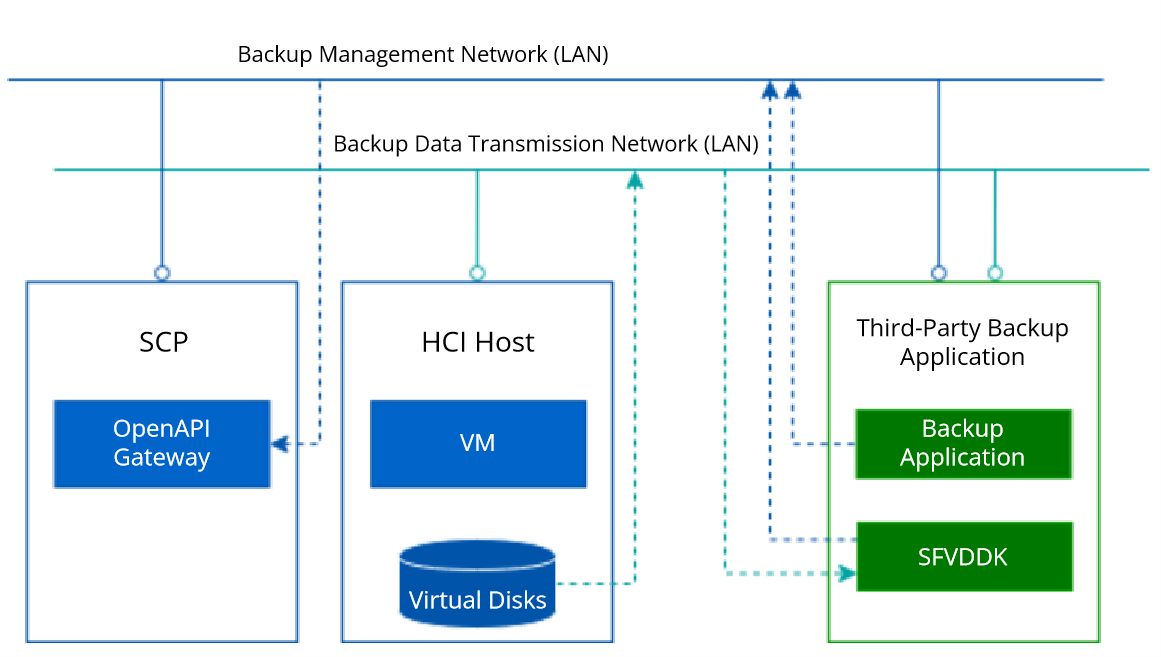
By using the OpenAPI and disk data provided by Sangfor SCP and Sangfor HCI to access Sangfor Virtual Disk Development Kit (SFVDDK), third-party backup applications can configure VMs on SCP and their disks and manipulate disk data to enable agentless VM backups and recovery, without installing plugins on SCP or VMs.
SFVDDK is a development kit consisting of SDKs and APIs written in the C programming language for accessing virtual disk files on SCP. Its APIs cover basic operations such as opening, closing, reading, and writing to virtual disk files. SFVDDK accesses virtual disk data of VMs in LAN through Network Block Device (NBD) or NBDSSL protocols. The NBD protocol uses the storage on the remote host as a block device, and the NBDSSL protocol uses SSL to encrypt all the data transmitted through TCP with a high level of security.
SCP provides management of basic compute, network, and storage resources, including snapshots, backups, and other resources relevant to agentless backups, so that third-party users can standardize the management and operation and maintenance of SCP through existing APIs. The APIs are all Representational State Transfer (REST) APIs that can be called by HTTPS requests.
Prerequisites
Precautions
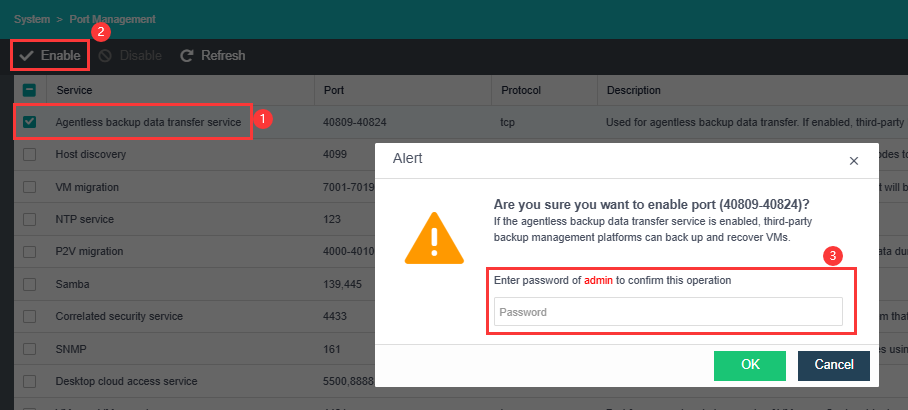
Steps
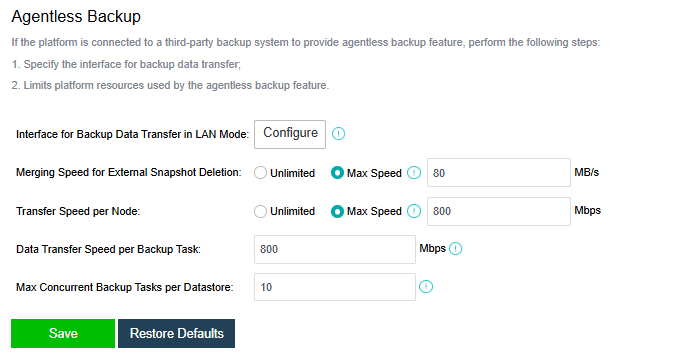
• Interface for Backup Data Transfer in LAN: Used for backup data transfer between a third-party backup system and the HCI node. The management interface is used by default. You can also select an idle interface or reuse other interfaces. The network connection between the backup data transfer interface and the third-party backup system must be normal; otherwise, backup tasks will fail.
• Merging Speed for External Snapshot Deletion: Used to configure a maximum merging speed for external snapshot deletion to reduce the impact of data merging on the VM services. The default value is recommended.
• Transmission Speed per Node: Used to configure a maximum network bandwidth for agentless backups. Other interfaces (such as the management interface) of HCI nodes can be reused as the backup data transfer interface. If the maximum transmission speed is not specified, the backup transfer may consume too many network resources, affecting the network performance of other services.
• Data Transfer Speed per Backup Task: Used to configure the maximum network bandwidth for agentless backups to read disks through SFVDDK, and here limits the data transfer speed for a single backup task. The default value is recommended.
• Max Tasks per Datastore: Used to configure the number of disks that can be concurrently backed up on a single datastore, and here limits the storage IO usage by agentless backups to reduce the impact of third-party backup applications on other services. You can configure this item as needed.
When deploying the network, make sure that the third-party backup application can access HCI to connect to OpenAPI, and that the third-party backup application is connected to the backup data transmission interface of the HCI node for SFVDDK to access the VM disk data.
Prerequisites for Network Deployment
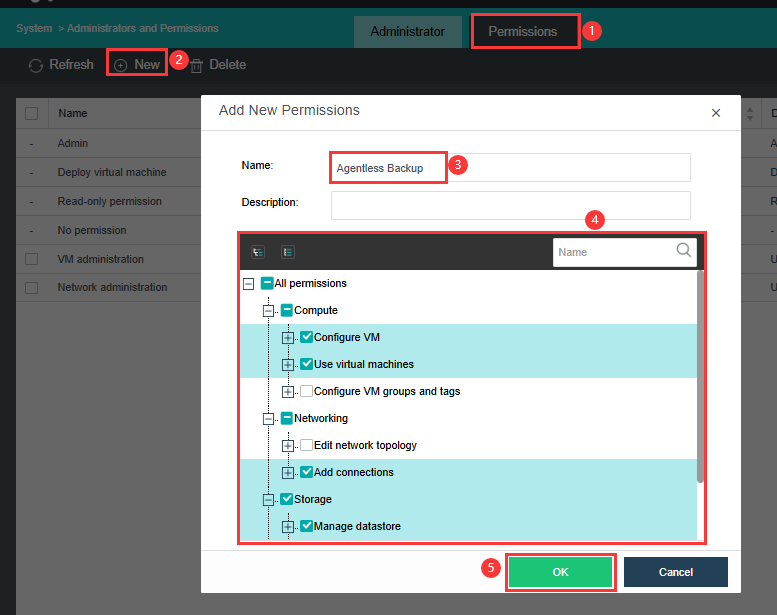
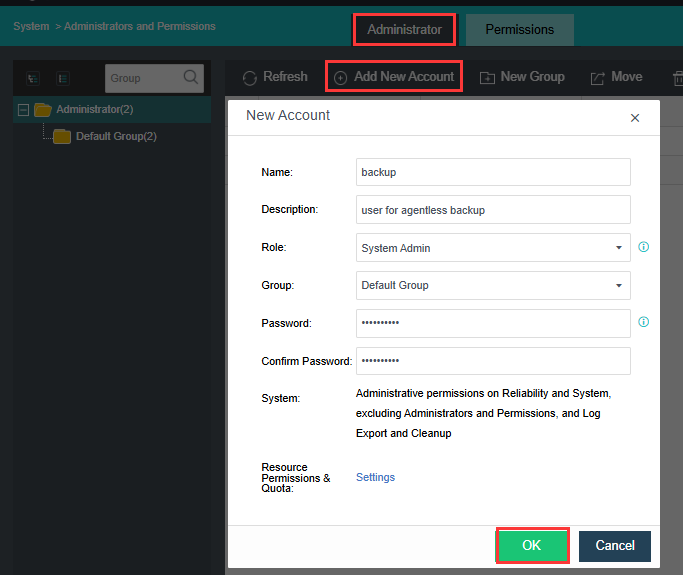
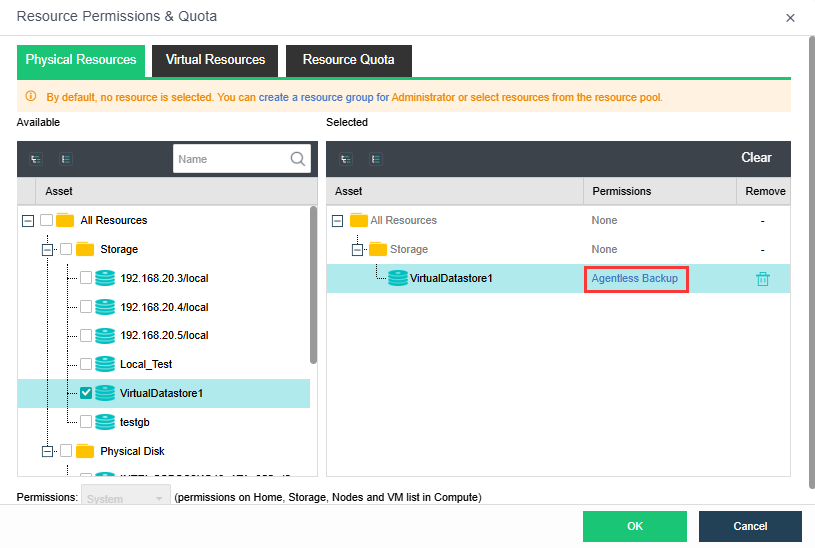
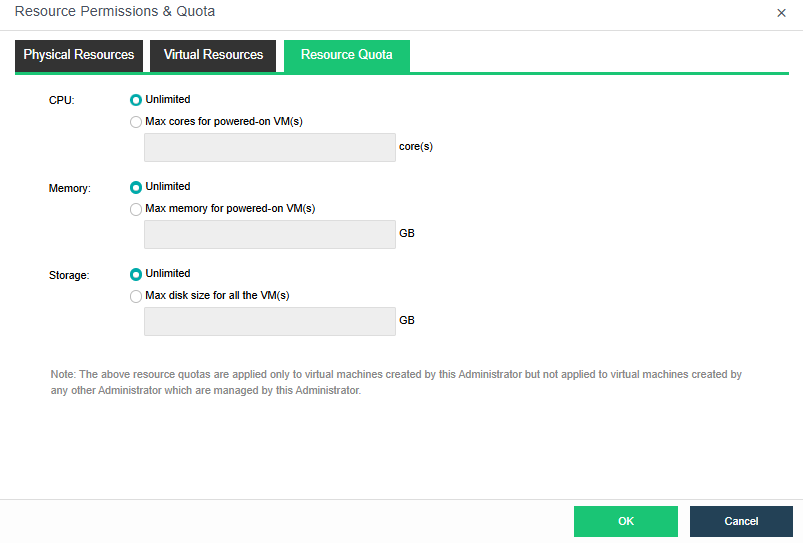
Steps for Account Creation
• Configure VM and Use virtual machine of Compute to perform operations on VMs using the agentless backup account.
• Edit network topology of Networking to connect VMs to virtual network devices such as switches using the agentless backup account.
• Manage datastore of Storage to add and delete datastores using the agentless backup account.
• Access disks of Disk to mount disks for VMs using the agentless backup account.


 {{ $t('index.defaultHeader.chromeBrowserTip') }}