{{ secondMenu.name }}


A role is an intermediate that builds a connection between user/group and resource, more specifically, designates internal resources to user or group. Users can only access the designated internal resources over SSL VPN. This kind of association enables one or multiple users or groups to associate with one or multiple resources, facilitating control over users’ access to corporate resources. Navigate to SSLVPN > Roles, and the Roles page appears, as shown below:
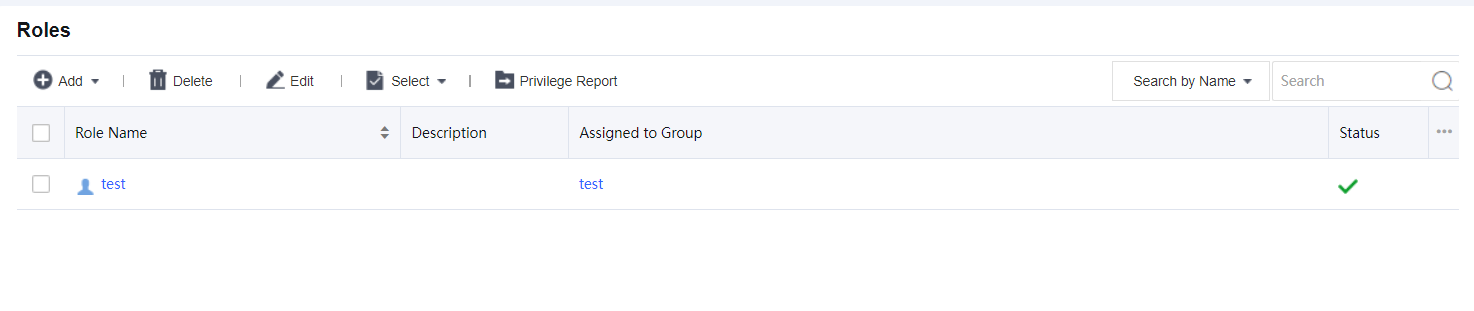
The following are some contents included on the Role Management page.
Search by Name/Description/User (Group): To search for a specific role or type of role, select an option, enter the keyword into the textbox, and click the magnifier icon.
Name/description indicates the name/description of the role. User/group indicates the user and/or group that the role is assigned.
Role Name: Indicates the name of the role.
Description: Indicates description of the role.
Add: Click it to add a new role directly or use an existing role as a template.
Edit: Click it to edit a selected role.
Delete: Click it to remove the selected role(s).
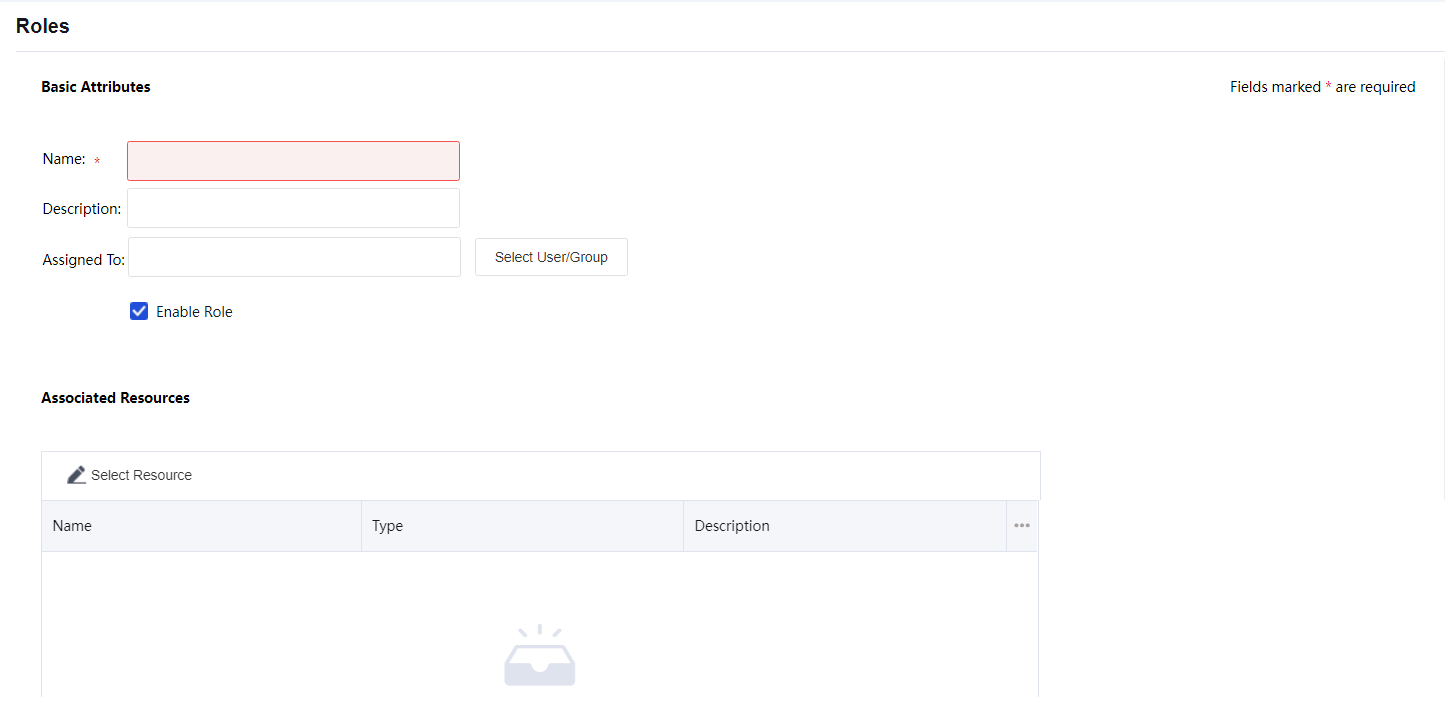
Name: Configures name of the role.
Description: Configures description of the role.
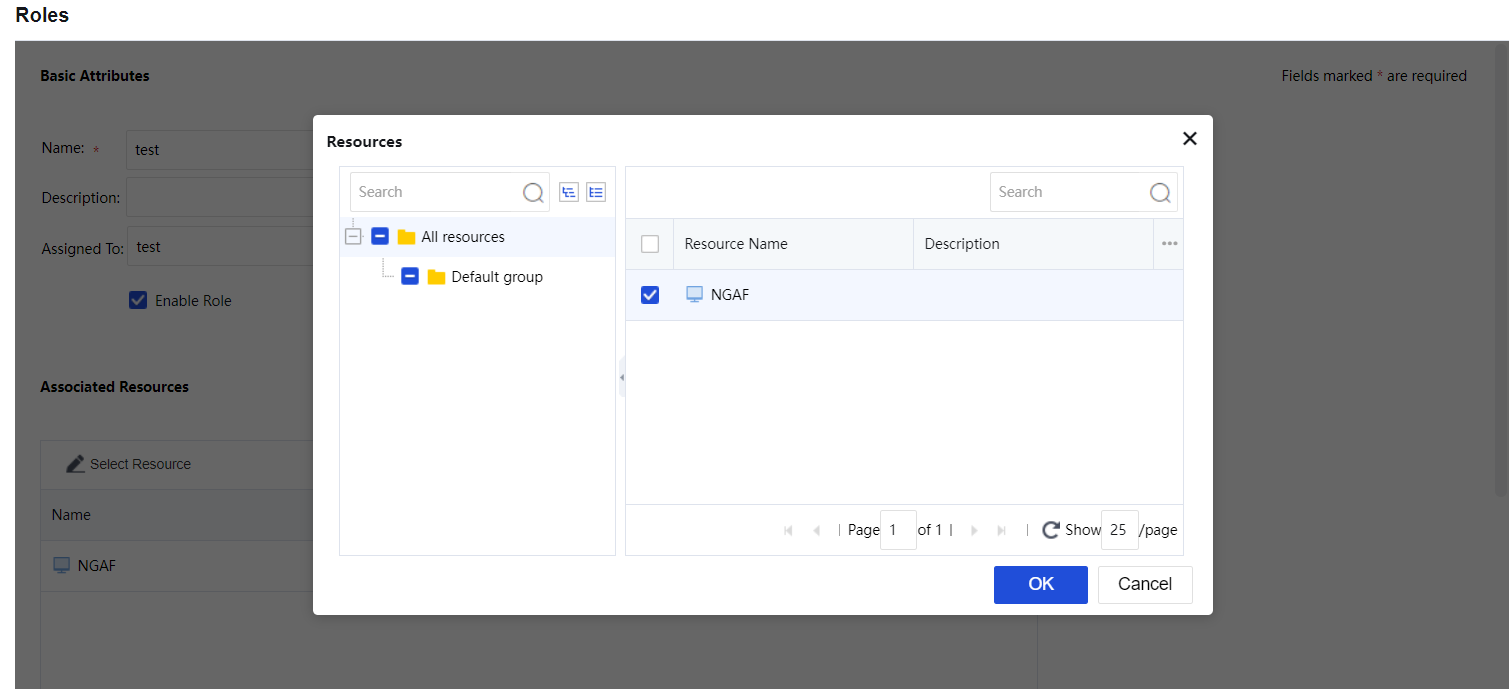
Assigned To: Configures the user and/or group that can access the associated resources.
To specify user and group, click the Select User/Group button, and all the predefined users and groups on the User Management page are seen in the list, as shown below:
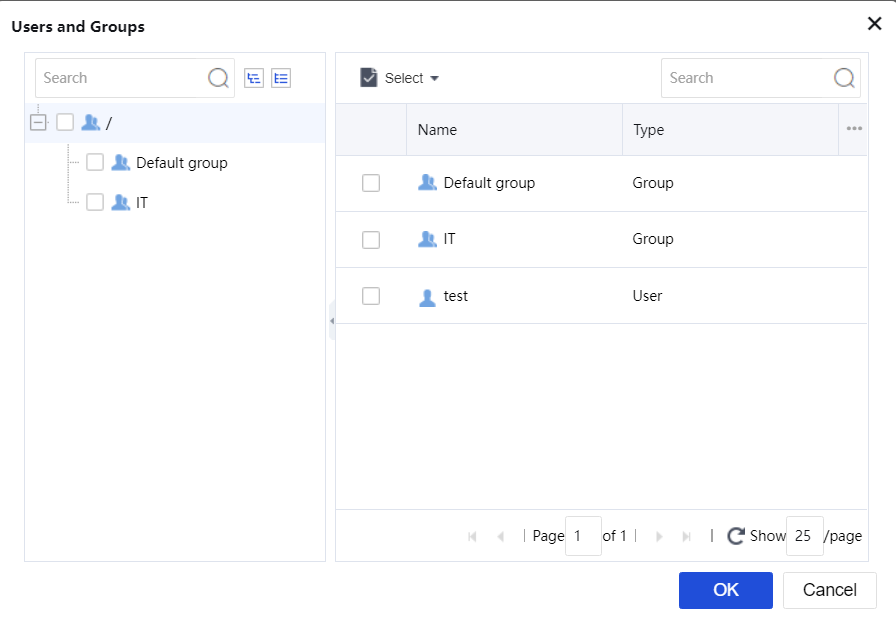
Select the user or group to which the role is to be assigned and click the OK button.
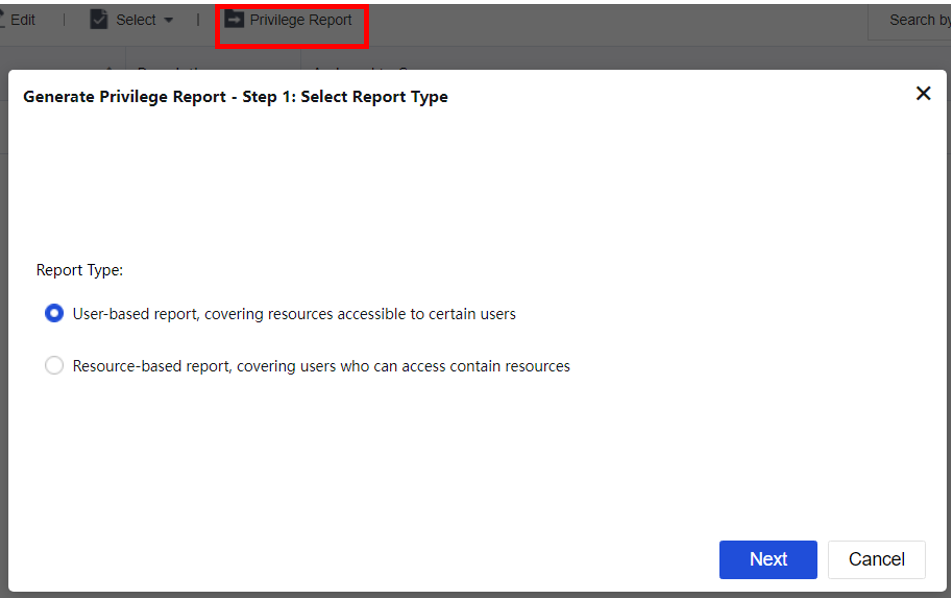
Generate Privilege Report is generated to view resources accessible to certain users as follows:
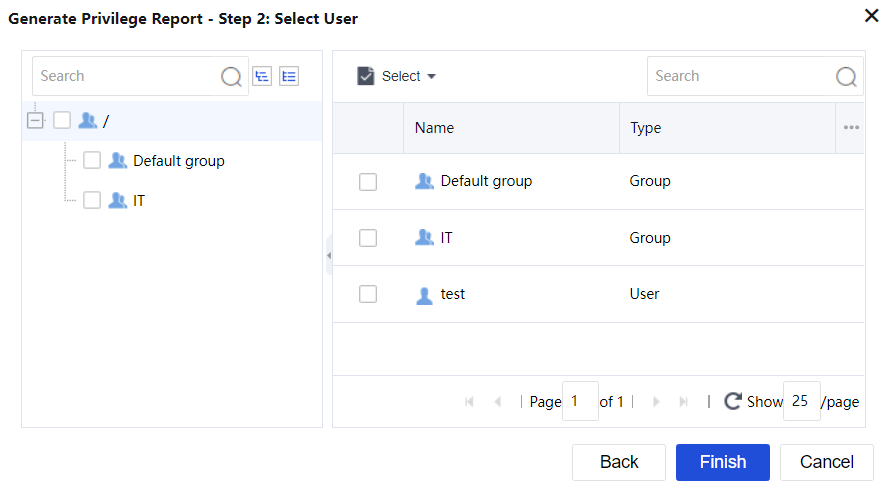
Click Next to select a user as shown below and click Finish to download the generated CSV file.

 {{ $t('index.defaultHeader.chromeBrowserTip') }}