{{ secondMenu.name }}


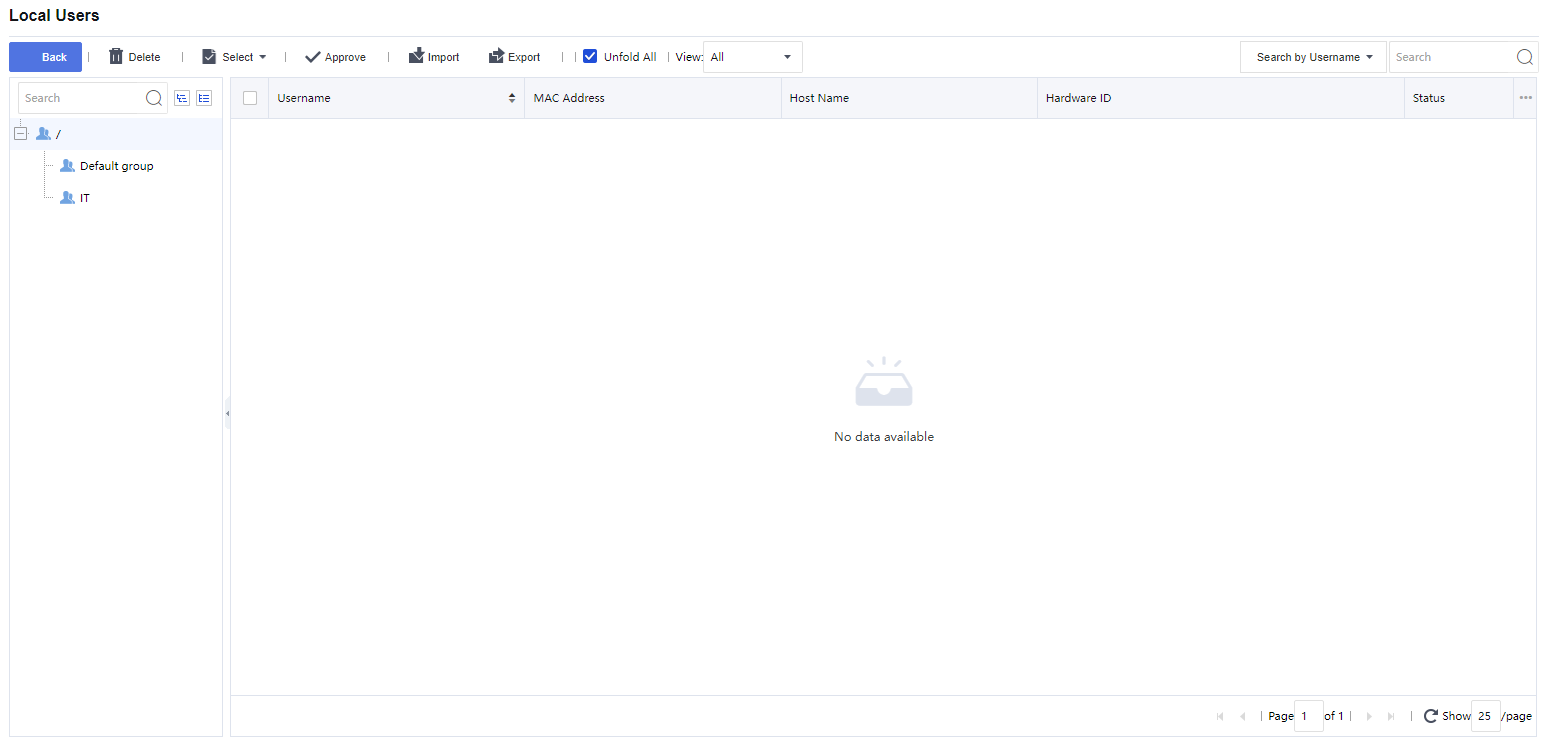
Users and groups are managed in a hierarchic structure. The users with similar attributes could be classified into a further included group in another higher-level user group. This kind of management is similar to and compatible with the interior organization structure of an enterprise, facilitating the management of VPN users. The Local Users page is shown below:
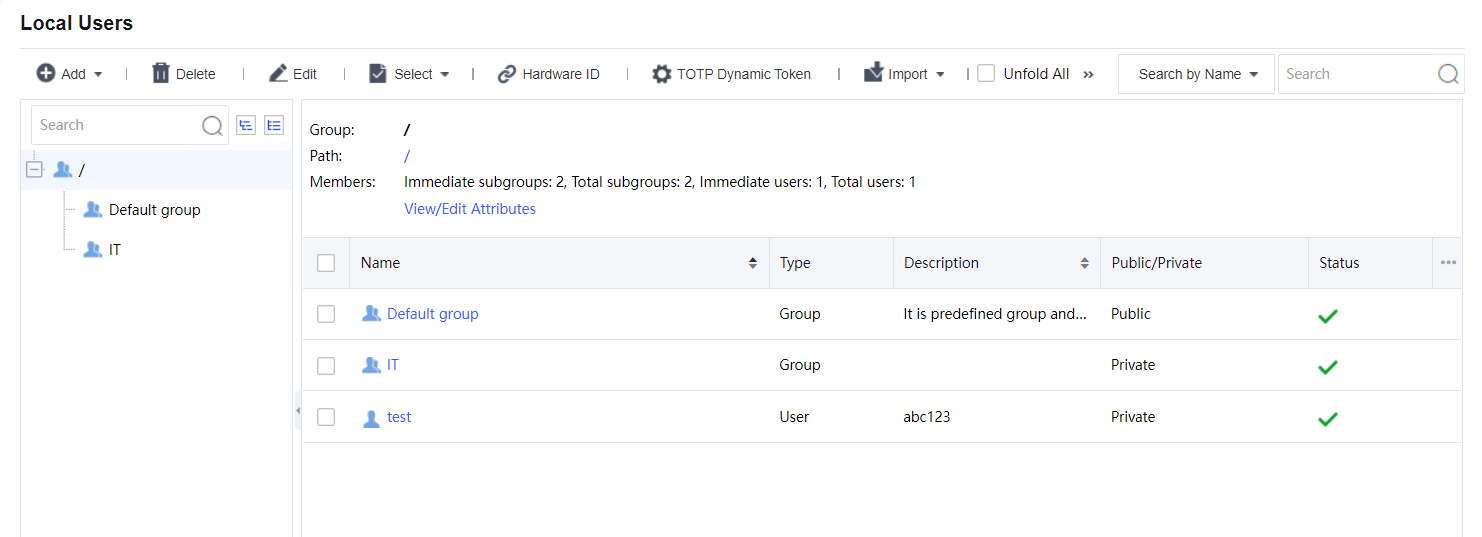
In the left pane, there is a tree of user groups. Click on a group name, and the subgroups and direct users of that group will be seen in the right pane, with group information (Group, Location, number of members) displaying above the right pane.
To search for a group, enter the keyword of the group name into the Search fielding the left pane and click the magnifier icon. The group will be highlighted in bold if found.
To see all direct and indirect users of the selected group, click Unfold All.
To delete the selected user or group, click Delete.
To choose the desired entries, click Select > Current page or All pages.
To deselect entries, click Select > Cancel.
To edit the attributes of a user or group, select the user or group and click Edit to enter the Edit User or Edit User Group page.
Step 1.Click Add > Group to enter Add User Group page, as shown in the figure below:
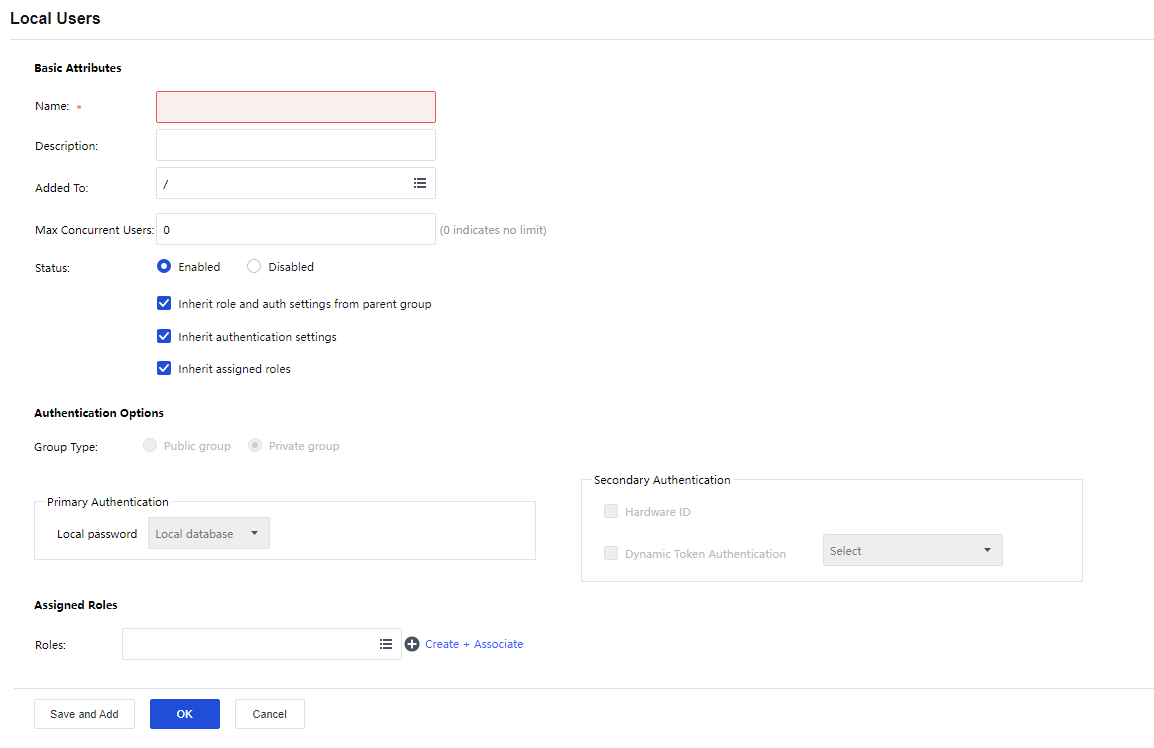
Step 2.Configure Basic Attributes of the user group. The following are basic attributes:
Name: Enter a name for this user group. This field is required.
Description: Enter a brief description for this user group.
Added To: Select the user group to which this user group is added.
Max Concurrent Users: Indicates the maximum number of users in this group that can concurrently access SSL VPN.
Status: Indicates whether this user group is enabled or not. Select Enabled to enable this group; otherwise, select Disabled.
Inherit role and authentication settings: Select the checkbox next to it, and this user group will inherit the attributes such as the roles and authentication settings.
Inherit authentication settings: Select the checkbox next to it, and this user group will inherit the authentication settings of its parent group.
Inherit assigned roles: Select the checkbox next to it, and the current user group will inherit the assigned roles of its parent group.
Step 3.Configure Authentication Settings:
Group Type: Specifies the type of this user group, Public group, or Private group.
Public group: Indicates that multiple users can use any user account in this group to log in to the SSL VPN concurrently.
Private group: Indicates that multiple users who log in to the SSL VPN concurrently can use none of the user accounts. If a second user uses a user account to connect to SSL VPN, the previous user will be forced to log out.
Primary Authentication: Indicates the authentication method(s) that is (are) firstly applied to verify users when they login to the SSL VPN. If any secondary authentication method is selected, primary authentication will be followed by secondary authentication when the users log in to the SSL VPN. By default is a Local password.
Local password: The connecting users need to pass local password-based authentication using the SSL VPN account in this user group.
Secondary Authentication: Secondary authentication is optional and supplementary authentication method. Select it to require the connecting users to submit the corresponding credentials after passing the primary authentication(s), adding security to SSL VPN access.
Hardware ID: This is the unique identifier of a client-end computer. Each computer is composed of some hardware components, such as NIC, hard disk, etc., which are unquestionably identified by their features that cannot be forged. SSL VPN client software can extract the features of some terminal hardware components and generate the hardware ID consequently. This hardware ID should be submitted to the Sangfor device and bound to the corresponding user account. Once the administrator approves the submitted hardware ID, the user will be able to pass hardware ID-based authentication when accessing SSL VPN through a specified terminal(s). This authentication method helps to eliminate potential unauthorized access. As mentioned above that multiple users could use the same user account (public user account) to access SSL VPN concurrently. It is reasonable that a user account may bind to more than one hardware IDs. That also means an end-user can use one account to log in to SSL VPN through different endpoints, as long as the user account is binding to the hardware IDs submitted by the user from those endpoints.
Step 4.Assign Roles to a user group.
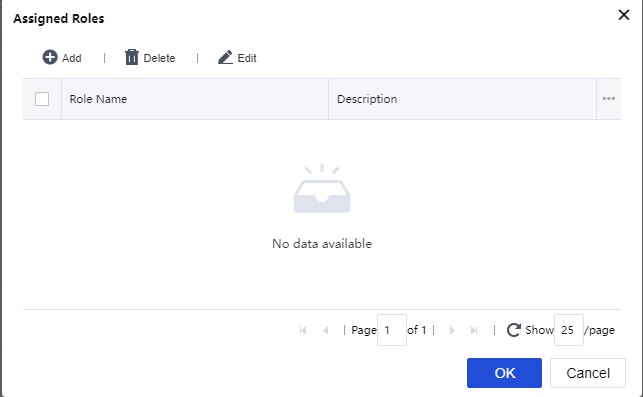
Click on the Roles field to enter the Assigned Roles page, as shown below:

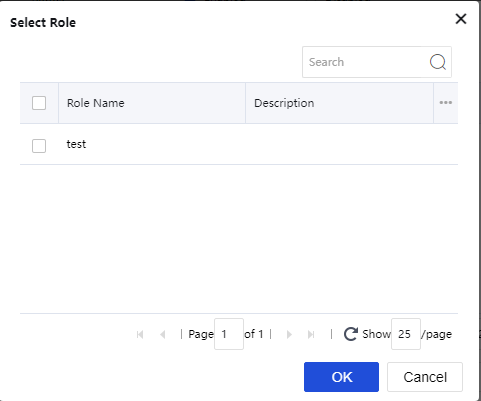
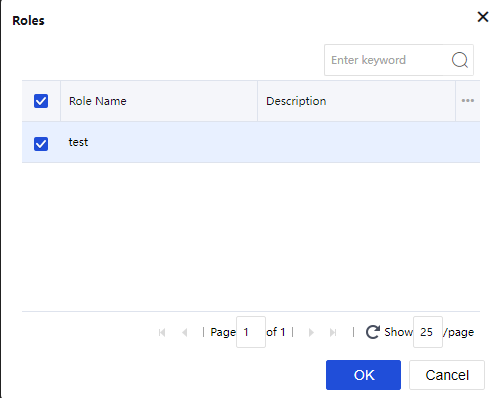
Click Add to enter the Select Role page, as shown below:
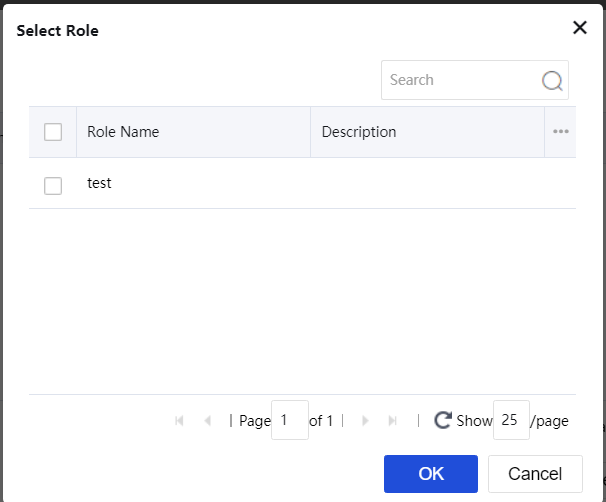
Select the checkbox next to the desired roles and click the OK button. The roles are added to the Assigned Roles page.
Click the OK button and name the assigned roles filled in the Roles field.
If the desired role is not found in the list, click Create + Associate to create a new role and associate with the user group. (The procedures of creating a role are the same as that in the Roles Adding section).
To remove a role from the list, select the role and click Delete.
To edit a role, select the role and click Edit.
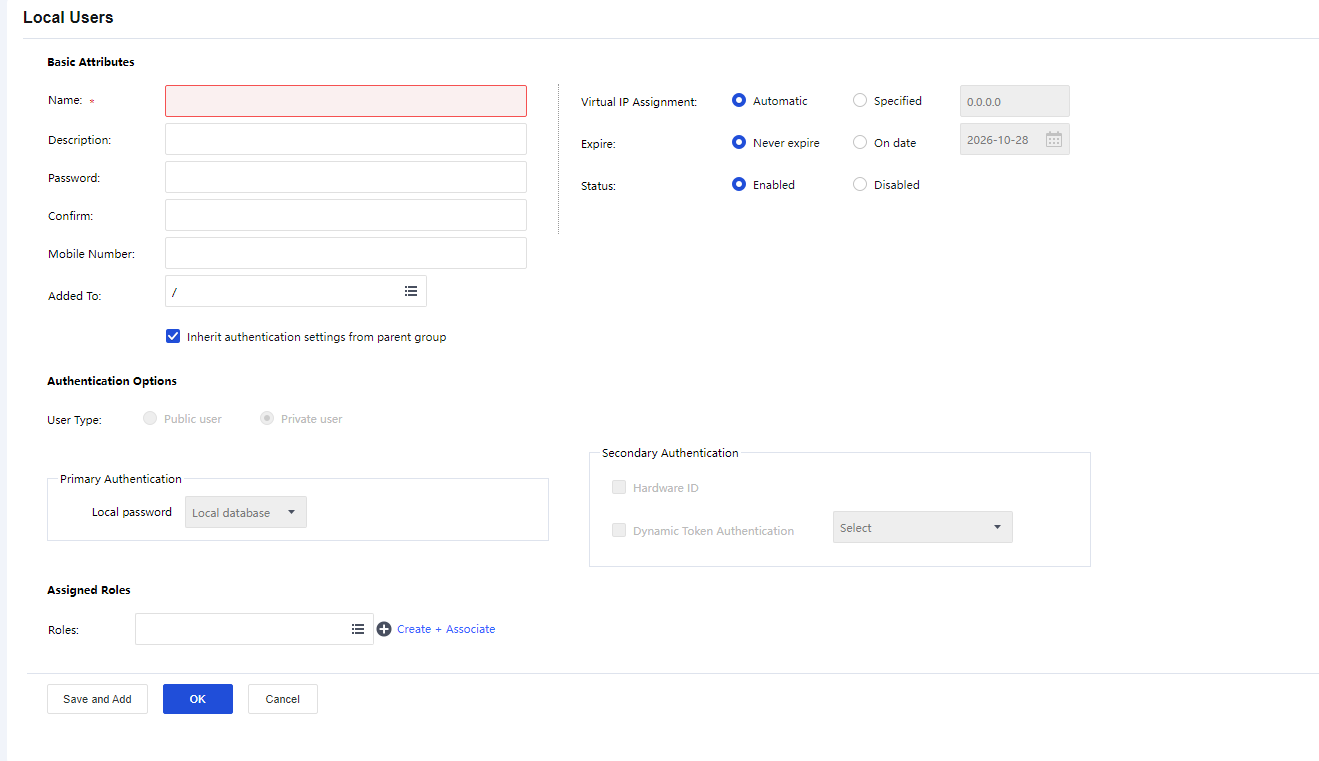
Name: Enter a name for this user. This field is required.
Description: Enter a brief description for this user.
Local Password, Retype Password: Enter the password of this user account.
Mobile Number: Enter the mobile phone number of the user.
Added To: Specifies to which user group this user is added.
Inherit authentication settings parent group: If selected, the current user will inherit its parent group’s policy set and authentication settings. If not selected, the authentication settings and policy set could differ from those of its parent group.
Virtual IP Assignment: To set the way users get virtual IP.
Expire indicates the date on which this user account will get invalid. If Never is selected, the user account will always be valid. If On date is selected, select the date as the expiry date.
Public user: Indicate that multiple users can use the user account to access SSL VPN concurrently.
Private user: Indicates that only one user can use the user account to log in to the SSL VPN at a time. If a second user uses this user account to connect to SSL VPN, the previous user will be forced to log out.
Primary Authentication: Indicates the authentication method(s) that is (are) firstly applied to verify users when they login to the SSL VPN. If any secondary authentication method is selected, primary authentication will be followed by secondary authentication when the users log in to the SSL VPN. By default is a Local password.
Local password: The connecting users need to pass local password-based authentication using the SSL VPN account in this user group.
Secondary Authentication: Secondary authentication is optional and supplementary authentication method. Select it to require the connecting users to submit the corresponding credentials after passing the primary authentication(s), adding security to SSL VPN access.
Hardware ID: This is the unique identifier of a client-end computer. Each computer is composed of some hardware components, such as NIC, hard disk, etc., which are unquestionably identified by their features that cannot be forged. SSL VPN client software can extract the features of some terminal hardware components and generate the hardware ID consequently. This hardware ID should be submitted to the Sangfor device and bound to the corresponding user account. Once the administrator approves the submitted hardware ID, the user will be able to pass hardware ID-based authentication when accessing SSL VPN through a specified terminal(s). This authentication method helps to eliminate potential unauthorized access. As mentioned above that multiple users could use the same user account (public user account) to access SSL VPN concurrently. It is reasonable that a user account may bind to more than one hardware IDs. That also means an end-user can use one account to log in to SSL VPN through different endpoints, as long as the user account is binding to the hardware IDs submitted by the user from those endpoints.
Click on the Roles field to enter the Assigned Roles page, as shown below:
Click Add to enter the Select Role page, as shown below:
Select the checkbox next to the desired roles and click the OK button. The roles are added to the Assigned Roles page.
Click the OK button and name the assigned roles filled in the Roles field.
If the desired role is not found in the list, click Create + Associate to create a new role and associate with the user group. (The procedures of creating a role are the same as that in the Roles Adding section).
To remove a role from the list, select the role and click Delete.
To edit a role, select the role and click Edit.
At the upper right of the Local Users page, there is a Search tool intended for searching for users or groups, as shown below:
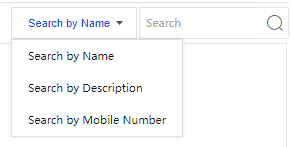
To search for a user or group by name, description, or mobile number, click and select Search by xxx, enter the keyword, click the magnifier icon, or press Enter key.
To sort users by name or description, in ascending or descending order, click column header Name or Description.
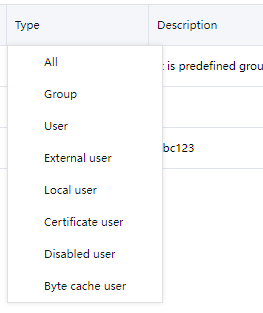
To filter users and view only one category of users, click column header Type, as shown below:
Among the tools on the Local Users page, there is an item Hardware ID. Click it to enter the Hardware ID page, as shown below:
The following are some optional operations on the Hardware ID page:
Delete: Click it to remove the selected user and/or group.
Select: Click Select > On all pages or On current page to select all the hardware IDs or only those showing on the current page, or click Select > Cancel to deselect users.
Approve: Click it, and the selected hardware ID(s) will be approved. The corresponding user will be able to pass hardware ID-based authentication.
View: Filter the hardware IDs. Choose a certain type of hardware IDs to show on the page. For example, all The approved or Not approved hardware IDs.
Search: Use the search tool on the upper right of the page to search for hardware ID based on username or hostname.
Import: Click it to import hardware IDs by hand, as shown below:
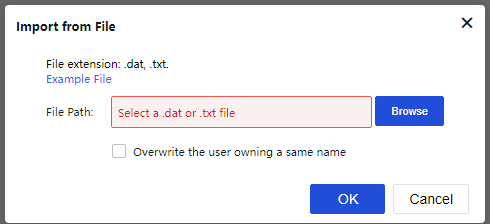
For the file format and maintaining the file containing hardware IDs, click the Example File link to download a copy to the local computer and main the hardware ID as instructed.
Overwrite the user owning a same name: If any imported user owns the name of an existing user, selection of this option would have that user imported and overwrite the existing user, including hardware ID and other information.
Click the Browse button to select a file and then the upload button to upload it.
Export: Click it to export the desired hardware IDs and save them into the computer, as shown in the figure below:
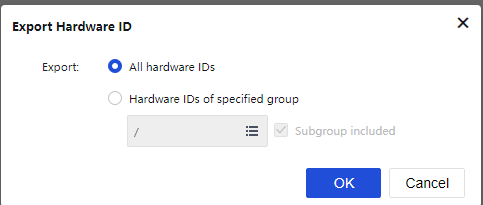
Specify the hardware IDs that you want to export.
To export all the hardware IDs, select All hardware IDs and click the OK button. All the hardware IDs will be written into a file that will then be saved on the computer.
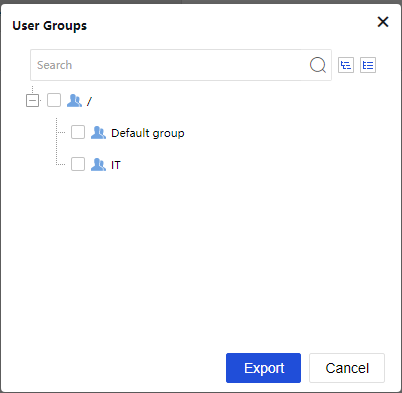
To export the desired hardware IDs of a specific user group, select Hardware IDs of specified group and click the textbox to specify a user group, as shown below:
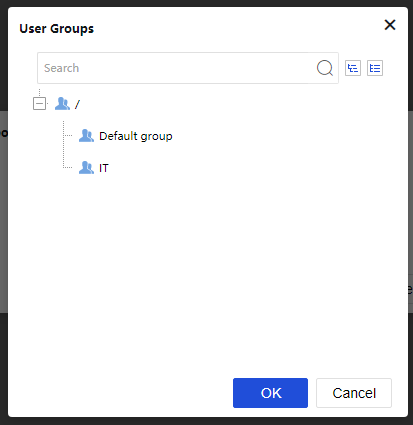
Click the OK button, and the name of the selected user group is filled in the textbox, as shown in the figure below:
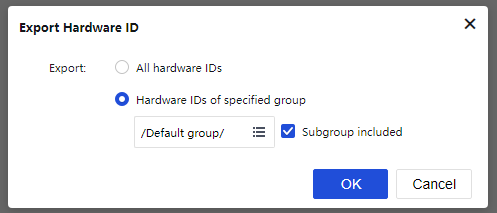
To also export the hardware IDs of the users that are included in the subgroups of the specified user group, select the checkbox next to the Subgroup included. If this option is not selected, only the hardware IDs of the direct users in the selected group will be exported.
Click the OK button to write the hardware IDs into a file and download the file to the computer.
Click Import and select Import user from file to import users into NGAF from a file as shown in the figure below:
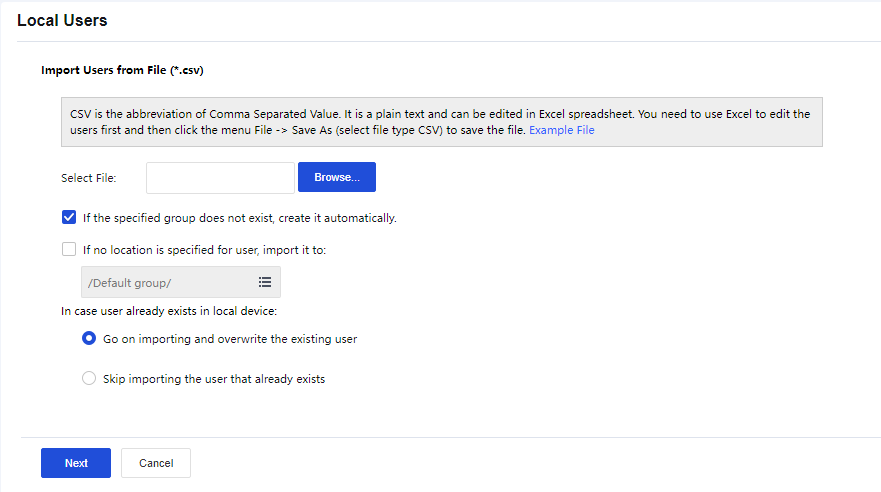
Select File: Browse a CSV file that contains user information, such as username, path, description, password, mobile number, etc., among which the username is required, and others are optional. For more details on how to maintain and edit the CSV file, click the Download Example File link to download a copy and refer to the instructions in it.
If the specified group does not exist, create it automatically: This happens if the Added to Group of some users in the CSV file does not match any of the user groups on this Sangfor device.
If no location is specified for user, import it to: This specifies the user group to which these users will be added if the Added to Group column is not filled in for some users in the CSV file.
In case user already exists in local device: This means the imported user’s name conflicts with an existing user’s name. Select Go on importing and overwrite the existing user to overwrite the existing one, or select Skip importing the user that already exists not to overwrite the existing one.
Next: Click to import the users and add them into the specified user group.
Moving Users to Another Group
The More Options include Export Users, Associate with role, and Advanced Search. See the figure below:
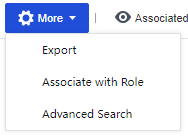
Exporting Users


Associating Roles with User

The roles on the Roles page are all the roles predefined under SSL VPN>Roles>Role Management.
Advanced Search
Click on More > Advanced Search to open the advanced search page. The criteria for advanced search are as shown in the figure below:
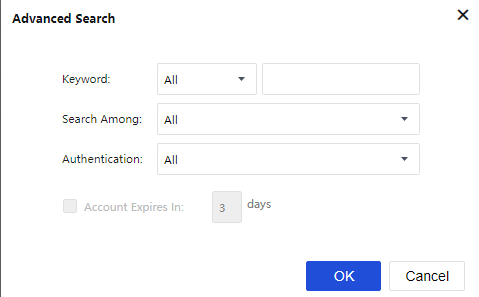
Search criteria are keyword, type of keyword, type of users, authentication method, and expiry date of the user account.
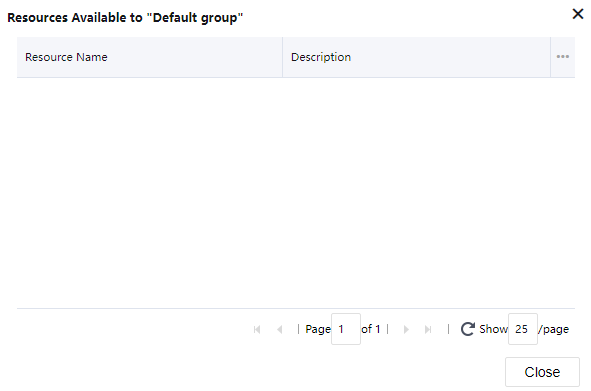
To see what resources are available to a certain user or group, select that user or group and click Associated Resource. The resources available to the selected user or group are as shown below:

 {{ $t('index.defaultHeader.chromeBrowserTip') }}