


{{ secondMenu.name }}






config ips sensor
edit "<Profile-Name>" # Name of the IPS sensor/profile
set comment "Default IPS" # Description or comment
config entries # Define specific IPS rules
edit 1
set rule <rule-id> # IPS rule ID (signature ID)
set action {default|block|monitor} # Action for this rule
next
end
next
end
| FortiGate Parameter |
FortiGate Parameter Description |
Corresponding Sangfor NGAF Module/Parameter |
Migration Notes |
| name |
IPS policy name |
Objects > Security Policy Template > Intrusion Prevention |
It is recommended to keep the name consistent |
| comment |
Policy description |
Objects > Security Policy Template > Intrusion Prevention |
Can be migrated directly |
| entries |
Signature entry configuration |
Objects > Security Policy Template > Intrusion Prevention |
Sangfor uses a combination of built-in and custom rule sets |
| rule |
IPS rule ID (signature number) |
Objects > Security Policy Template > Intrusion Prevention |
NGAF has a built-in signature database; individual import is not required |
| action |
Rule action (default/block/monitor) |
Policies > Network Security > Policies |
No need to configure actions in the template; actions are set in the Network Security Policy |
Because Fortigate's IPS configuration file differs significantly from NGFW, it is recommended to understand the protection capabilities of Fortigate's IPS before configuring it according to Sangfor NGFW's IPS template and referencing it in the policy.
This function checks packets for latent threats against the LAN system. Two internal templates are configured, Internet access control and business protection:
Default Template_Internet Access Scenario is to protect LAN users.
Default Template_Server Scenario is to protect servers. 
Click Add to create a vulnerability attack prevention template, as shown in the figure below. 
Template Name: Define the name of the template to prevent the attack behavior.
Description: Define the description of the template to prevent the attack behavior.
Protection Features: Specify the protection parameters.
Select Server Protection and click Selected System, Shellcode, Scan, Custom IPS Rules, Database, Mail, Web, FTP, TFTP, DNS, Telnet, IoT, Media. In the Select Attack Type dialog box, select vulnerability types according to the service type published by the server. The server will prevent attacks against vulnerabilities of this service type.
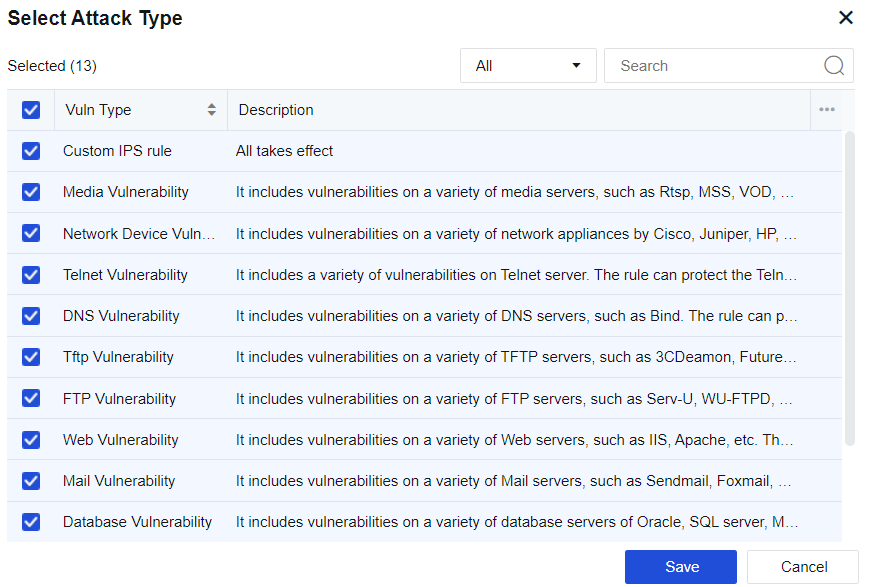
Check Endpoint Protection and click Selected System, Shellcode, Scan, Custom IPS Rules, Web ActiveX, Web Browser, File, Application. Then, the Select Attack Type dialog box will pop up, where you can check corresponding vulnerability types, and the server will perform intrusion prevention against the vulnerabilities related to this type of client. 
Select Brute-Force Attack Protection and click Selected TELNET_Ubuntu, IMAP_Standard, RLOGIN, TELNET_Microsoft_Server…. In the Select Attack Type dialog box, select vulnerability types. The server will prevent attacks against this type of brute-force attack. 
Click a brute-force attack to enter the Edit Signature dialog box (the vulnerability attack signature database) to set the maximum number of attacks allowed, detection interval, and status (Enable or Disable).

Check Anti-malware and meanwhile click Selected Backdoor, Spyware, Trojan, Worm. Then, the Select Attack Type dialog box will pop up, where you can check corresponding vulnerability types, and the server will perform intrusion prevention against this type of malware. 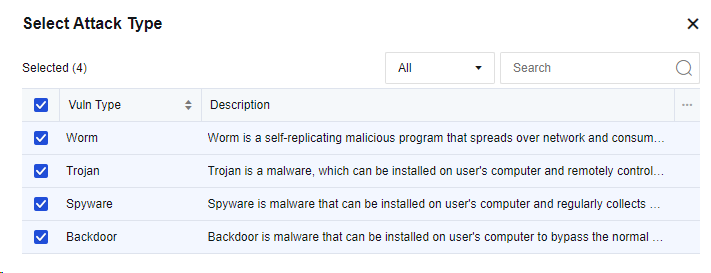
Check the option C&C Attack Detection Engine and click Select C&C attack detection engine. Then, the C&C Attack Detection Engine dialog box will pop up, where you can select corresponding detection engine, and the server will perform intrusion prevention against such C&C attacks.

Check Semantic Web Engine and click Selected Enable Java deserialization prevention. In the Semantic Web Engine dialog box, you can check Enable Java deserialization prevention for the server to prevent Java deserialization. 
Click Save to finish establishing vulnerability attack protection.
On the Intrusion Prevention page, click Advanced to navigate to the advanced options configuration page. See the figure below. 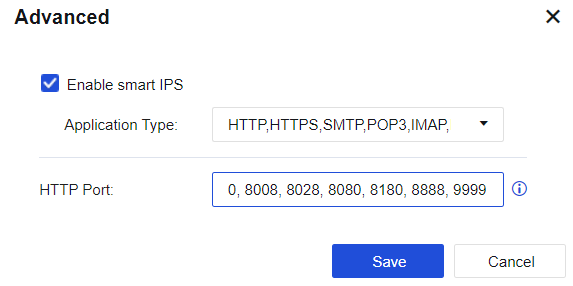
Select Enable smart IPS to identify vulnerability attacks and protect vulnerabilities based on applications. If this option is not selected, the system identifies IPS vulnerabilities based on ports.
HTTP port: Add multiple HTTP ports to identify HTTP attacks more accurately.


 {{ $t('index.defaultHeader.chromeBrowserTip') }}