{{ secondMenu.name }}


Functional Terminology
NetBackup: Provides a comprehensive and flexible data protection solution, ideal for various platforms. NetBackup contains server and client software.
NetBackup Master Server: Used for backup management, archiving, and restoration. It also selects media and devices for NetBackup.
NetBackup Media Server: Allows NetBackup to use the storage devices mounted to it, thereby providing additional storage areas.
NetBackup Client: The client resides on the computer containing data that needs to be backed up. (The server also contains the client software and can be backed up.)
XBSA App: A backup app implemented with the XBSA SDK, which runs on the NetBackup client to provide customized backup and recovery capabilities.
sf-vmbackup-app: An XBSA app used by Sangfor. It is developed by the XBSA SDK and can be used to back up VMs on the SCP Platform.
Principle Description
By using the agentless backup capability on the SCP platform, the XBSA app can back up VMs from the SCP platform to a third-party backup platform. VMs can be backed up to NetBackup through the XBSA SDK on NetBackup.

Take the backup process as an example. When a customer initiates a backup task on SCP, the backup request will be forwarded to the XBSA app. The XBSA app then calls SCP's API to create a snapshot and uses SFVDDK to read the changed data from the snapshot and writes the data directly to the NetBackup storage device through the XBSA SDK to complete backup.
Steps
Step 1.Log in to NetBackup web UI and create API key.
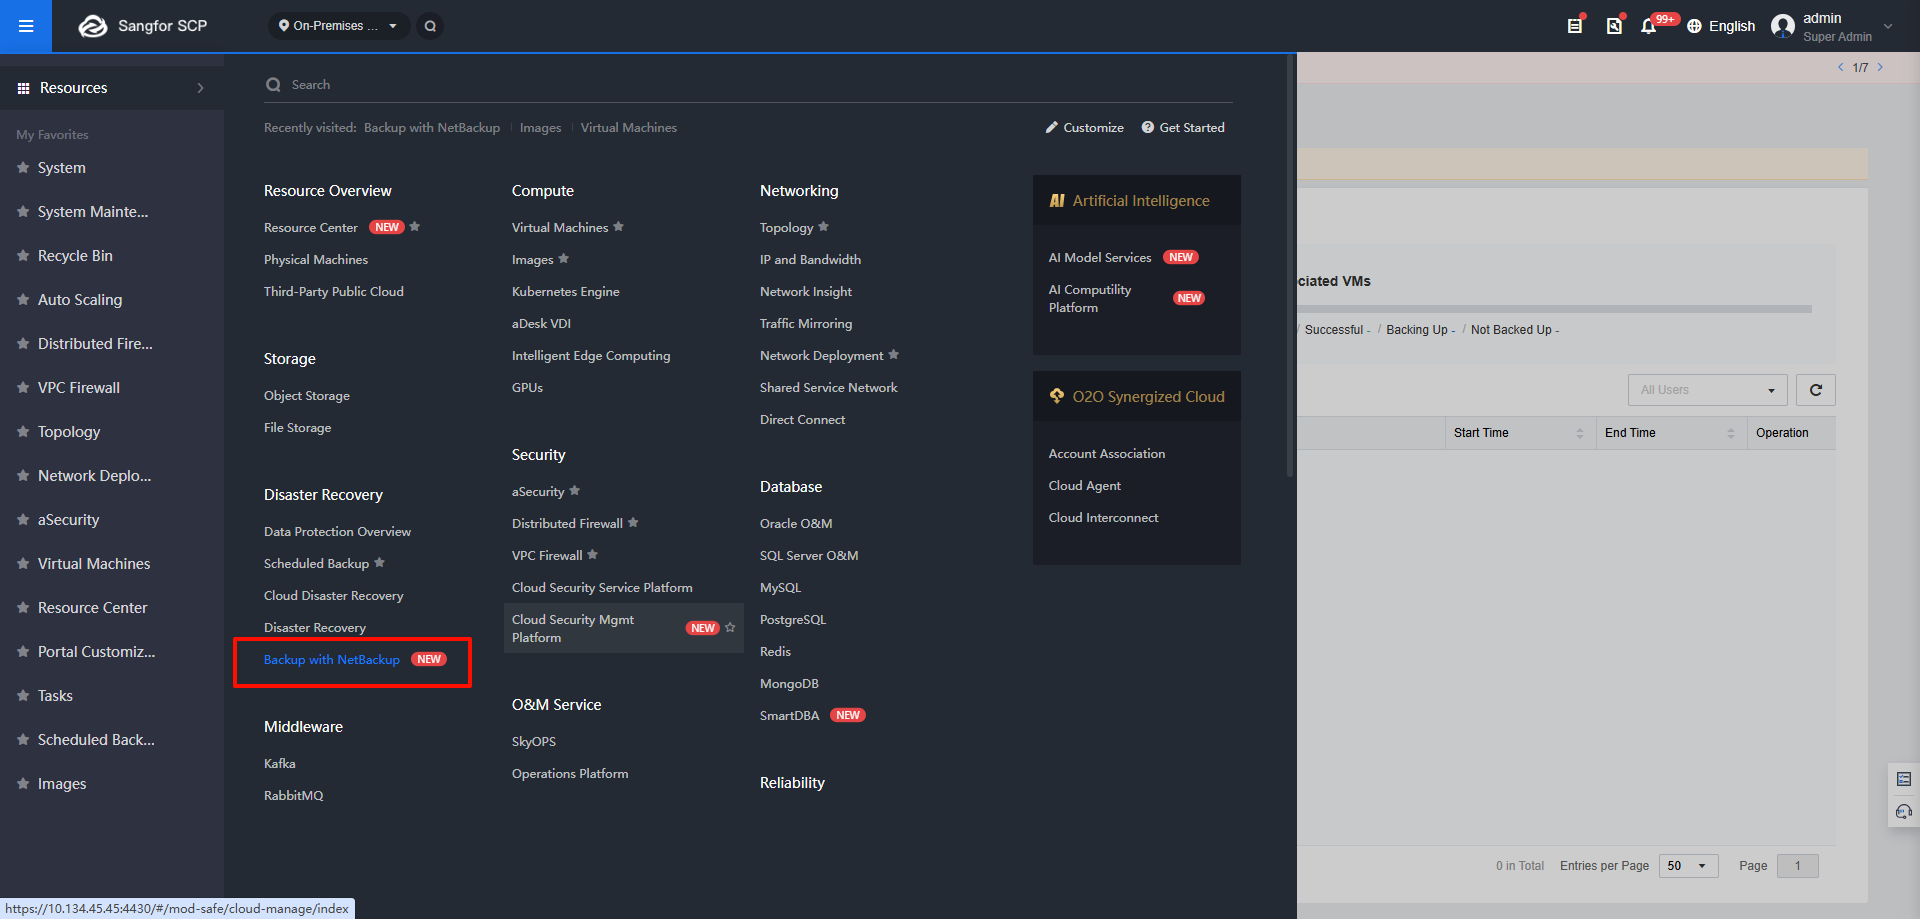
Step 2.Log in to the SCP platform and go to Disaster Recovery > Backup with NetBackup.
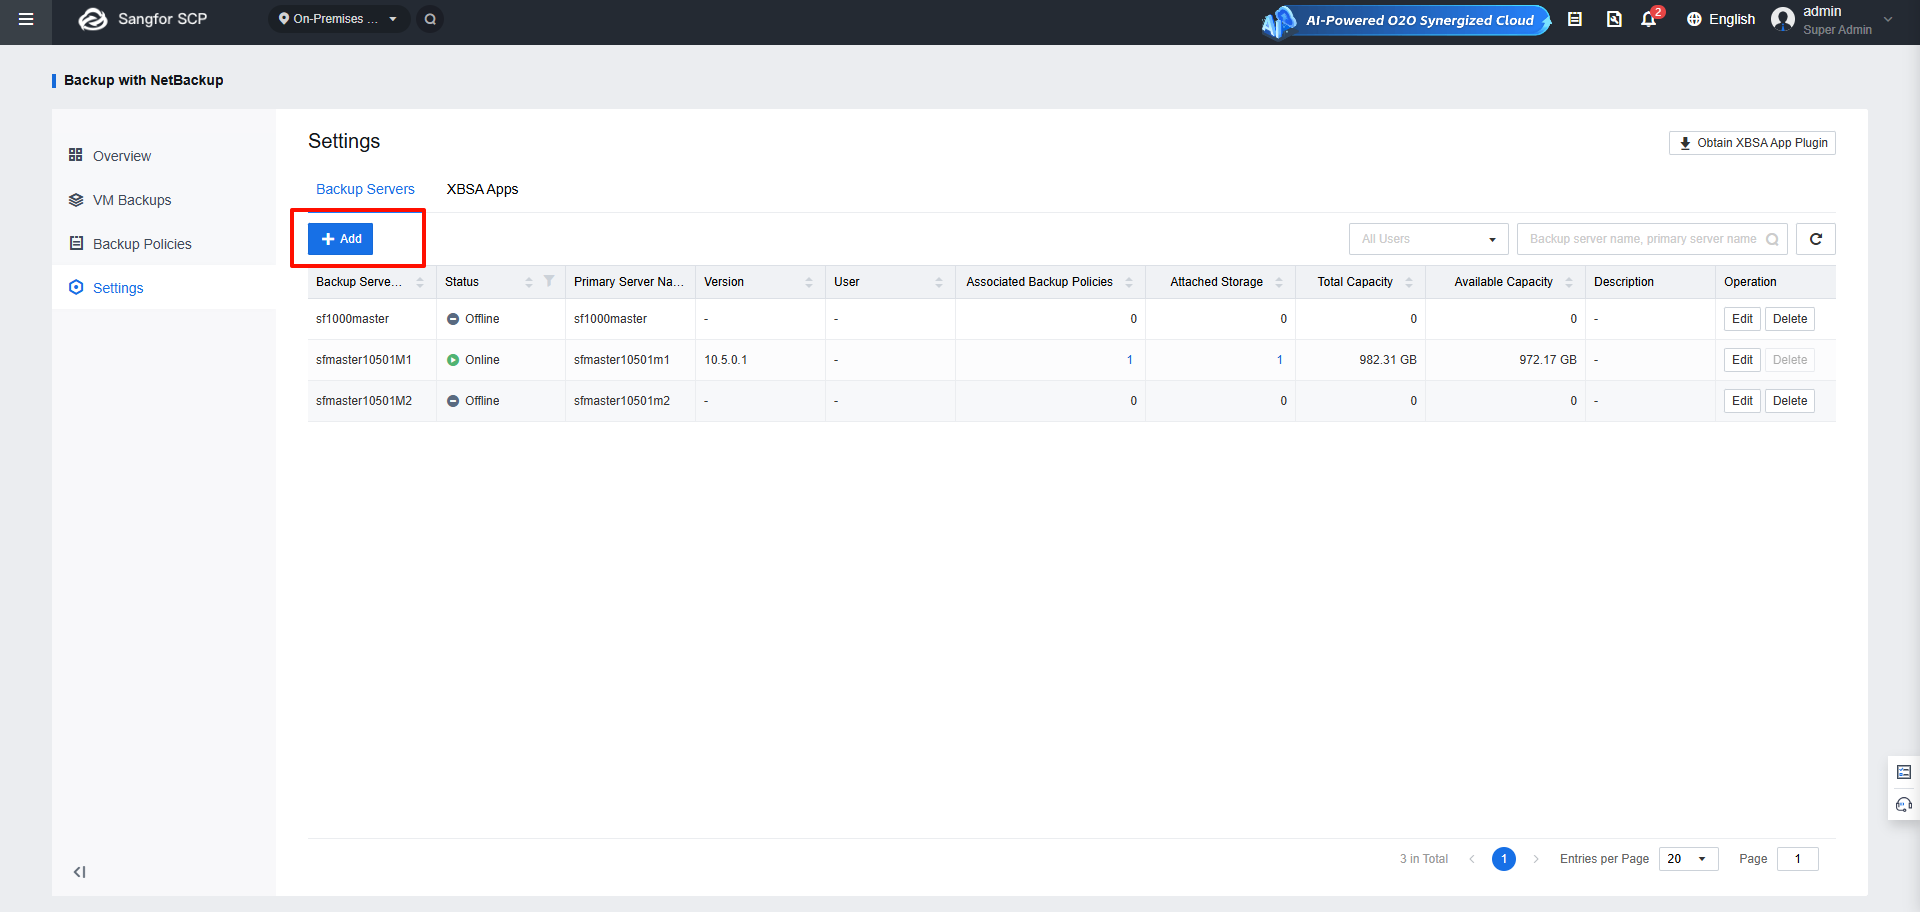
Step 3.On the Backup with NetBackup page, go to Settings > Backup Servers, and click Add.
Step 4.In the Add Backup Server pop-up window, specify Backup Server Name, Primary Server Name, Server Address, and API Key, and click OK.
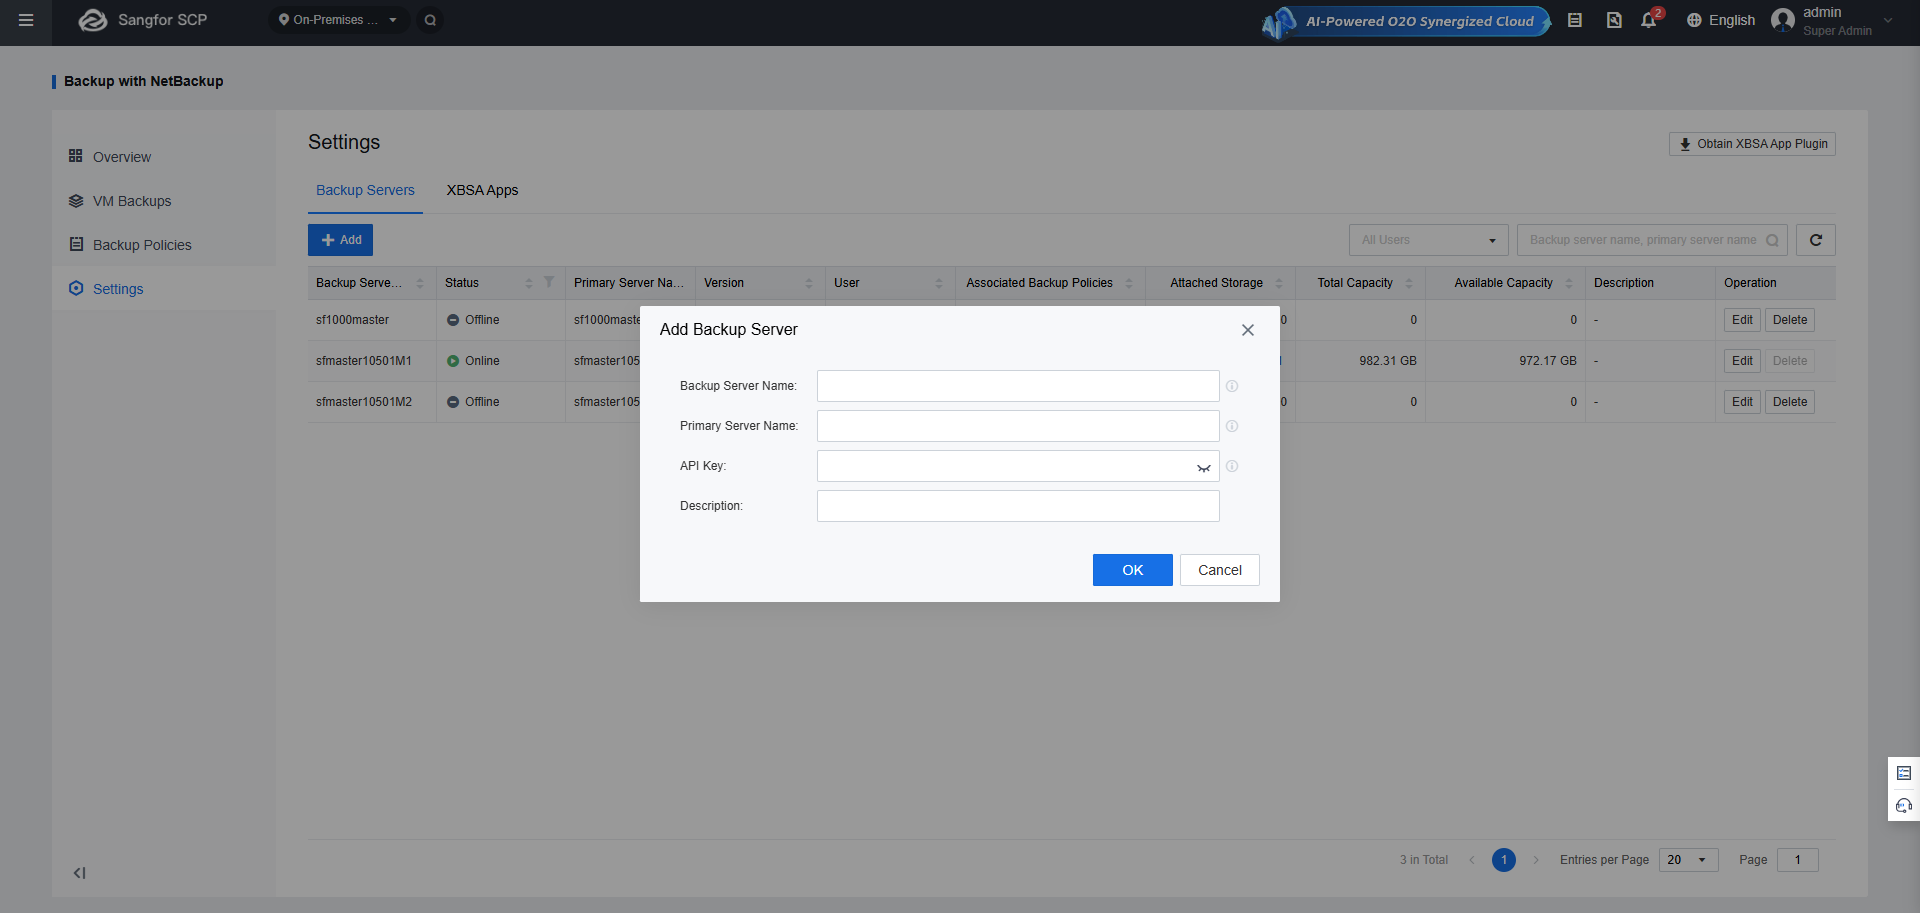
Description of some backup server options:
Backup Server Name: A customized alias for the NetBackup server.
Server Address: The domain name of the NetBackup primary server. If no domain name server is available, please refer to section x Host Name Resolution. IP address is not supported.
API Key: The API key applied on NetBackup.
Steps
Step 1.On the Backup with NetBackup page, go to Settings > XBSA Apps, and click Add.
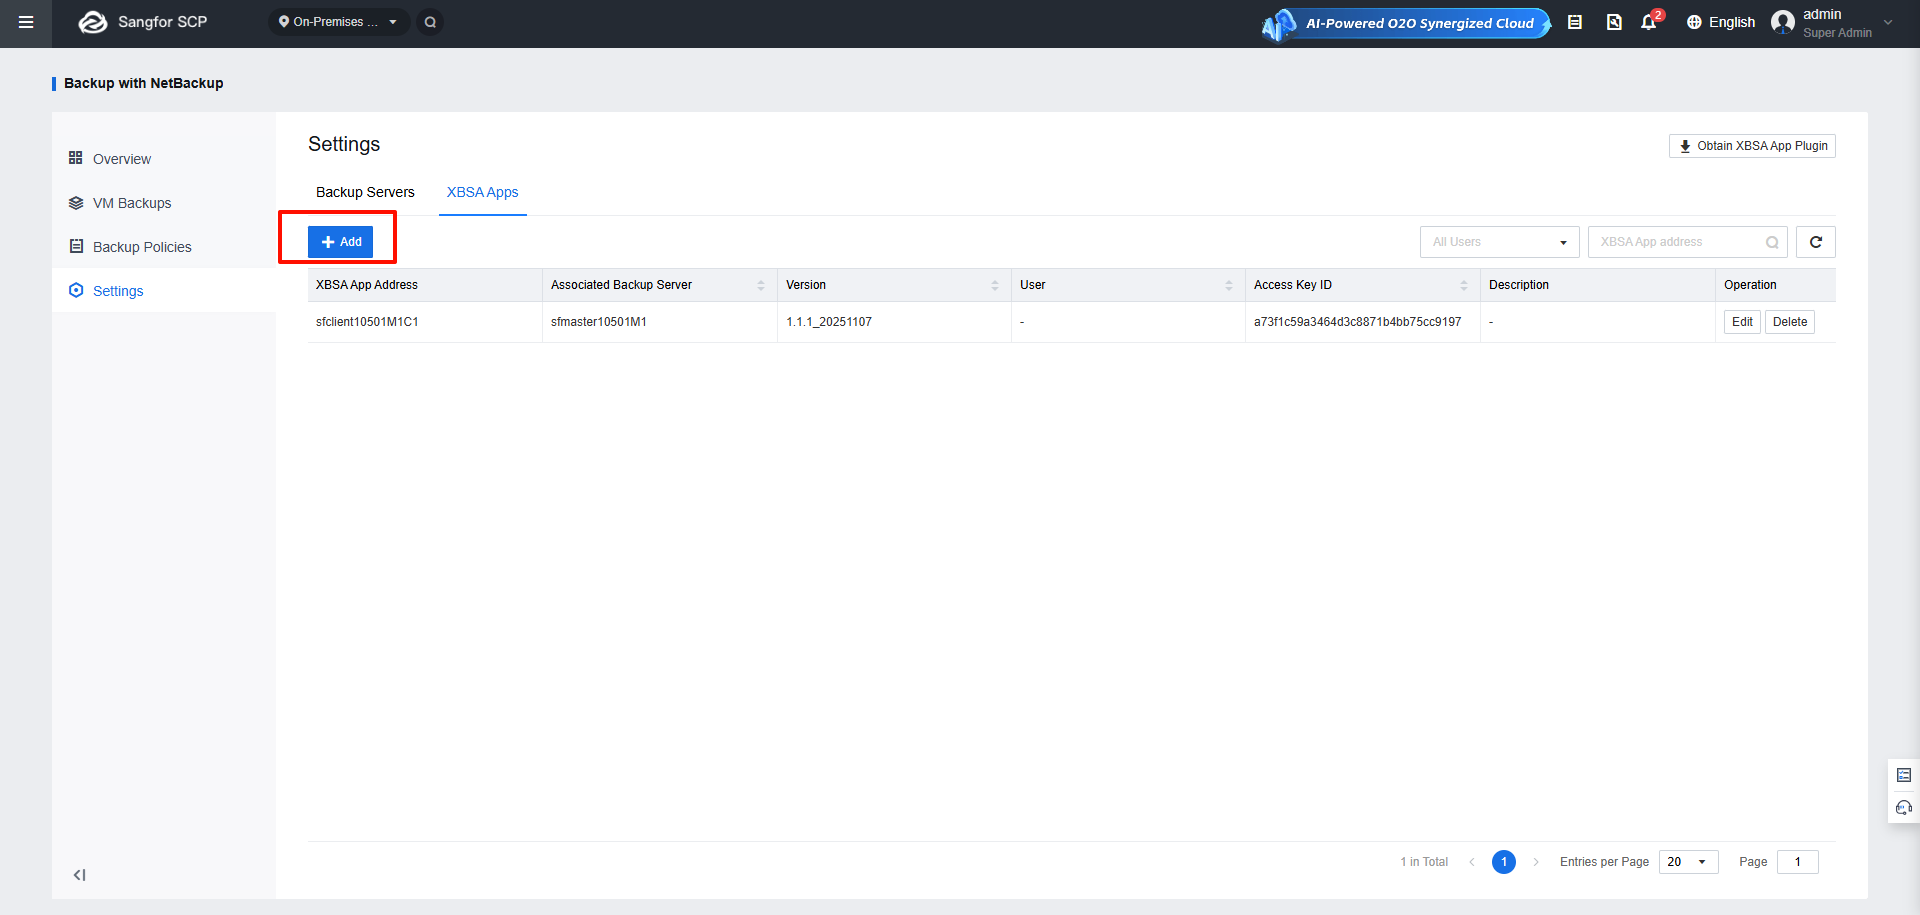
Step 2.In the Add XBSA App pop-up window, specify XBSA App Address, Port, Certificate, Access Key, Secret Key, and Associated Backup Server, and click OK.
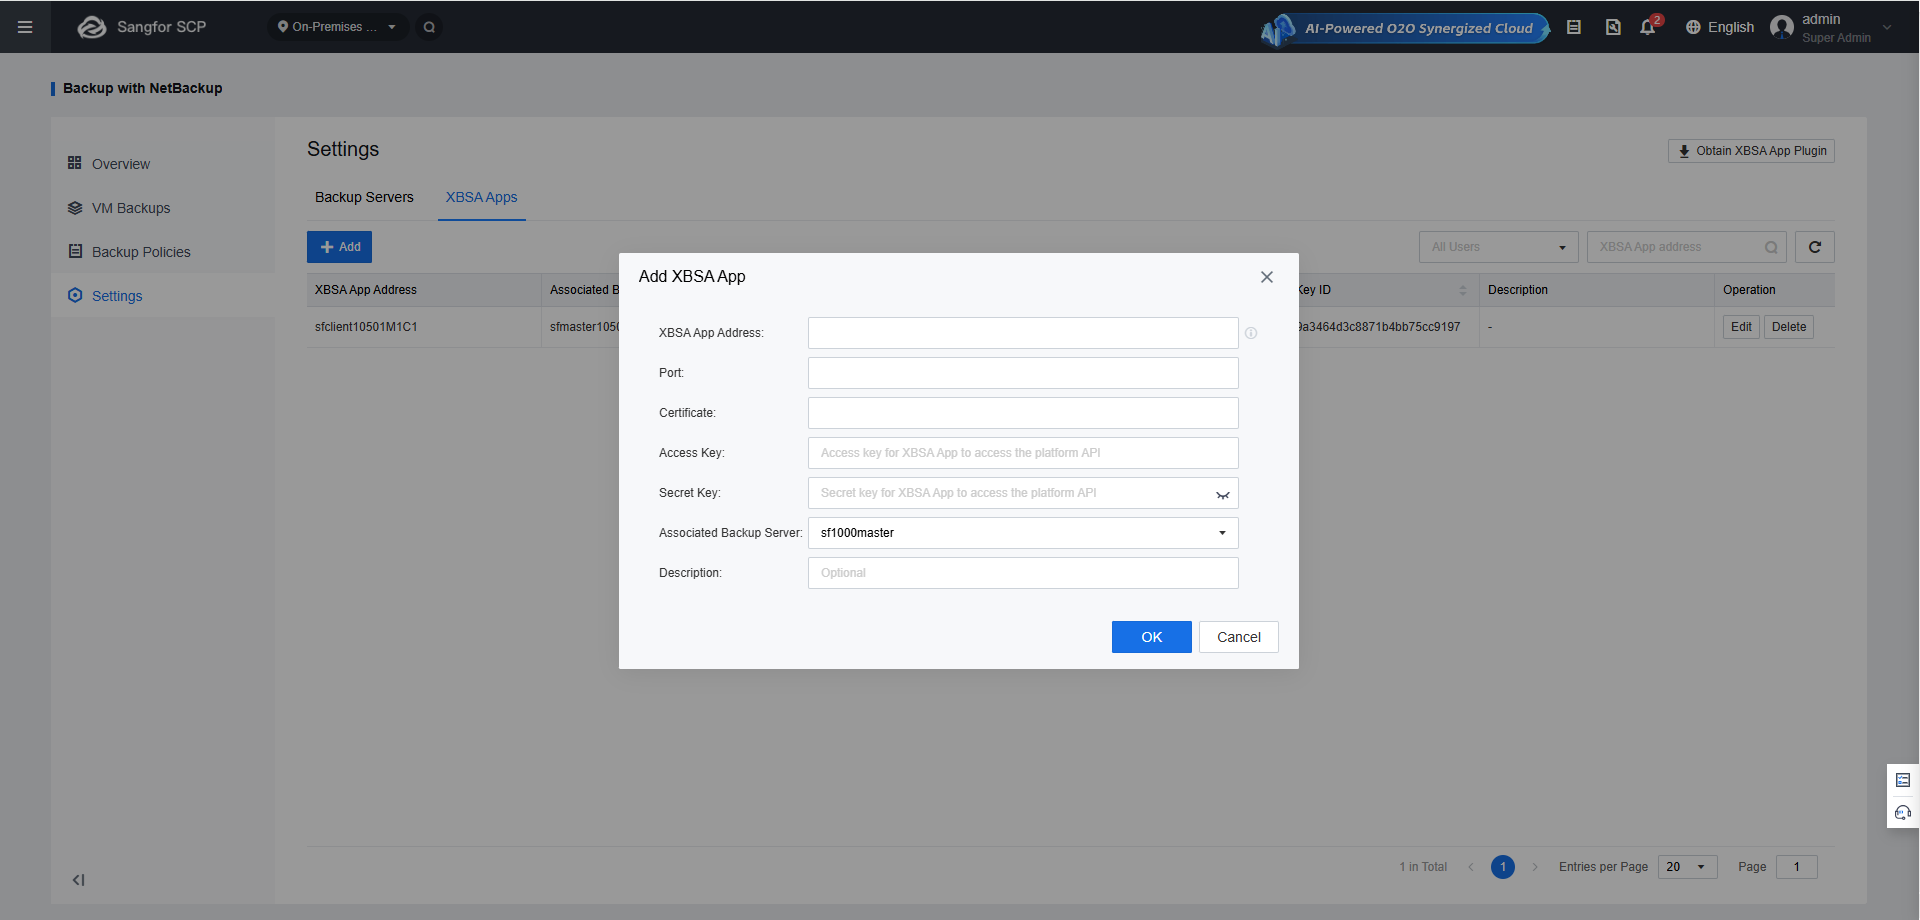
Description of some XBSA app options:
XBSA App Address: The domain name of the NetBackup client where the XBSA app resides. If no domain name server is available, please refer to section x Host Name Resolution. IP address is not supported.
Port: The service port of the XBSA app, which is 8888 by default. It can be modified during deployment.
Certificate: The HTTPS certificate for the XBSA app, which is available after XBSA app deployment is complete.
Access Key/Secret Key: The API keys used by the XBSA app for communicating with SCP.
Associated Backup Server: The primary server associated with the NetBackup client where the XBSA app resides.
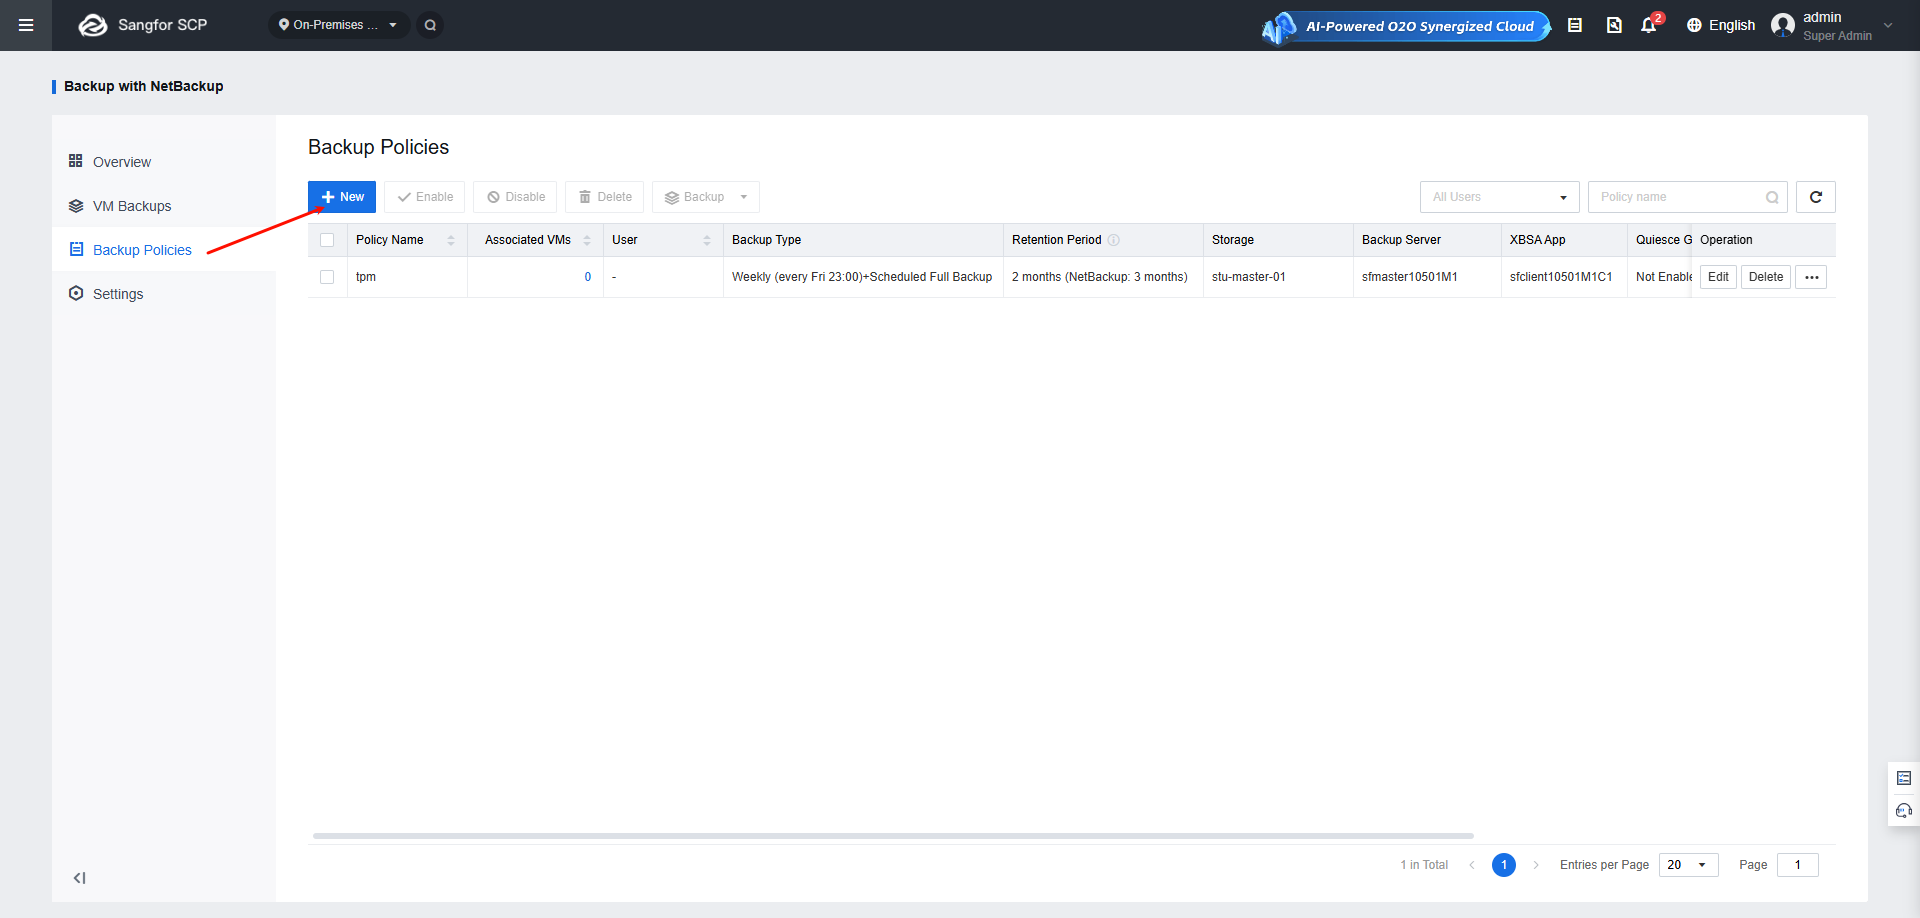
Create Backup Policy
Step 1.On the Backup with NetBackup page, go to Backup Policies, and click New.
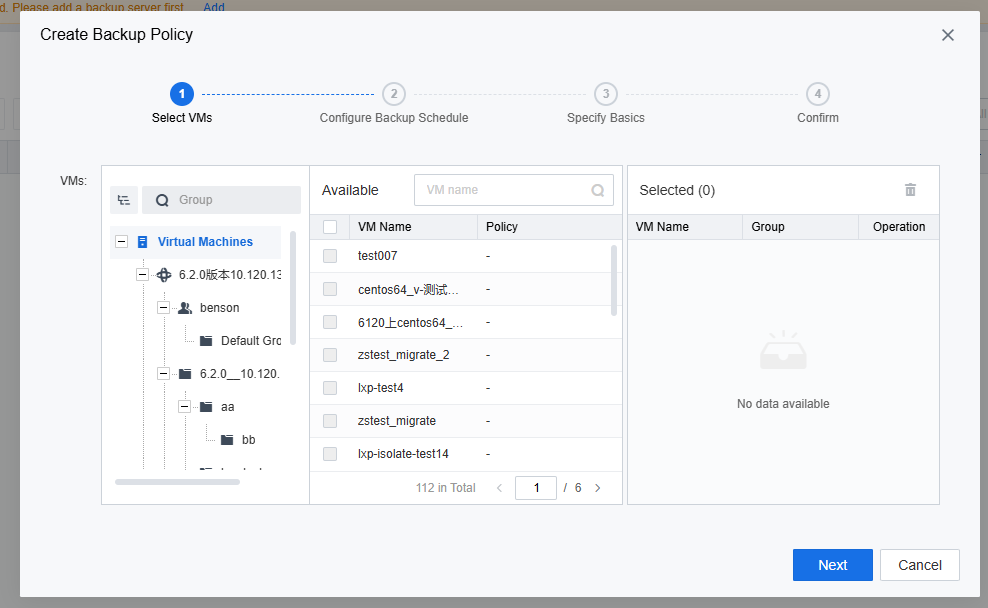
Step 2.In the Create Backup Policy pop-up window, select the VMs you want to add to the policy in the Select VMs step, and click Next.
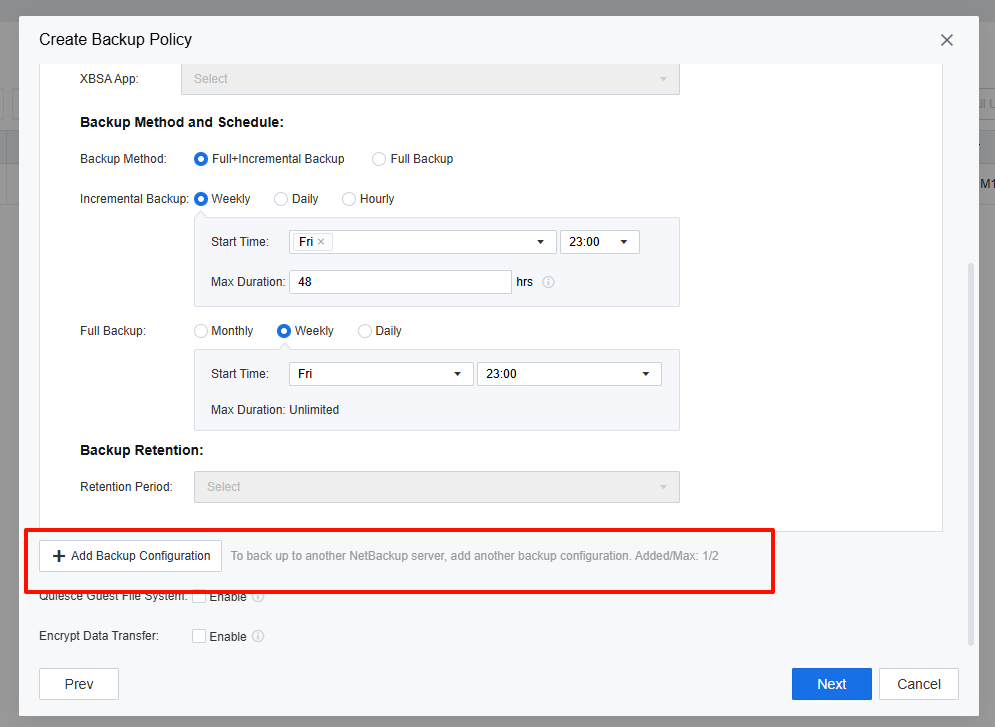
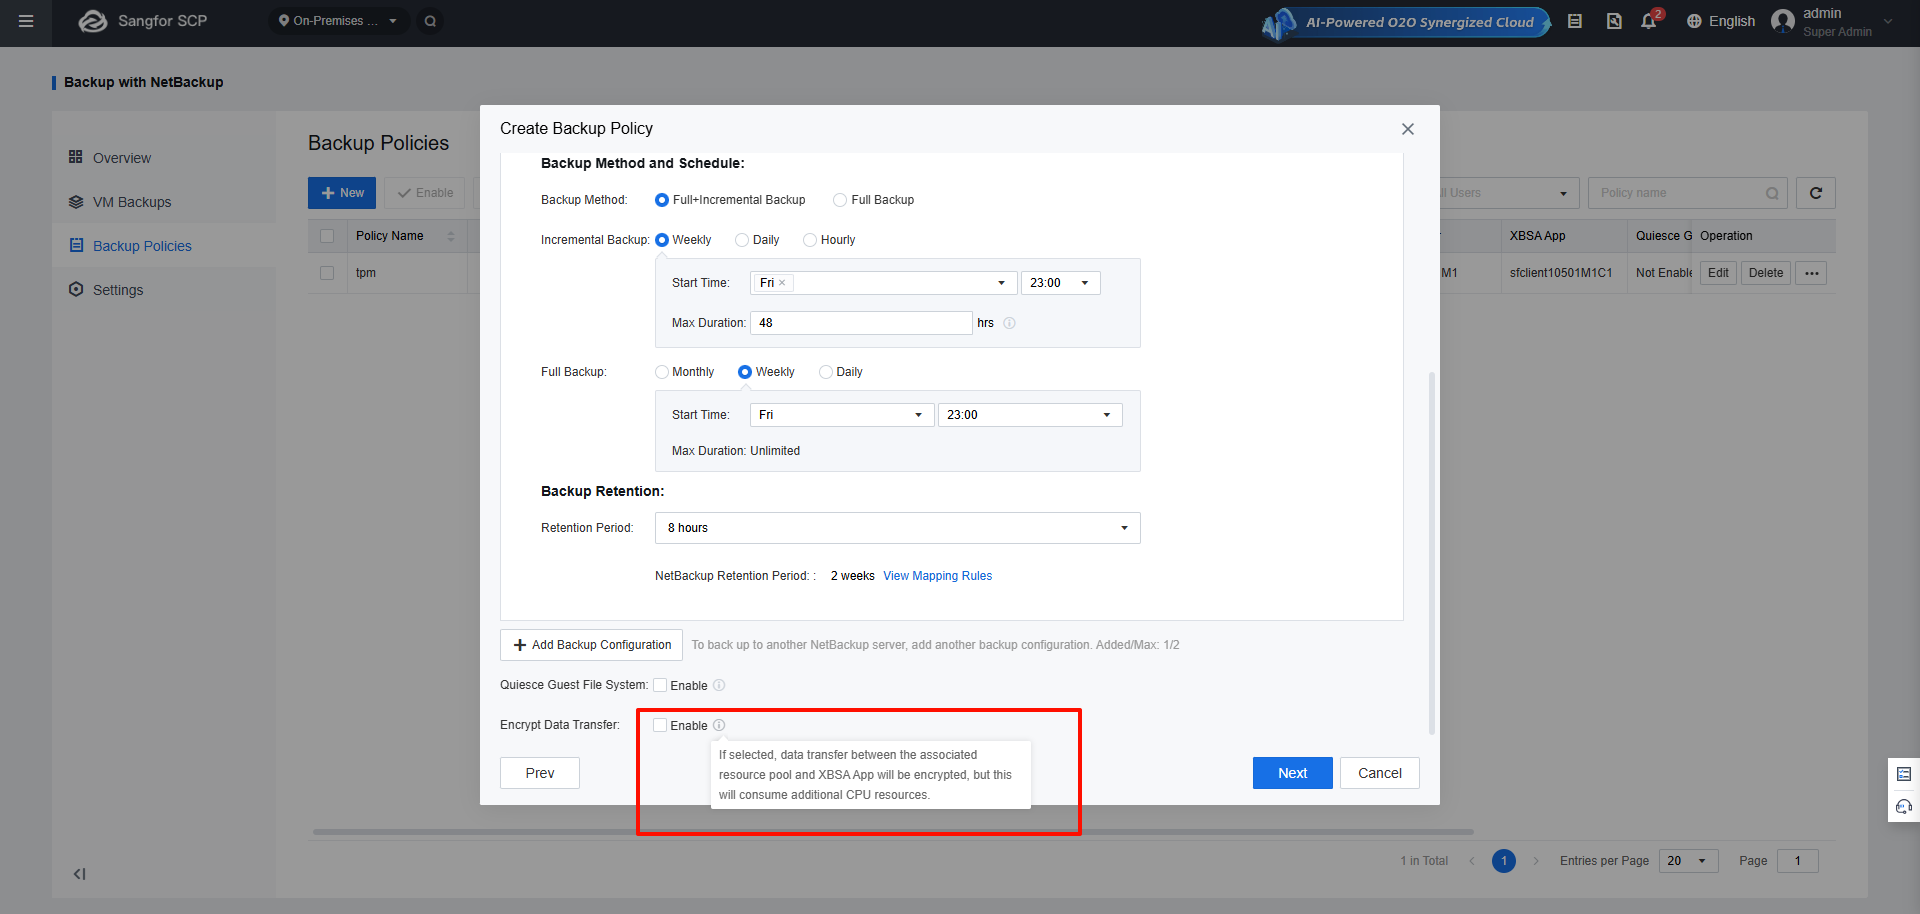
Step 3.In the Configure Backup Schedule step, configure the schedule and frequency for triggering Incremental Backup and Full Backup.
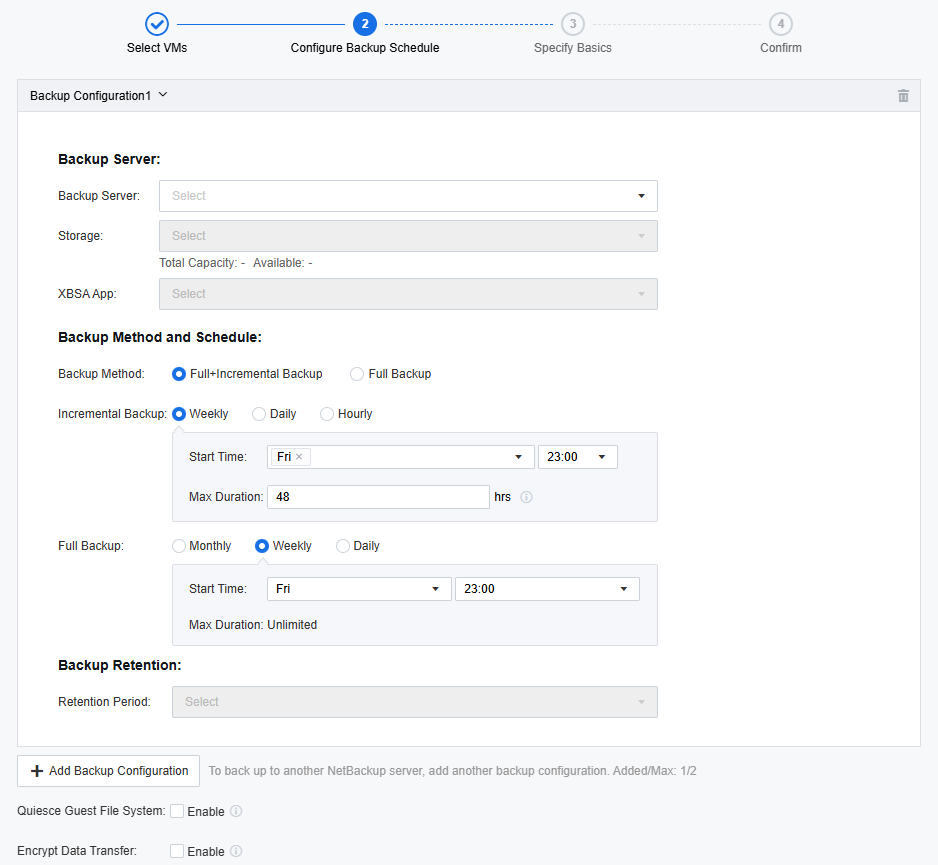
To back up to another NetBackup server, click Add Backup Configuration.
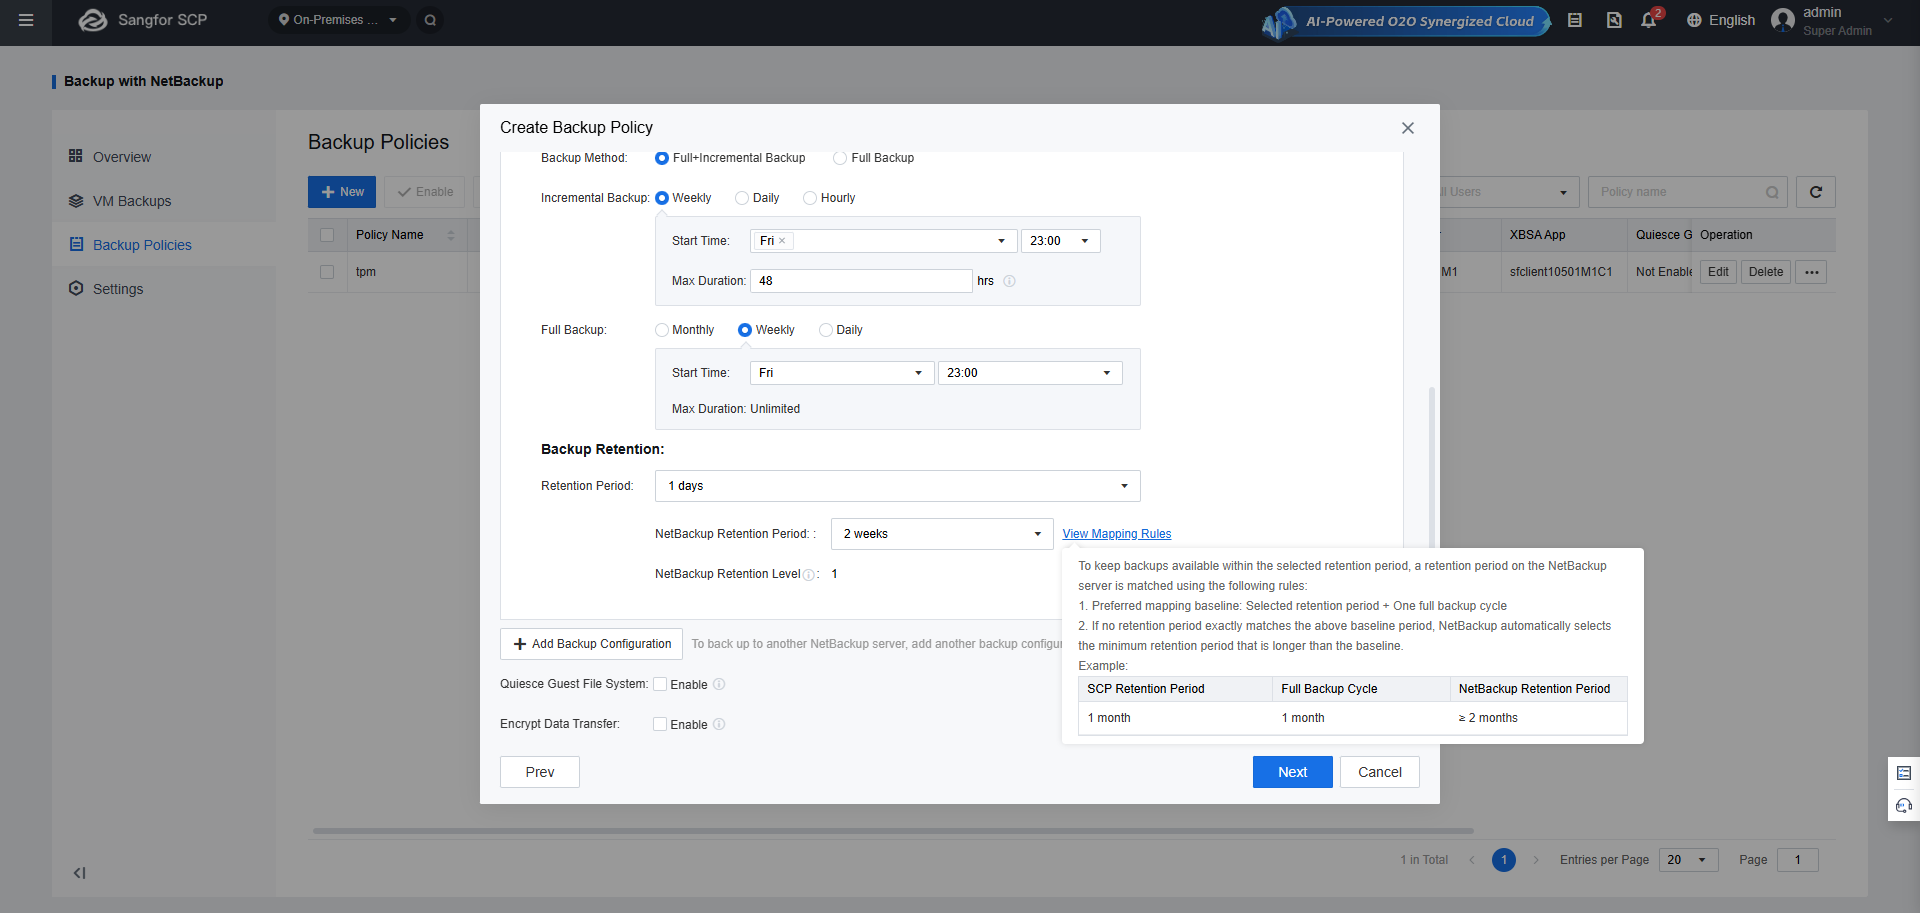
NetBackup Retention Period: Supports specifying the retention period of backups on NetBackup.
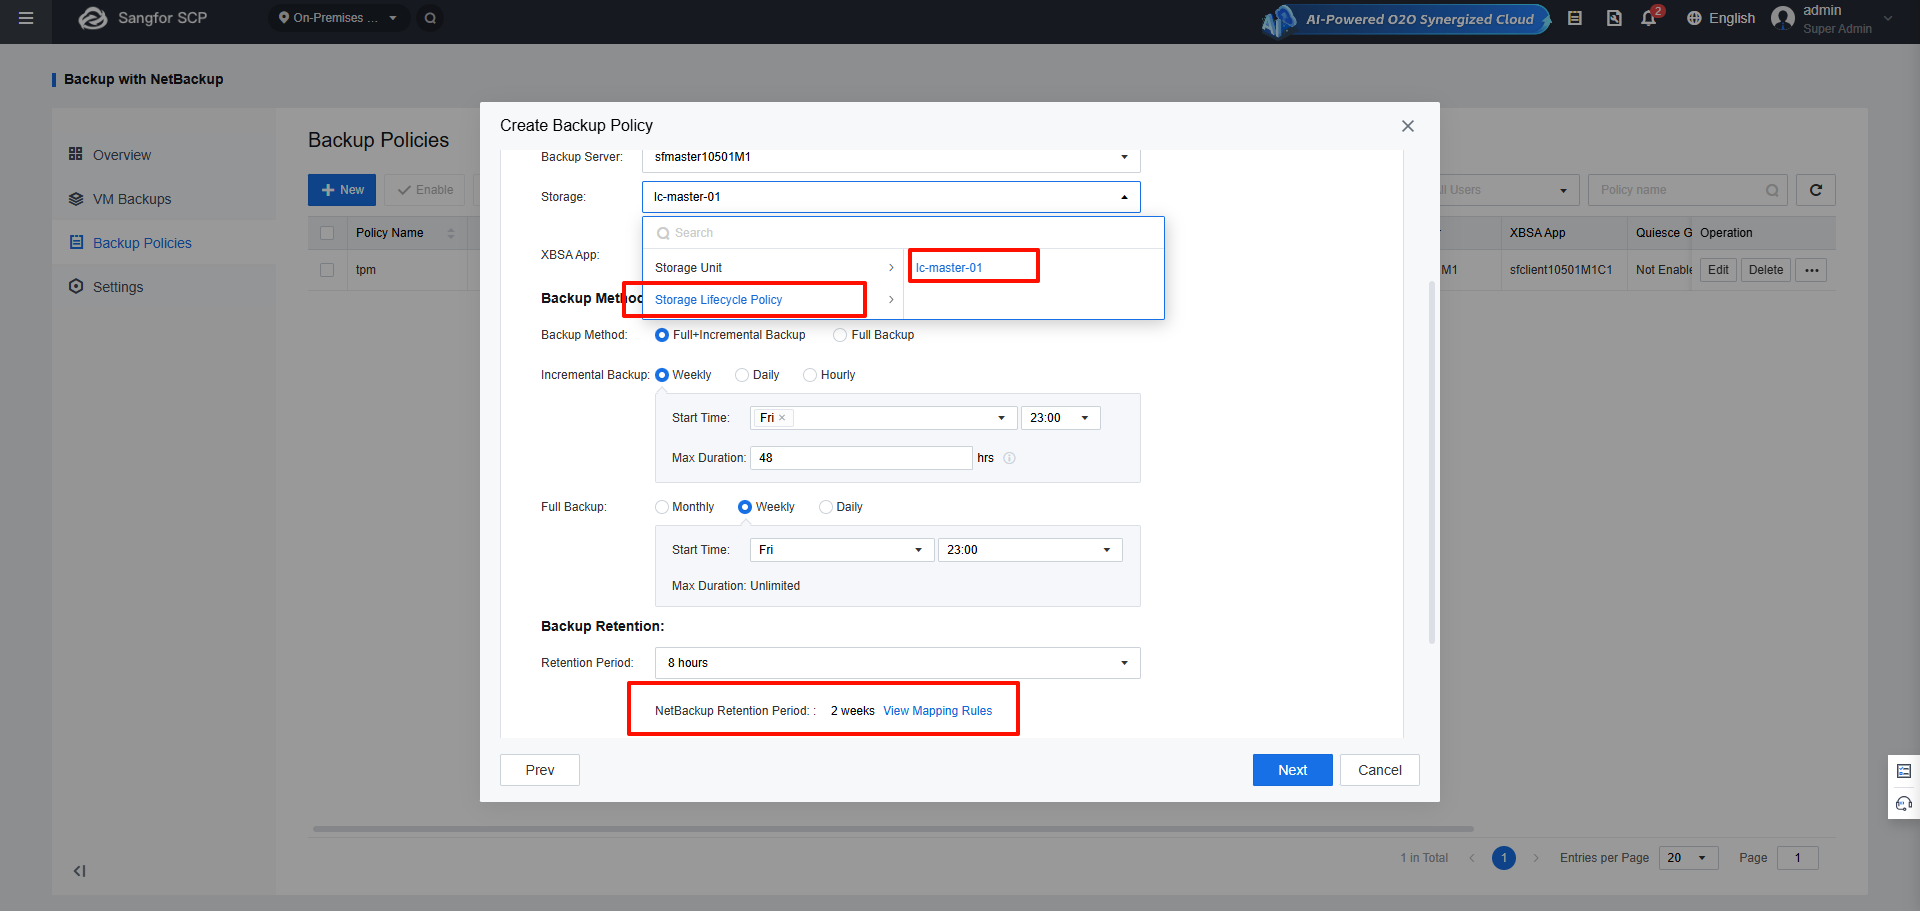
Select Storage Lifecycle Policy for Storage: Supports displaying the default retention period on NetBackup.
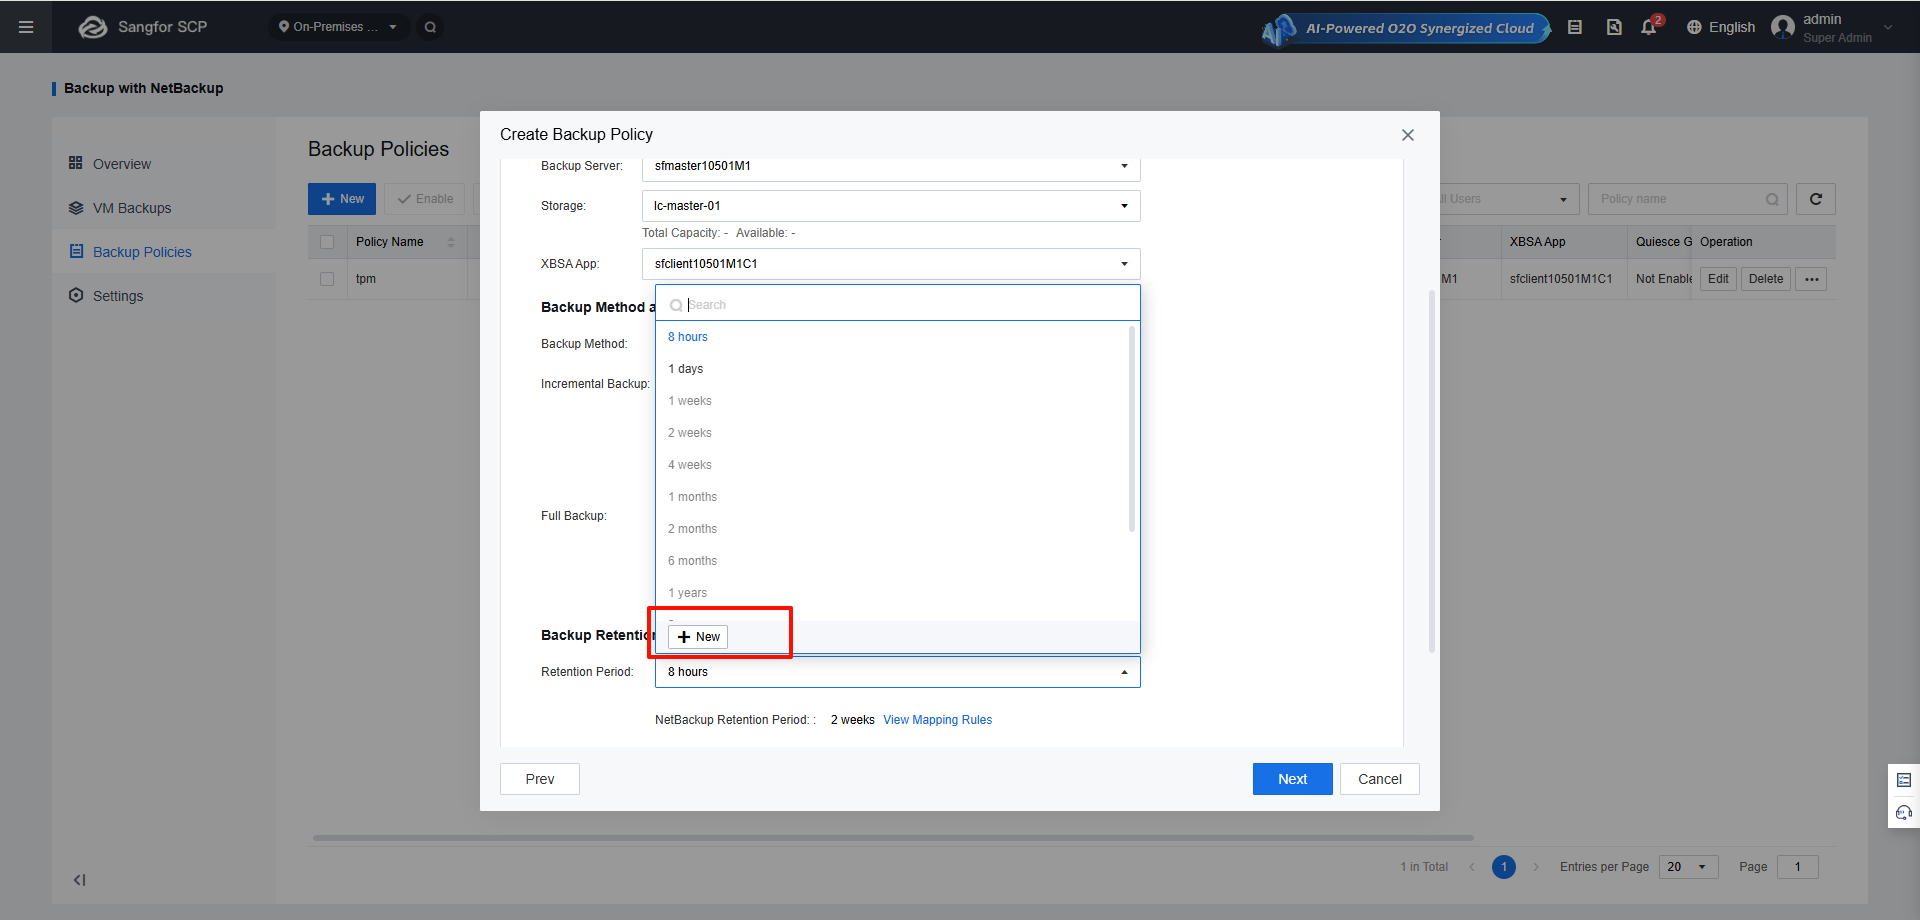
You can specify the retention period of backups on SCP.
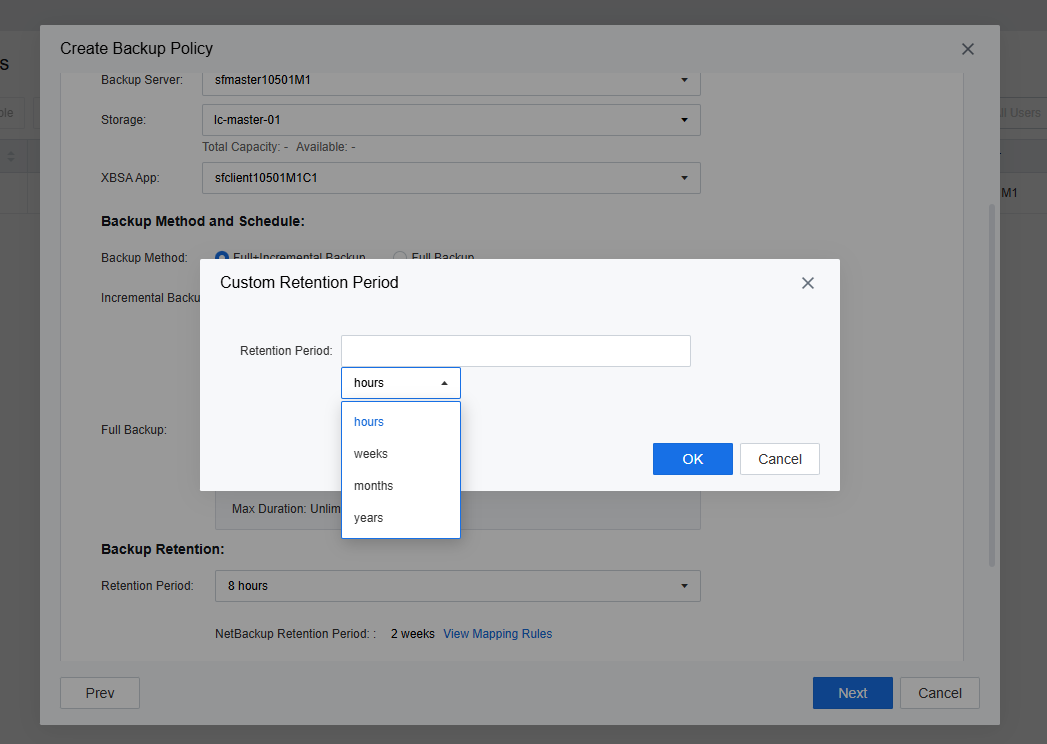
The retention period of backups on NetBackup will be displayed.
You can enable Encrypt Data Transfer.
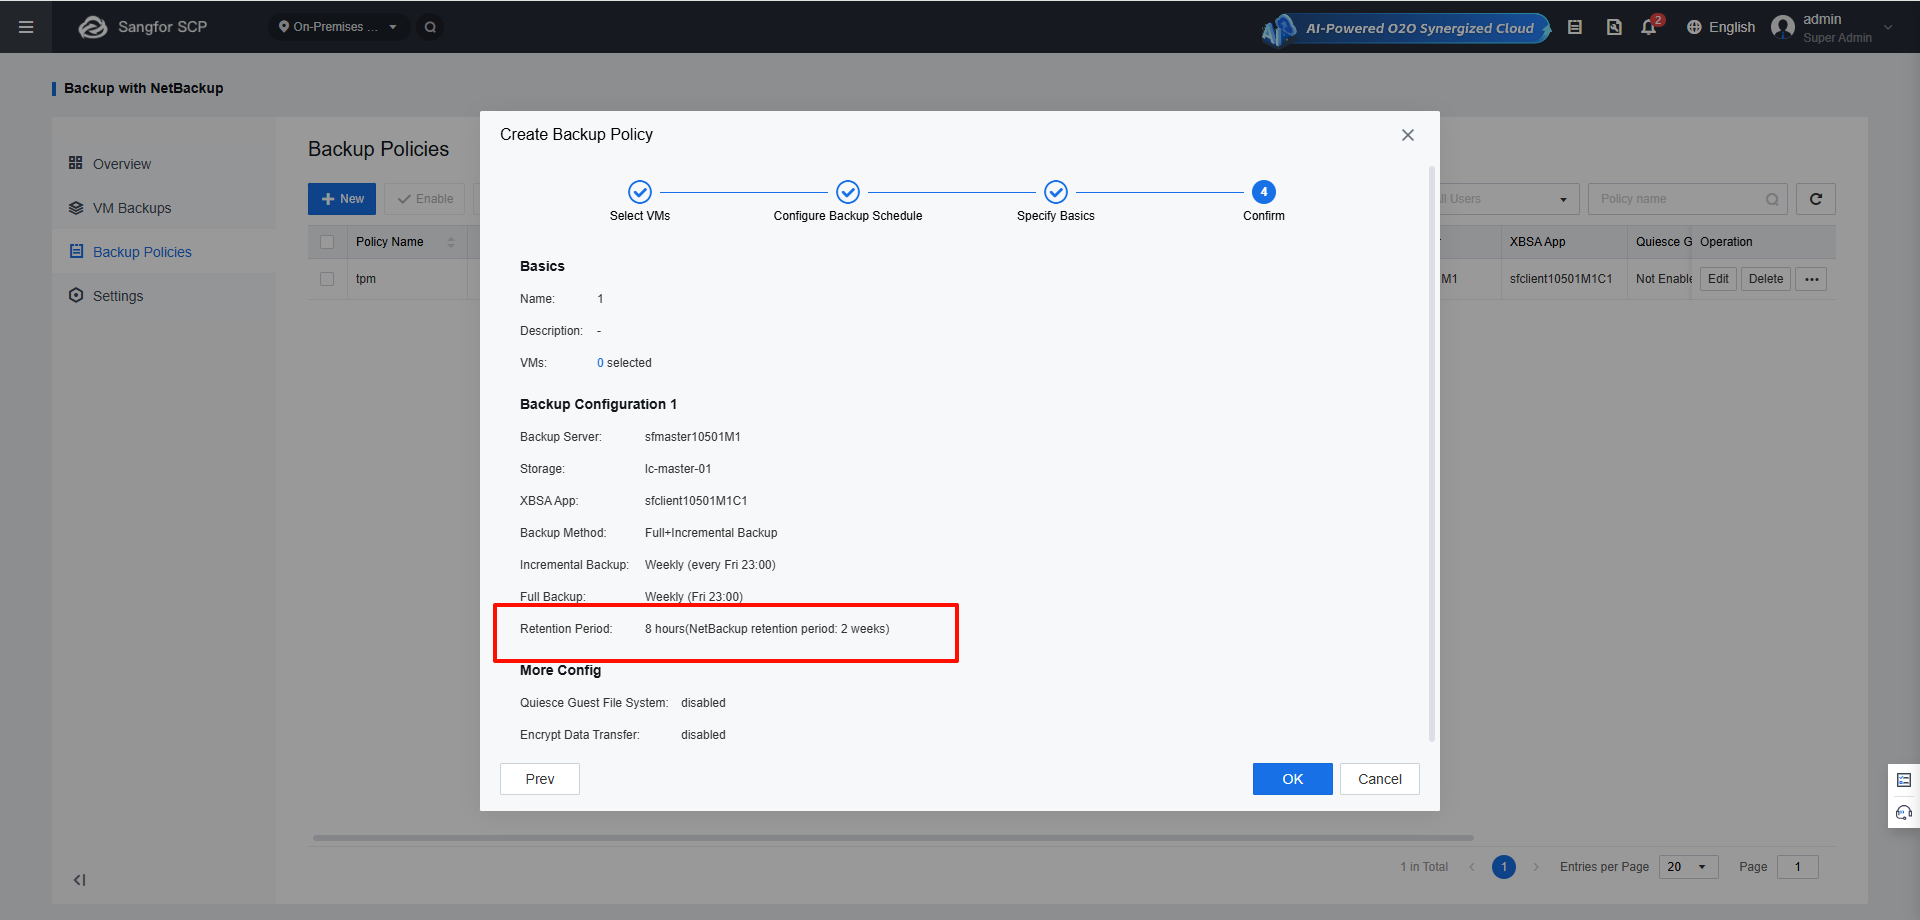
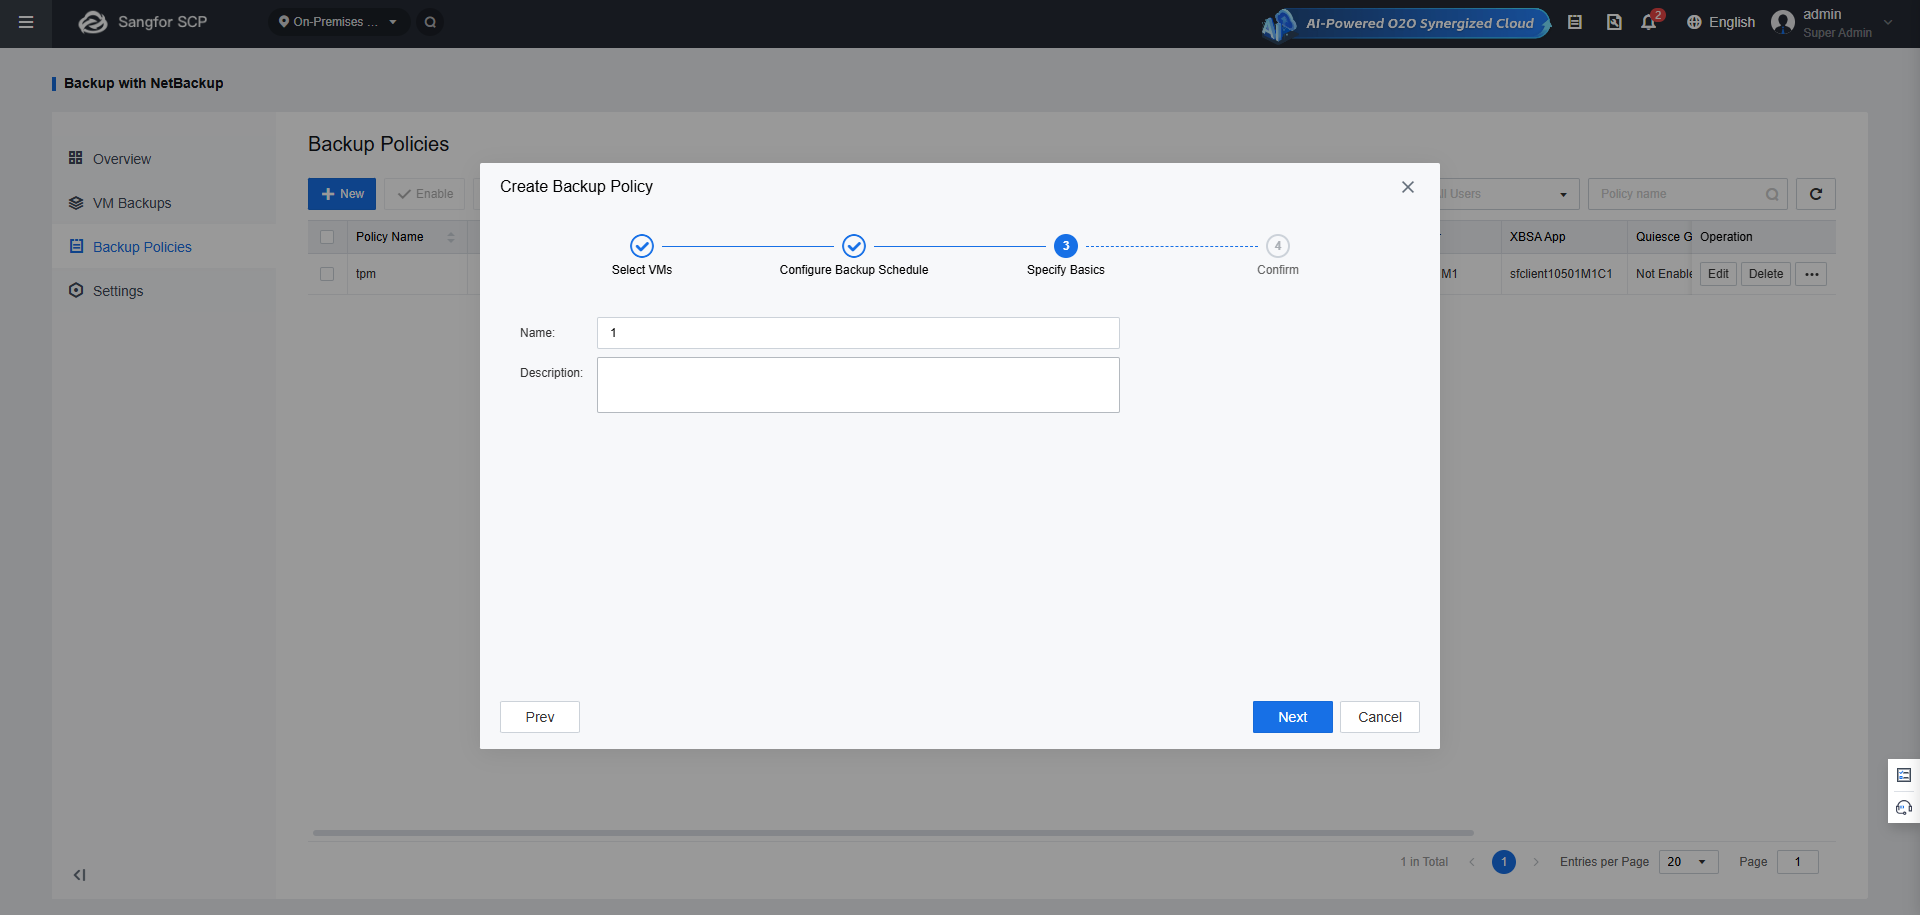
Step 4.In the Specify Basics step, enter Name and Description, and click Next to confirm the configuration.
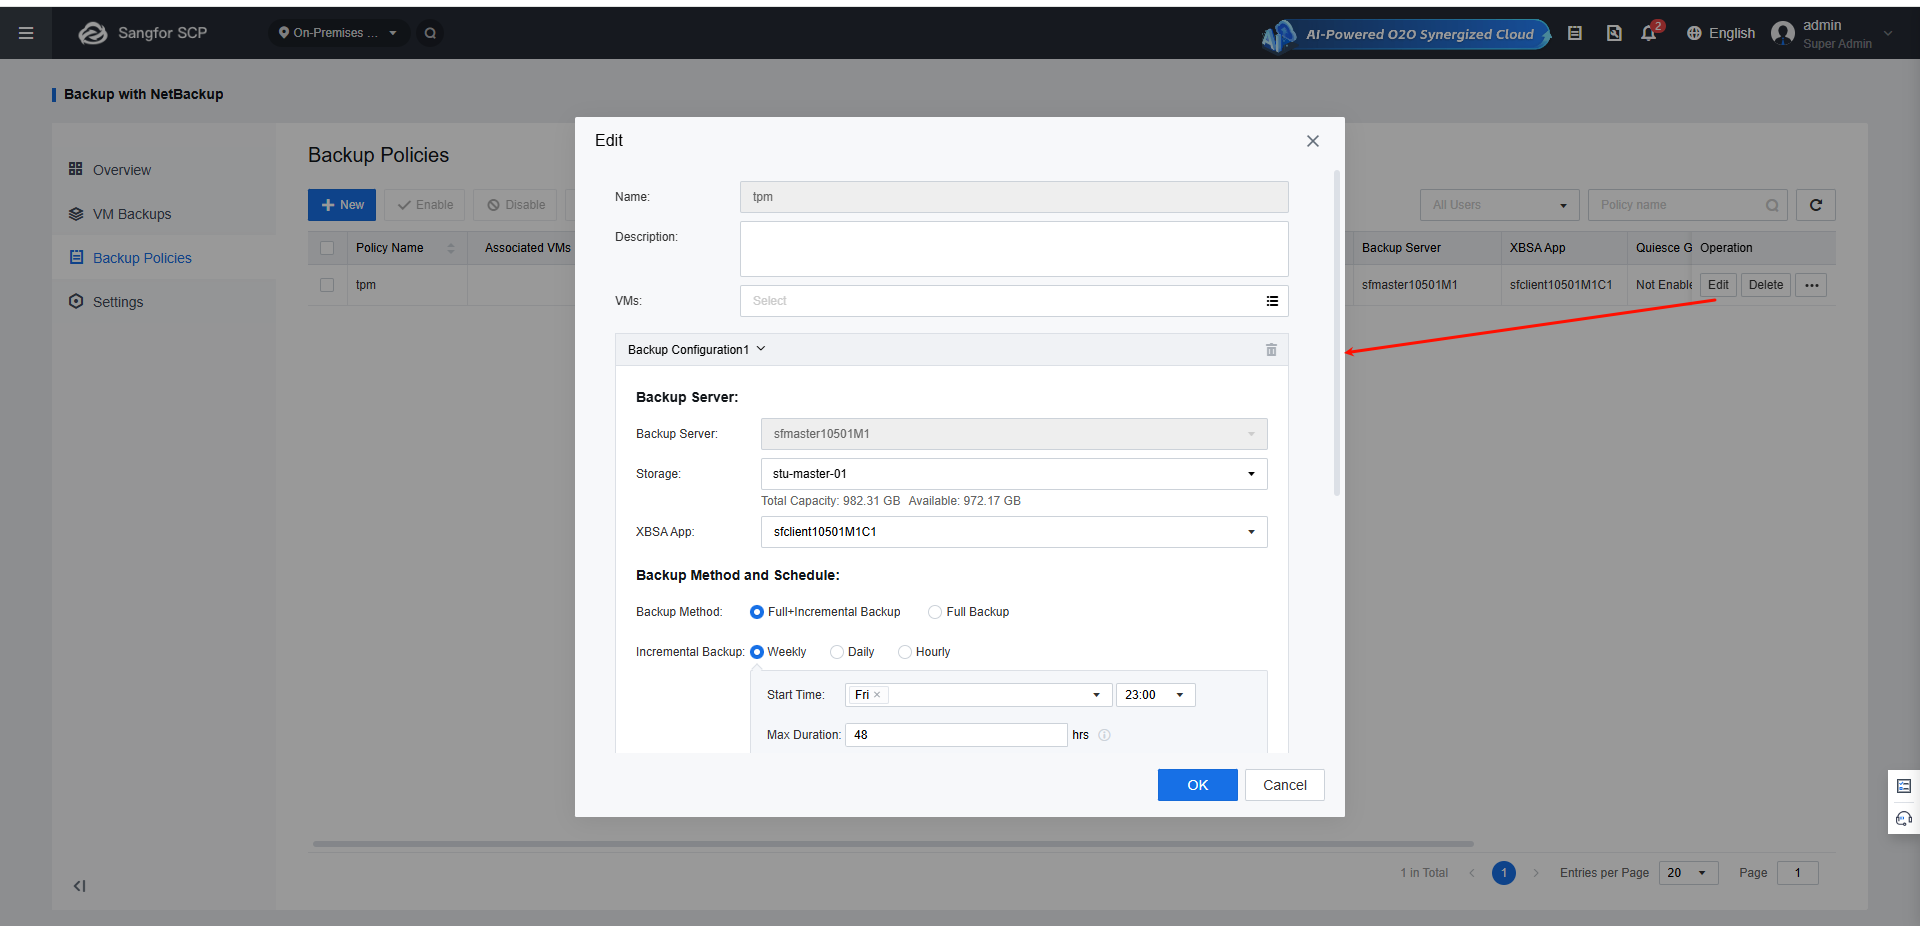
Edit Backup Policy
On the Backup Policies page, find the policy you want to edit, and click Edit in the Operation column.
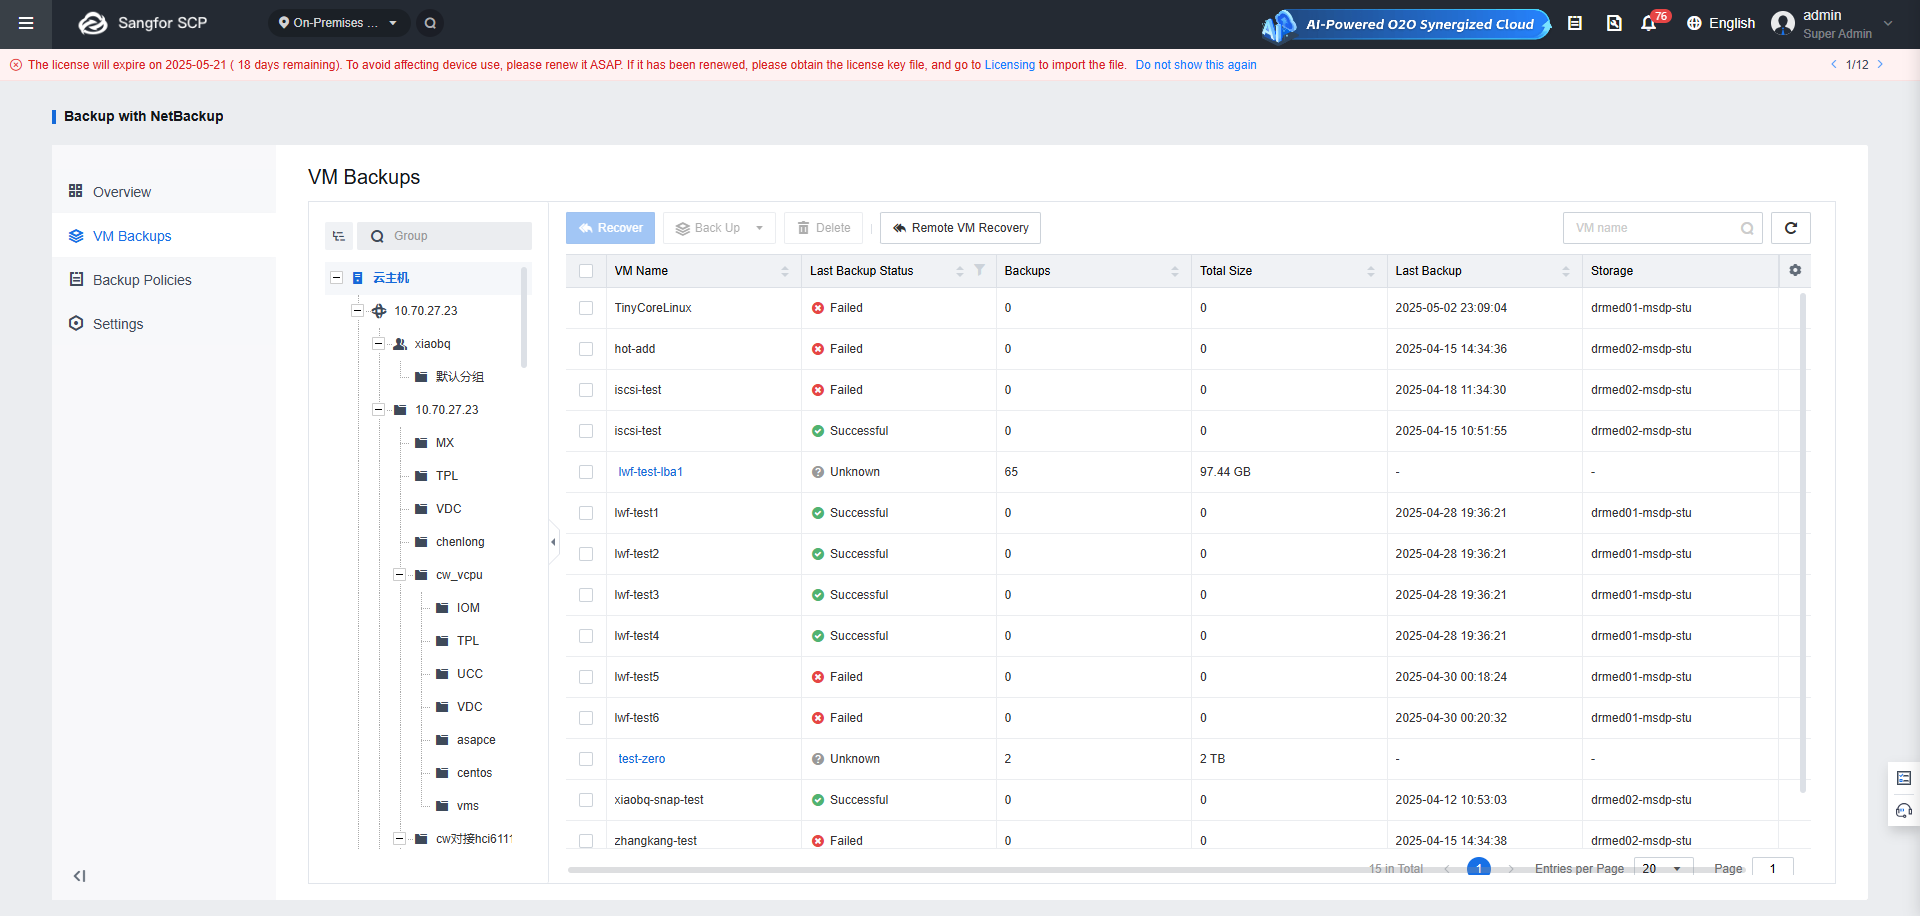
VM Backups
The VMs that are backed up on NetBackup or are contained in a backup policy will be displayed on the VM backups page. Other VMs will not be displayed here.
Back Up VM
To back up selected VMs, click Back Up.
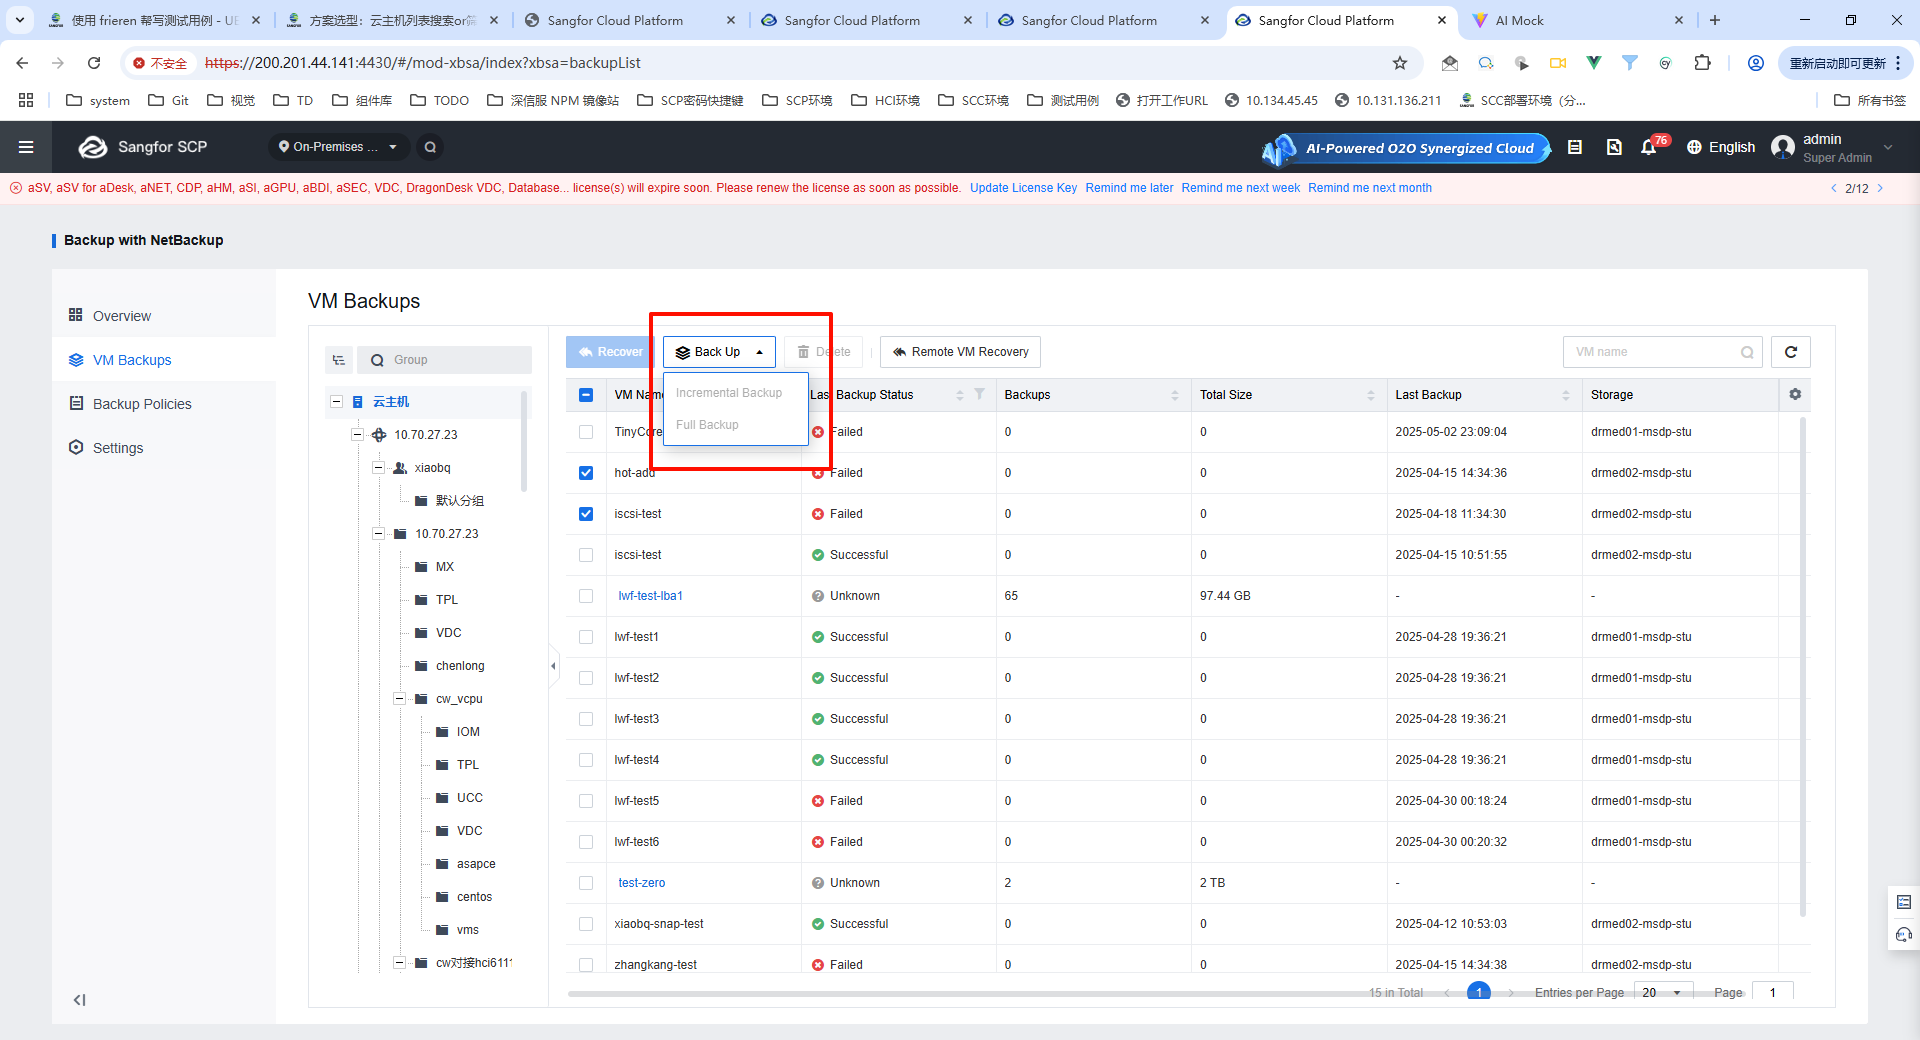
Please note that this option is unavailable for the VMs that are not contained in a backup policy.
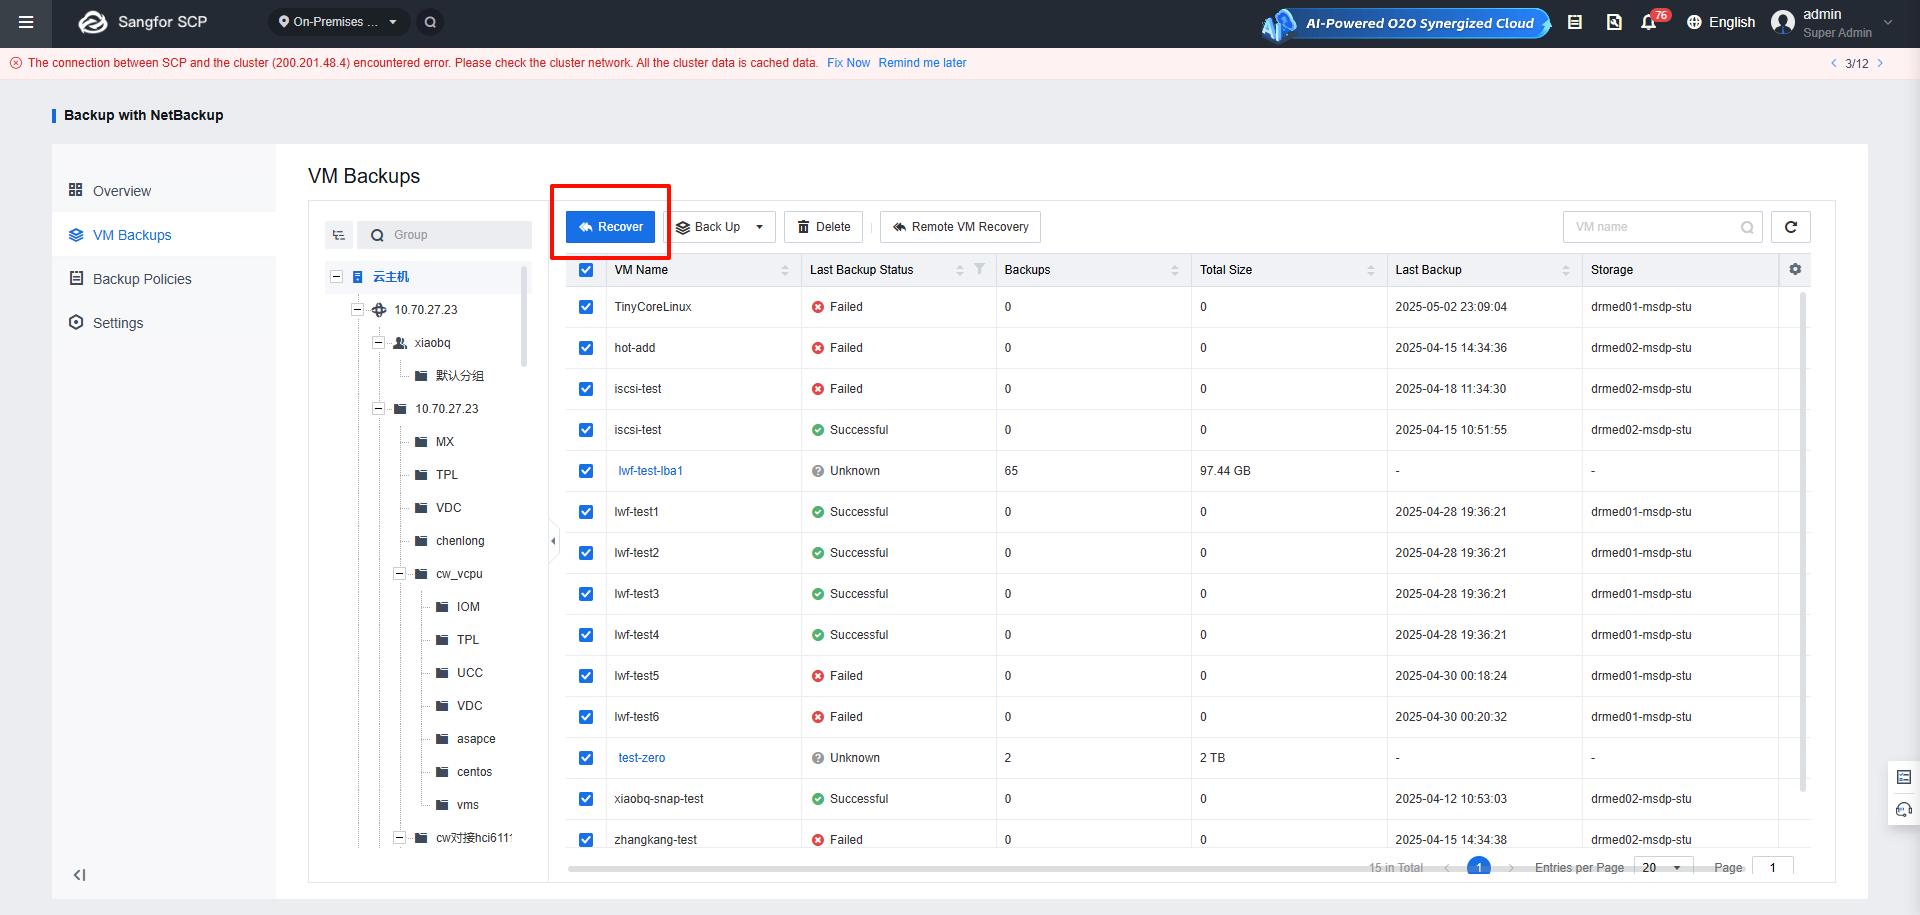
Restore VM Backup
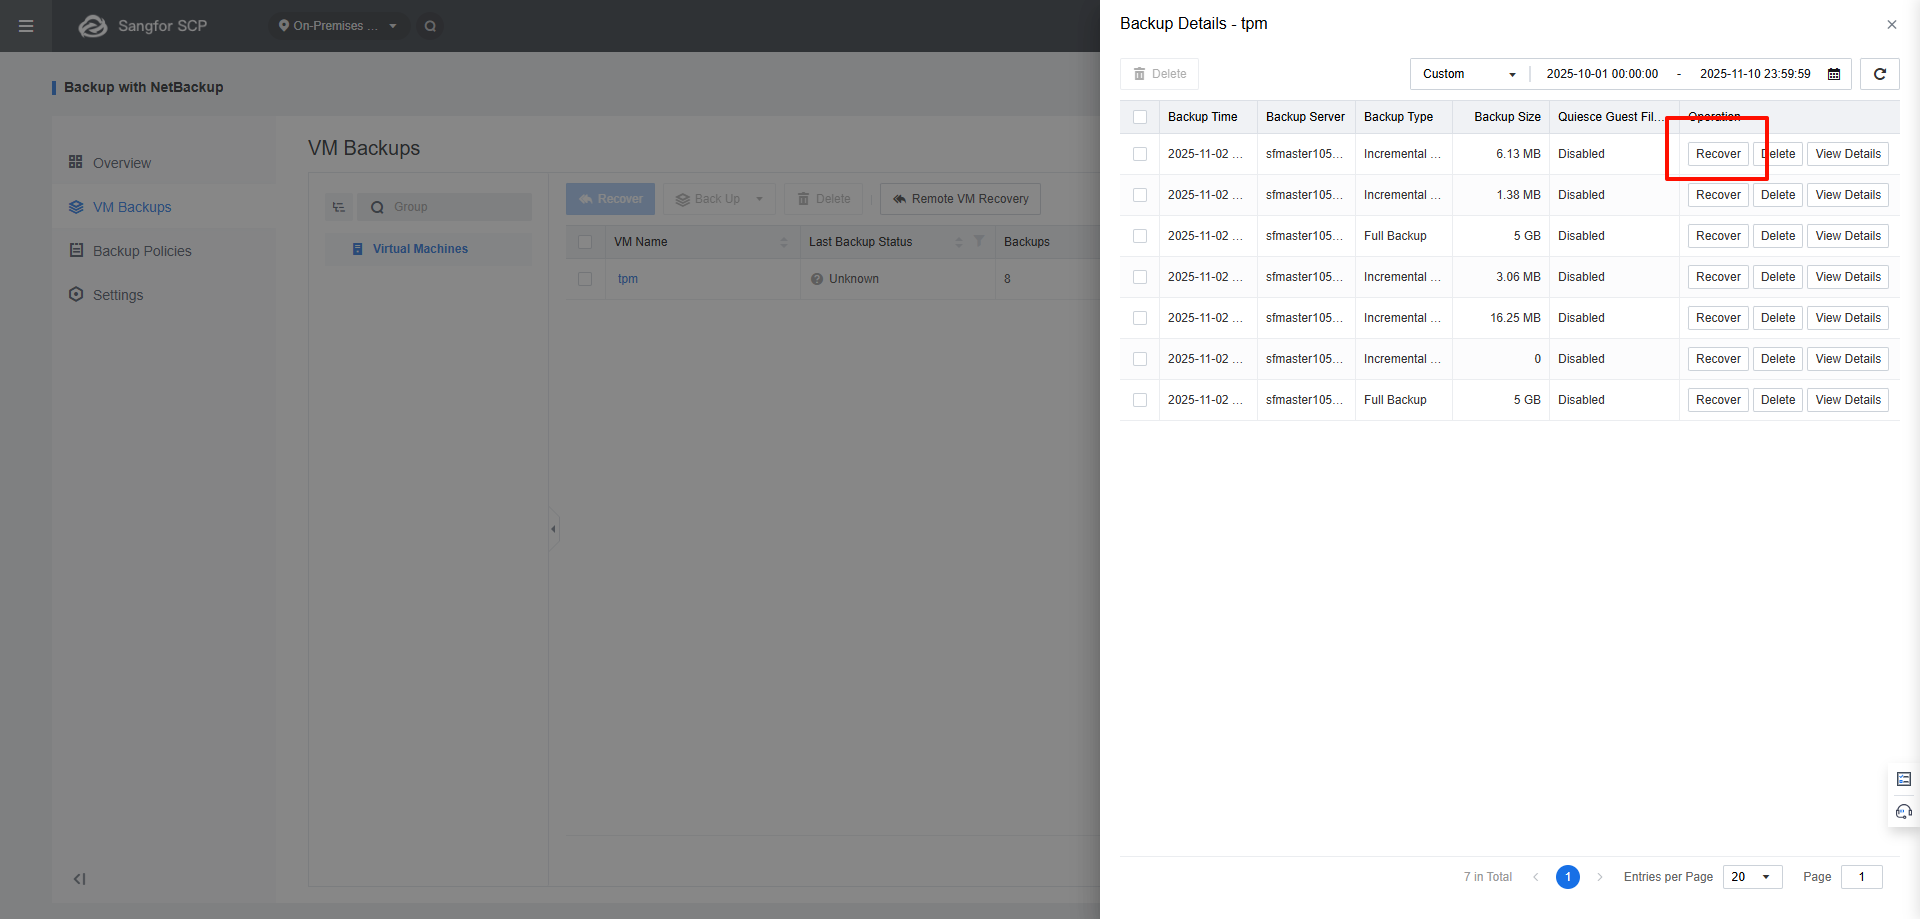
To bulk recover the backups of the selected VMs, click Recover on the VM Backups page.
To recover the backup of a specified VM, find the VM in the Backup Details panel, and click Recover in the Operation column.
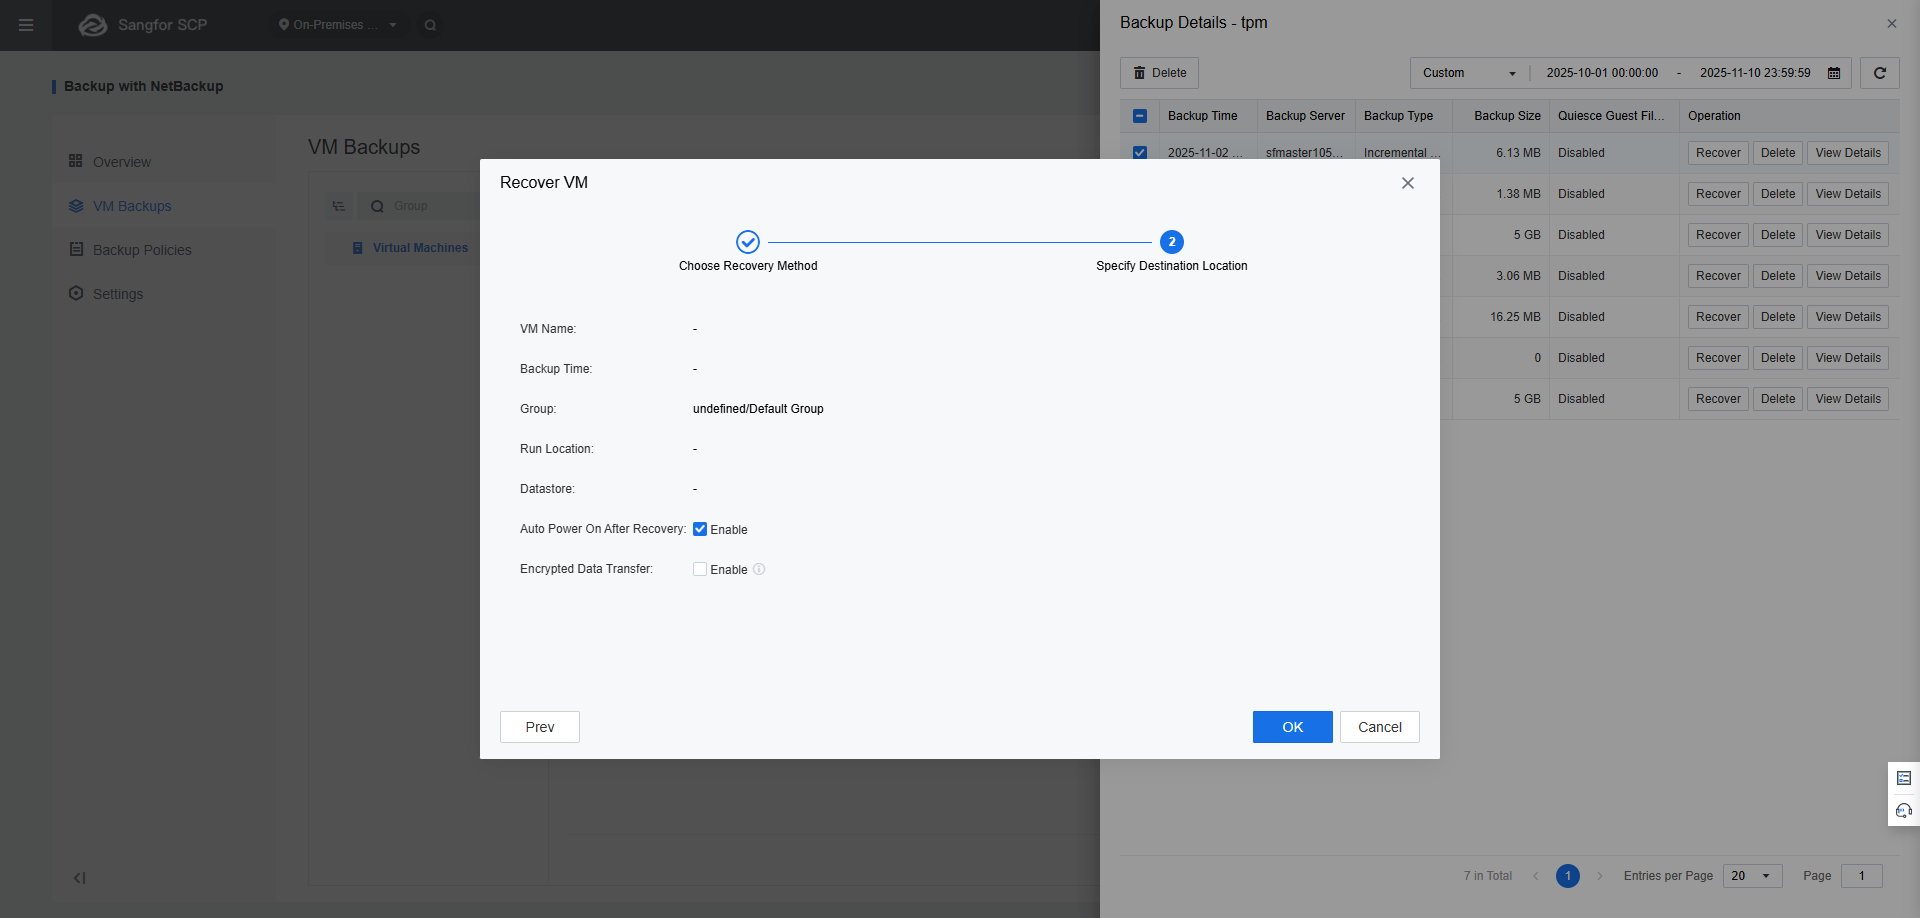
Two recovery methods are supported:
Creating: Create a VM using the backup. Supports specifying parameters such as the resource pool, datastore, run location, group, and VM name.
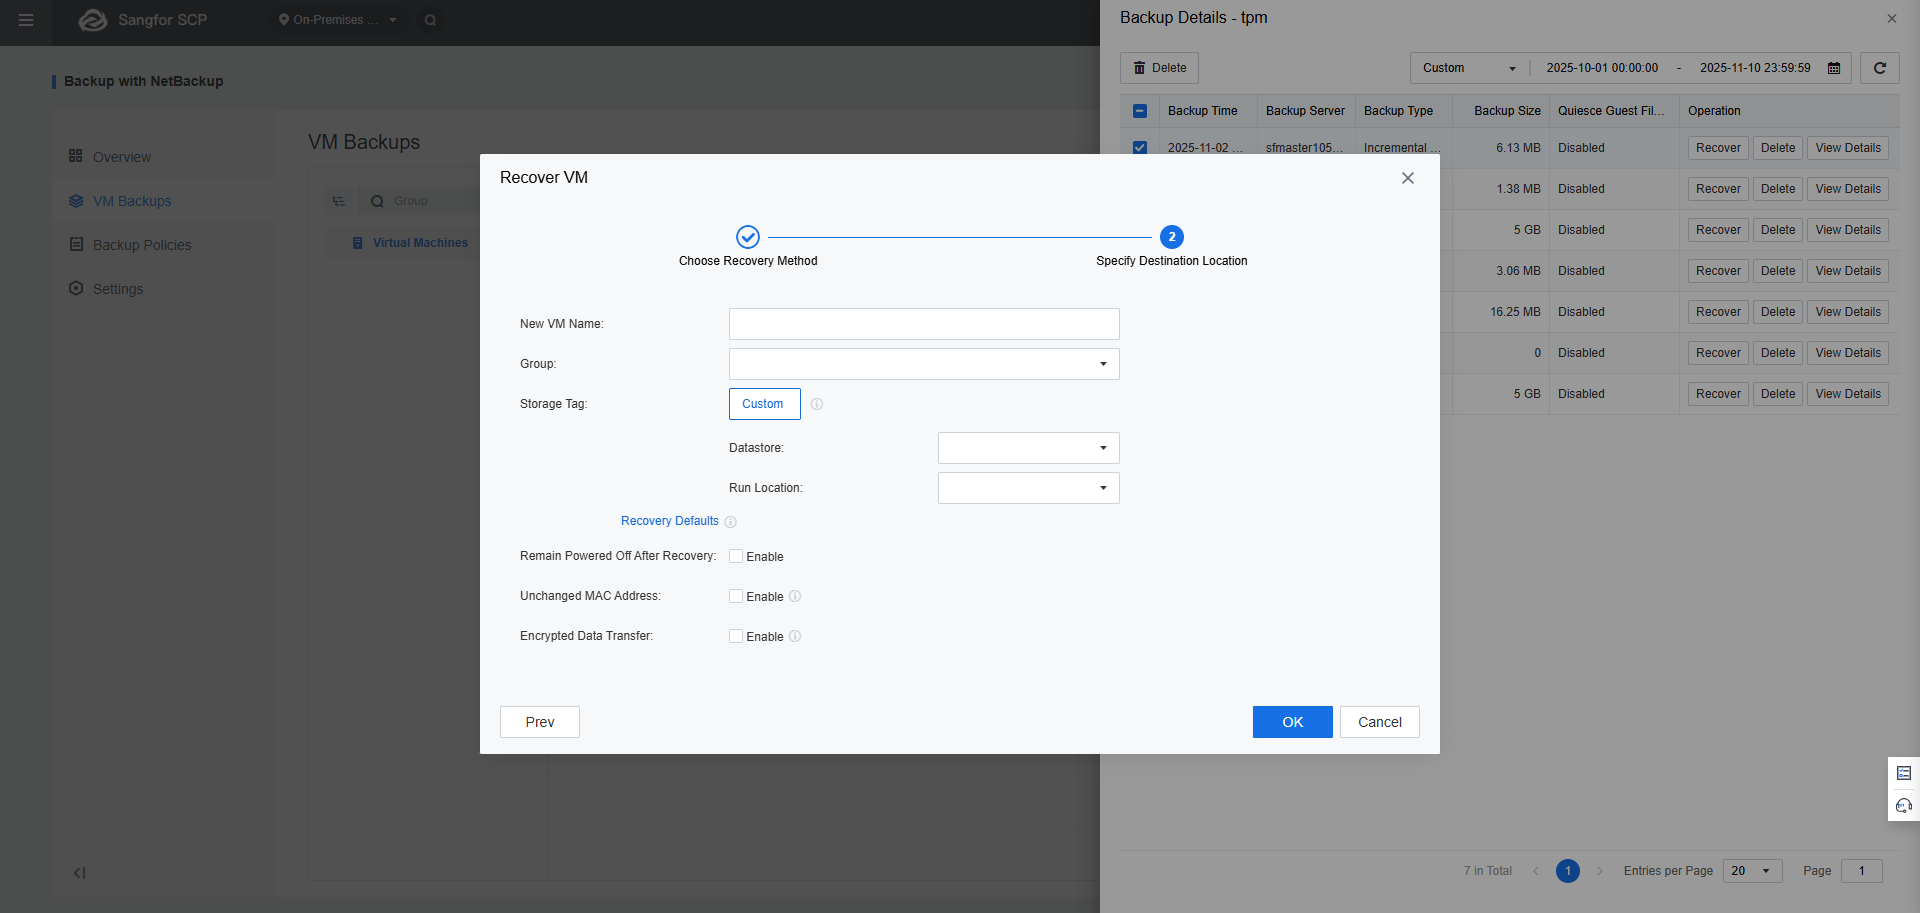
Overwriting: Recover the data on the source VM using the backup. The parameters, such as the resource pool, datastore, run location, group, and VM name, cannot be specified.
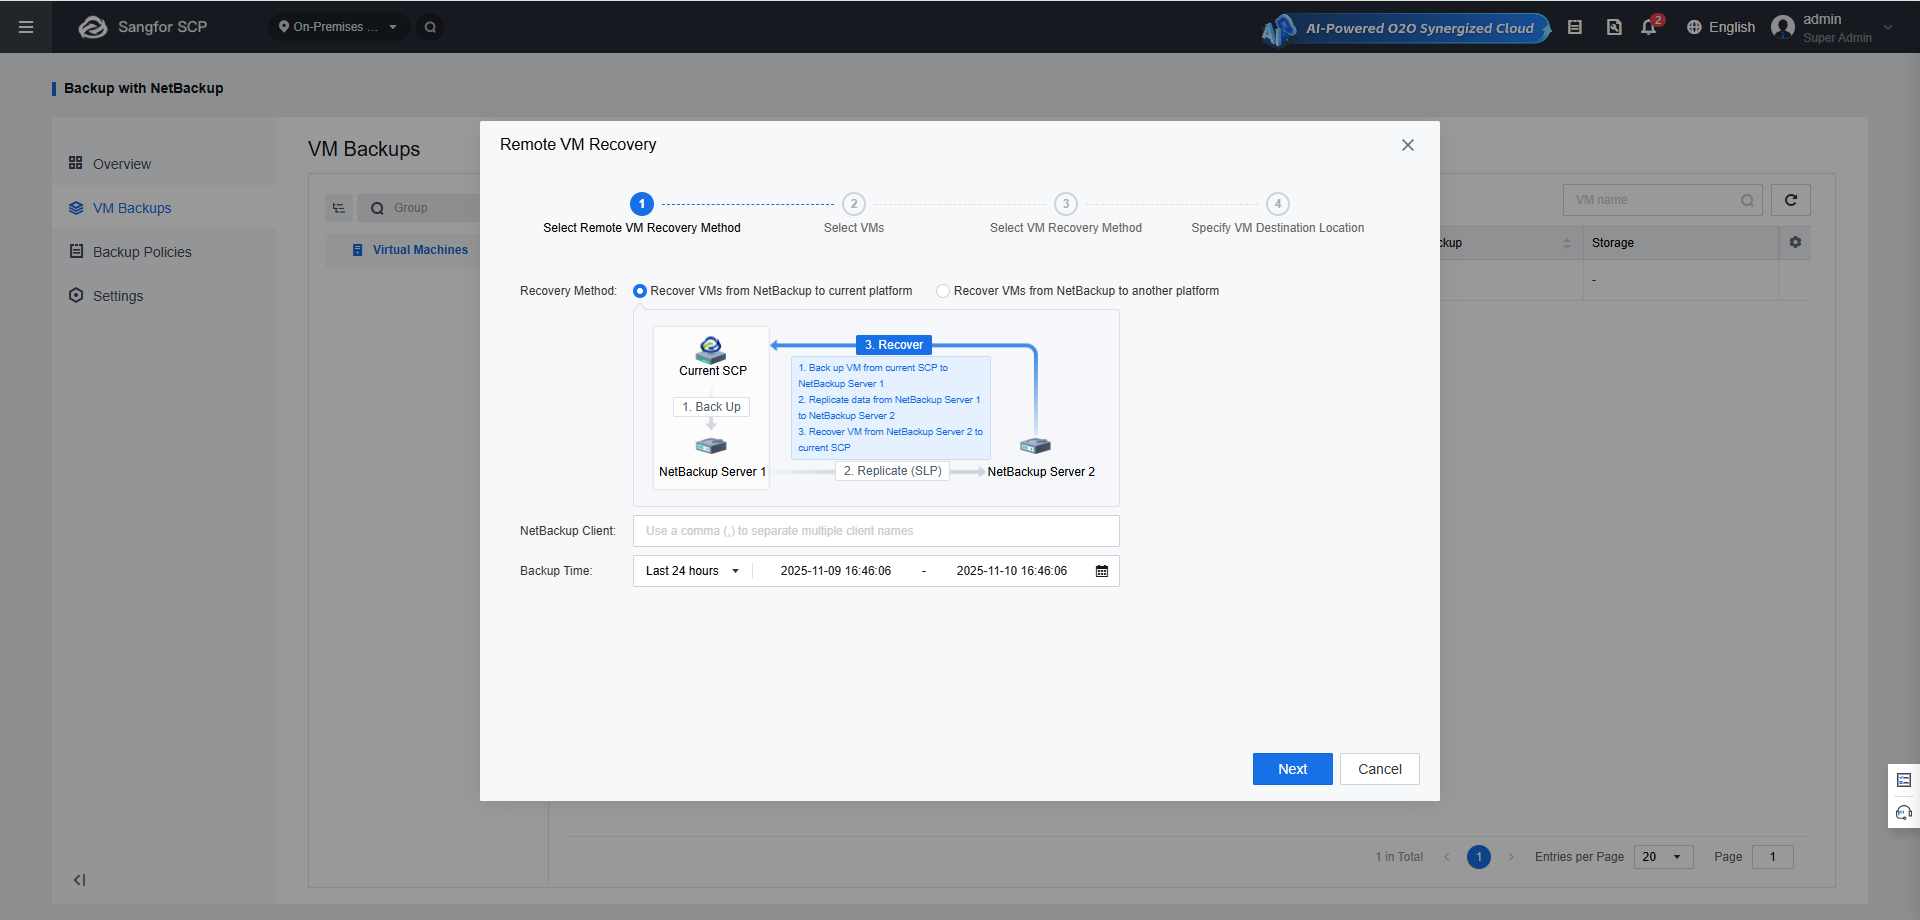
Cross-Platform VM Recovery from Backup
Prerequisites
Cross-platform VM recovery from backup is based on the backup replication capability of NetBackup. It involves replicating backups from the primary site to the secondary site, followed by scanning and restoring them at the secondary site. To enable the feature, the following requirements must be met: SCP and NetBackup must be deployed at both the primary and secondary sites, and the NetBackup server at these sites must be in a primary-secondary relationship. The configuration for the primary and secondary sites is as follows:
Primary site configuration: The NetBackup server on the primary site must be configured with storage lifecycle policies. If Storage Lifecycle Policy is selected for Storage for a backup policy, all backups generated by this backup policy will be replicated to the secondary site.
Secondary site configuration: To enable the secondary site to discover backups created by other clients, remove the restriction by performing the following steps:
Execute the command: mkdir -p /usr/openv/netbackup/db/altnames
Execute the command: touch /usr/openv/netbackup/db/altnames/No.Restrictions
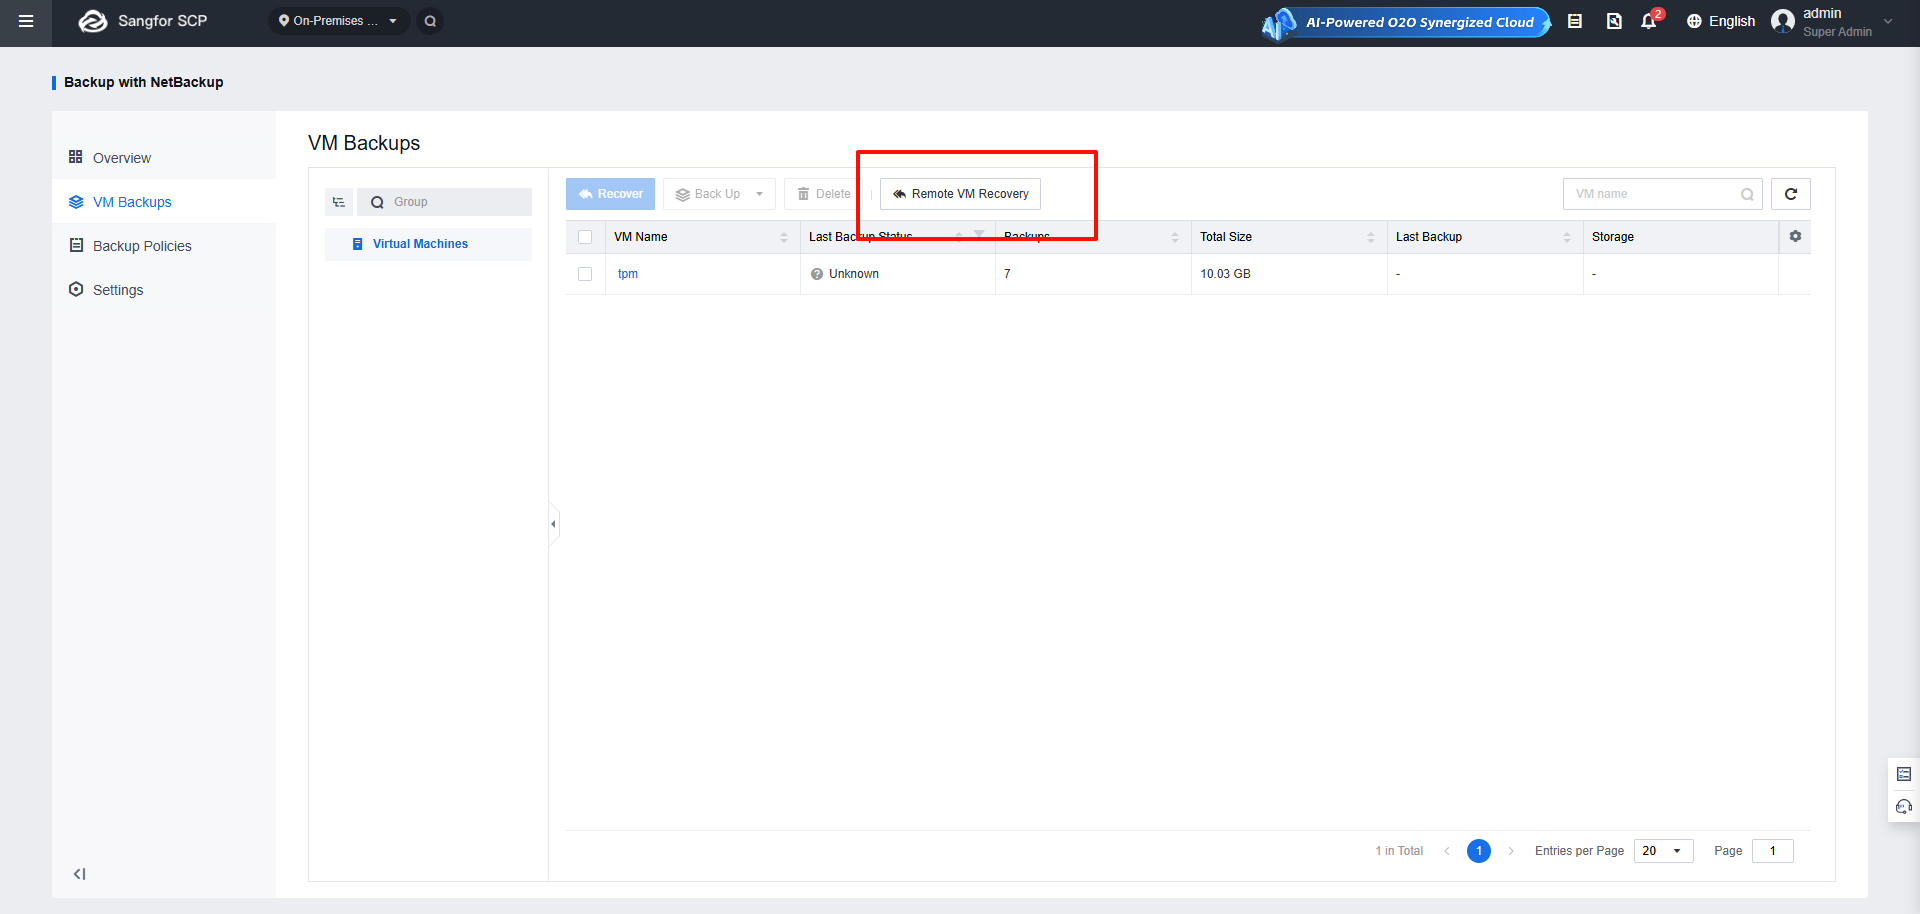
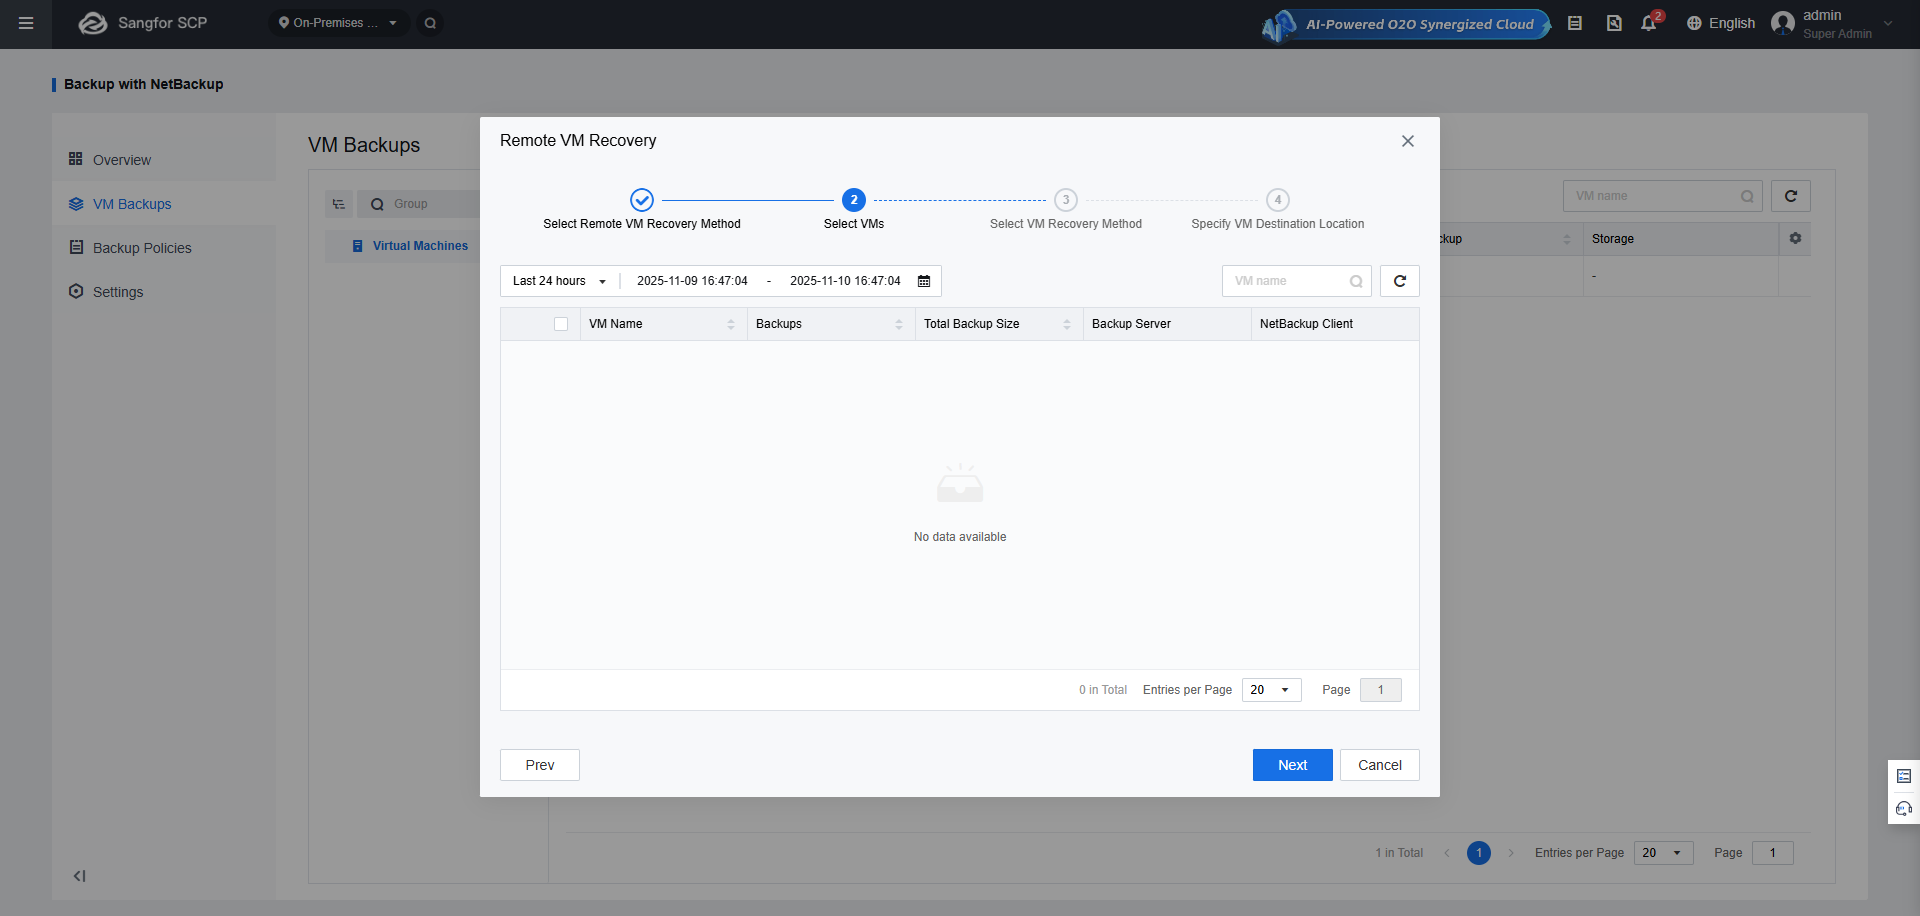
Find backup and recover VM from it
Click Remote VM Recovery to scan on another SCP to find the created backup and recover the VM from it.
Function Description:
This function provides high-availability services for virtual machines. When any one of the node's hardware, storage, or network fails, the HA mechanism will automatically restore the virtual machine (including virtual network devices) to run on other nodes to ensure business continuity.
Precautions:
When the management interface and edge port are disconnected simultaneously, only the virtual machine HA in the two-node scenario takes effect, and the HA in the three-node scenario does not.
Prerequisite
The virtual machine needs to enable the HA function, and other hosts have sufficient resources.
Steps:
Log in to the SCP platform, and navigate to Reliability > HA. You can set the Monitoring Sensitivity, and the setting is set for the entire cluster. Example: If the fault sensitivity level is high and the fault status is detected for 30 seconds, HA will shut down the virtual machine on the faulty node and try to restore the virtual machine to other nodes in the cluster.

 {{ $t('index.defaultHeader.chromeBrowserTip') }}