Function Description:
In SCP 6.11.1 and higher versions, resources including resource pools, nodes, VMs, storage, and virtual switches are managed in the Resource Center, which can be viewed by node, VM, storage, and network.

Steps:
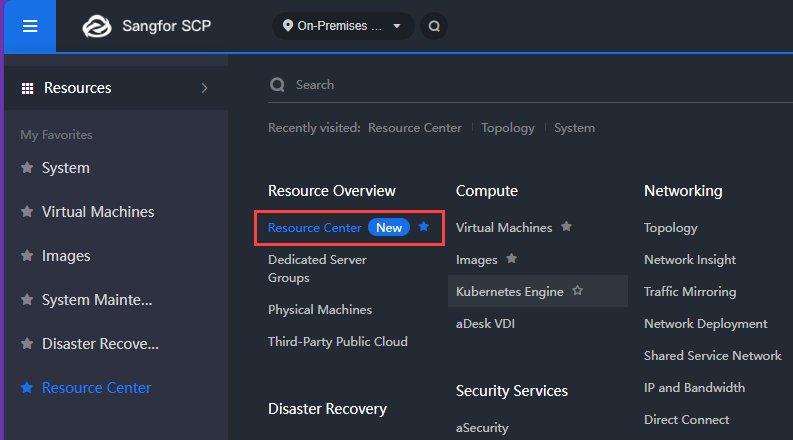
Step 1.Log in to SCP and go to Resources > Resource Overview > Resource Center.

Step 2.Go to the Resource Pools page.

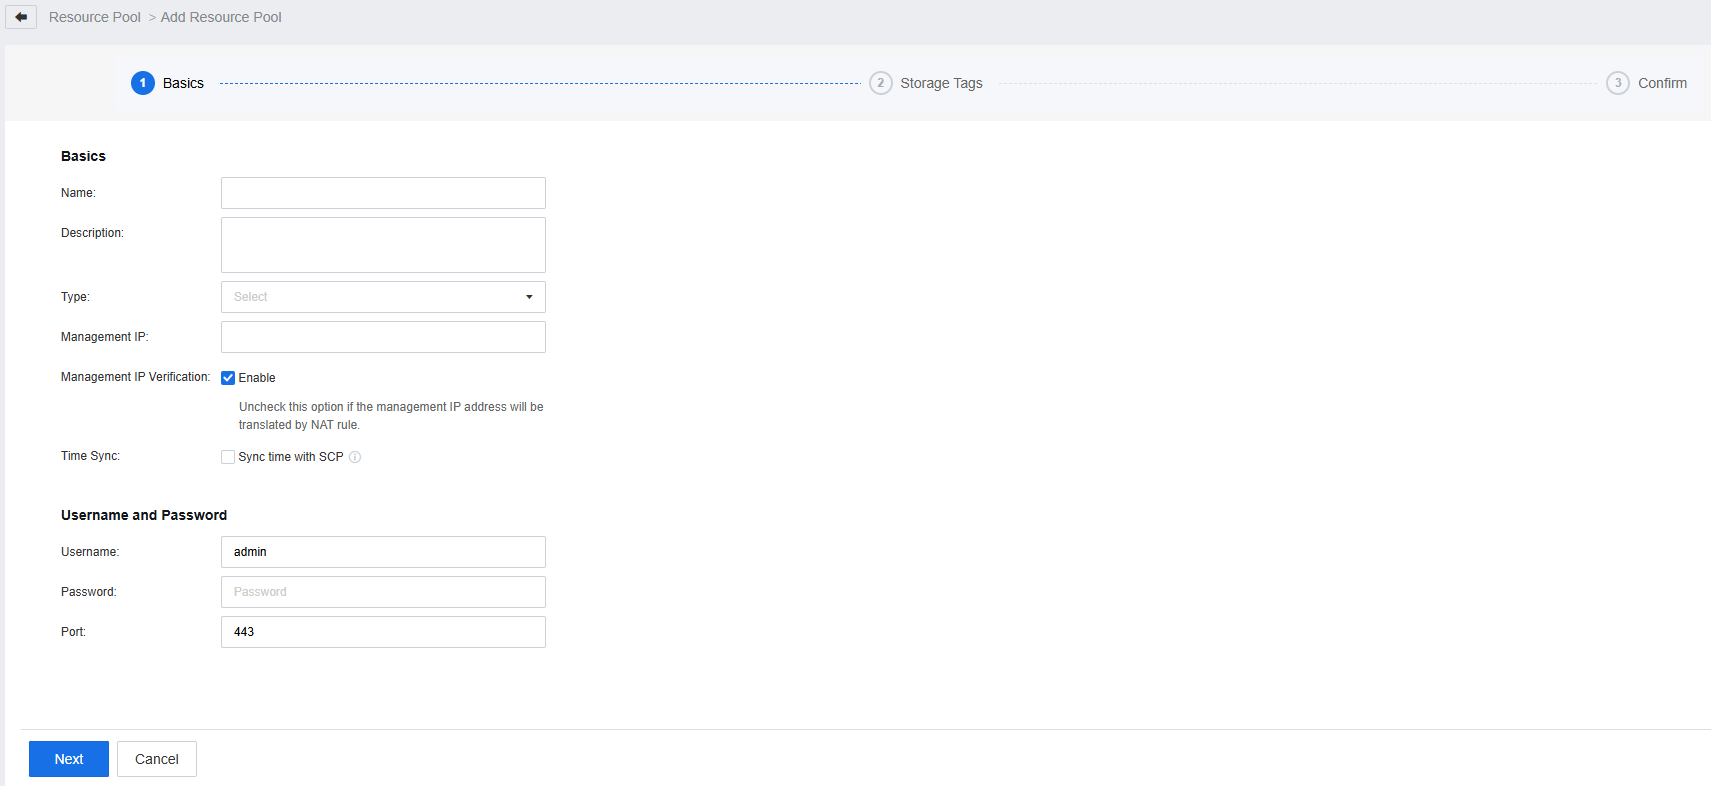
- Click New, complete the basic information, and tag the storage to create a resource pool.

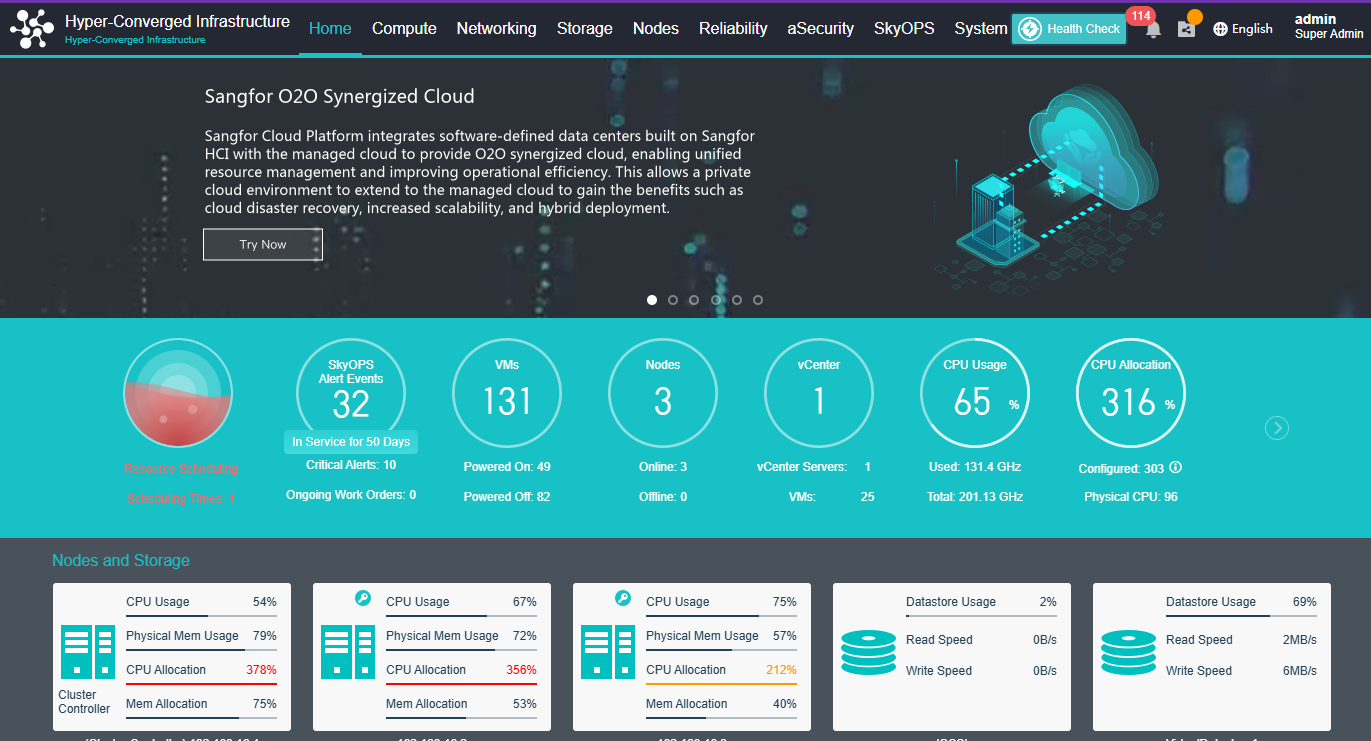
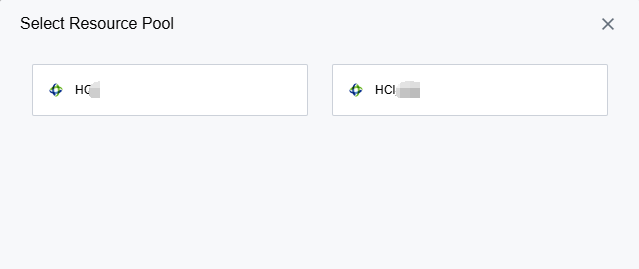
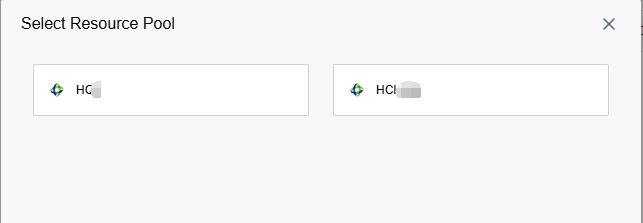
- Click Visit of the created resource pool (HCI) to log in to it.

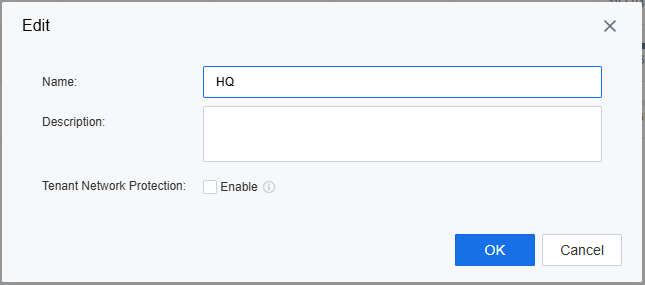
- Click its Edit to modify the Name and Description, and enable or disable Tenant Network Protection.
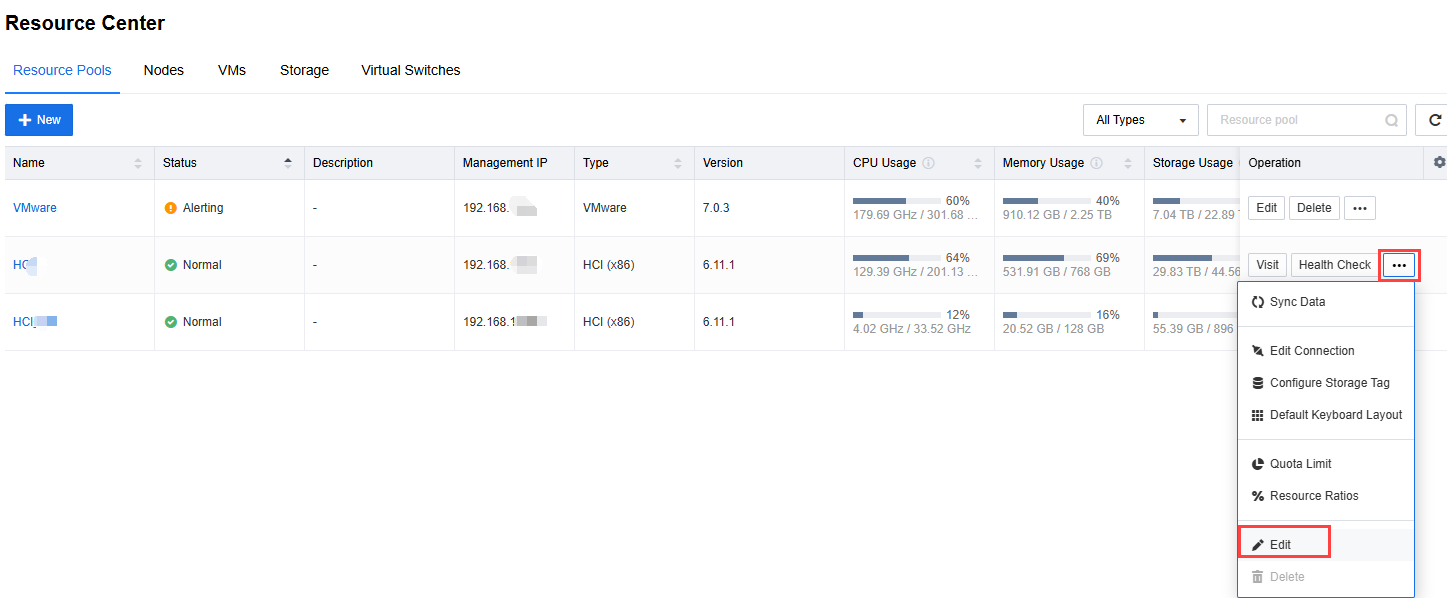
- Click its More to configure the connection, storage tag, default keyboard layout, quota limit, and resource ratios.
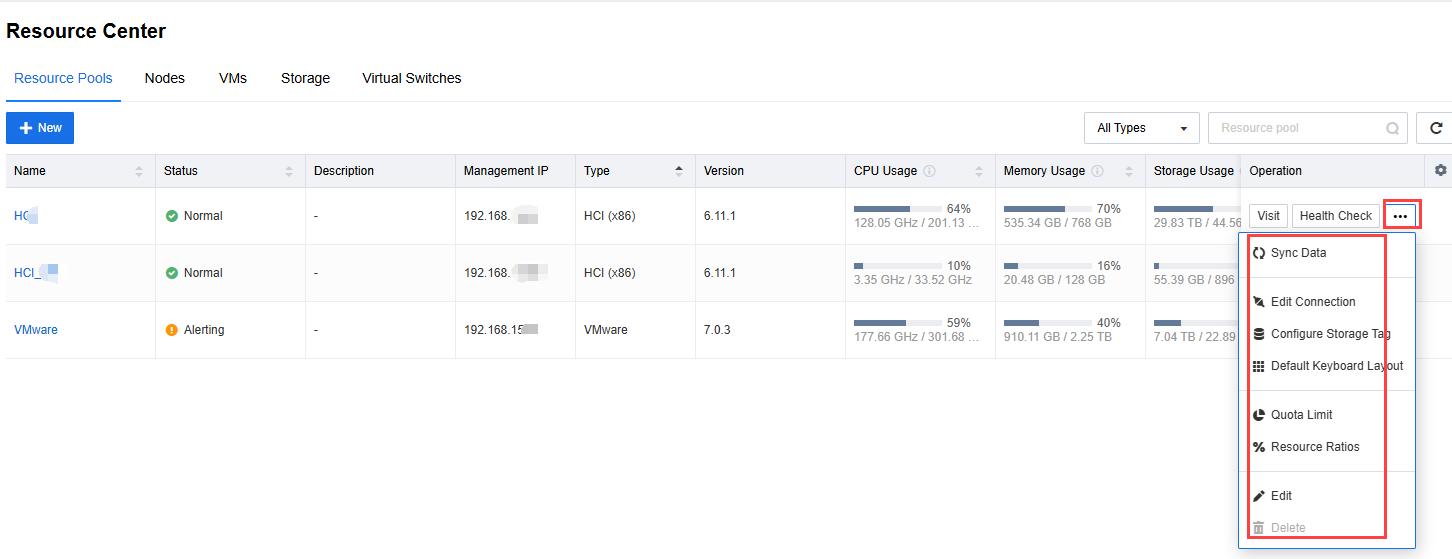
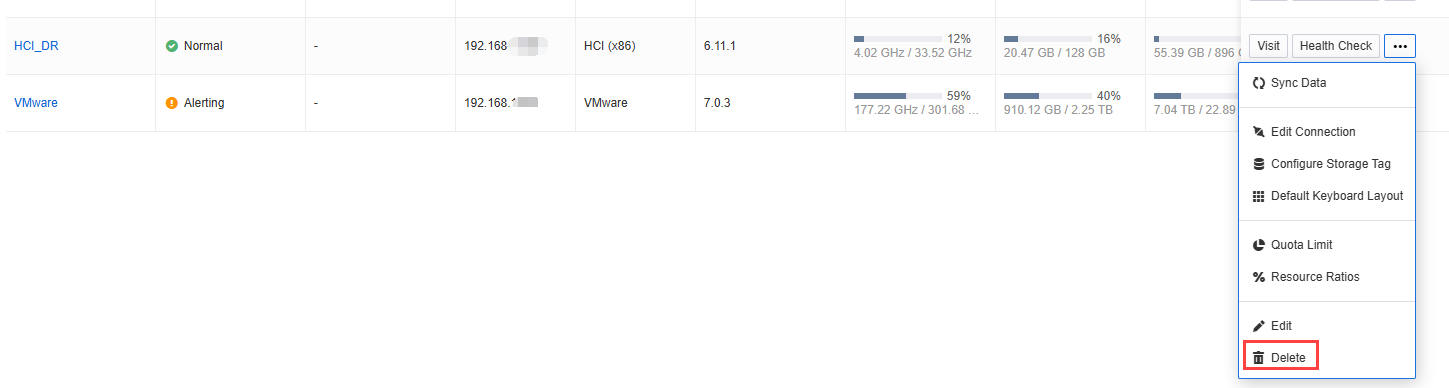
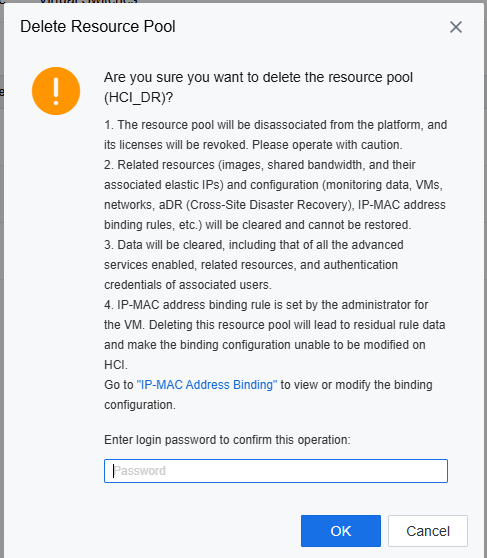
- Click its More then Delete, and enter the administrator password to delete it (high risk).
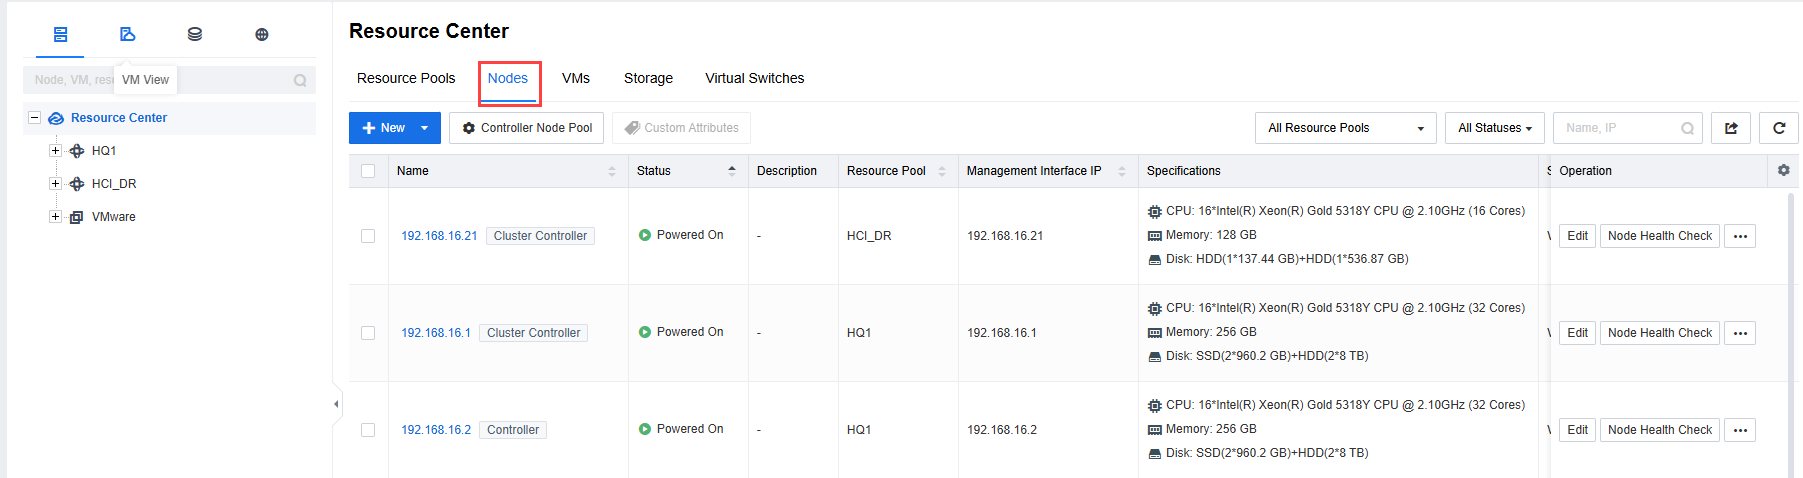
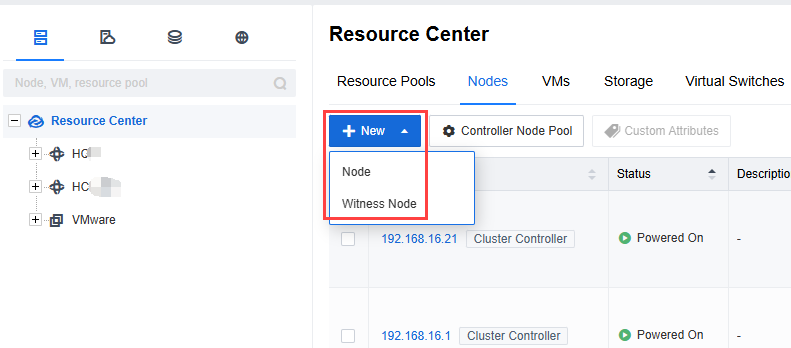
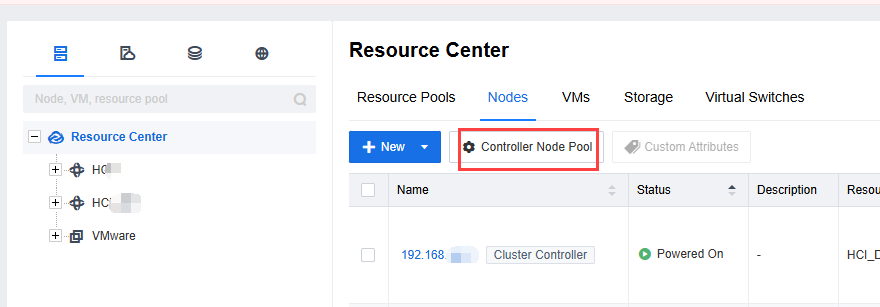
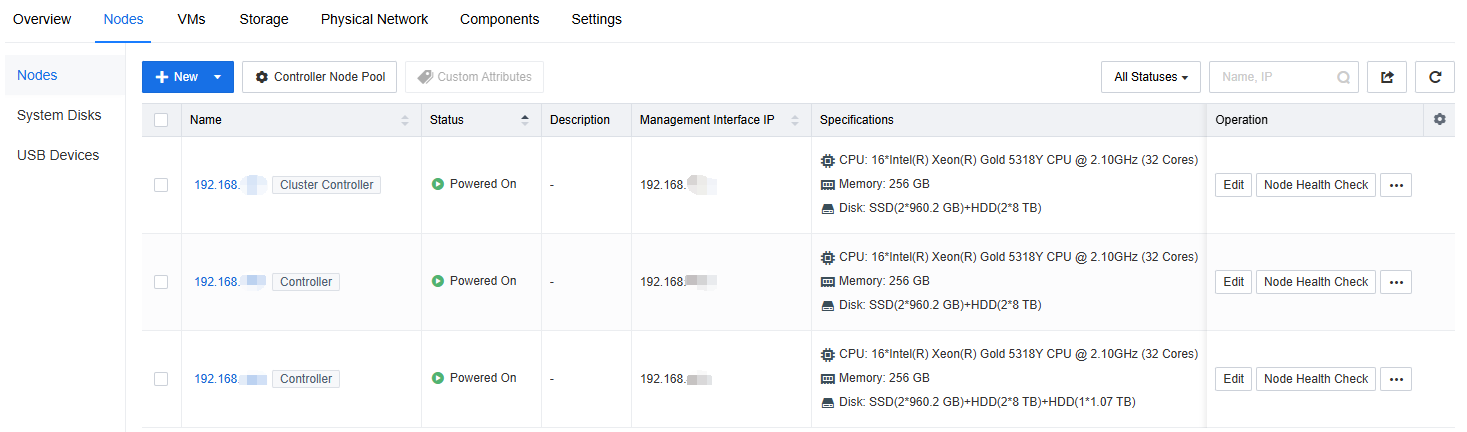
Step 3.Go to the Nodes page.
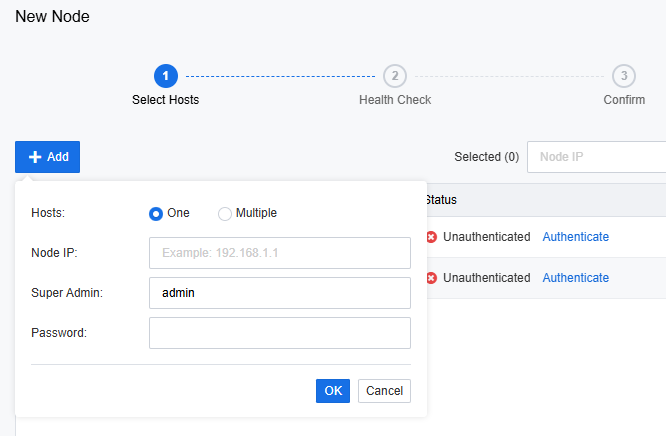
- Click New, select Node or Witness Node and the resource pool to which nodes belong, and check the environment to add them.
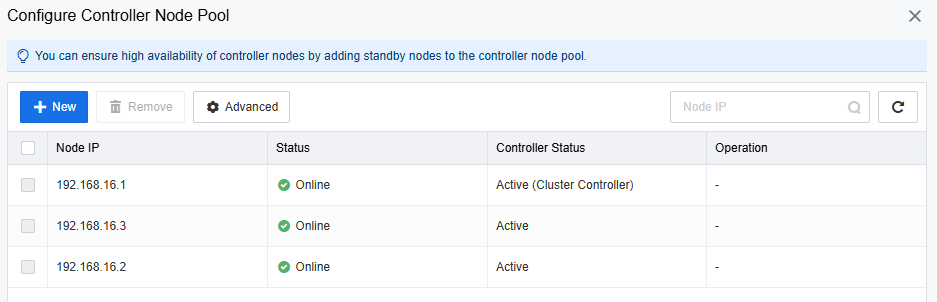
- Click Controller Node Pool, select the corresponding resource pool, and add or remove controller nodes.
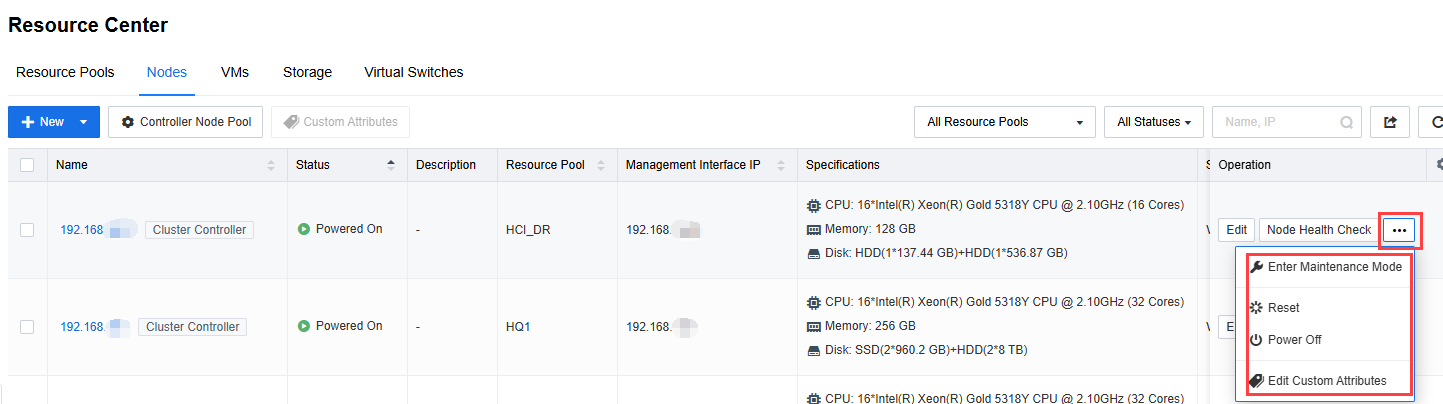
- Click Edit of an added node to modify the Name and Description, and click its More to set it as cluster controller, enable Maintenance Mode, edit custom attributes, and replace, reset, or power off it.
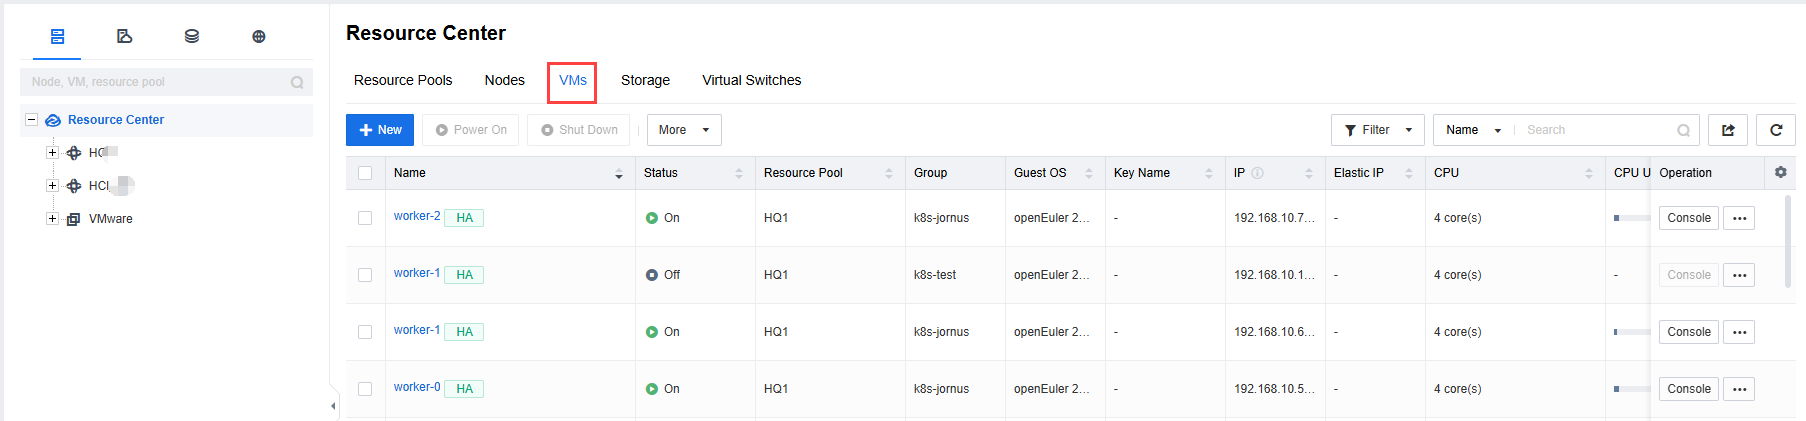
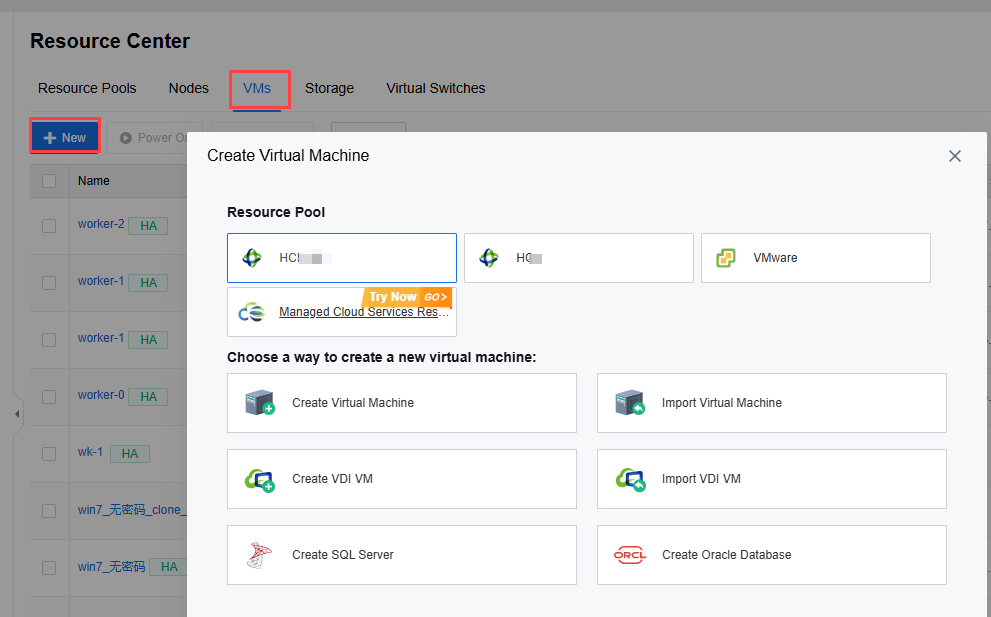
Step 4.Go to the VMs page.
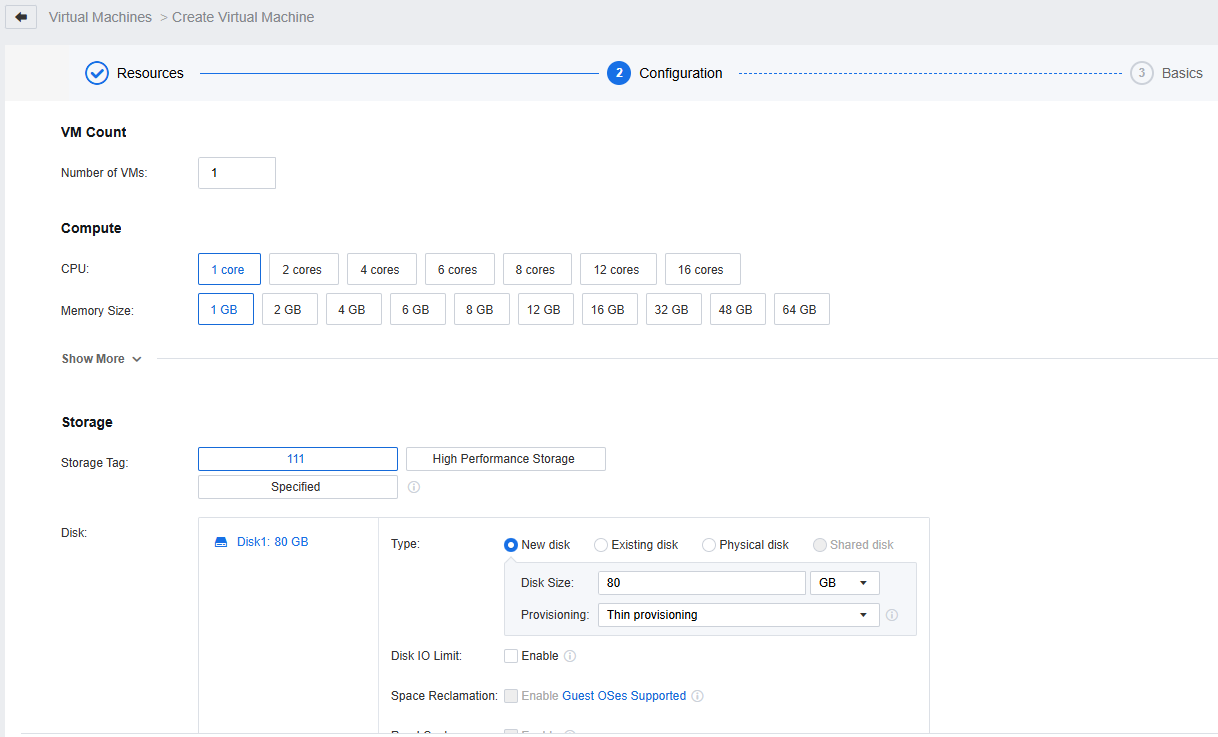
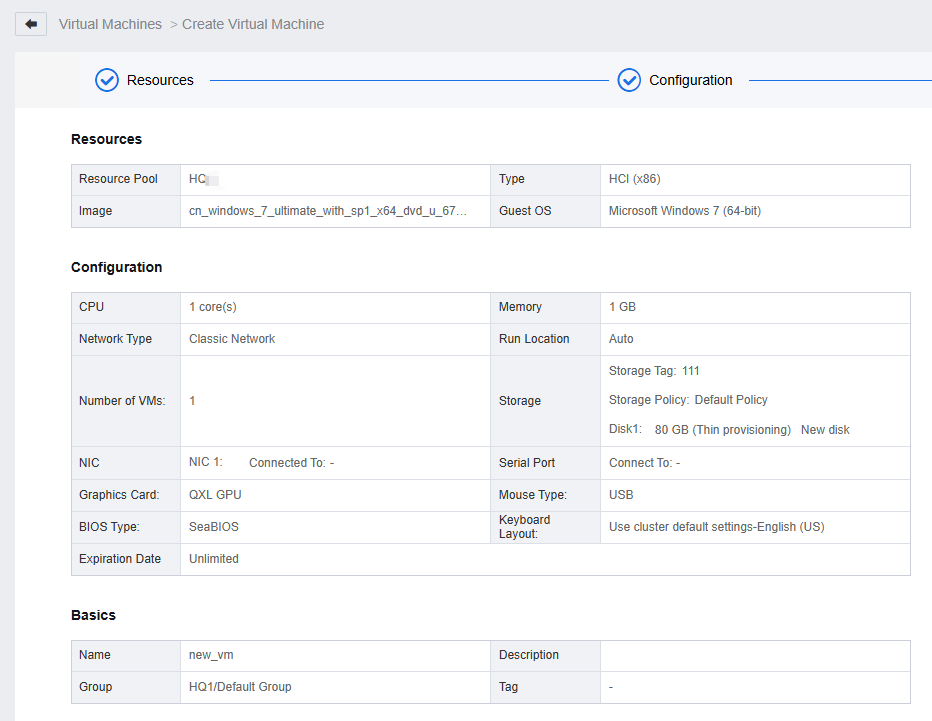
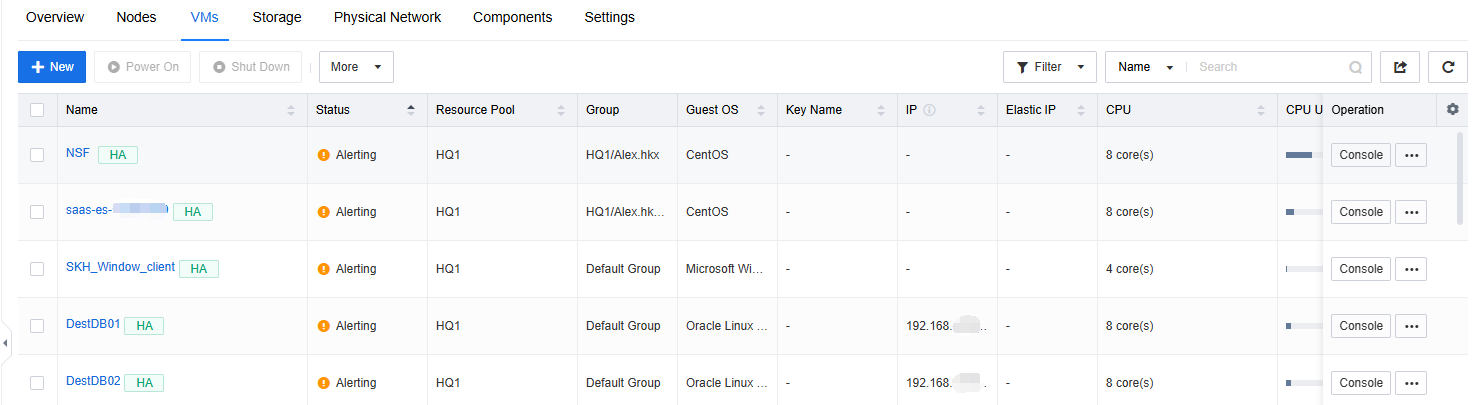
- Click New, select the resource pool to which VMs belong and the creation method, and follow the instructions to create them as needed.

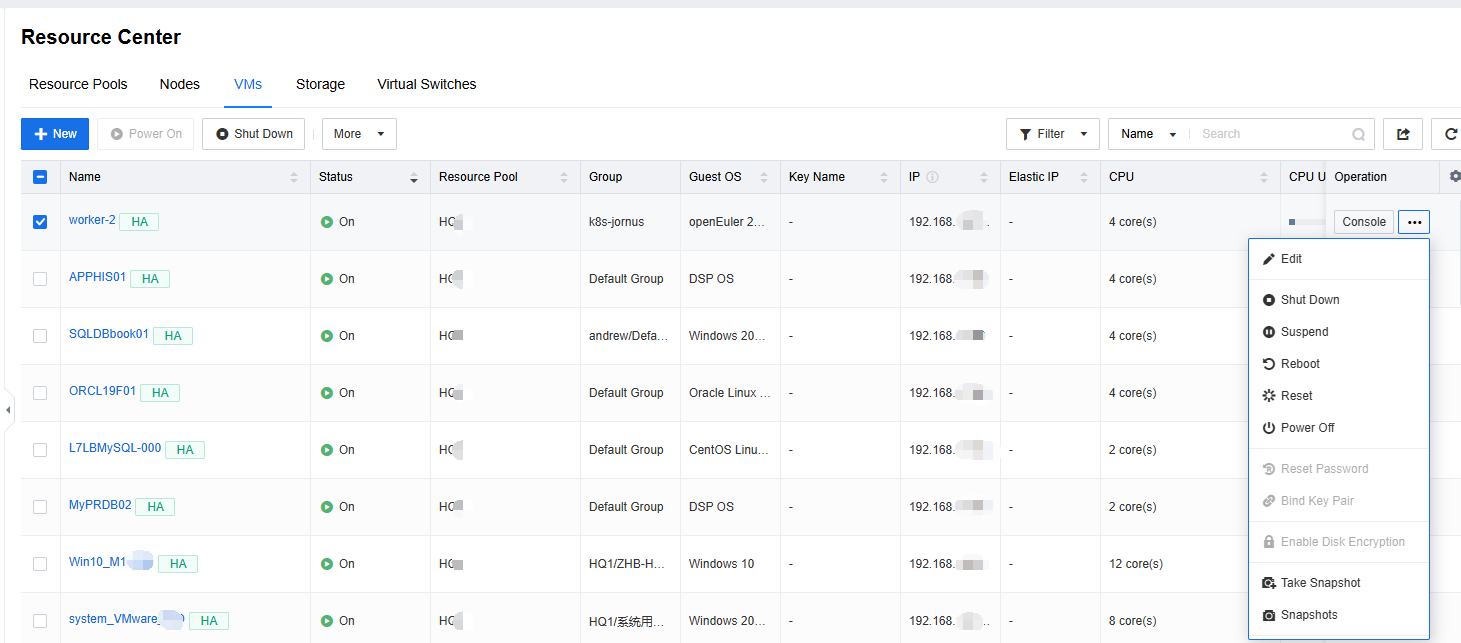
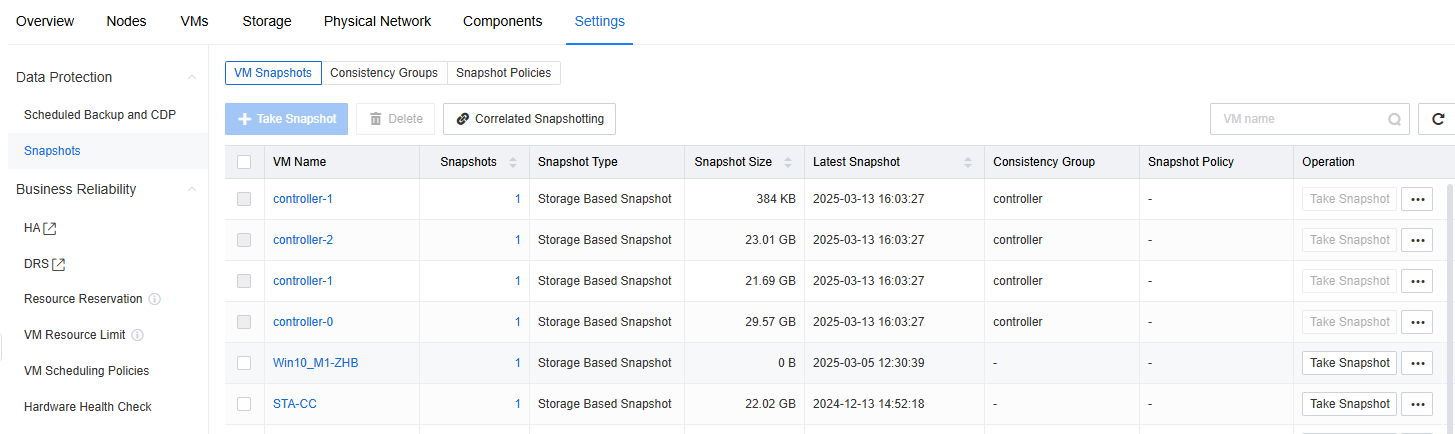
- Click Console of a created VM to access the console, and click its More to edit, shut down, suspend, restart, reset, or power off it, and take and manage snapshots.
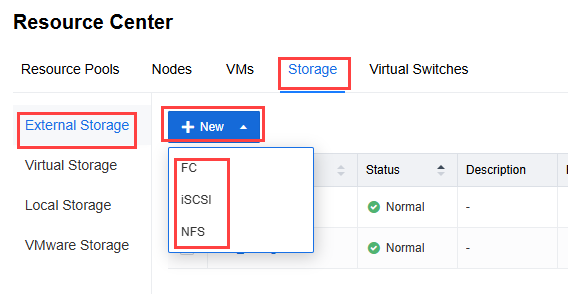
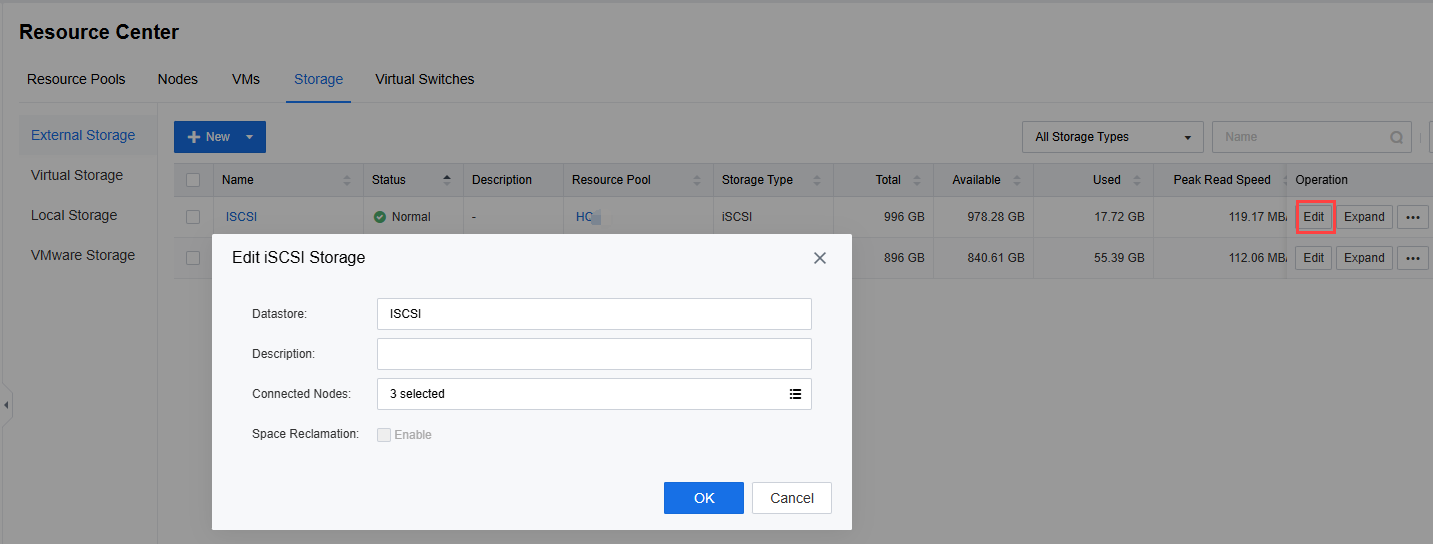
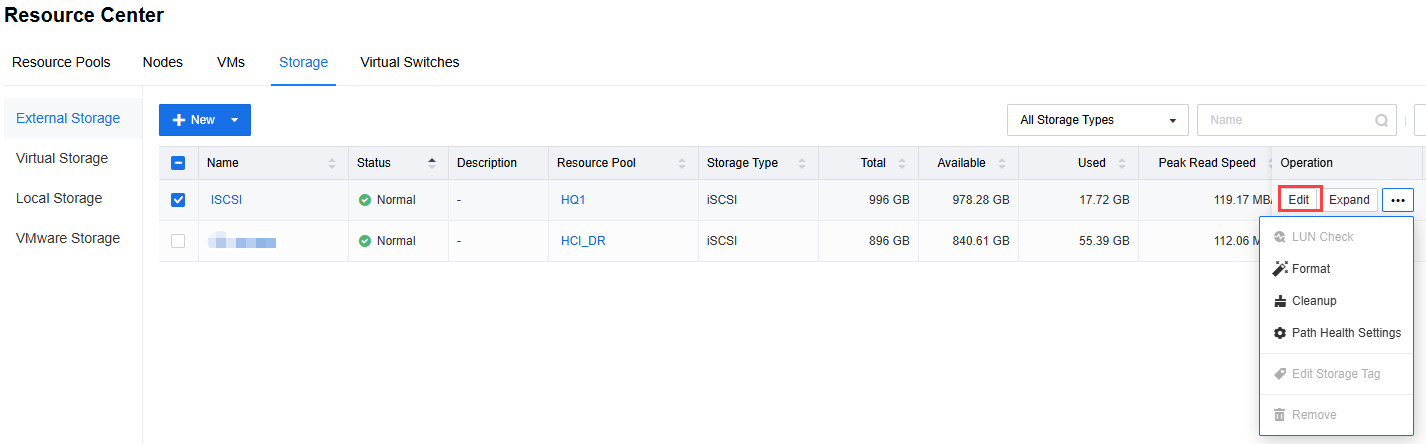
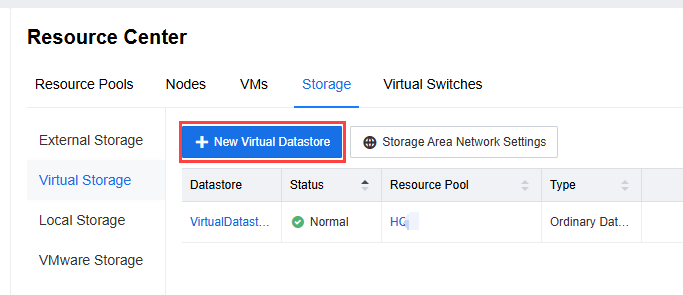
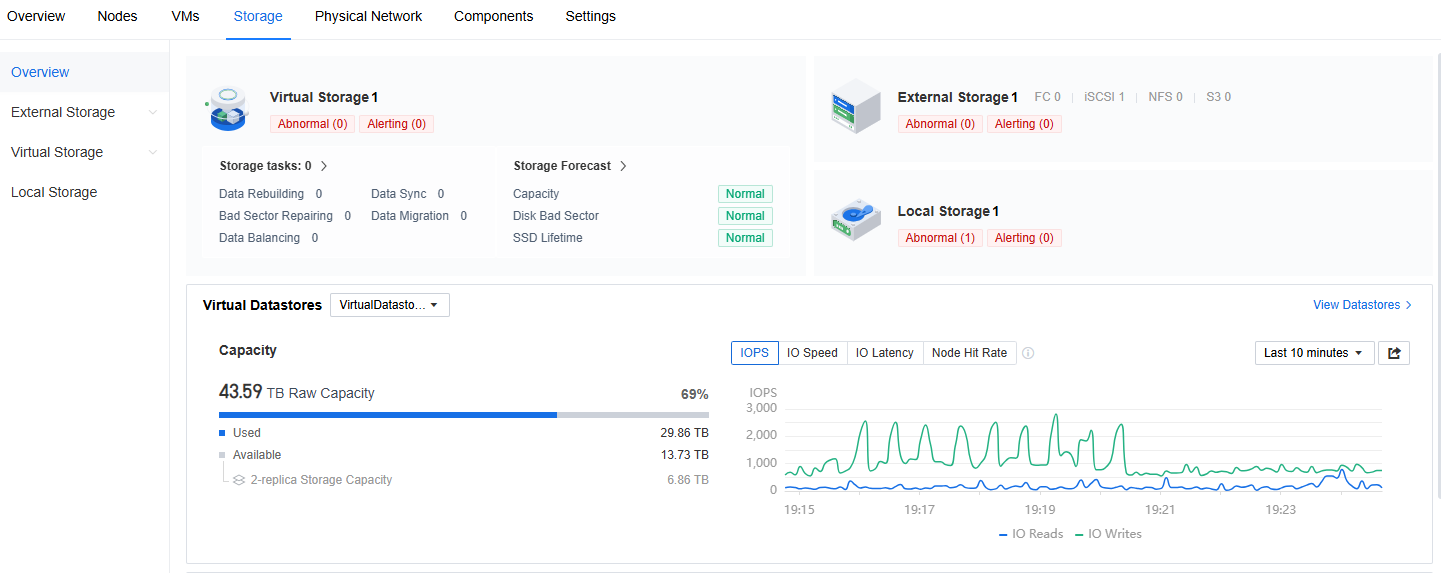
Step 5.Go to the Storage page.
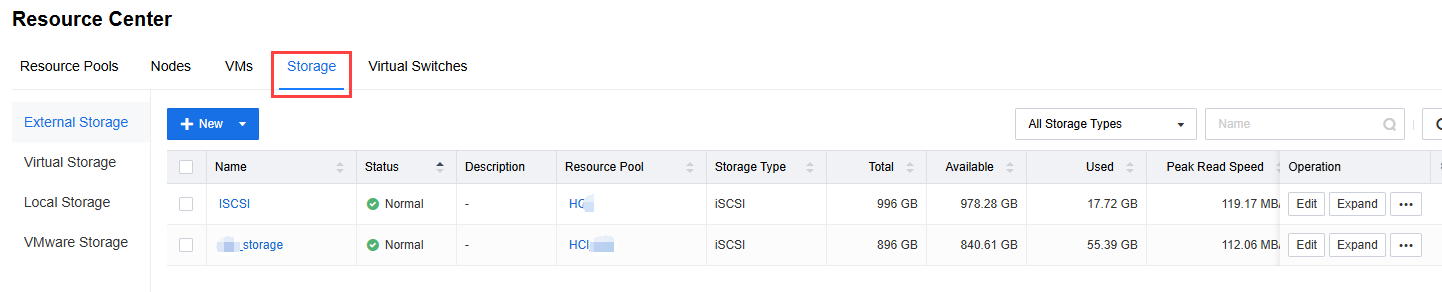
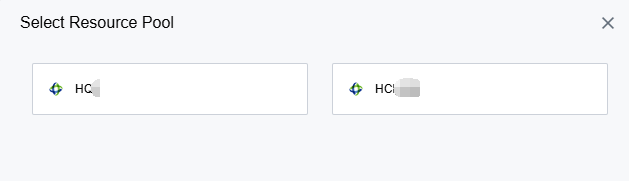
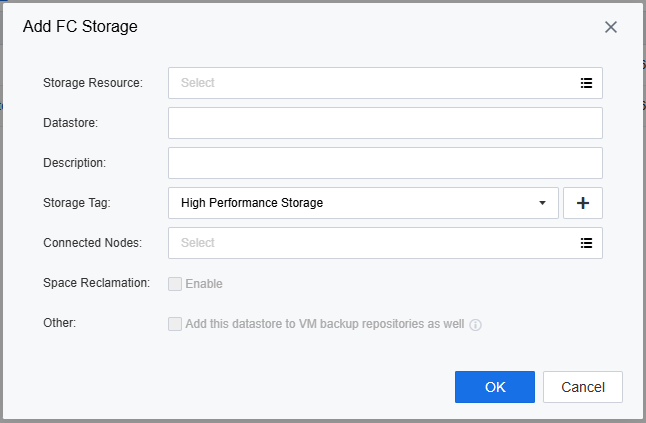
- Go to External Storage > New, select FC, iSCSI, or NFS and the resource pool to which the storage belongs, and complete the configuration to add it.
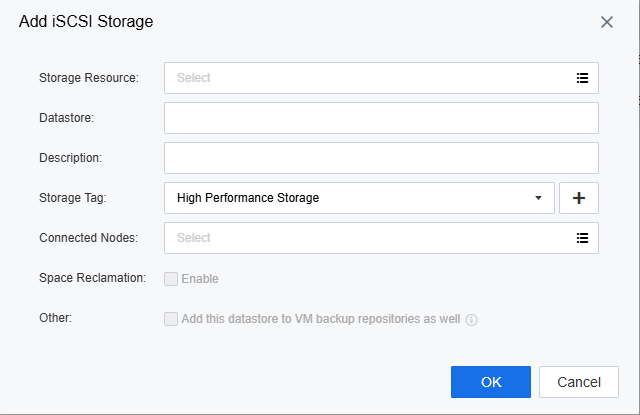
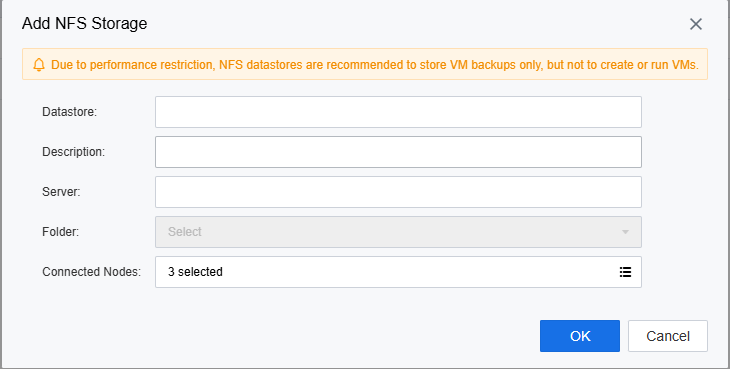
- Click Edit of the added external storage to modify the Datastore, Description, and Connected Nodes, and enable or disable Space Reclamation.
- Click its More to format, clean up, or remove it, edit the storage tag, and configure the path health monitoring policy.
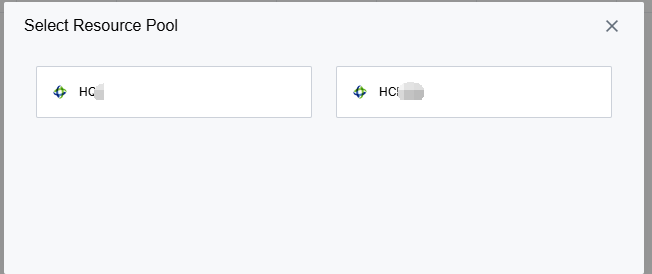
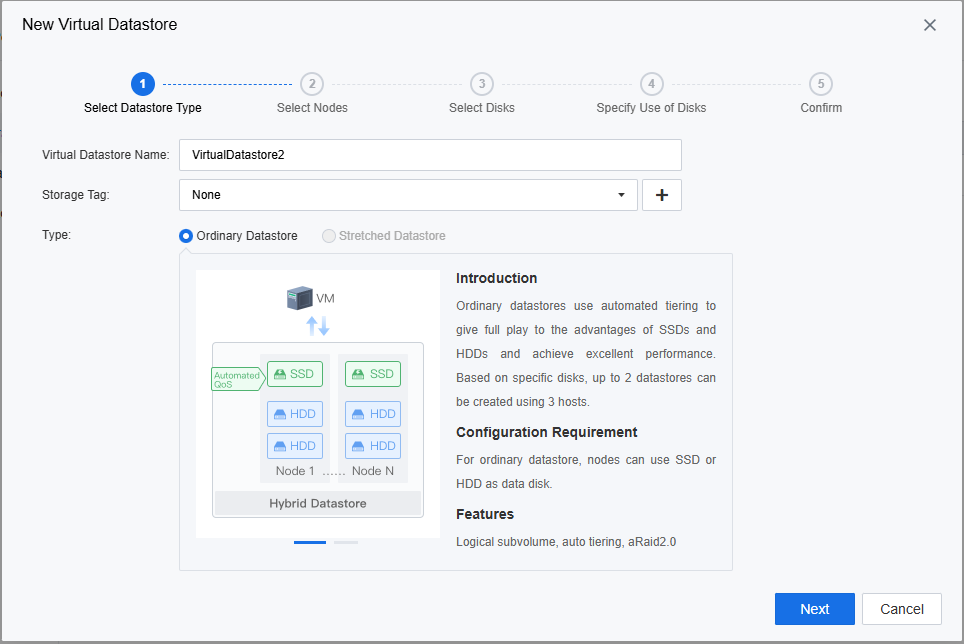
- Go to Virtual Storage > New, select the resource pool to which the virtual datastore belongs, and follow the instructions to complete the configuration to create it.
- Edit the storage tag of the created virtual datastore, expand its capacity, or remove it.

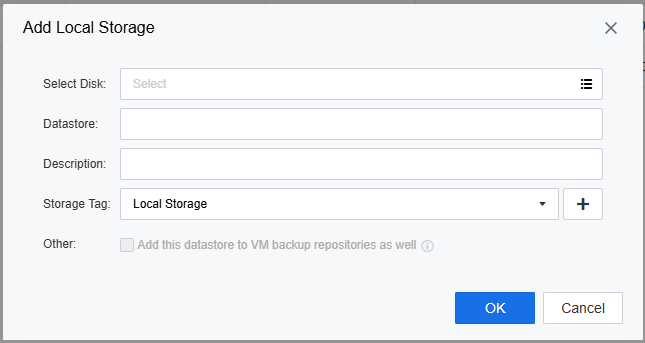
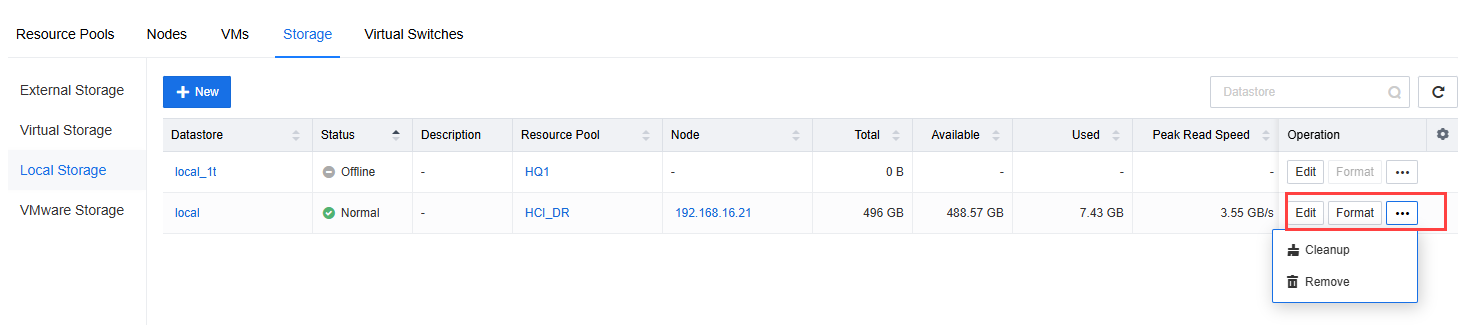
- Go to Local Storage > New, select the resource pool to which the storage belongs, and complete the configuration to add it.
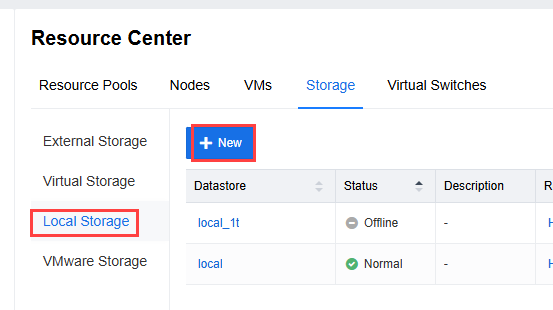
- Modify the name of the added local storage, edit its storage tag, and format, clean up, or remove it.
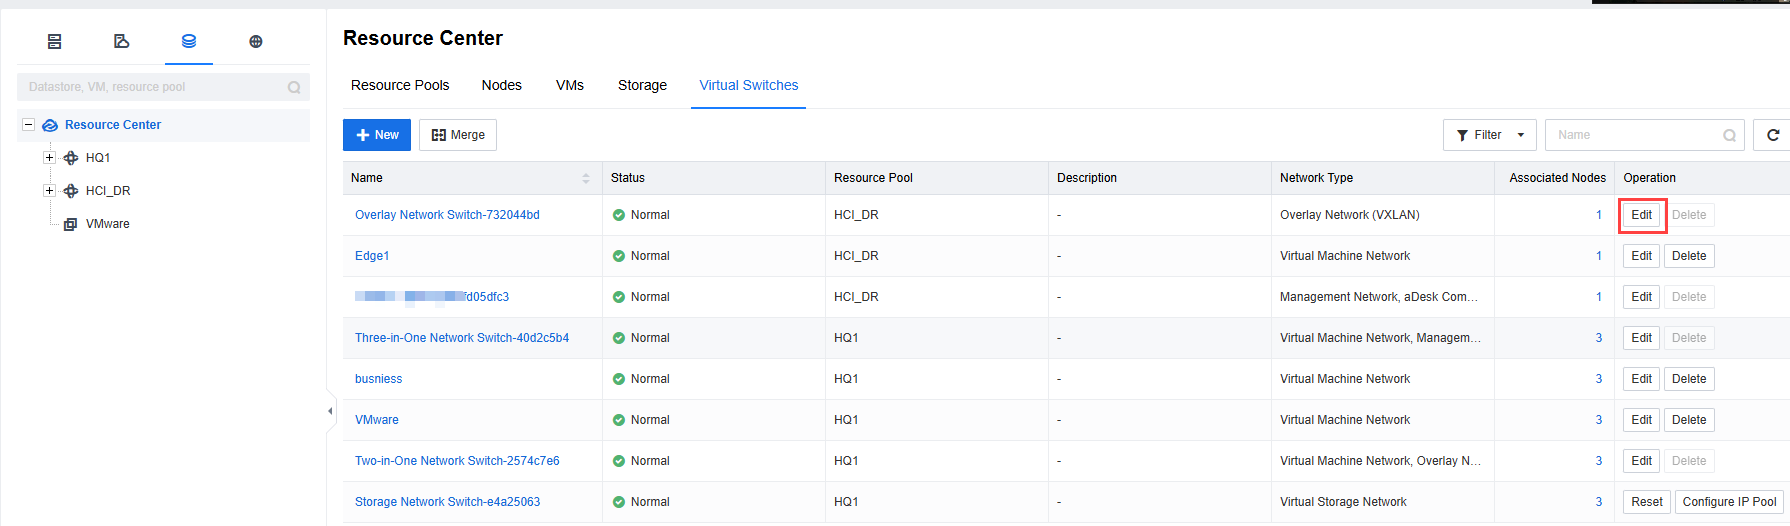
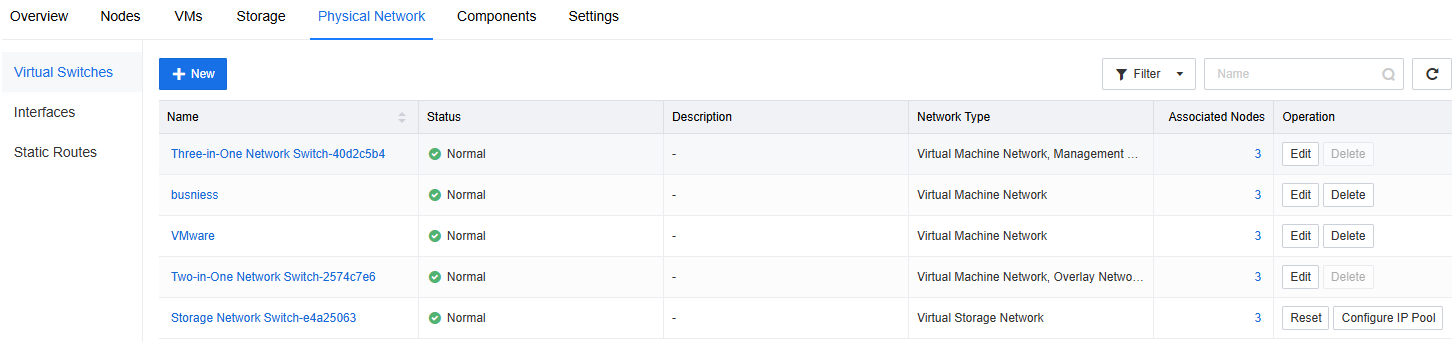
Step 6.Go to the Virtual Switches page.
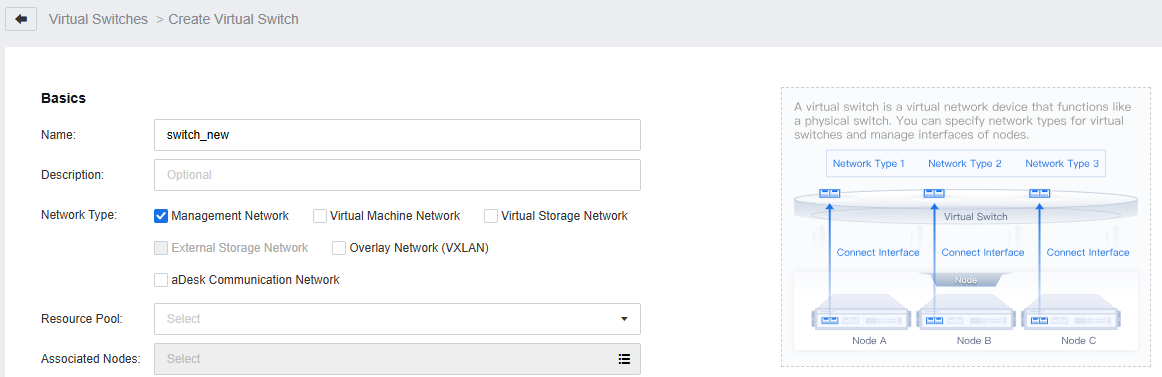
- Click New, specify the Name and Description, and select the Network Type, Resource Pool, and Connected Nodes to create a virtual switch.
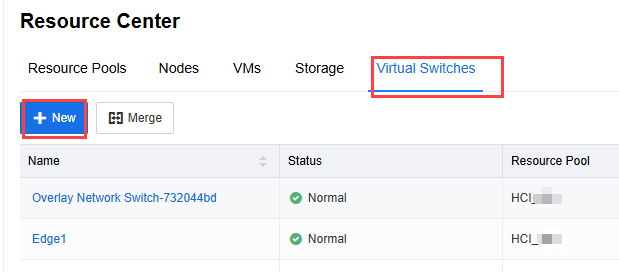
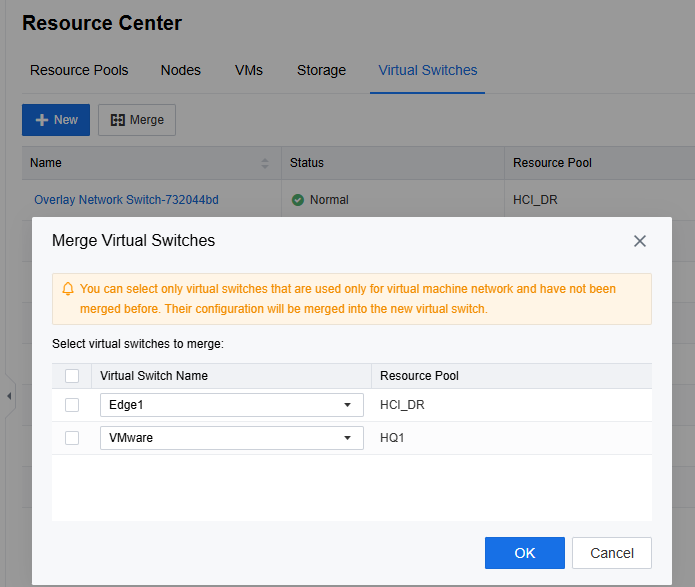
- Click Merge and select virtual switches to merge their configuration into the new virtual switch.
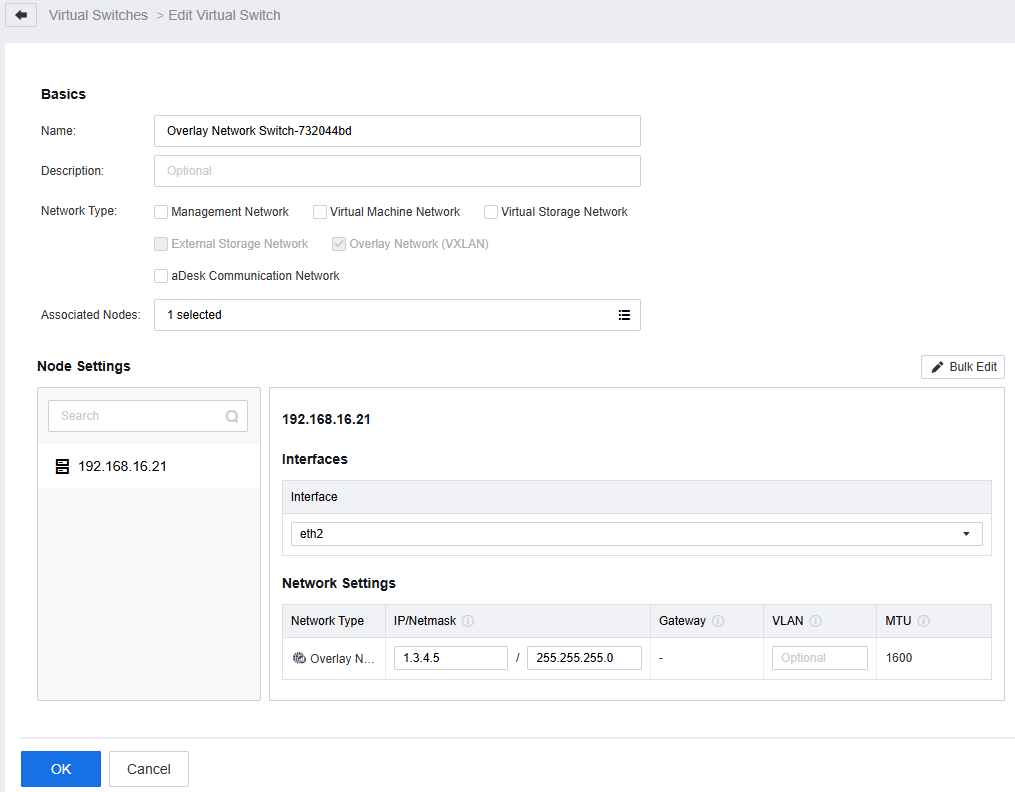
- Click Edit of a virtual switch to modify the Name, Description, Network Type, Connected Nodes, and Interfaces, Network Settings, and Max Bandwidth Limit for each node.
4.2.1.1View by Node
Function Description:
Resources such as resource pools, nodes, VMs, and storage can be viewed and managed by node.
Steps:
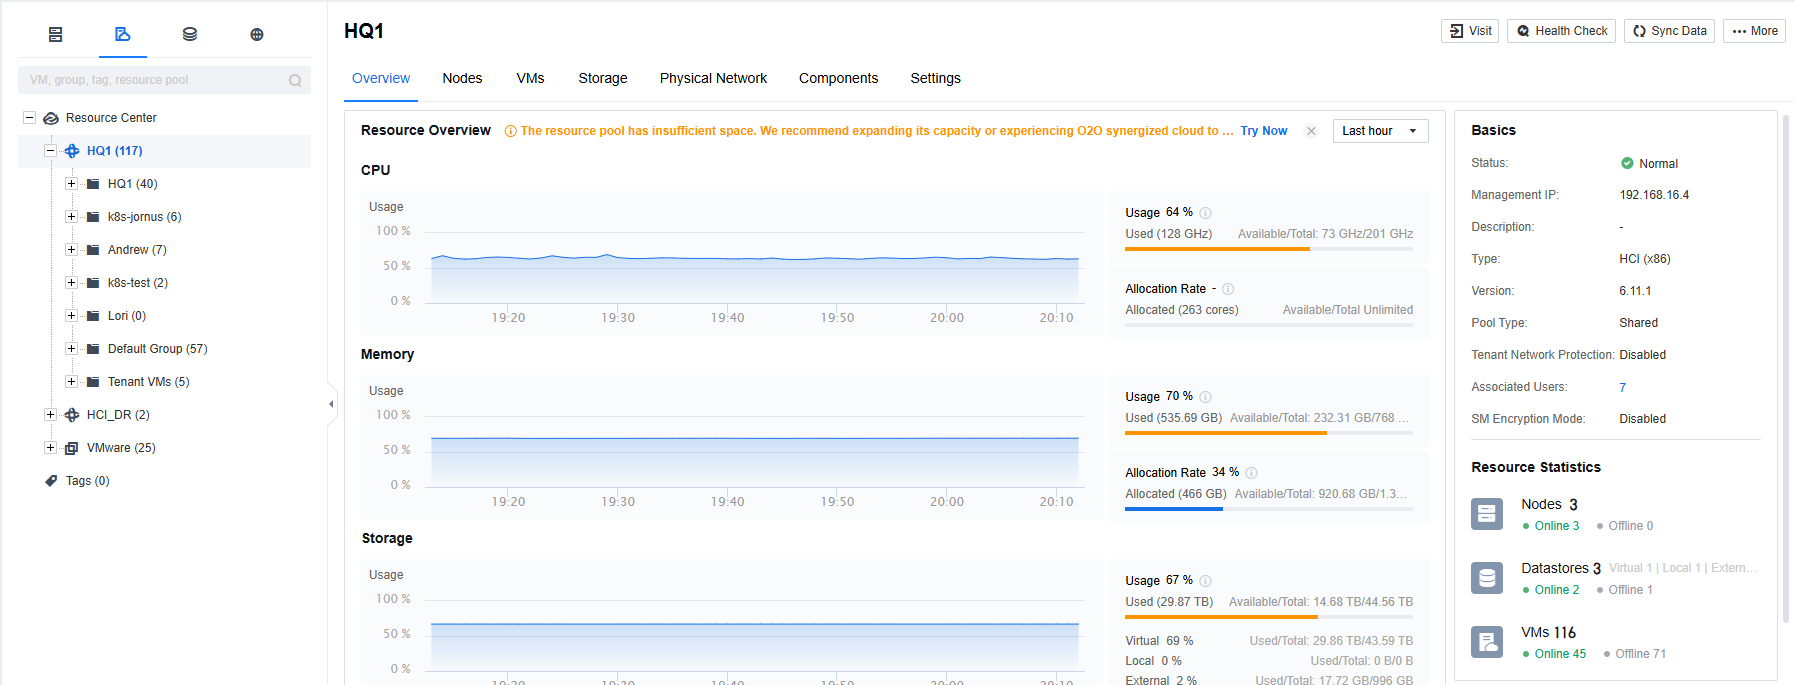
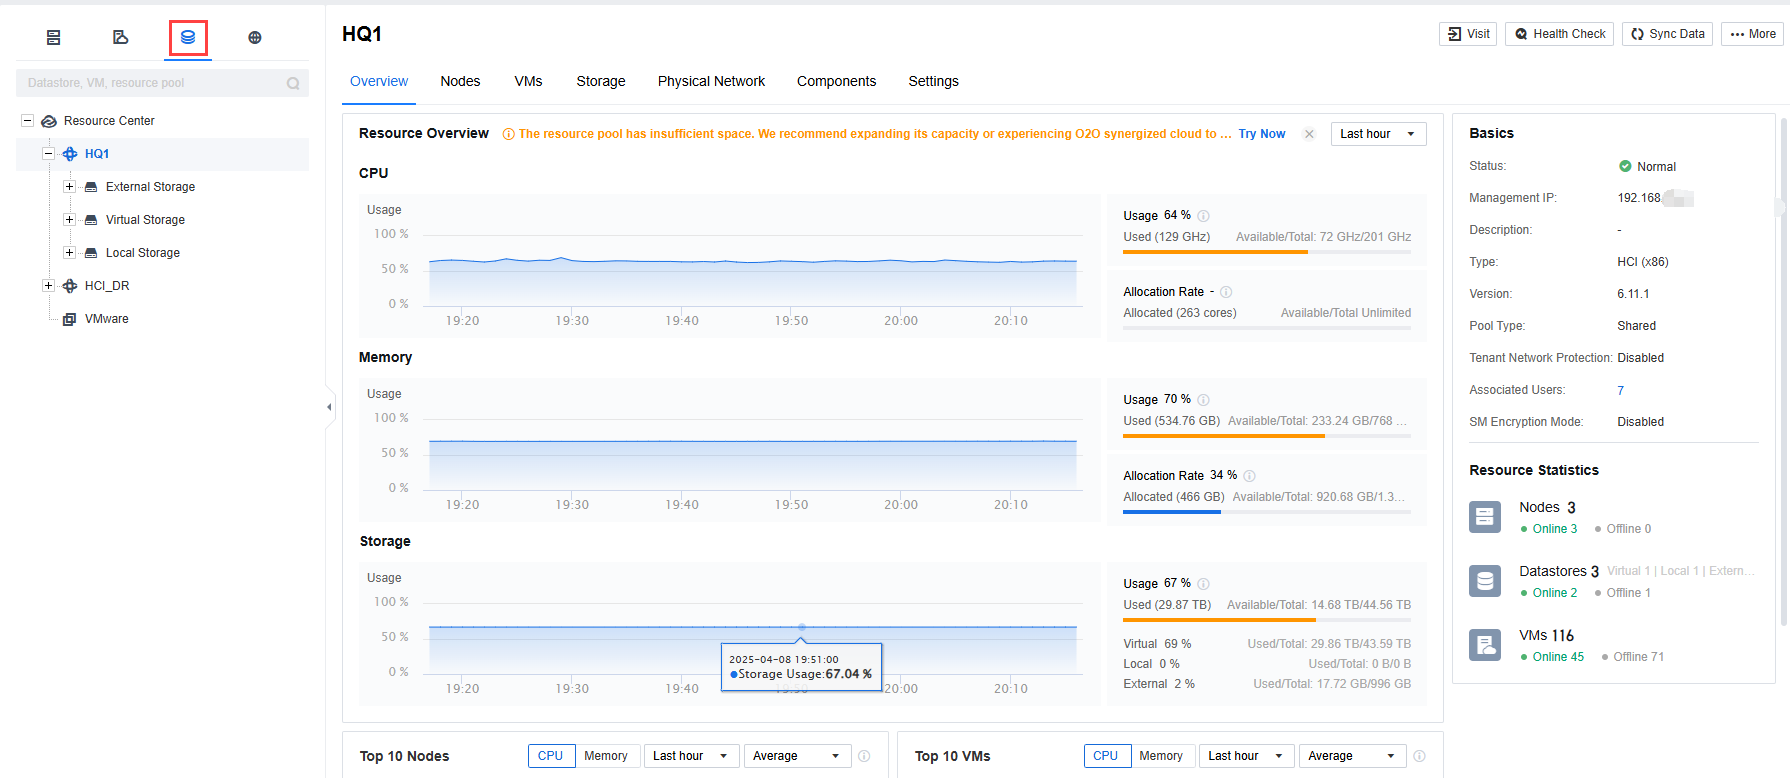
Step 1.Click View by Node on the left to display resource pools by node.
Step 2.Click a resource pool to view the nodes in it and the VMs on the nodes.
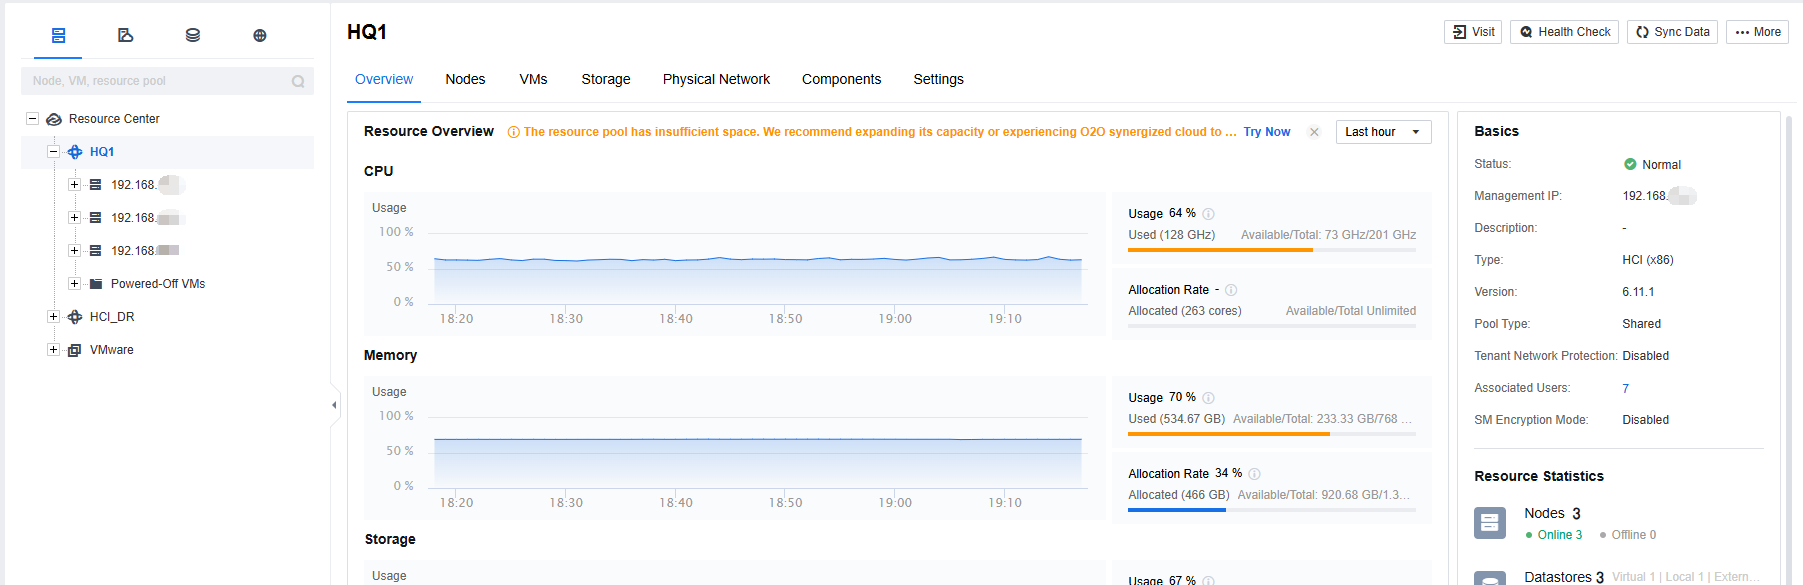
- View the Overview.
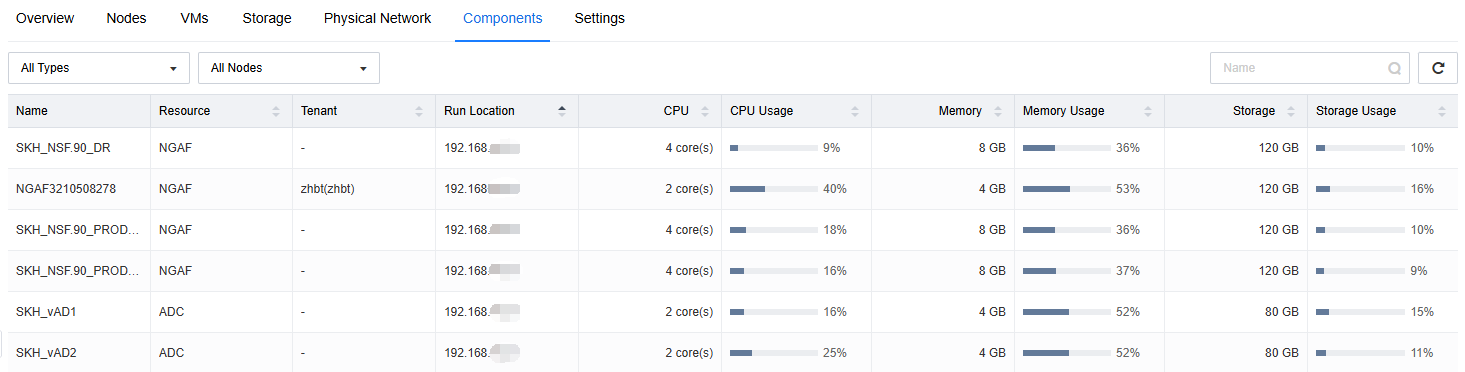
- View and manage nodes, VMs, storage, physical network, and components.
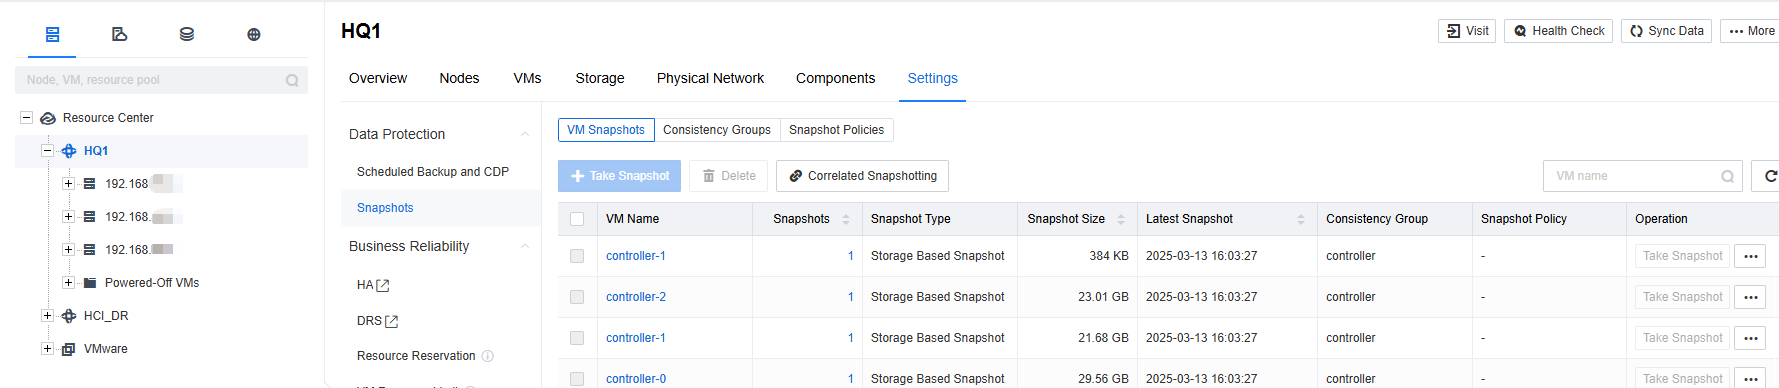
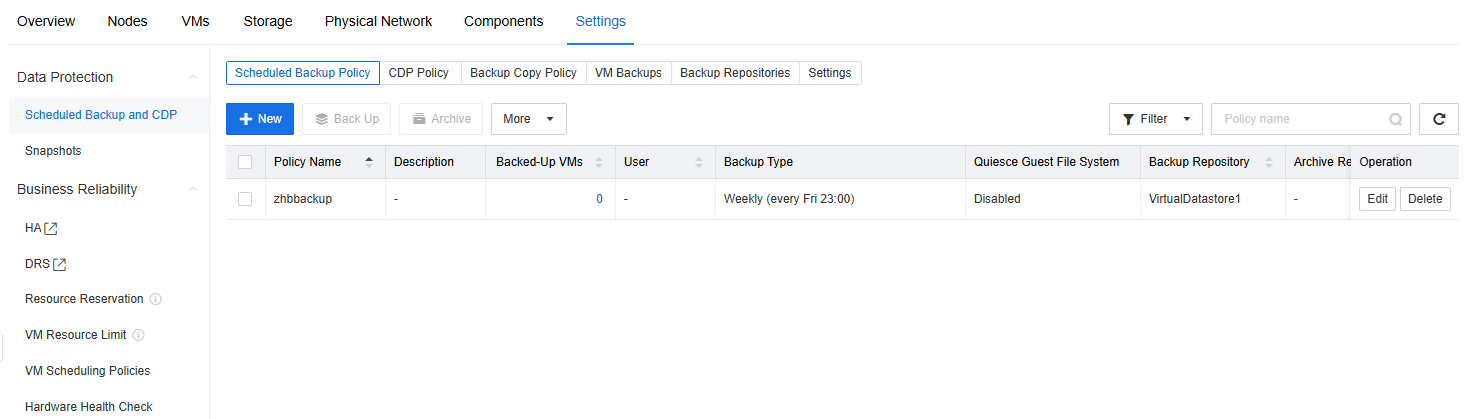
- Click Settings to configure data protection, business reliability, resource ratios, and system.
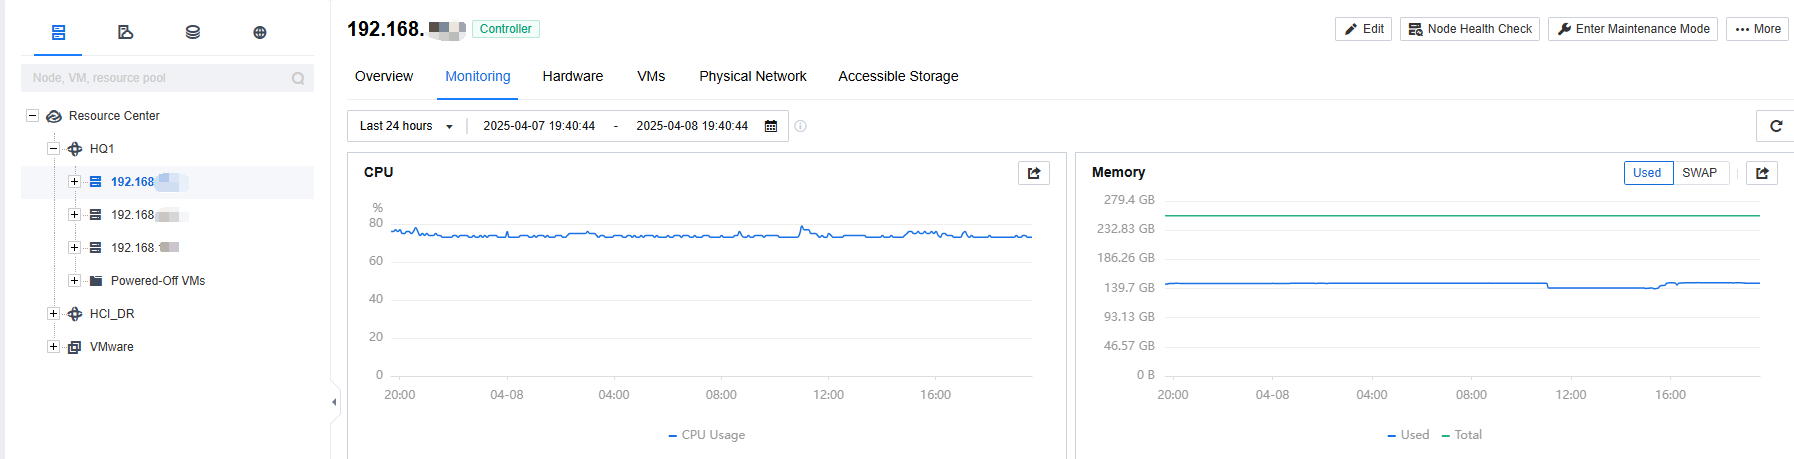
Step 3.Click a node to view the Overview.

- Click Monitoring to view CPU and memory usage, interface throughput, and disk I/O.
- Click Hardware to view and manage system disks, PCI-e devices, and USB.


- Click VMs to create and manage VMs.

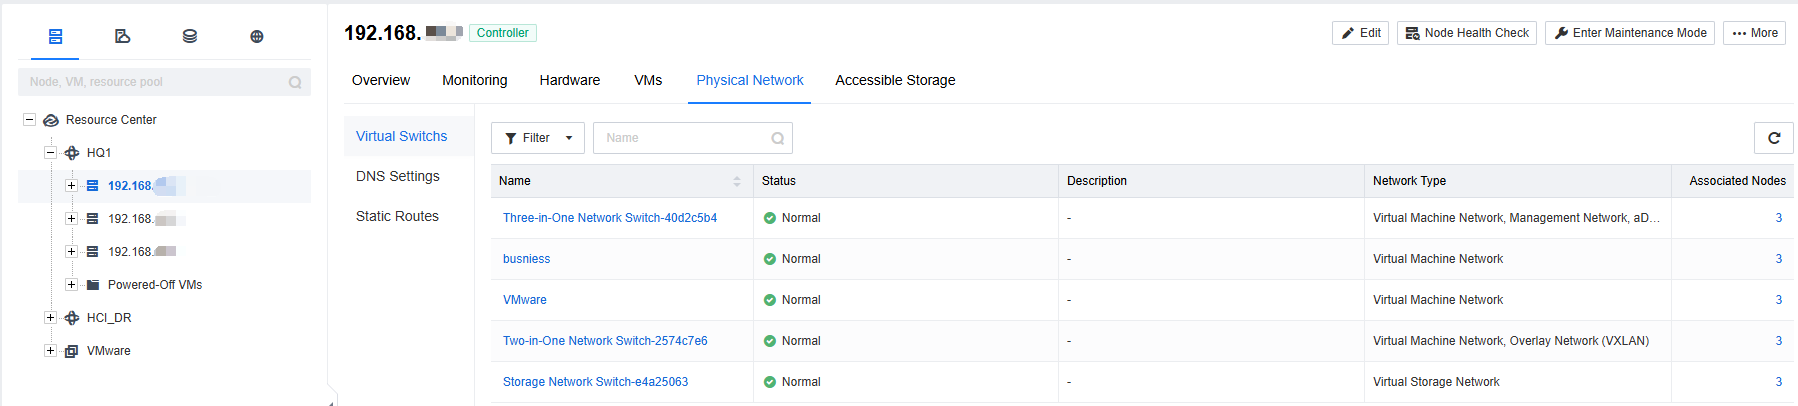
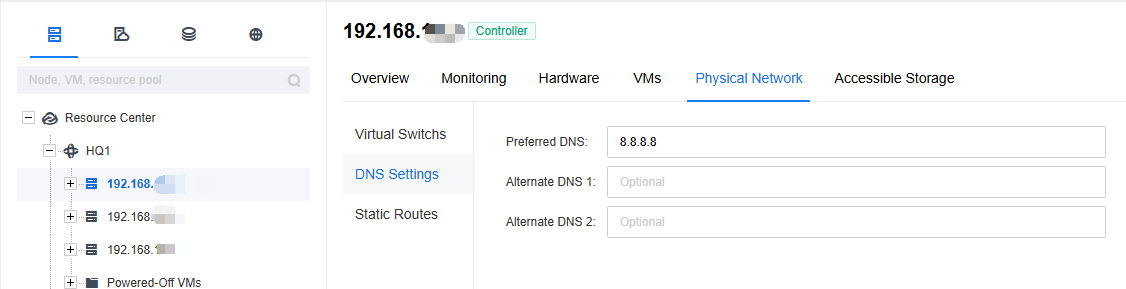
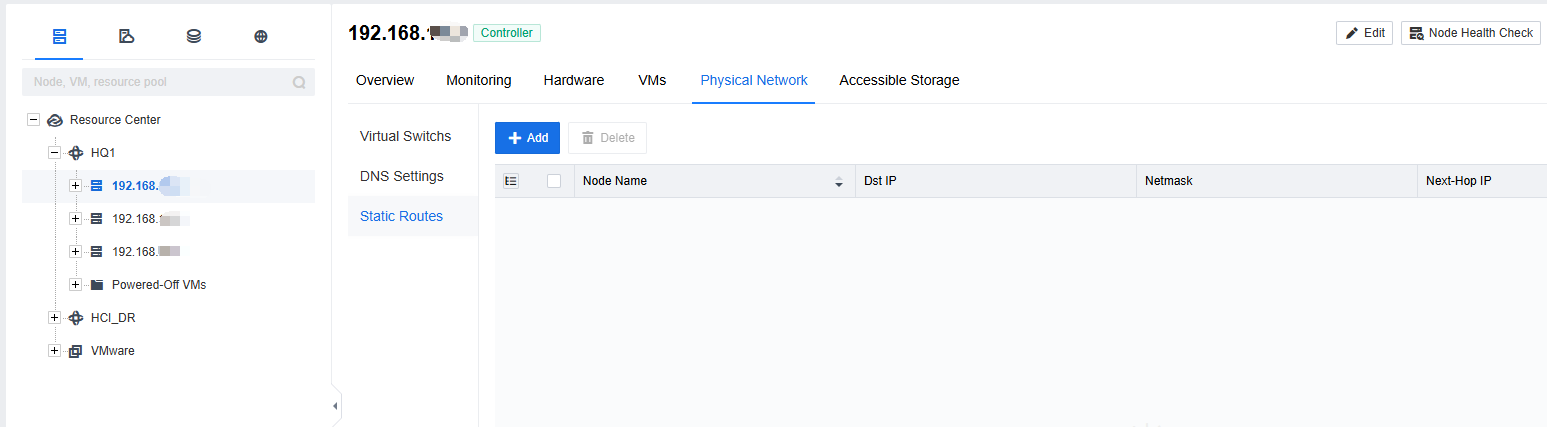
- Click Physical Network to configure virtual switches, DNS, and static routes.
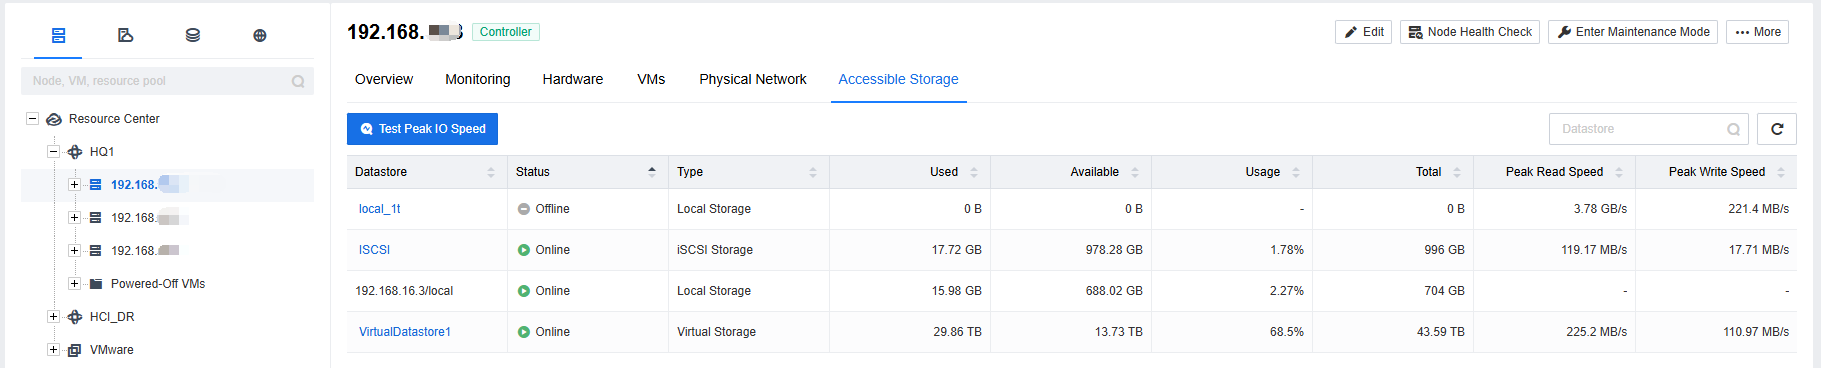
- Click Accessible Storage to view accessible storage and test peak I/O speeds.
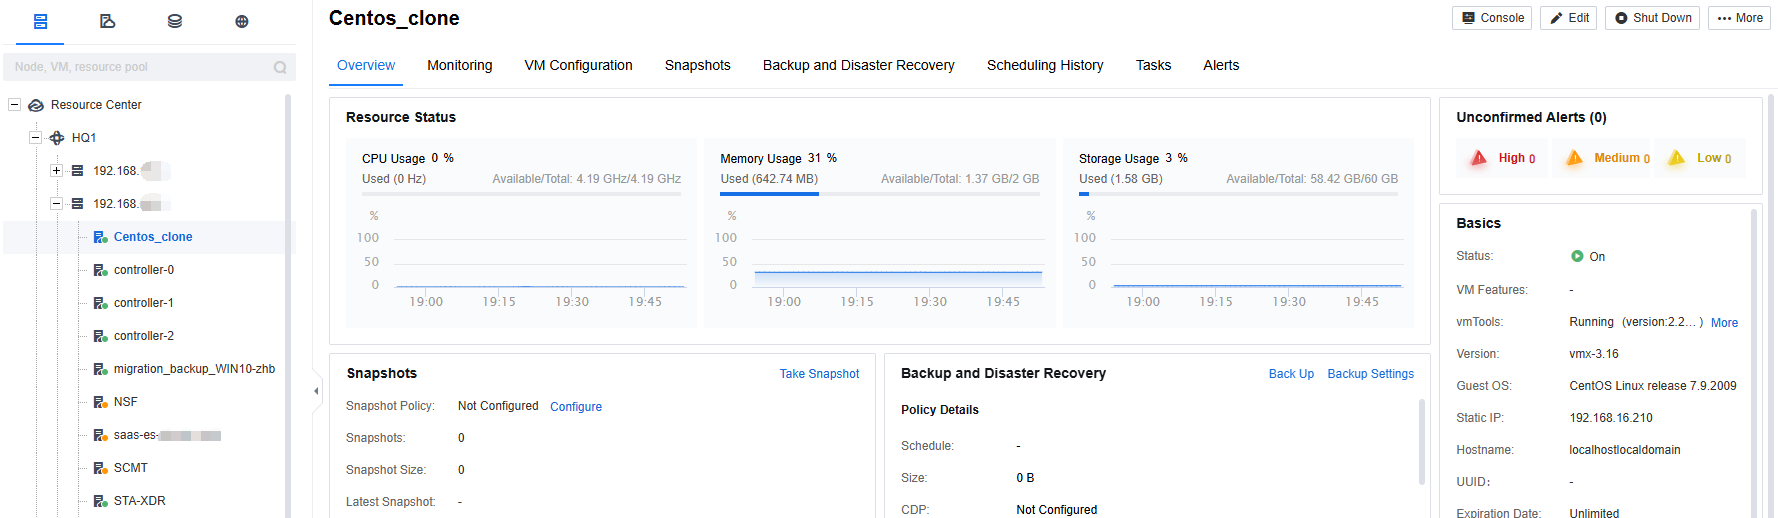
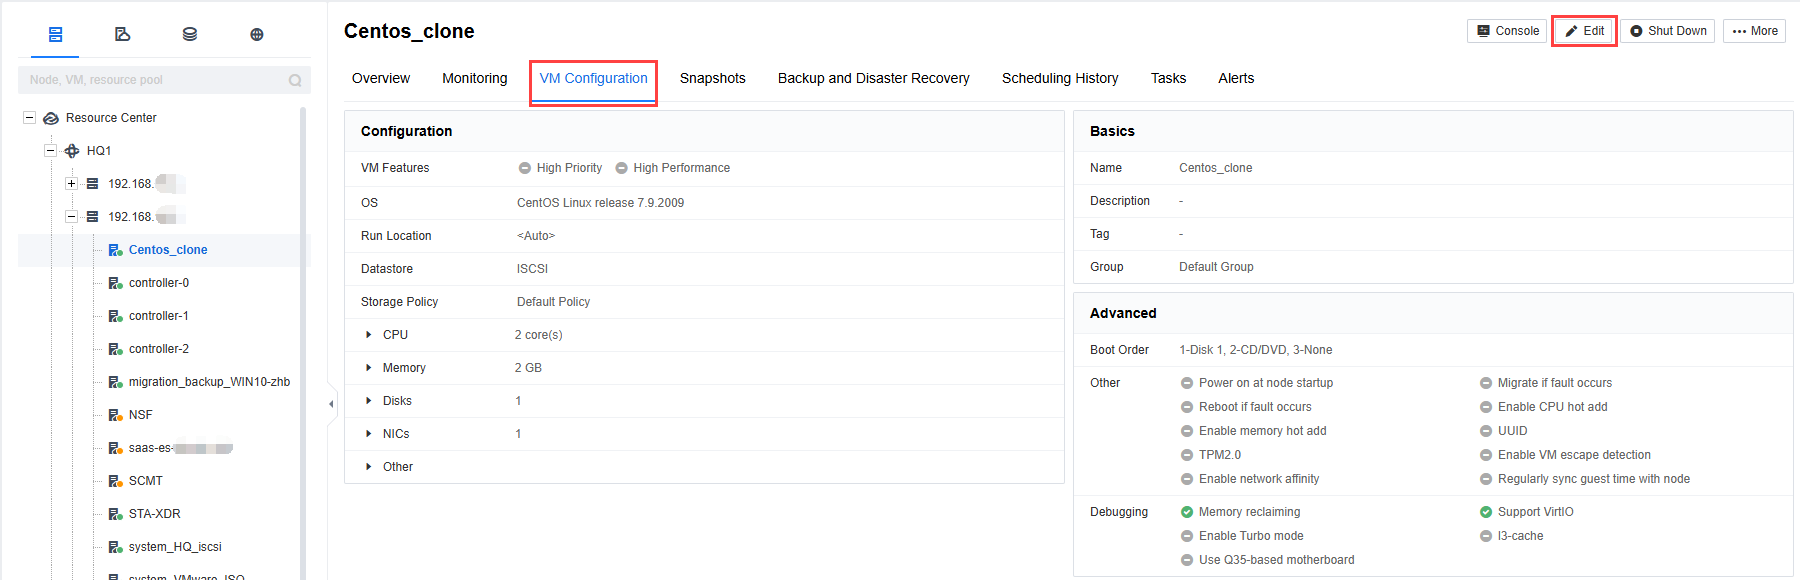
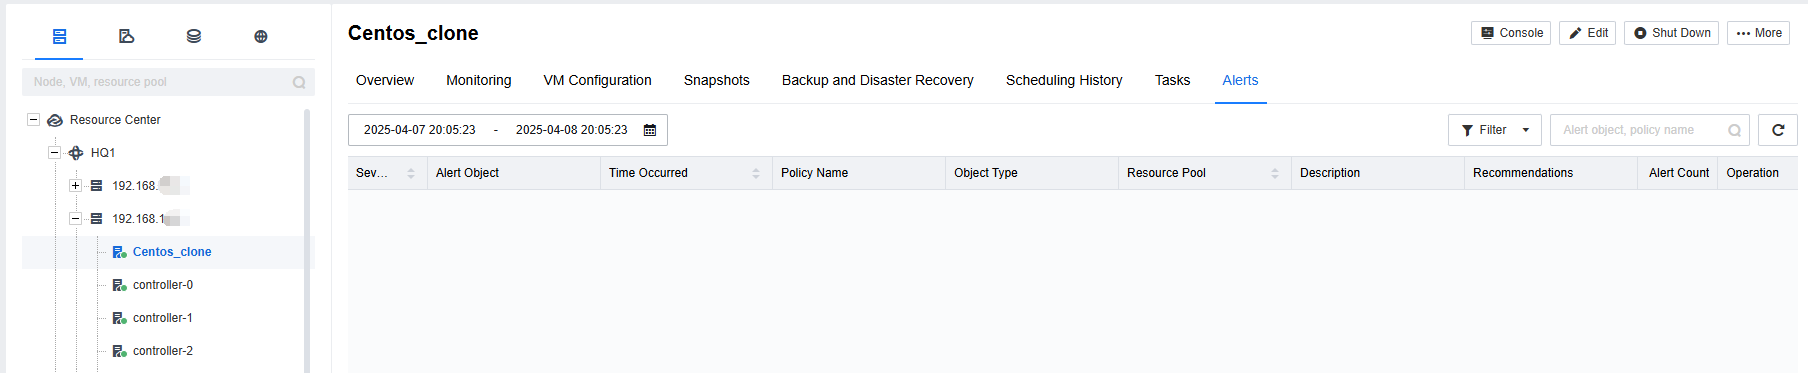
Step 4.Click a VM to view the Overview.
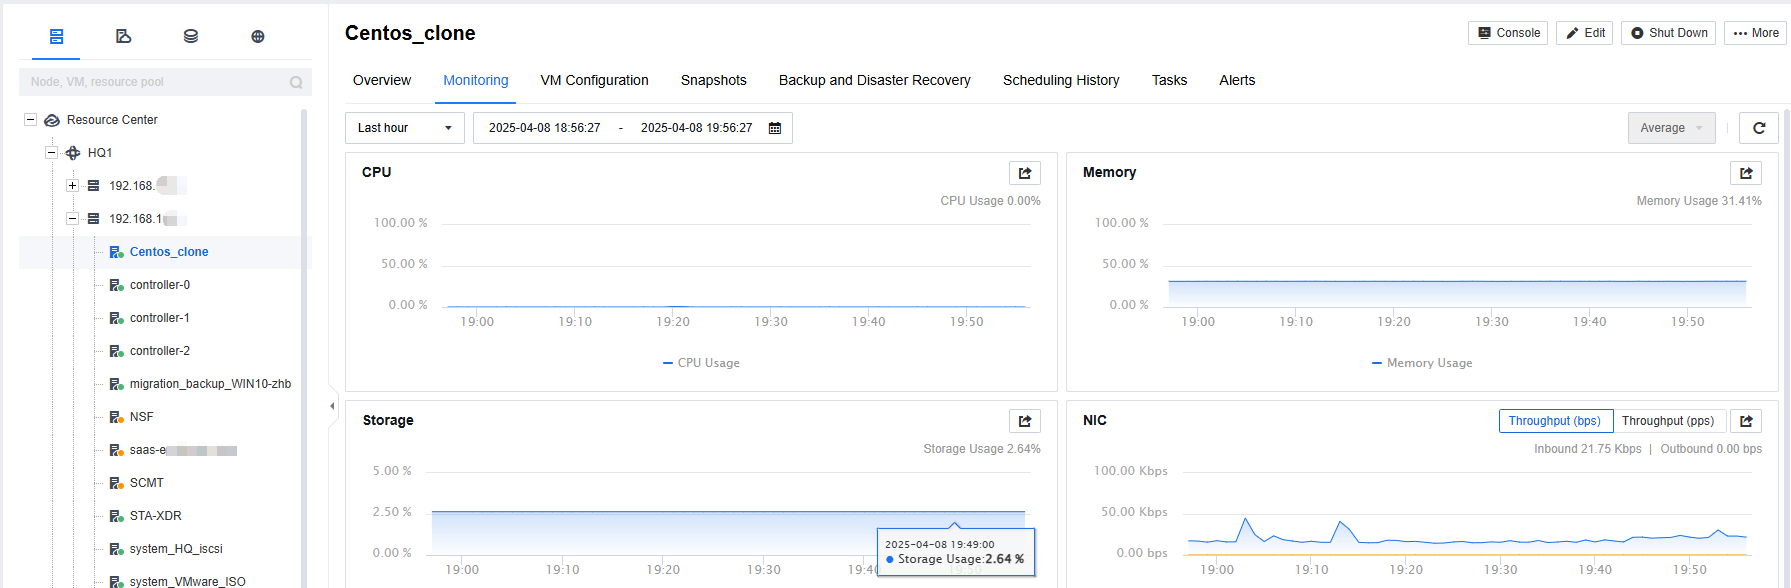
- Click Monitoring to view CPU, memory, and storage usage, and NIC throughput.
- Click Configuration to view the configuration and click Edit to modify it.
- Click Snapshots to view and take snapshots.


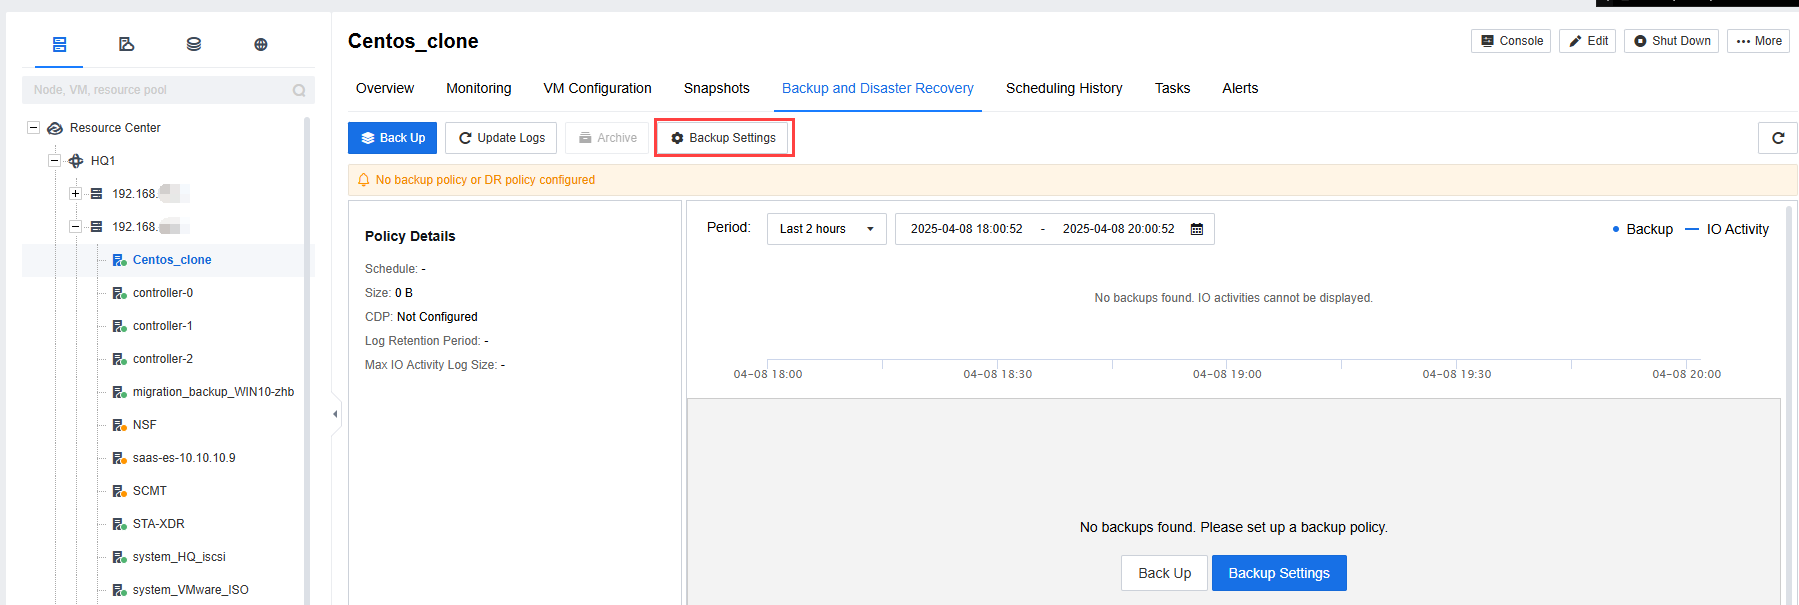
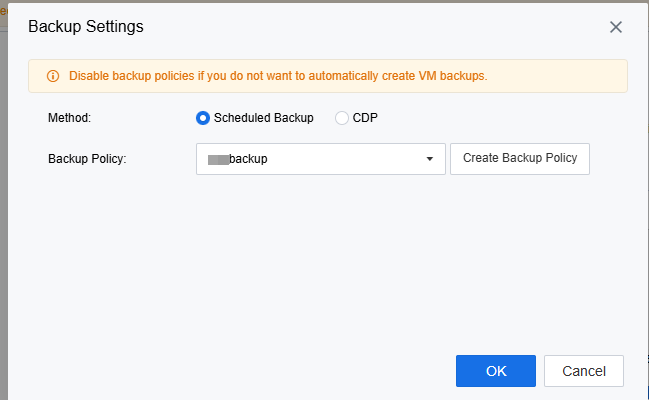
- Click Backup and Disaster Recovery to perform backups and configure backup settings.
- Click Scheduling History to view the scheduling history.

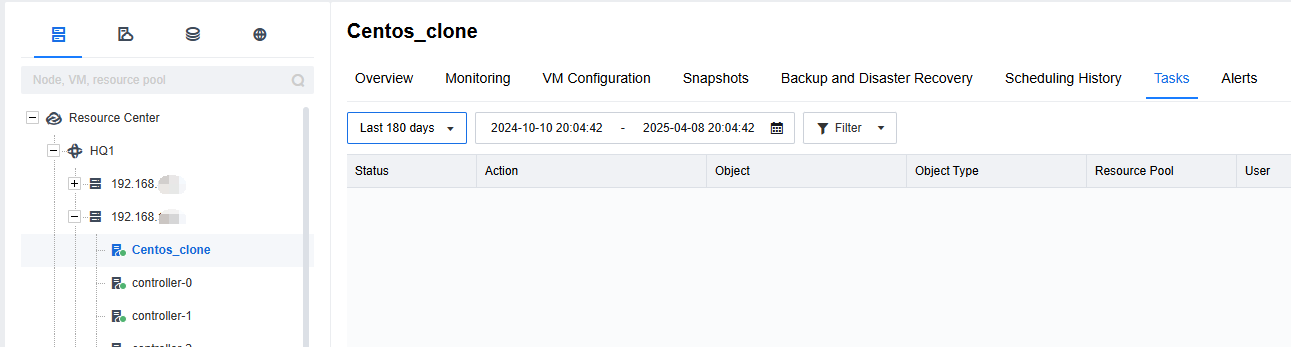
- Click Tasks to view tasks.
- Click Alerts to view alerts.
4.2.1.2View by VM
Function Description:
Resources can be viewed and managed by VM.
Steps:
Step 1.Click View by VM on the left to display resource pools by VM group.
Step 2.Click a VM group to view, create, and manage the VMs in it.

4.2.1.3View by Storage
Function Description:
Resources can be viewed and managed by storage.
Steps:
Step 1.Click View by Storage on the left to display resource pools by storage type.
Step 2.Click an External Storage to view, create, edit, or delete the external storage in the corresponding resource pool and view their shared virtual disks.

Step 3.Click a Virtual Storage to view the Basics, Capacity, and Storage Forecast of the datastores in the corresponding resource pool.
- Create virtual datastores, modify storage network settings, configure storage policies, expand the capacity of existing datastores, edit their storage tags, or delete them (high risk).

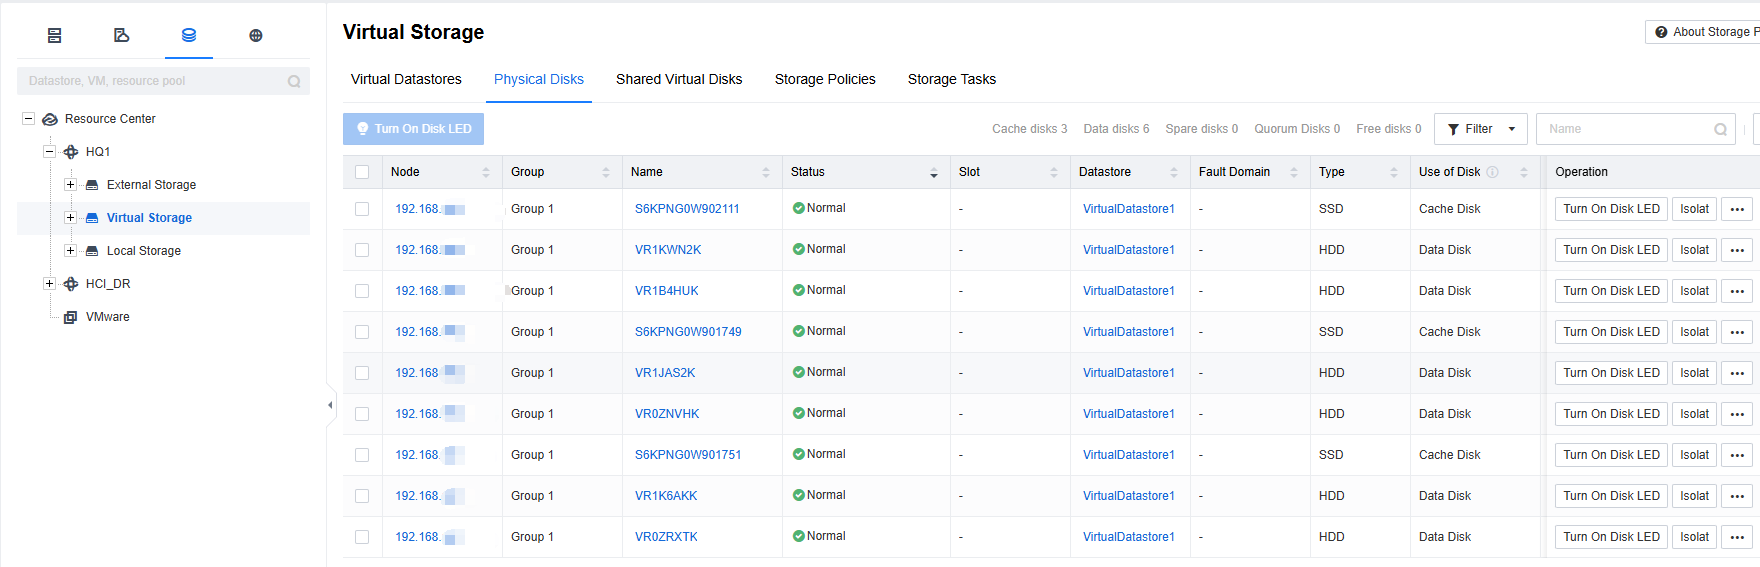
- Click Physical Disks to view the disks on datastores and isolate, replace, or remove them based on O&M requirements.
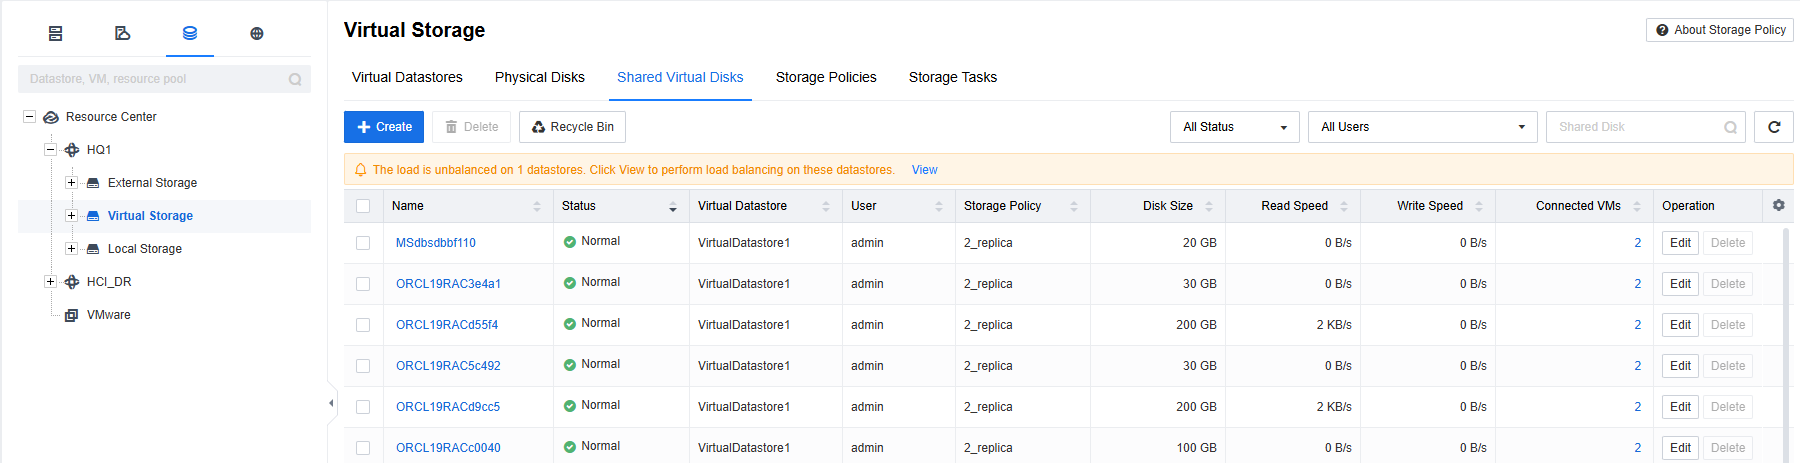
- Click Shared Virtual Disks to view, create, edit, or remove shared virtual disks on datastores.
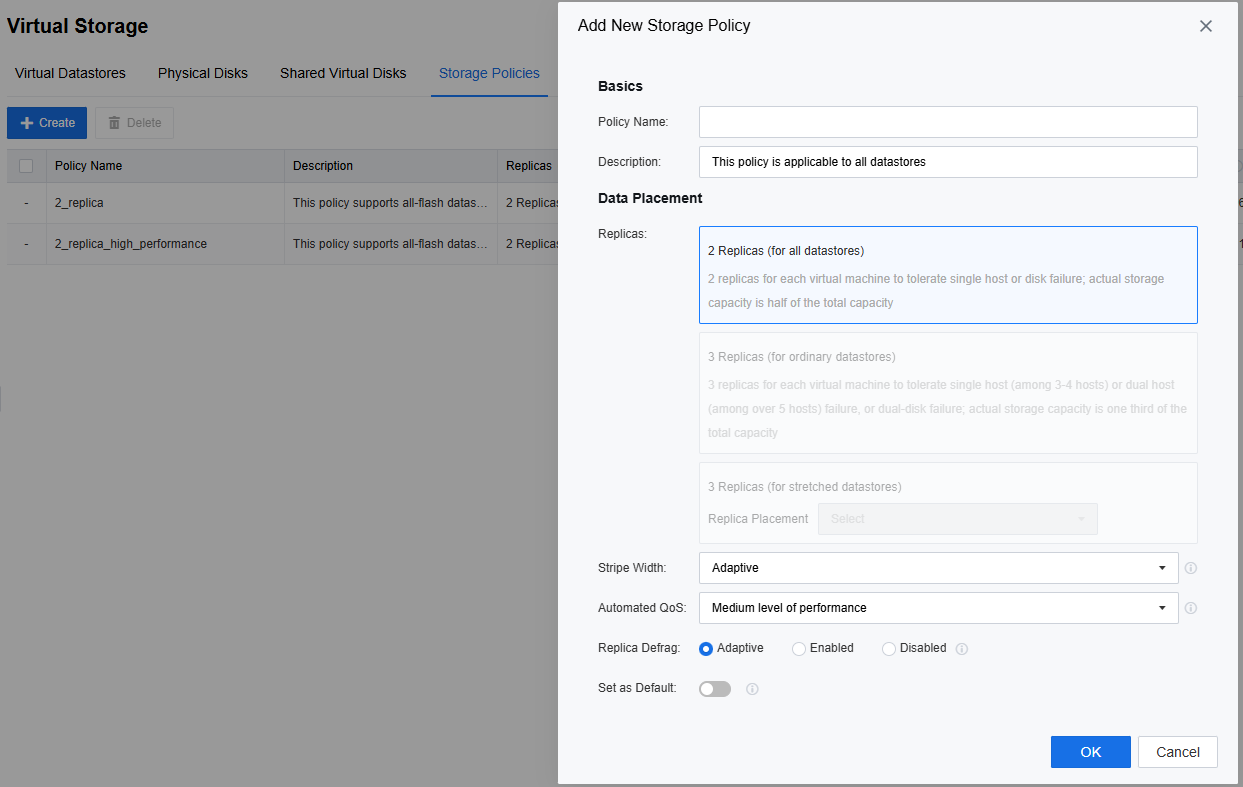
- Click Storage Policies to create storage policies for datastores.

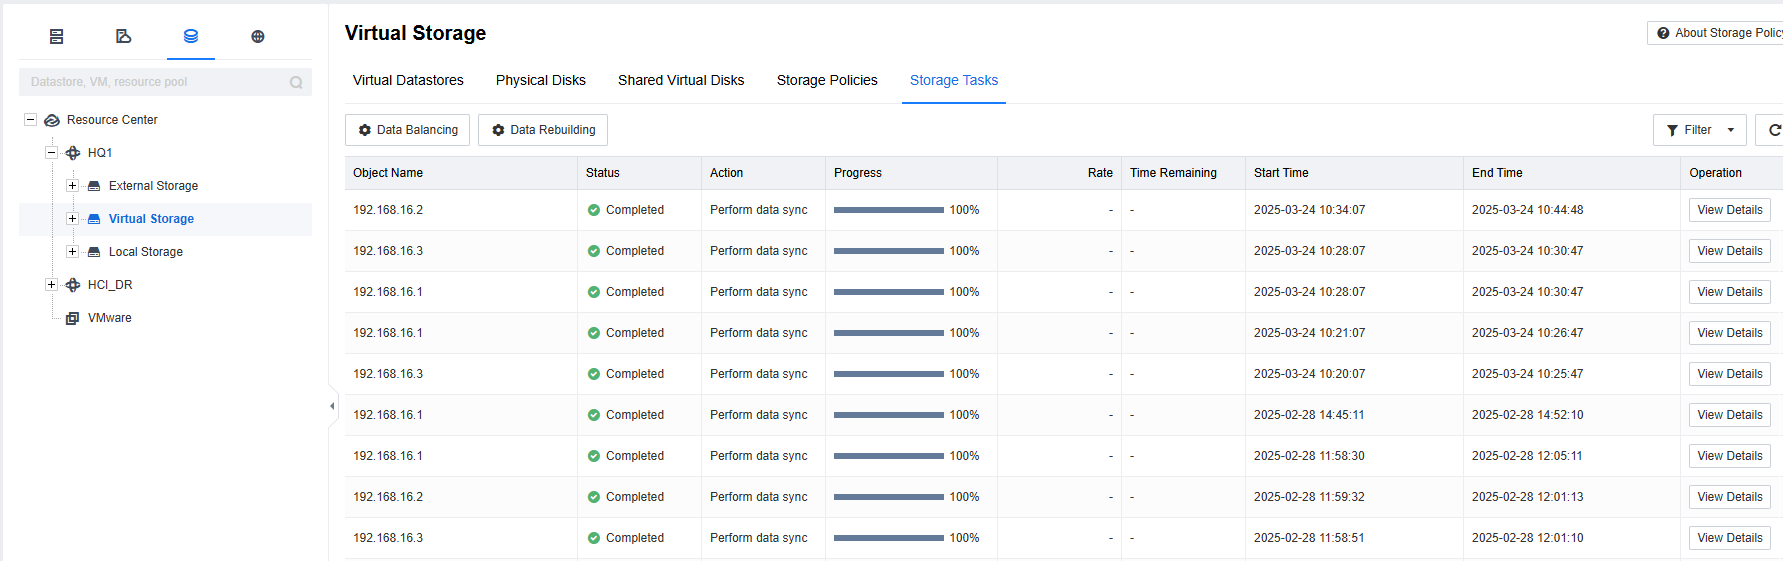
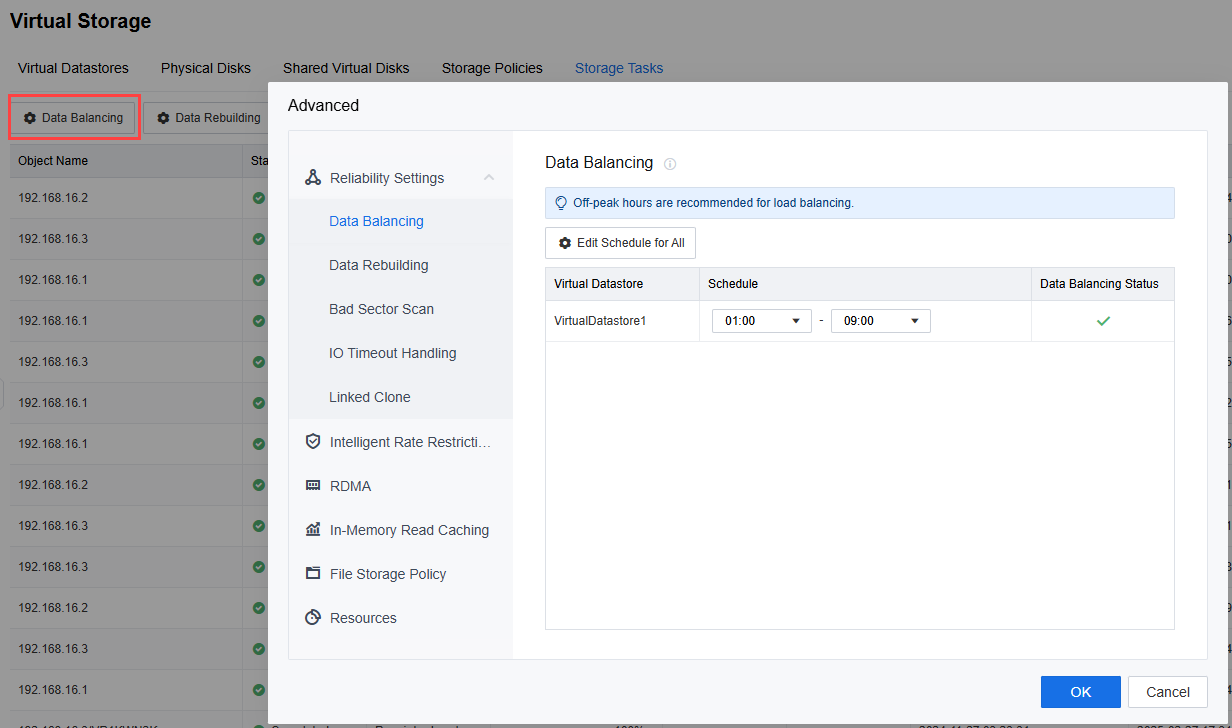
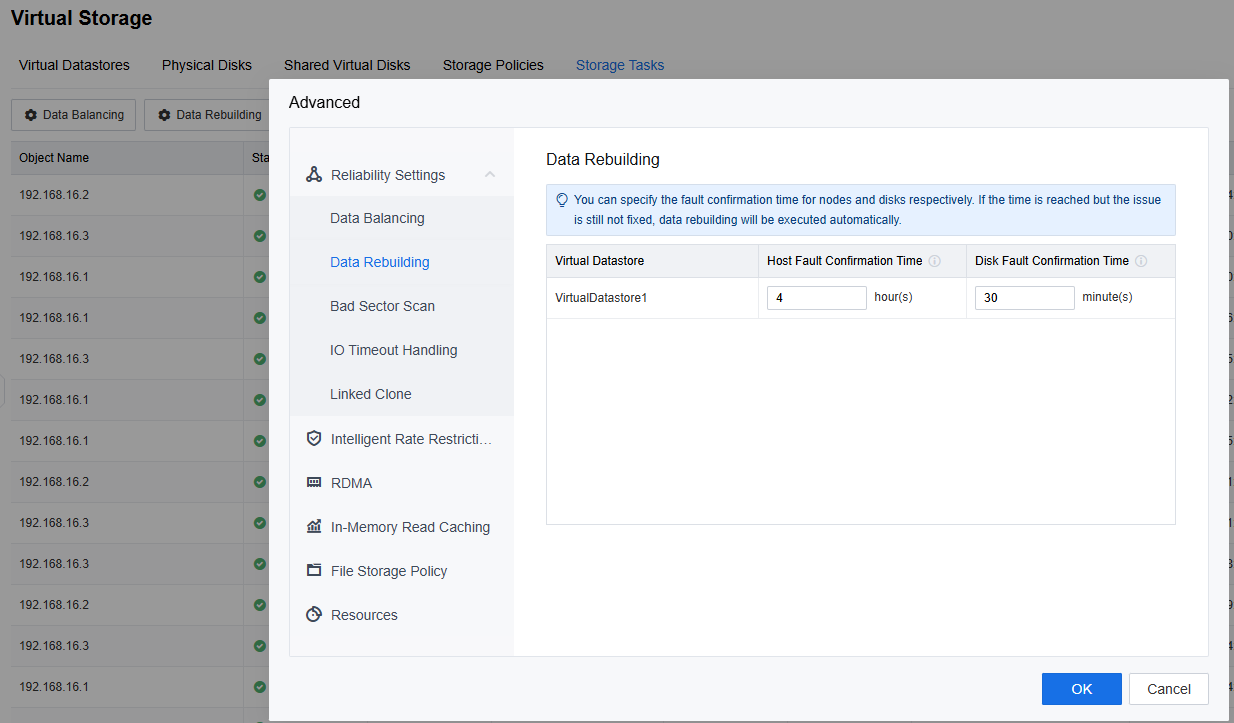
- Click Storage Tasks to view the progress of storage tasks and configure data balancing and data rebuilding for datastores.
4.2.1.4View by Network
Function Description:
Resources can be viewed and managed by network.
Steps:
Step 1.Click View by Network on the left to display resource pools by virtual switch.

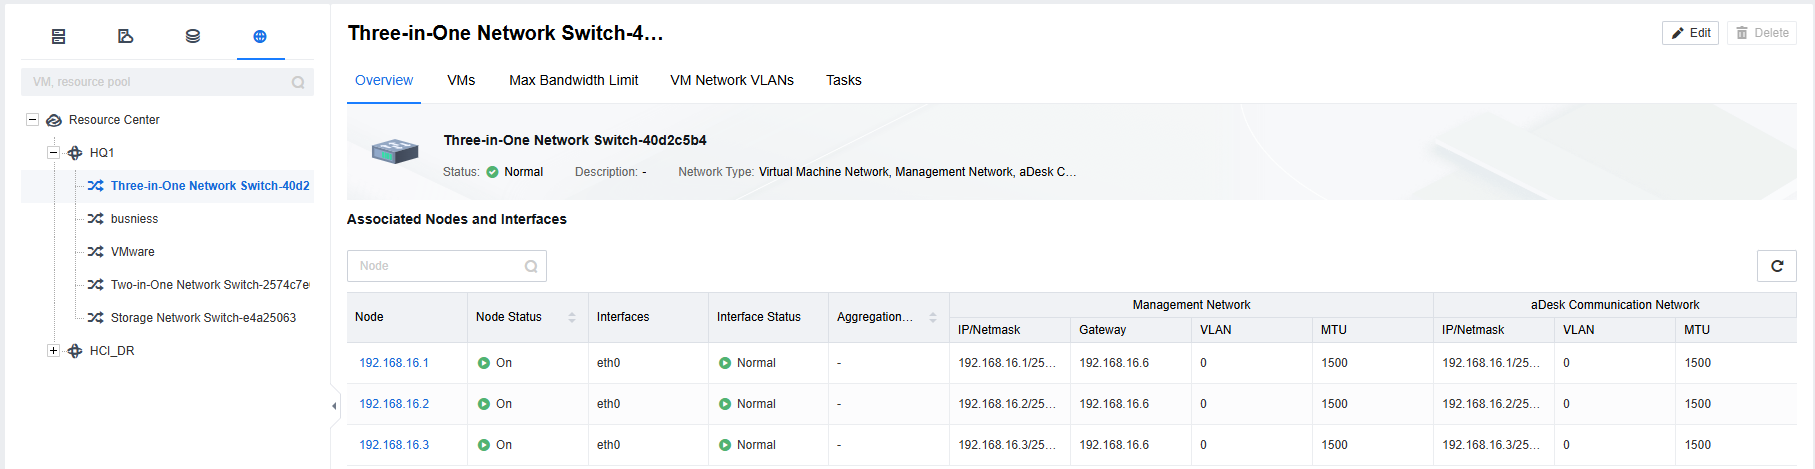
Step 2.Click a virtual switch to view the Overview, including the Network Type and Connected Nodes and Interfaces.
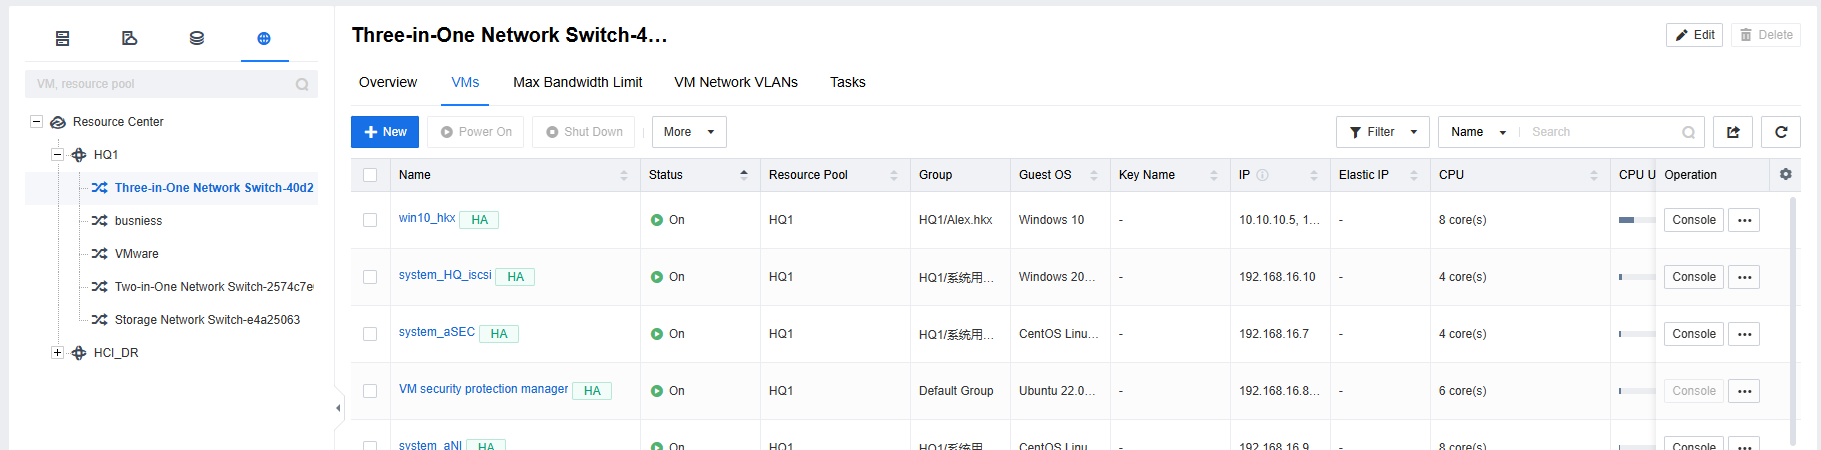
Step 3.Click VMs to view, create, edit, or delete connected VMs.
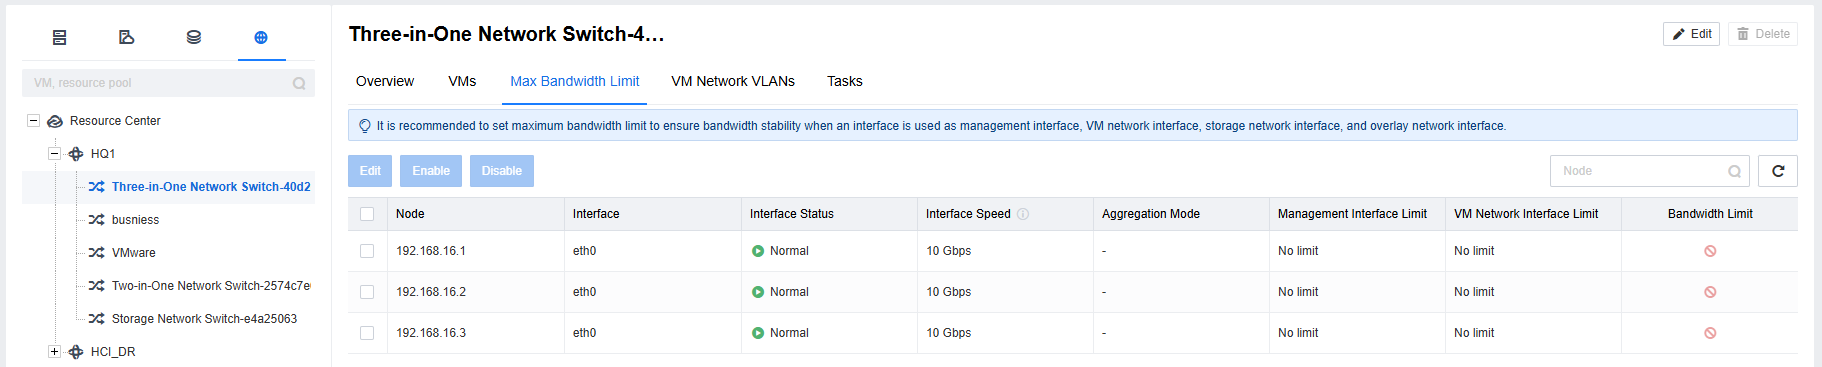
Step 4.Click Max Bandwidth Limit to view the status and bandwidth limit of the connected nodes’ interfaces.
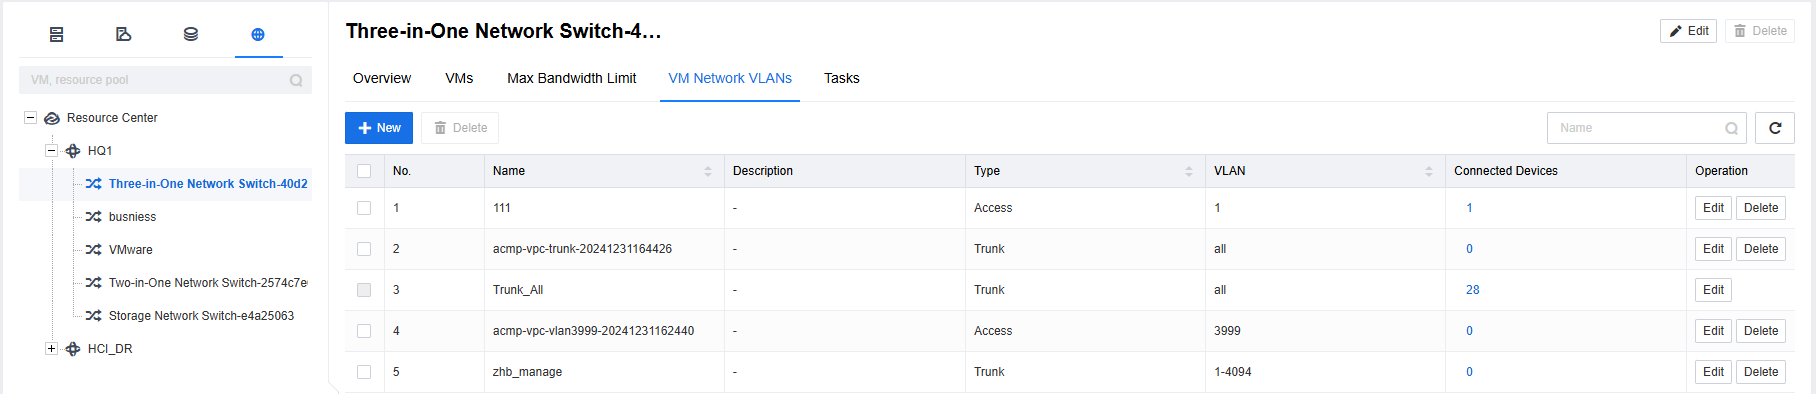
Step 5.If the virtual switch has the network type of VM network, click VLANs in VM Network to view VLAN information.
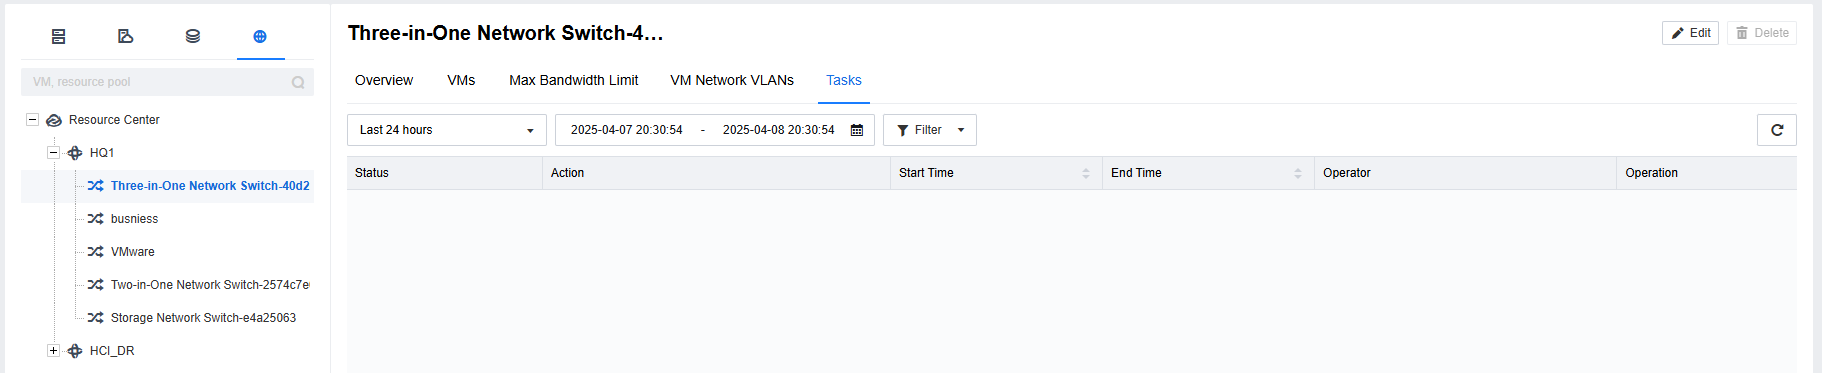
Step 6.Click Tasks to view tasks.


 {{ $t('index.defaultHeader.chromeBrowserTip') }}