{{ secondMenu.name }}


Athena EPP organizes endpoints in a tree structure. On the Endpoint Groups page, you can create groups, import groups, synchronize the Lightweight Directory Access Protocol (LDAP) information, allow users to assign groups, and manage endpoints.
Applicable Scenarios
In scenarios that involve a lot of groups, you can create groups manually for automatic endpoint grouping by endpoint IP range or endpoint name.
Configuration Guide
Plan business groups and IP addresses in advance, create groups according to asset attributes, and enable automatic grouping by endpoint IP range or endpoint name. Then, the endpoints with the Athena EPP agent installed will automatically join the corresponding groups based on their IP addresses or names when they go online.
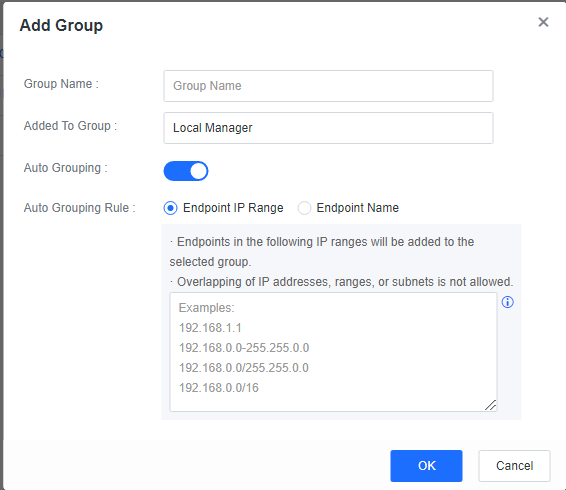
To create a group, go to Endpoints > Endpoint Groups and click New. In the Add Group dialog box, enable Auto Grouping, select Endpoint IP Range or Endpoint Name for Auto Grouping Rule, and enter IP address ranges or keywords, as shown in the following figure.
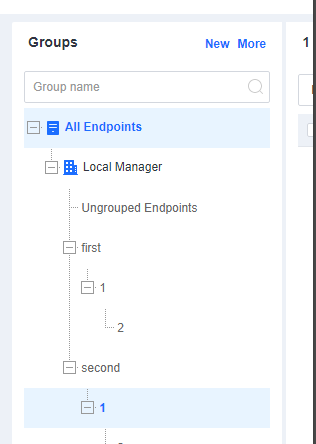
A sample organizational structure of groups is as follows.
Applicable Scenarios
You can import groups using an Excel file if there are many groups.
Configuration Guide
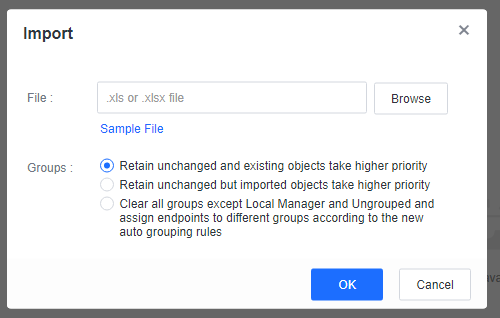
Go to Endpoints > Endpoint Groups and click More > Import. In the Import dialog box, click Sample File to download the template. Add the group information to the Excel template and select the template to import all groups.

Applicable Scenarios
In scenarios where the customer has deployed an AD domain server in the internal network to which endpoints are connected for unified management, administrators can enable LDAP synchronization to automatically synchronize specific OUs and users to Athena EPP for unified user management.
Configuration Guide
Go to System > System > LDAP Sync and configure parameters based on the configurations in the following figure.
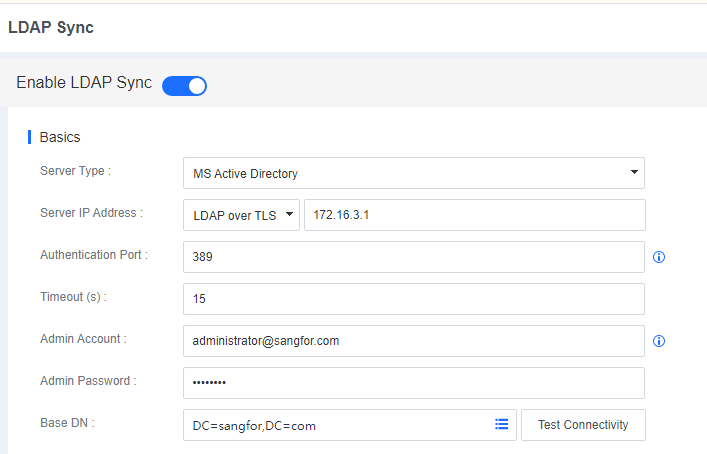
Basics: Specify the IP address of the AD domain server, the authentication port, the administrator account username, the administrator account password, and the Base DN. The administrator account username must be in the following format: administrator@domain.com.

Organizational Sync: Specify OU paths and a group creation mode, and keep other parameters at their defaults.
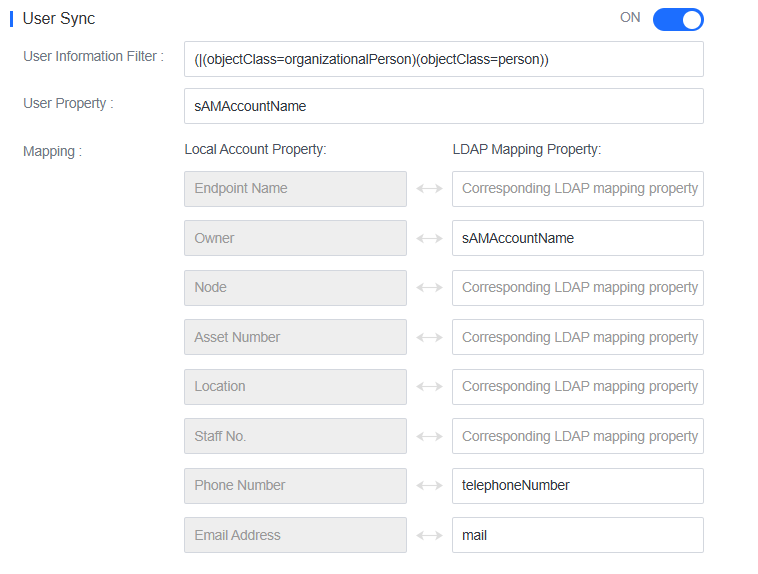
User Sync: Map domain user properties to the Athena EPP manager and keep other parameters at their defaults, as shown in the following figure.

Group Sync: Endpoints are automatically grouped on the Athena EPP manager according to the structure in the AD domain. Automatic grouping is triggered after you log in to an endpoint with a domain account and trigger LDAP synchronization.
Trigger LDAP Sync
You can trigger LDAP synchronization manually or at a scheduled time.
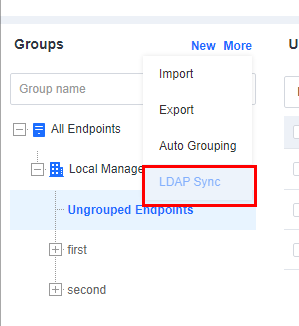
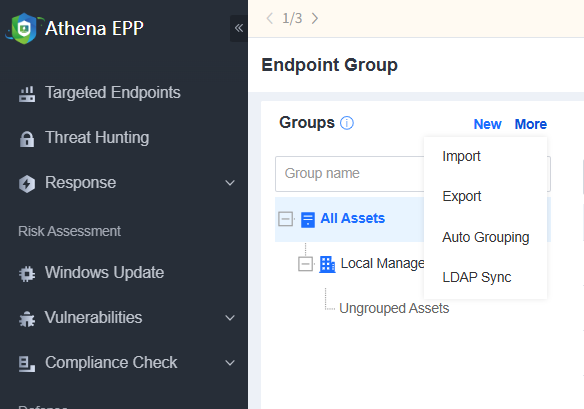
To synchronize the LDAP information manually, go to Endpoints > Endpoint Groups and click More > LDAP Sync, as shown in the following figure.
To synchronize LDAP information automatically, enable Auto Sync Setting, select Every day, Every week, or Every month, and set a specific time, as shown in the following figure. Then, the Athena EPP manager will automatically synchronize OU and user information from the LDAP server.

Effects
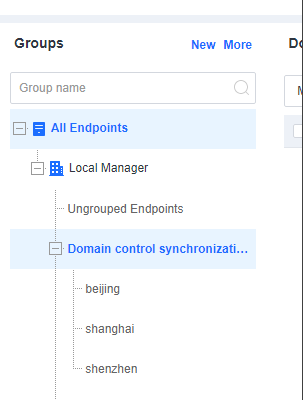
On the Endpoint Groups page of the Athena EPP manager, you can find the OUs synchronized from the LDAP server, as shown in the following figure.
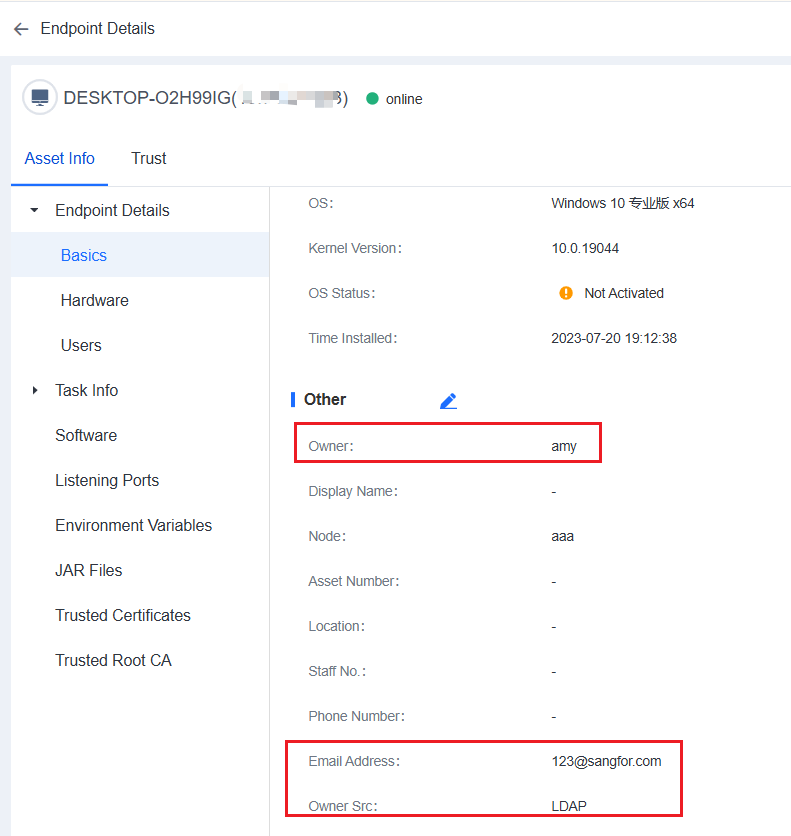
The Athena EPP manager automatically groups endpoints with the Athena EPP agent installed to the corresponding OUs when you log in to the endpoints with domain accounts.
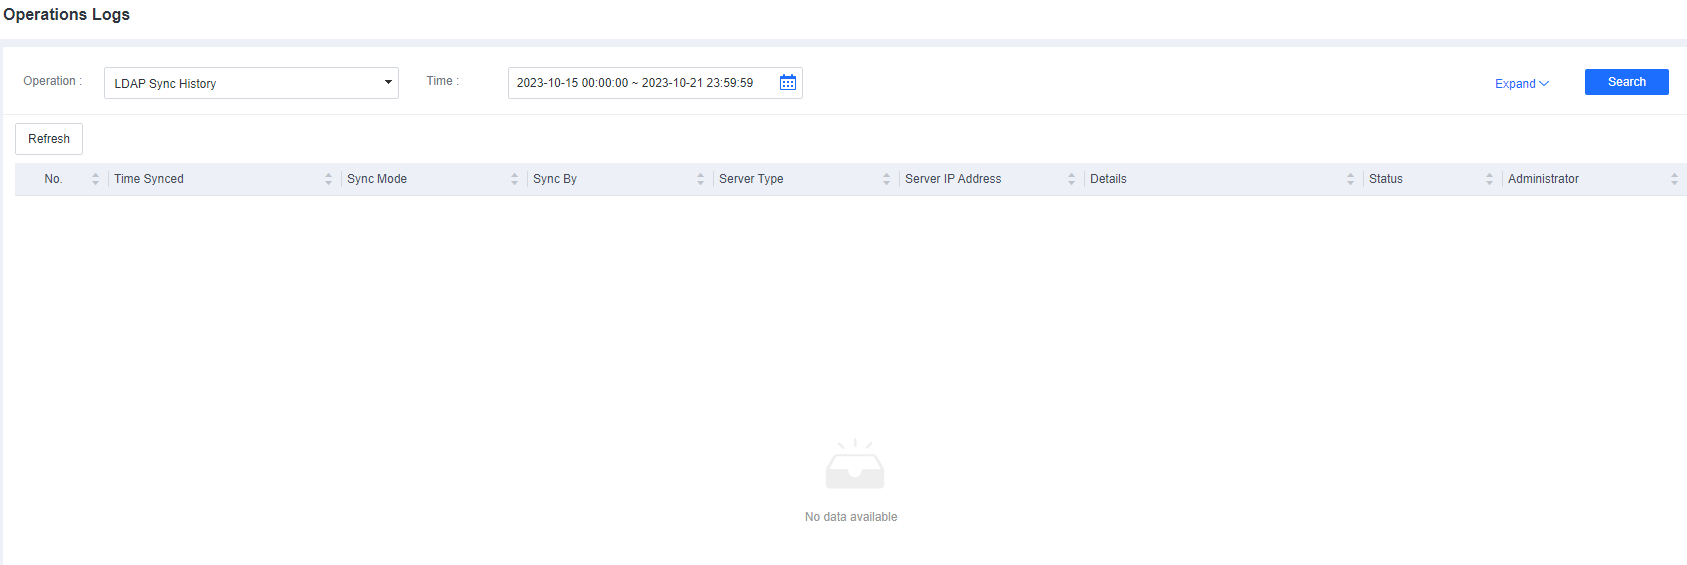
You can view LDAP synchronization details by going to System > Logs > Operations Logs, as shown in the following figure.
Applicable Scenarios
In multi-branch scenarios without any AD controller, automatic grouping by IP range is not applicable because IP address conflicts may exist between the endpoints of different branches. In this case, you can enable endpoint users to assign groups to their endpoints.
Configuration Guide
Step 1.Create or import groups.
Go to Endpoints > Endpoint Groups and click More > Auto Grouping to disable the automatic grouping, as shown in the following figure.
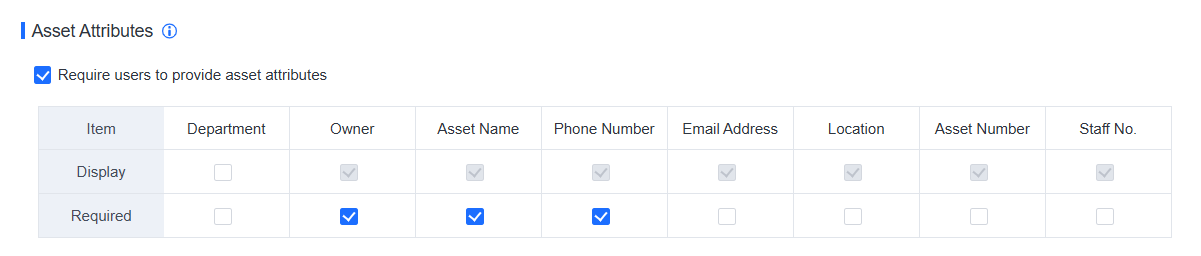
Step 2.Select Require users to provide asset attributes.
Go to Policies > General Policies > Basic Config, select Require users to provide asset attributes, and then select Display and Required in the Department column, as shown in the following figure.
Step 3.Users assign groups to their endpoints.
Users can set organizational information for their endpoints during asset registration during the first installation of the Athena EPP agent or edit organizational information after the installation is complete, as shown in the following figure. 
On the Endpoint Groups page, you can view endpoint information, move endpoints to other groups, manage remote endpoints, enable remote support, send messages, and export endpoints.
View endpoint information:
On the Endpoint Groups page, you can view the basic information of all endpoints, as shown in the following figure. 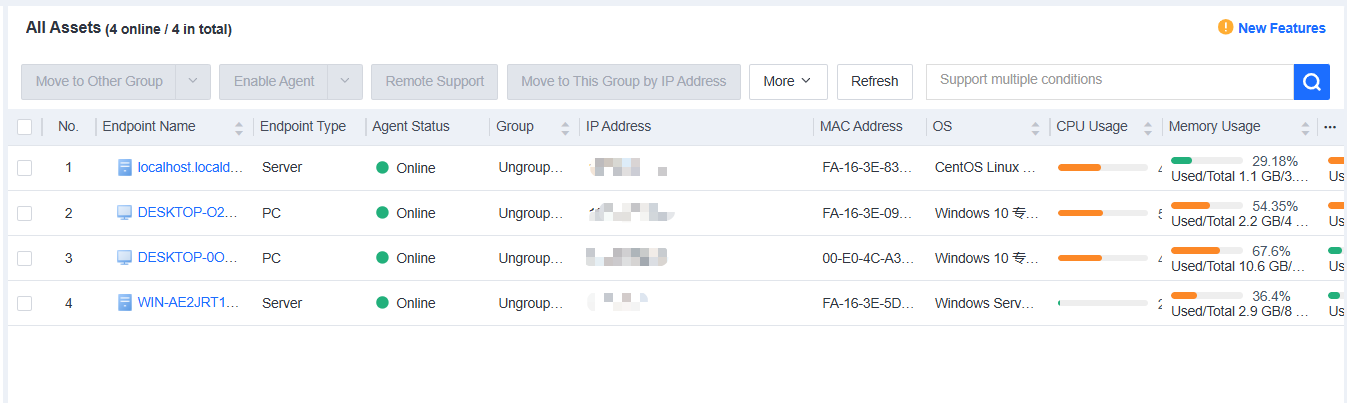
The page includes columns such as Endpoint Name, Asset Status, Group, IP Address, MAC Address, OS, Realtime Protection Status, CPU Usage, Memory Usage, Asset User, Asset Number, and Location. Administrators can determine whether to display a column by clicking the More (...) icon on the right.
You can click the name of an endpoint to go to its details page, as shown in the following figure. 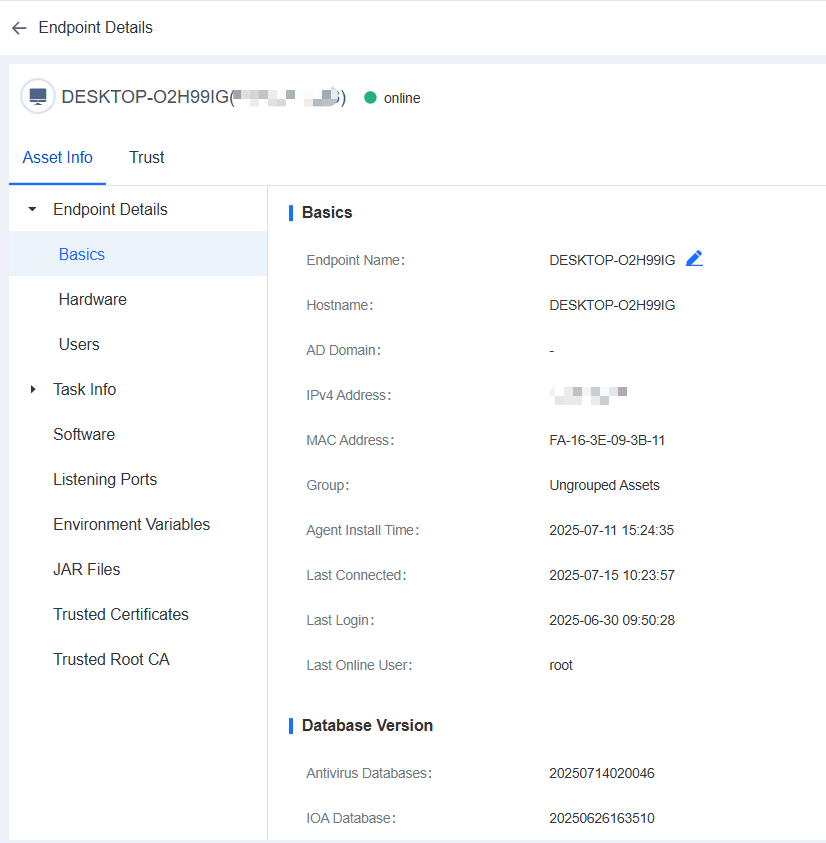
On the Endpoint Details page, you can run a Quick Scan and Full Scan. You can also Enable, Disable, or Uninstall Athena EPP agent on the same page.
Basics: Includes information such as Endpoint Name (editable), Hostname, IPv4 Address, MAC Address, Group, Agent Install Time, Last Connected, Last Login, and Last Online User.
Database Version: Includes information such as Antivirus Databases, IOA Database, IOC Database, and Vulnerability Database.
System Information: Includes information such as OS, Kernel Version, OS Status, and Time Installed.
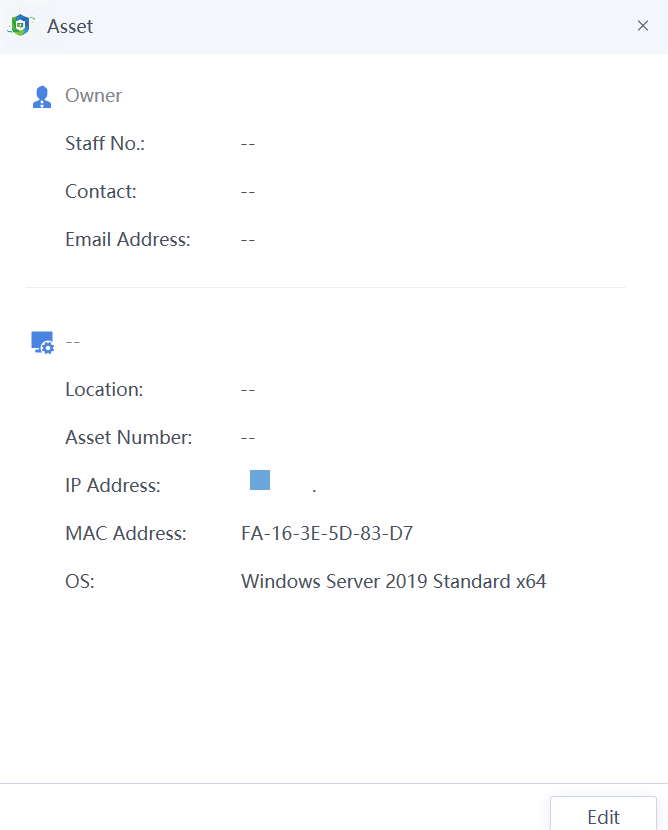
Other (editable): Includes information such as Asset User, Node, Asset Number, Location, Staff No., Phone Number, and Email Address.
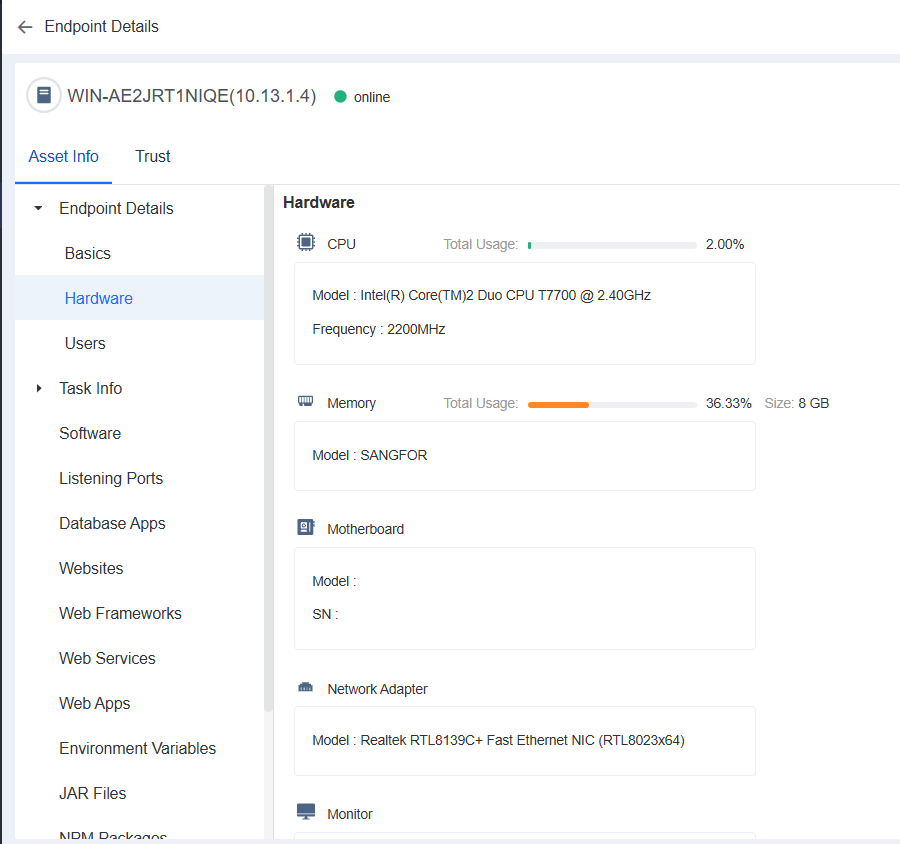
Hardware: Includes the models and usage of the CPU, Memory, Motherboard, Network adapter, Monitor, Graphics card, and Hard Disk.
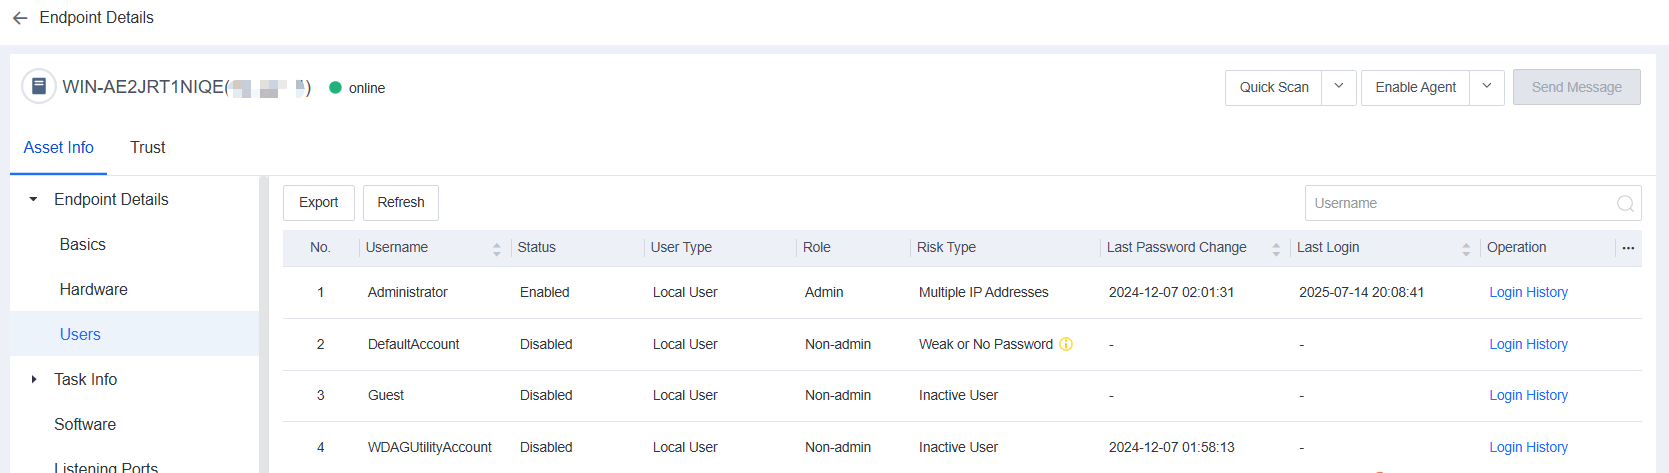
Users: Includes the endpoint account information such as Username, Status, User Type, Role, Risk Type (if there is an exclamation point, you can move the pointer over the exclamation point to view the risk details), Last Password Change, Last Login, Password Status, and Login History.
![]()
Click the More (…) icon on the right to determine whether to display a hidden column.
Task Info includes information such as Processes, Services, Connections, Startup Items, Scheduled Tasks, Sharing, and Registry.
Software includes information such as Software Name, Type, Version, Publisher, Installation Path, and Time Installed. You can filter software by software name, version, or publisher and export software information. 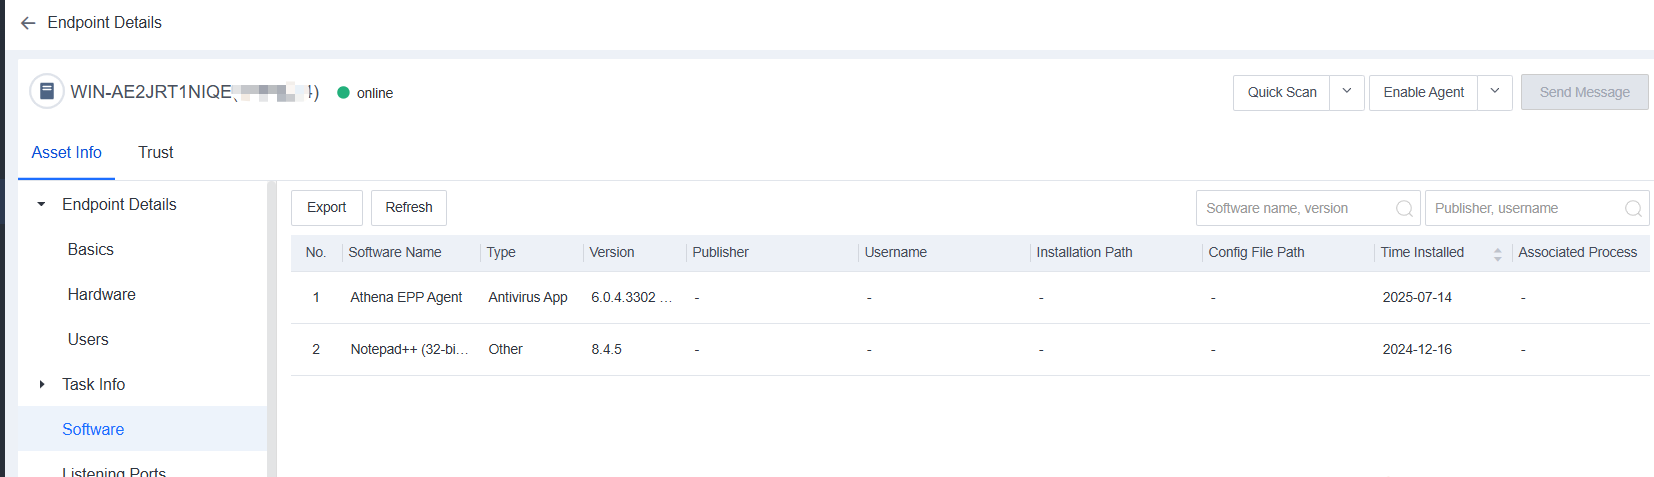
Listening Ports includes information such as Port, Protocol, Open Port, Bound IP, Listening Process, and Status. You can block or unblock ports, import port information, and search for ports by protocol or port number. 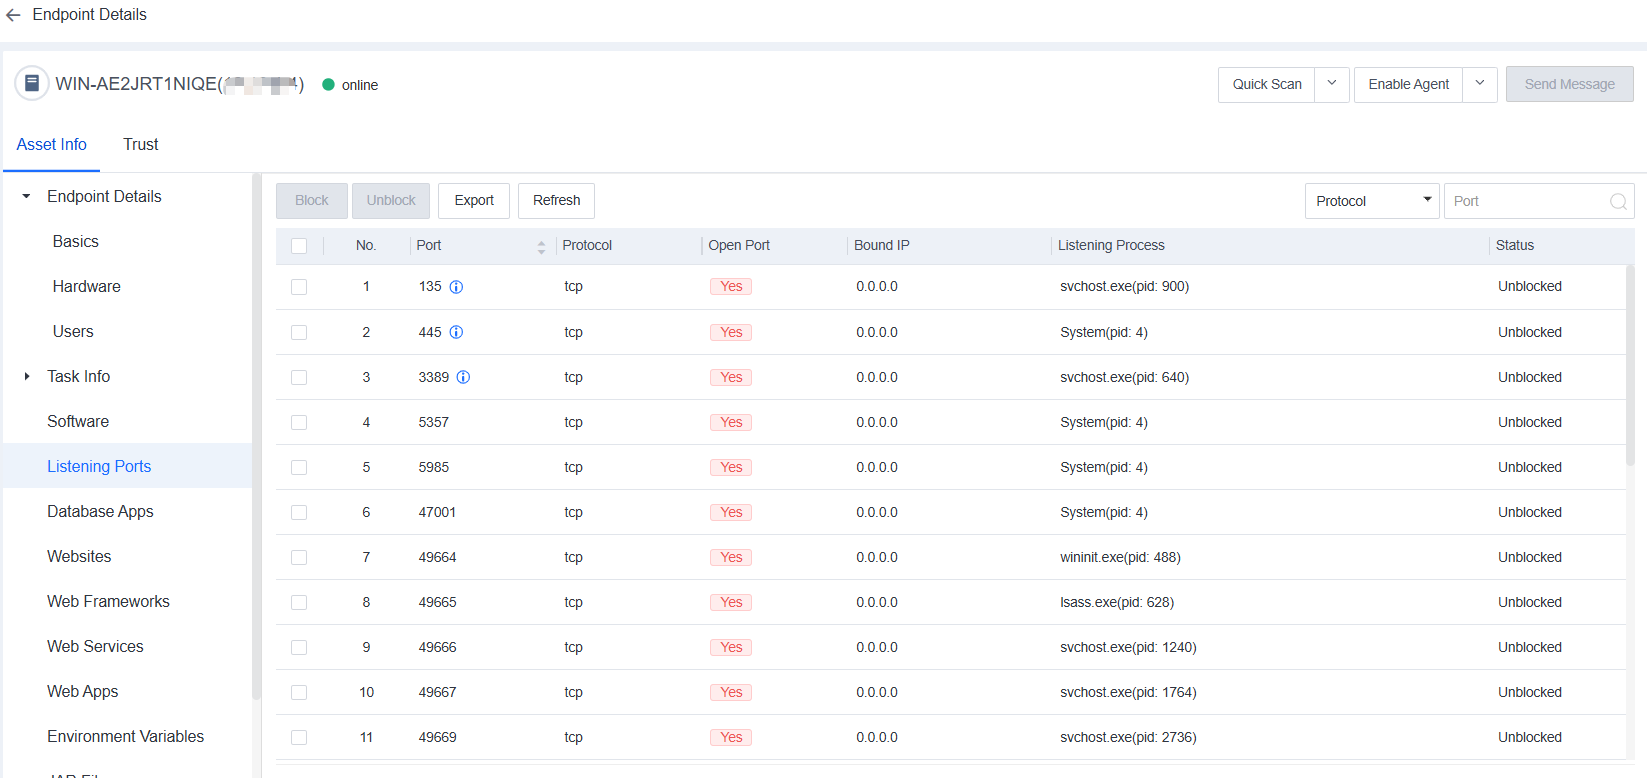
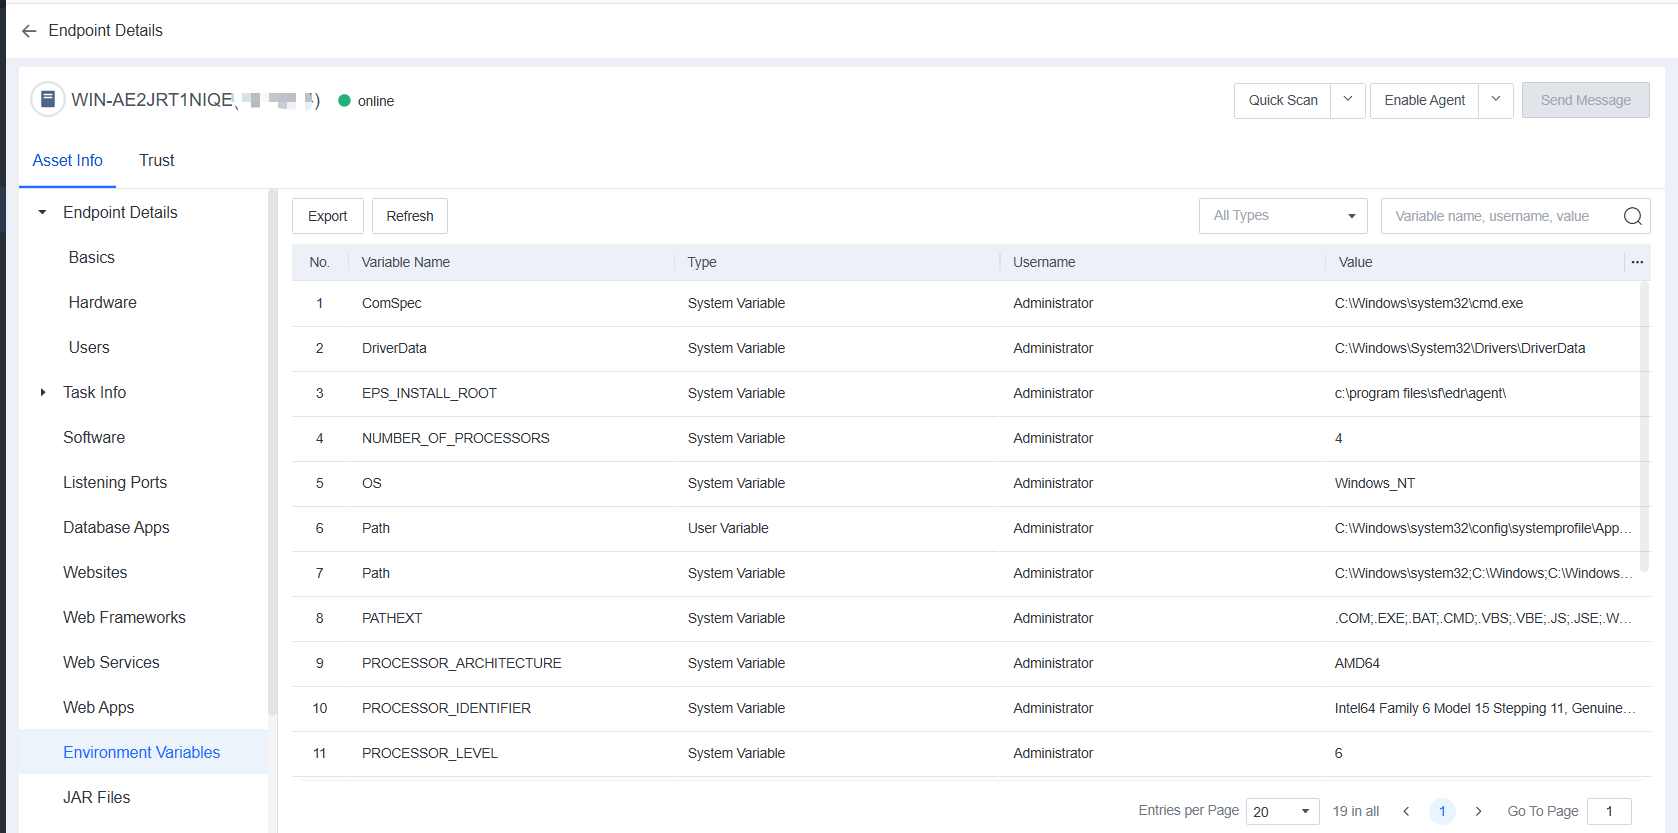
Environment Variables include the environment information of the system and the currently logged-in user. Some programs use such information to determine where files (such as temporary files) are to be placed.
Java Archive (JAR) is a platform-independent file format that allows you to compress multiple files into one. JAR Files shows the JAR files of the endpoint on the Athena EPP manager. 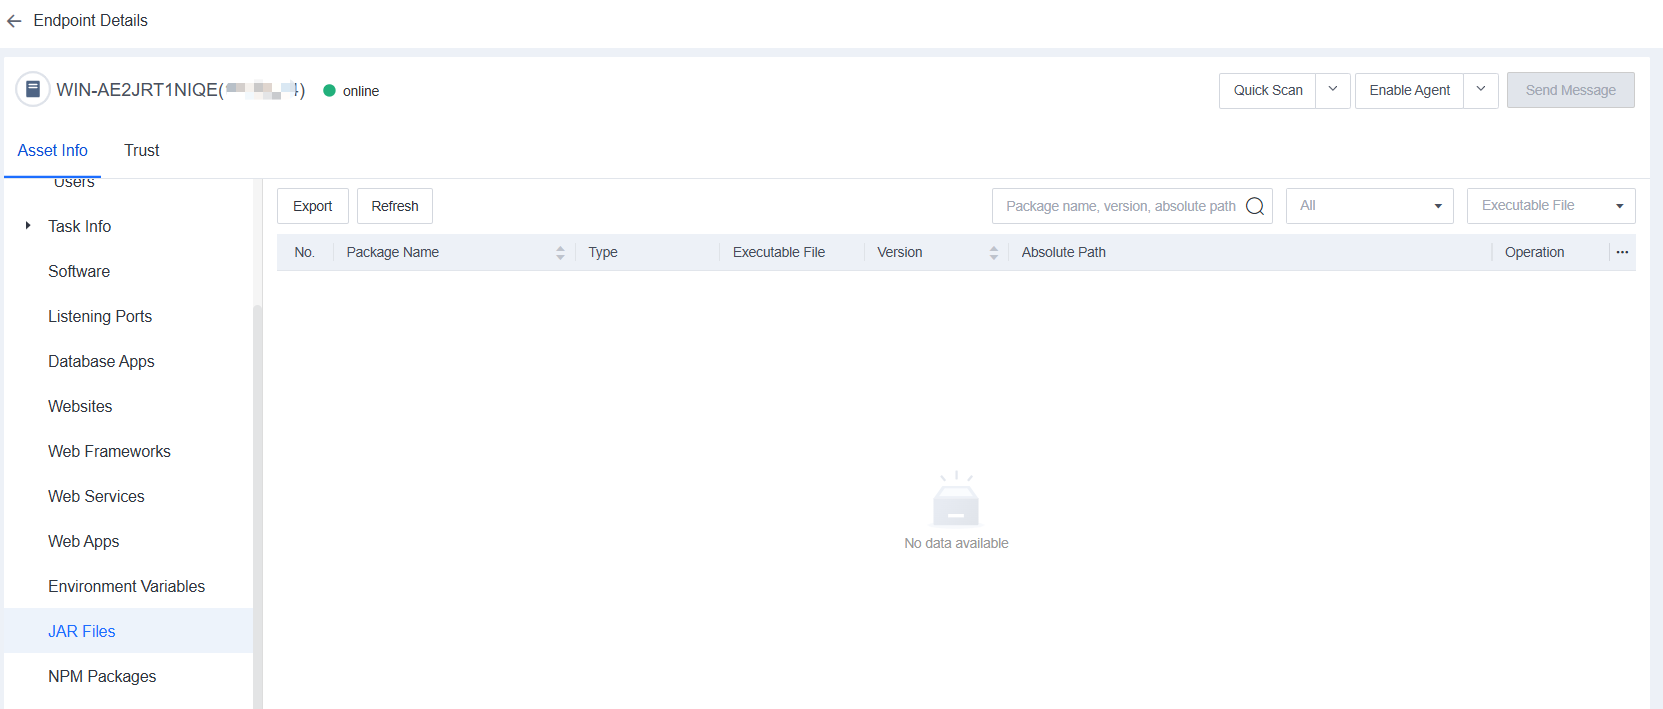
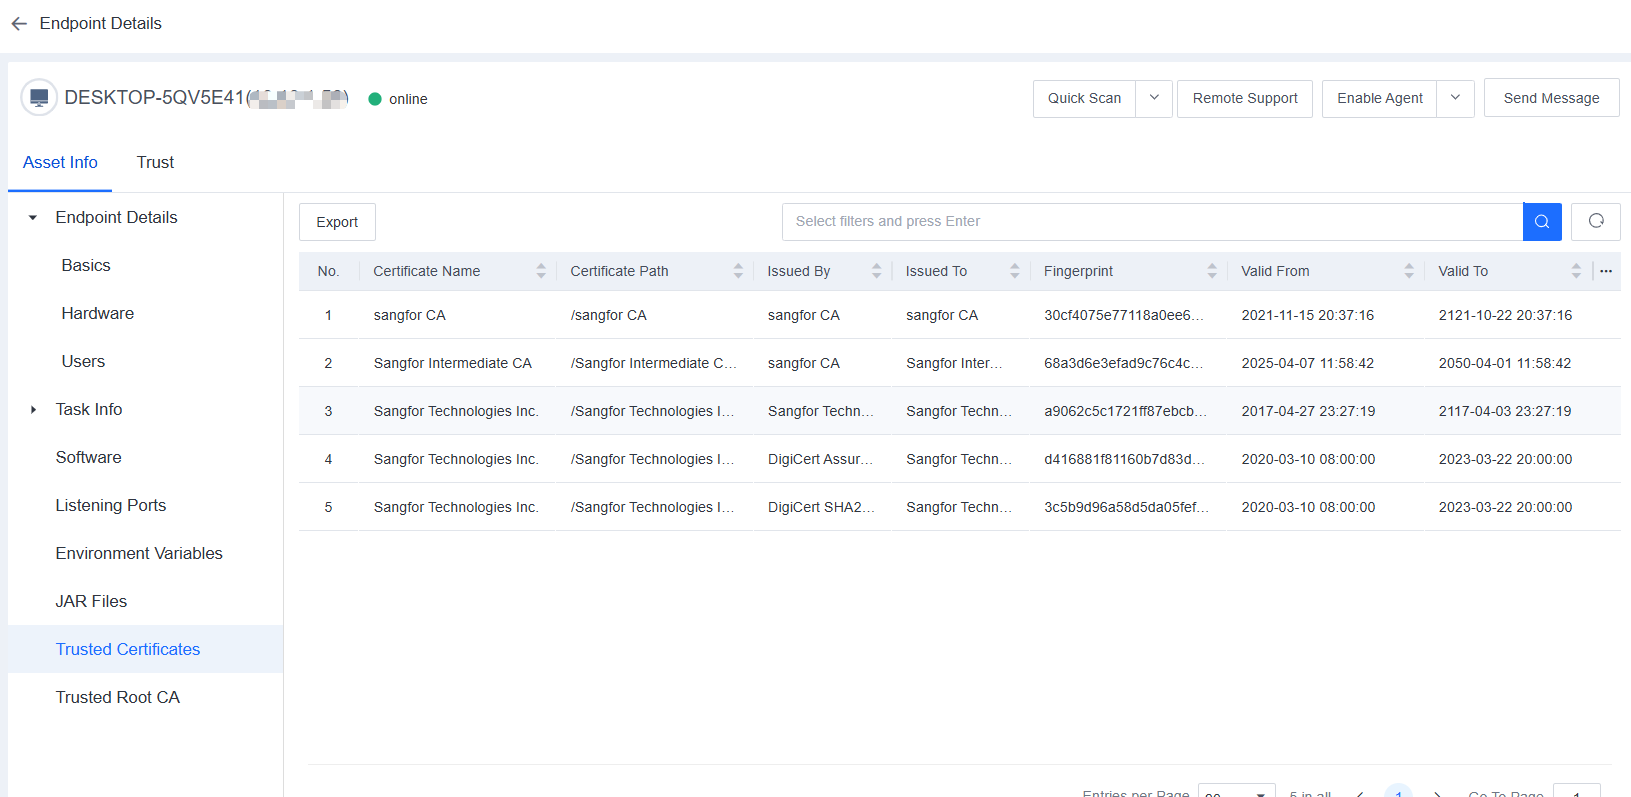
Trusted Certificates displays all trusted files, paths, and processes added by the endpoint. Administrators can check such information to avoid viruses caused by improper addition, as shown in the following figure.
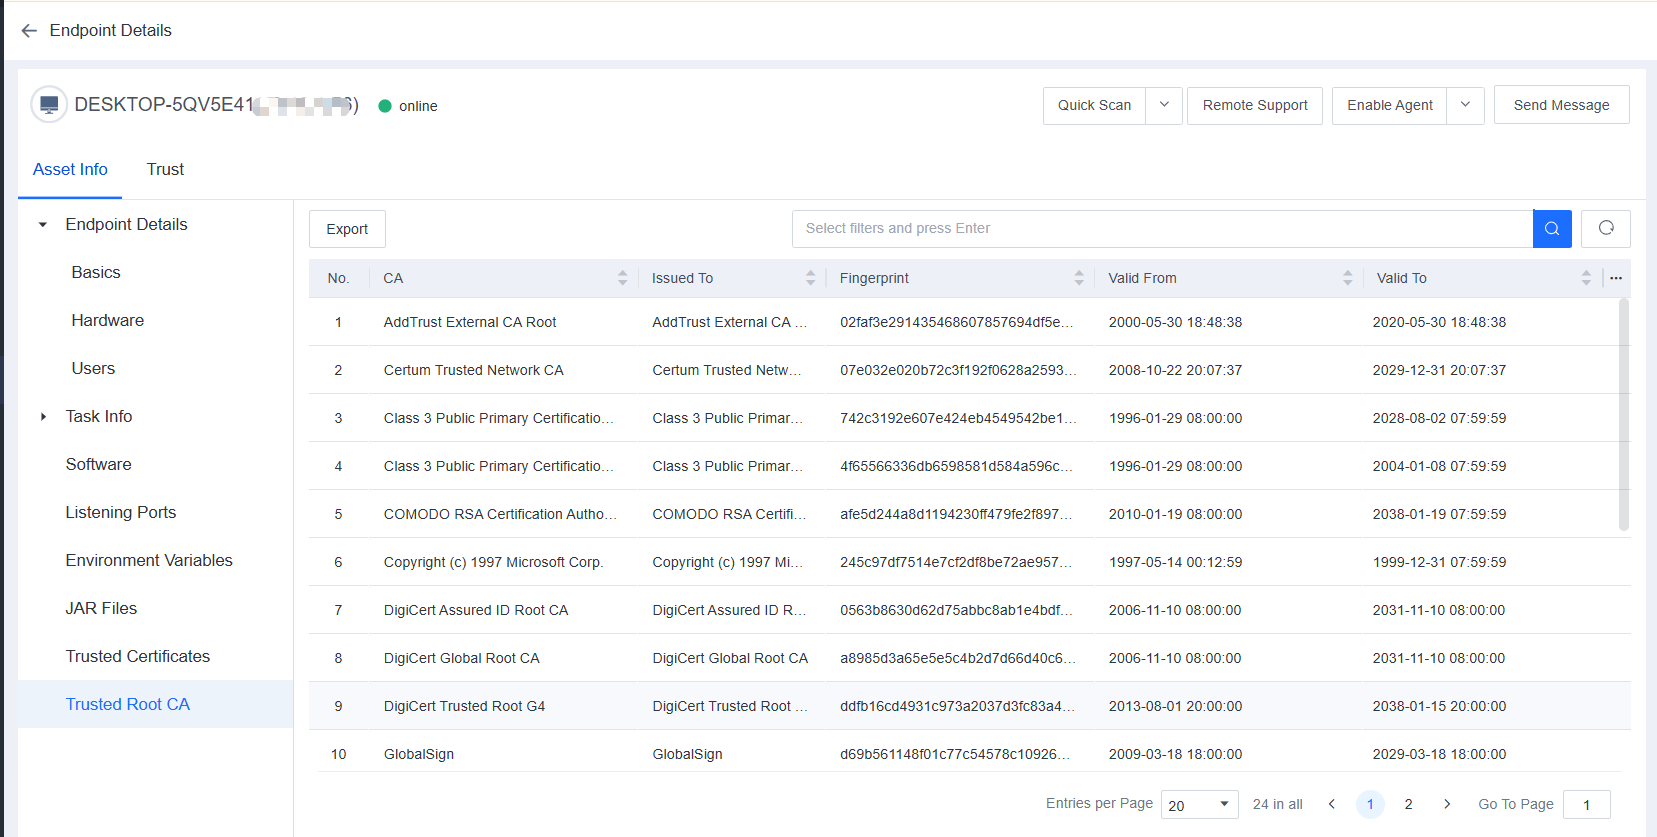
The Trusted Root CA tab allows you to view root CA information such as CA, Issued To, Fingerprint, Valid From, and Valid To.
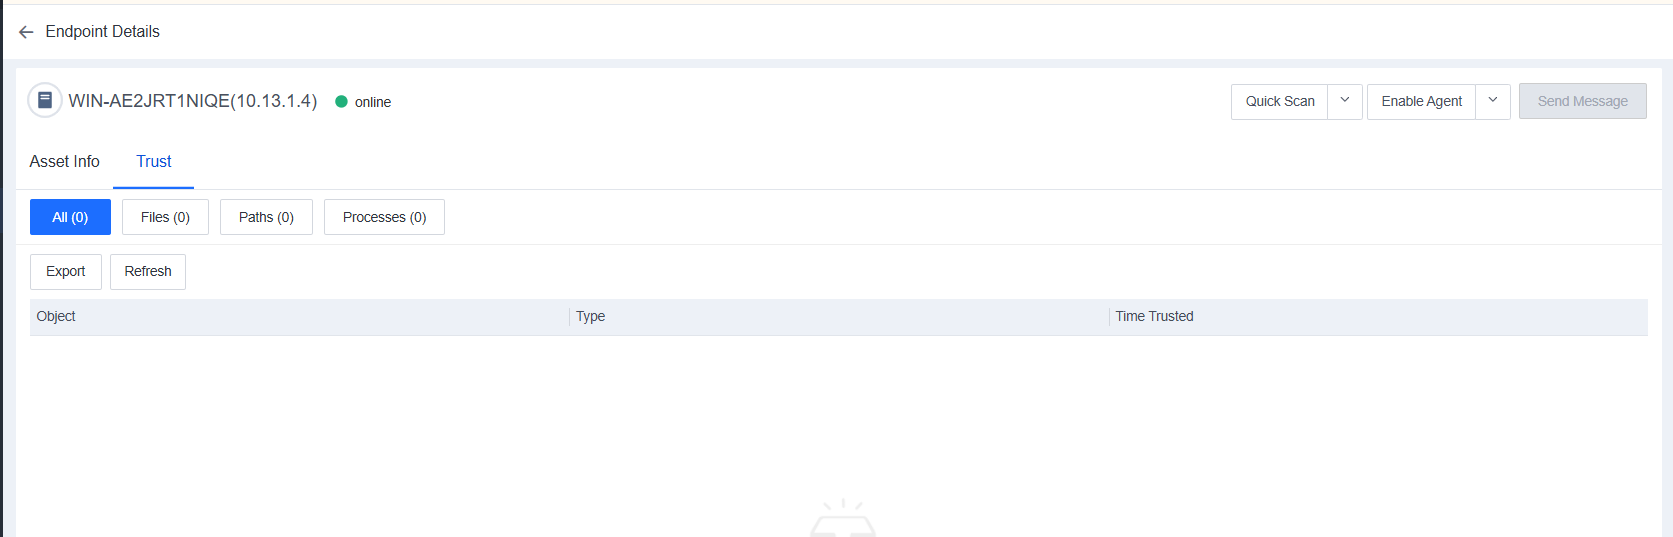
Displays the trust policies that have been added to the endpoint.
You can click Move To Other Group to move online endpoints to other groups, as shown in the following figure. 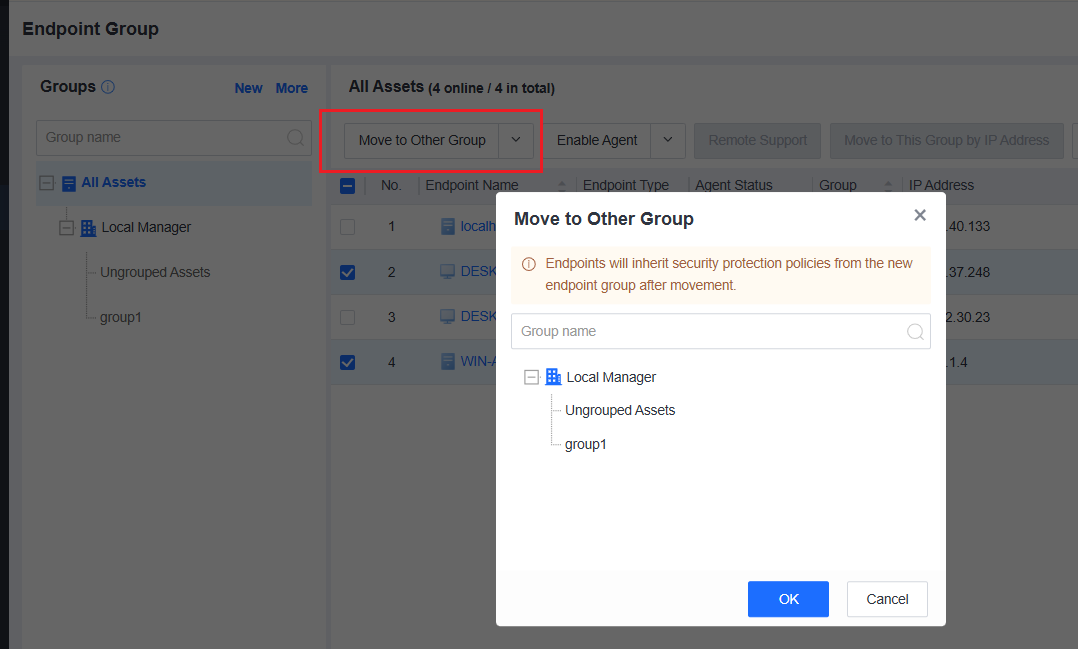
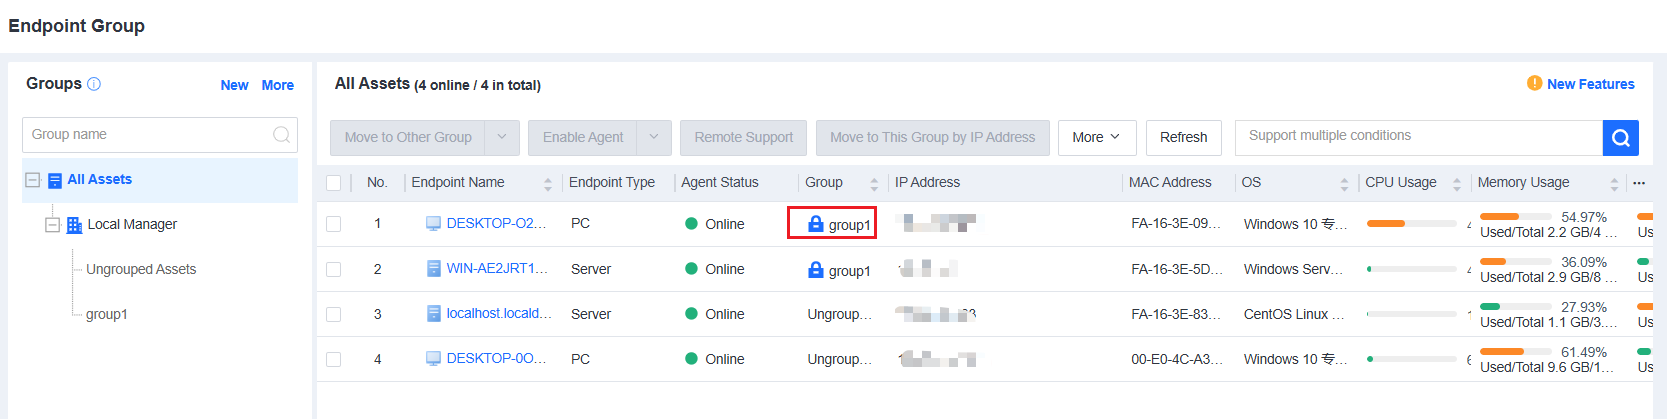
When Endpoint IP Range is selected as the auto grouping rule, the system automatically adds a ![]() tag to manually move endpoints to be locked into the current group and not automatically grouped based on their IP addresses, as shown in the following figure.
tag to manually move endpoints to be locked into the current group and not automatically grouped based on their IP addresses, as shown in the following figure.
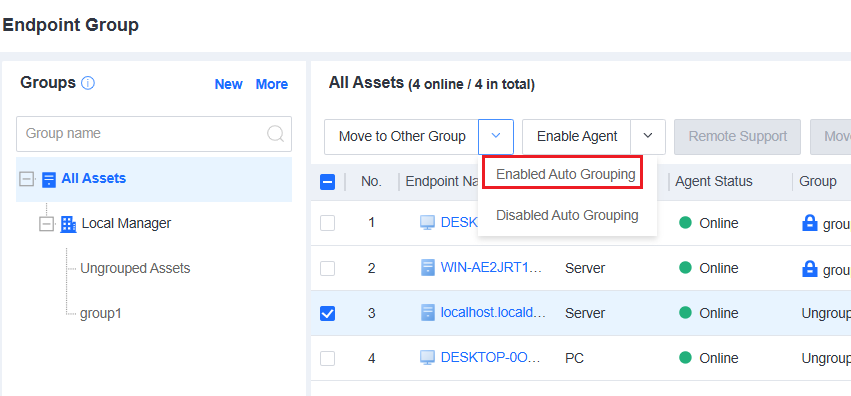
To recover auto grouping for an endpoint with a fixed group, select the endpoint and click Enable Auto Grouping, as shown in the following figure.
![]()
When the agent goes online, it will trigger the auto grouping policy if the following two prerequisites are met:
1. The auto grouping policy has been configured.
2. The group to which the endpoint belongs is not in a locked status.
Actions such as restarting the endpoint or agent will make the agent go online. Therefore, if you do not want a specific endpoint to be moved to a different group due to the automatic grouping policy, please manually move the endpoint to a specific group as described above.
Manage remote endpoints:
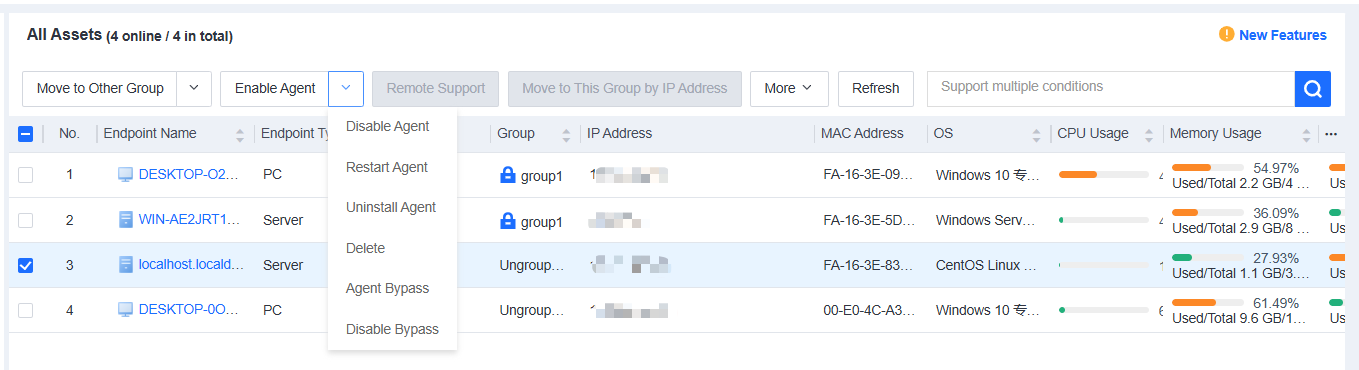
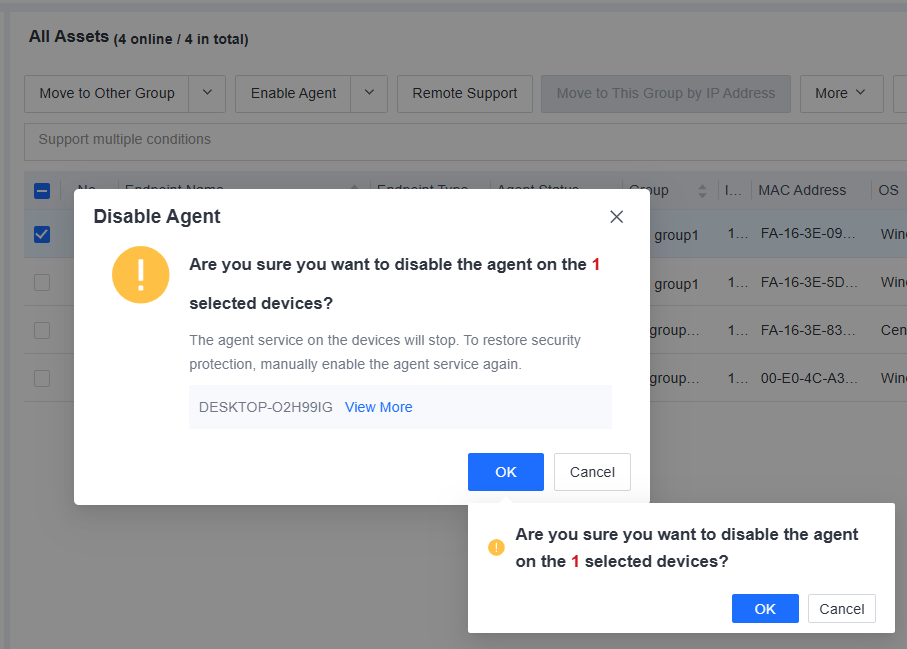
You can enable, disable, restart, or uninstall the Athena EPP agent for selected endpoints, delete endpoints, and send messages to endpoints. You can also enable or disable Agent Bypass for Windows Server or Linux endpoints, as shown in the following figure.
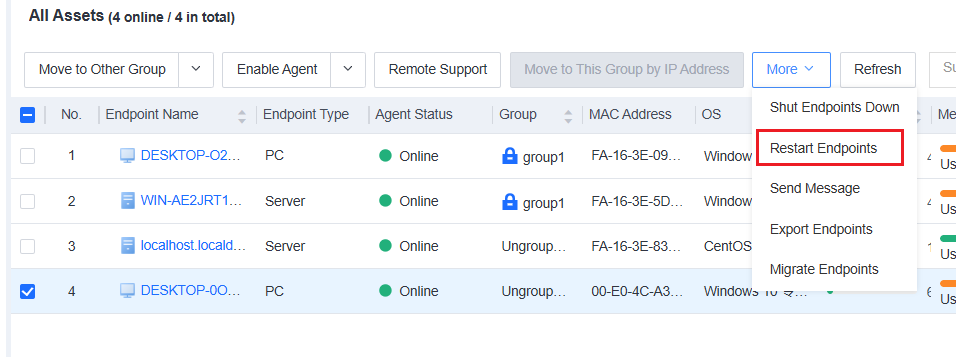
On the All Assets pane, you can restart one or more endpoints as needed, as shown in the following figure.
In the Restart Endpoints dialog box that appears, configure a restart policy.
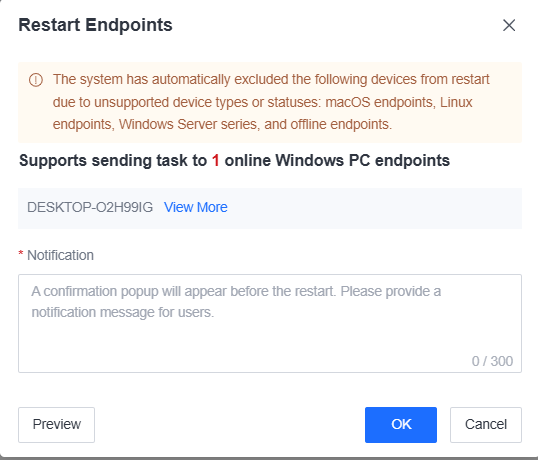
![]()
This applies to Windows endpoints only.
On the All Assets pane, you can shut down one or more endpoints as needed, as shown in the following figure. 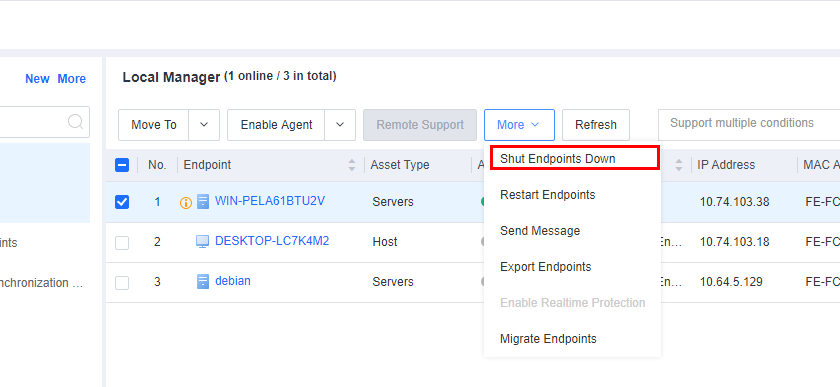
In the Shut Endpoints Down dialog box that appears, configure a shutdown policy. 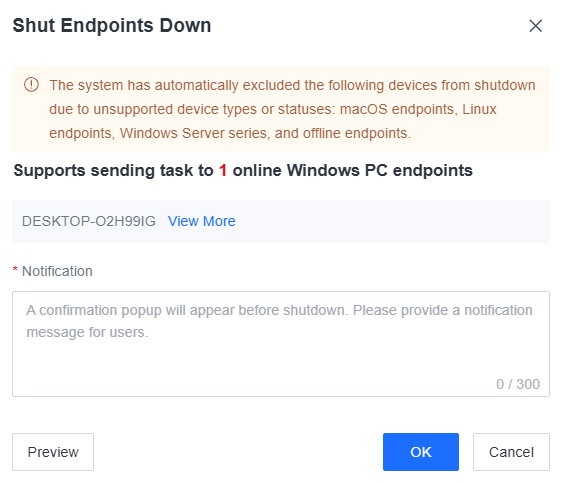
![]()
This applies to Windows endpoints only.
On the All Assets pane, you can send messages to one or more endpoints as needed. The procedure is as follows:
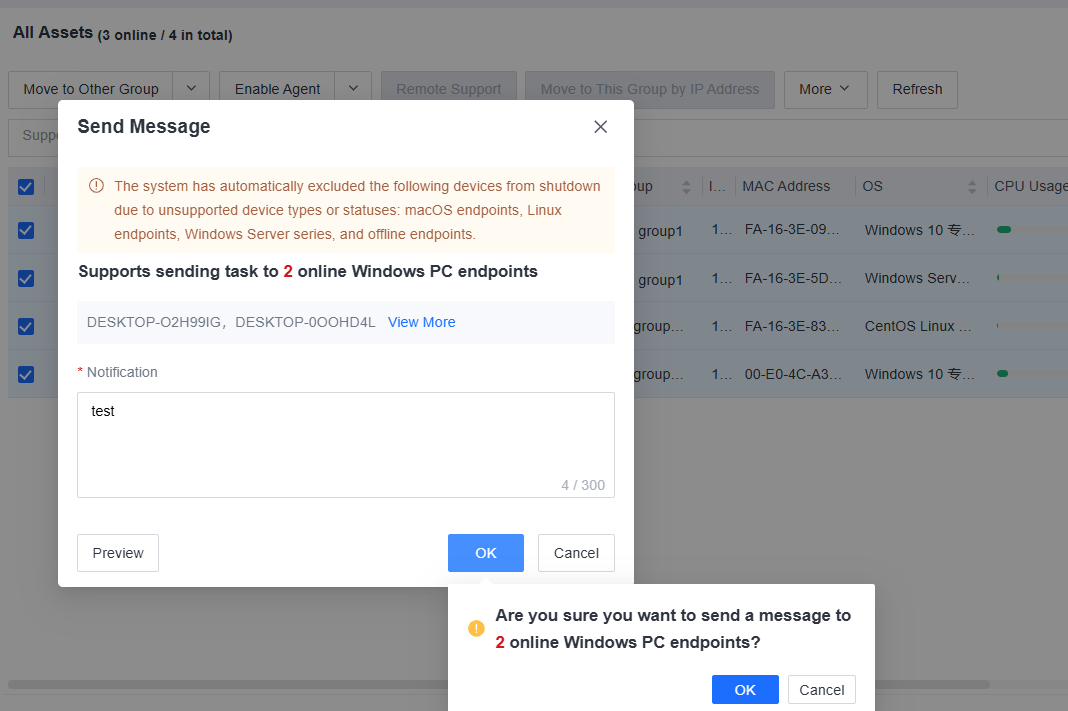
Step 1.Go to Endpoints > Endpoint Groups, select one or more endpoints, and click More > Send Message. The Send Message dialog box appears, as shown in the following figure. 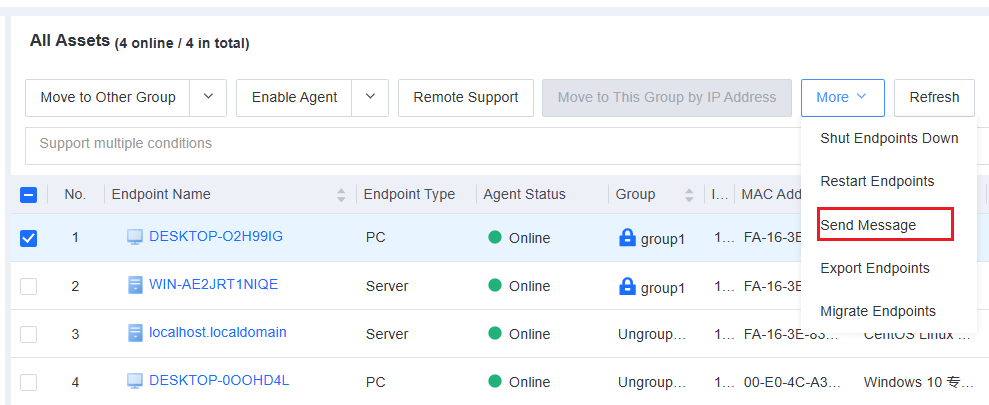
Step 2.Customize the notification content. Then, users of the selected endpoints will receive the notification message, as shown in the following figure.
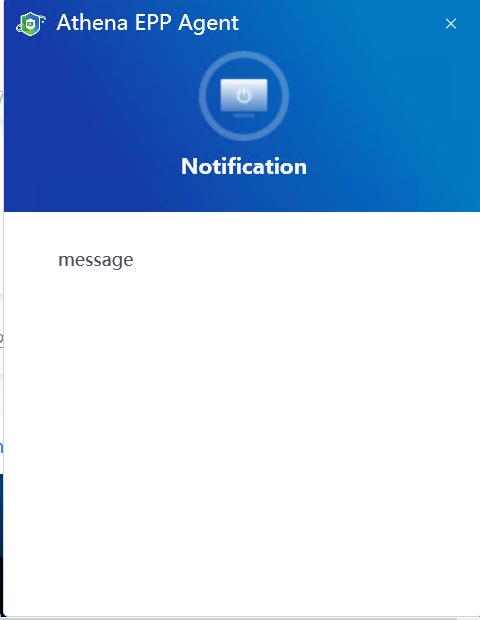
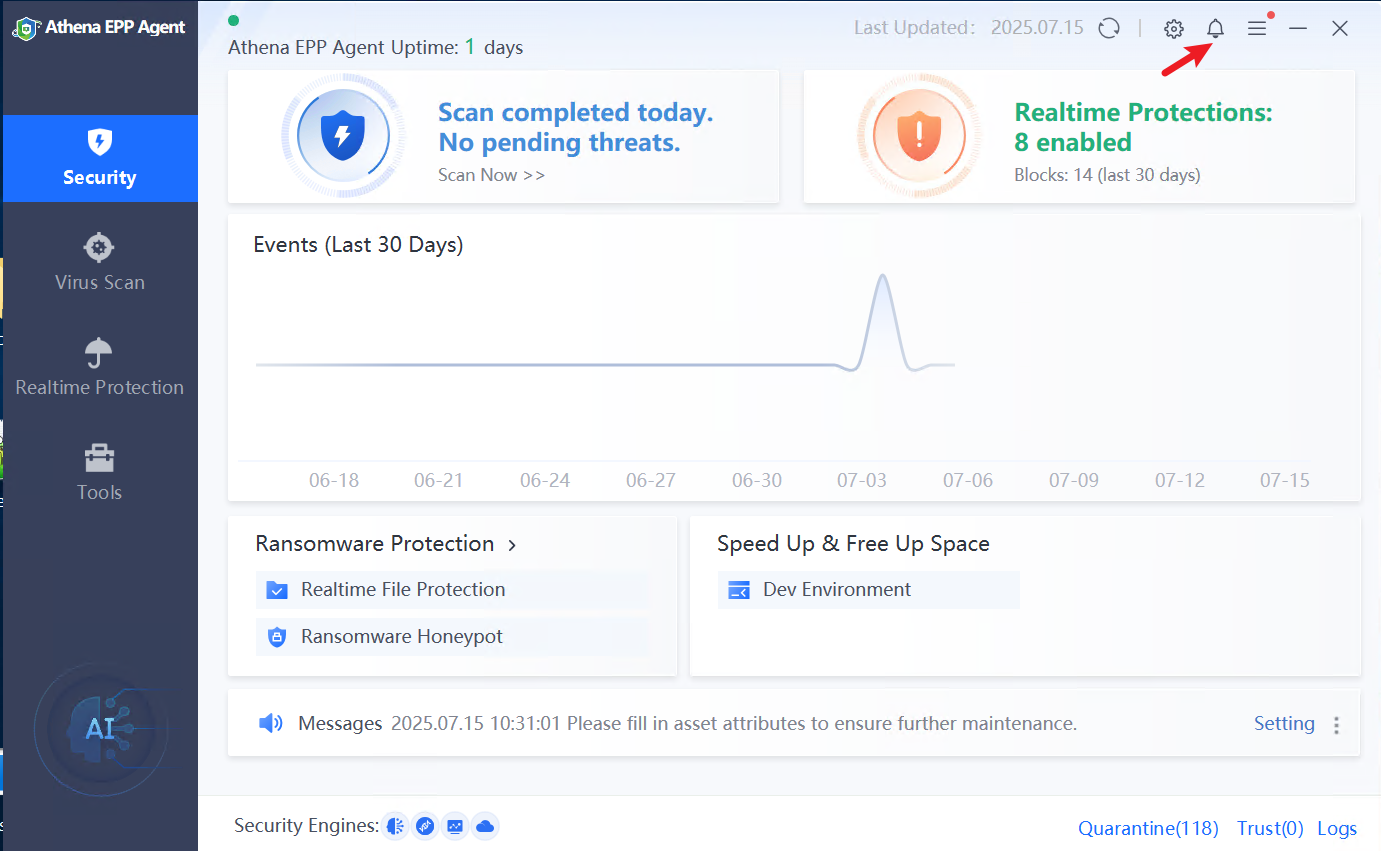
Step 3.Users can click the close (X) icon in the upper right corner to close the message and click the notification icon shown in the following figure to view historical messages.
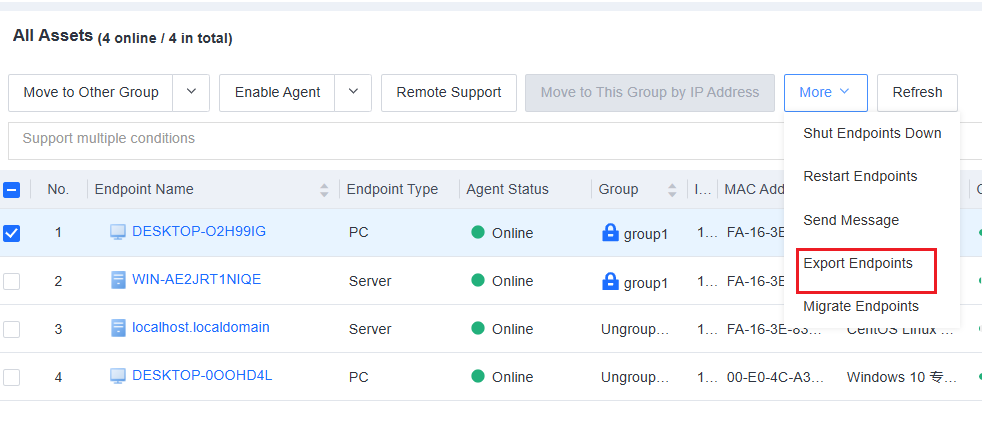
To export an Excel file containing endpoint details, go to Endpoints > Endpoint Groups, select the endpoints to be exported, and click More > Export Endpoints, as shown in the following figure.

 {{ $t('index.defaultHeader.chromeBrowserTip') }}