{{ secondMenu.name }}


You can issue scan tasks from the Athena EPP manager to identify suspicious files on endpoints. The scan operation uses various engines, including Local Reputation Database, Sangfor Engine Zero, Behavioral Analytics Engine, Gene Analytics Engine, and Cloud-Based Engine.
Virus scan tasks include three types: quick scan, full scan, and forced scan. To select a task type, click Create Task in Defense > Malware Scan > Tasks. In the dialog box that appears, select the task type. The following table describes these three task types.
|
Full Scan |
Scans all files on the endpoint hard disks. |
|
Quick Scan |
Scans important file directories on the system disk, which include the following ones on different operating systems: Windows: /Windows, /Windows/system32, and private directories under /Windows/system32 /Windows/system32/drivers and its subdirectories Linux: /bin, /sbin, /usr/sbin, /usr/bin, /lib, /lib64, /usr/lib/usr/lib64, /usr/local/lib, /usr/local/lib64, /tmp, /var/tmp, /dev, and /proc macOS: /private/tmp, /Users/[Current account name]/Downloads, /Users/[Current account name]/Desktop, /Users/[Current account name]/Documents |
|
Forced Scan |
For stubborn viruses, you can use the dedicated tool on the Athena EPP manager to handle viruses in bulk. It helps you respond rapidly to widespread, stubborn viruses. Currently, this feature applies to Windows systems only. |
4.4.1.1.1Virus-Infected Files
Go to Defense > Malware Scan > Malware to view the details of detected security events, including malware, ransomware, cryptomining, backdoor programs, and worms, as shown in the following figure.
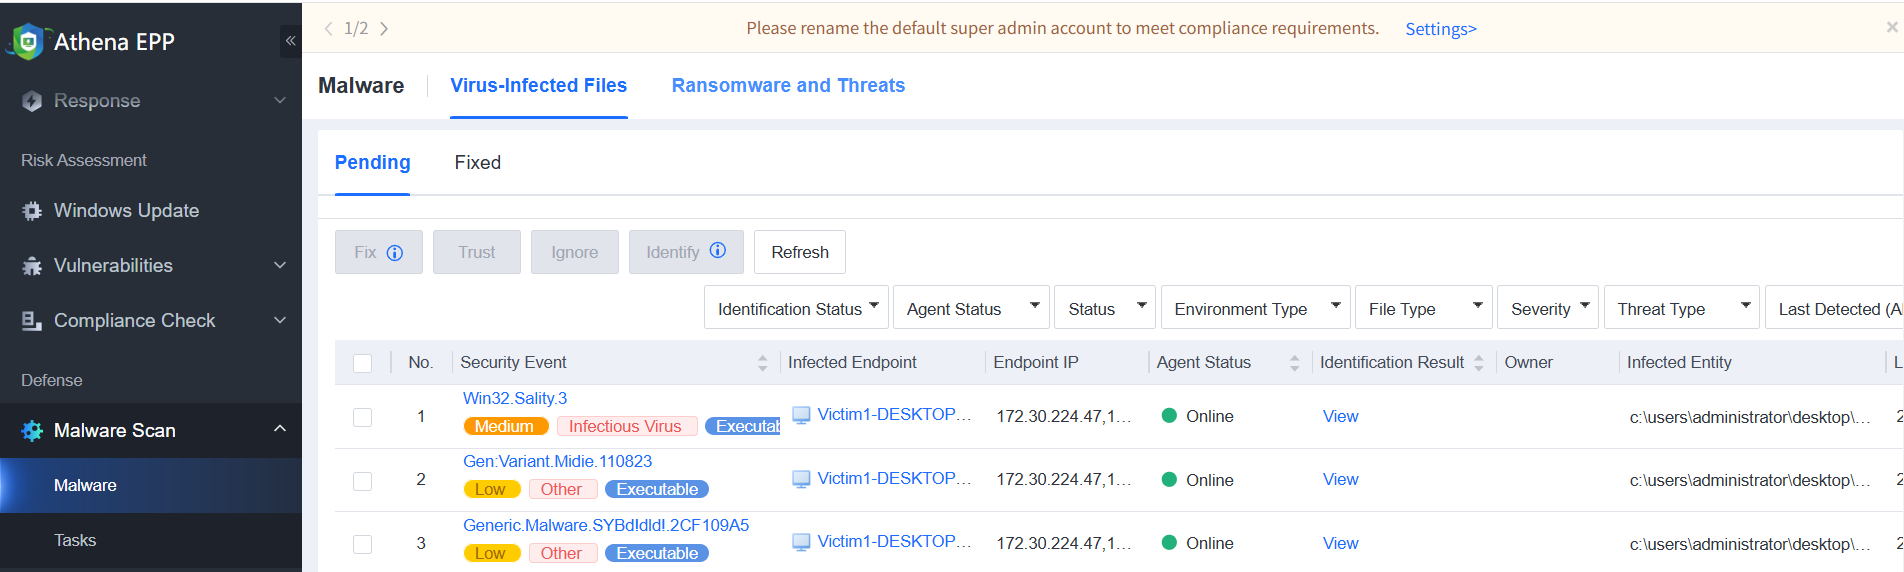
You can also filter security events by endpoint status, handling status, file type, severity, threat type, last detection time, and endpoint name/IP address/virus name/file path as an administrator. For example, to handle online security events only, filter events by selecting Online for Agent Status.
Click the name of a security event to check its details, as shown in the following figure. 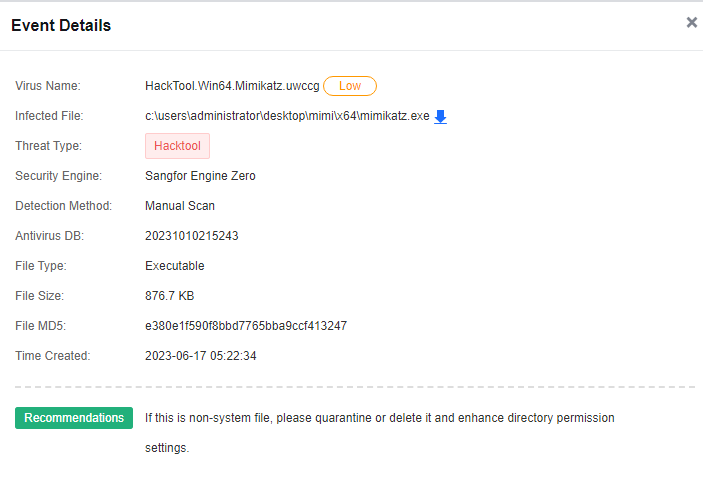
Pending:
The Pending tab displays a list of pending security events. Under the Operation column, you can click Fix, Trust, or Ignore to handle the event. For example, for an infected file you want to quarantine, click Fix for the corresponding event, as shown in the following figure.
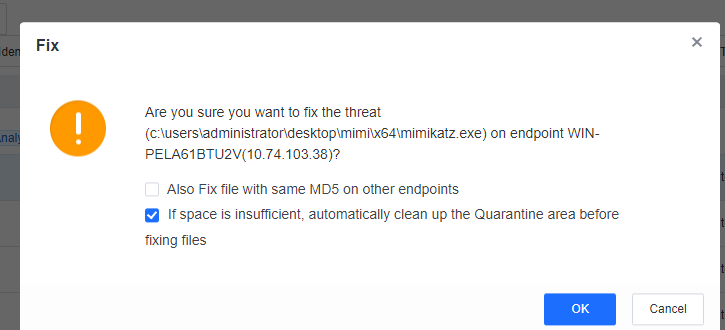
Select Also Fix file with same MD5 on other endpoints to fix the same infected file on other endpoints in bulk.
If you select If space is insufficient, automatically clean up the Quarantine area before fixing files, the files in the Quarantine area will be automatically cleaned up if the number of files in the Quarantine area has reached the upper limit.
![]()
If If space is insufficient, automatically clean up the Quarantine area before fixing files is selected, half of the files in the Quarantine area will be automatically cleaned up sequentially.
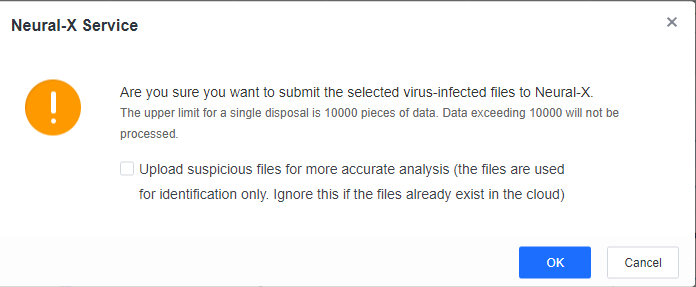
If you are unsure of whether a file is malicious, click Identify or Analyze to submit the file to Neural-X Threat Intelligence for further analysis and identification.
The Neural-X service provides file identification capabilities backed by security experts, sandboxes, and engines, and analyzes files using a Cloud-Based Engine and the collected intelligence. It provides more accurate identification results and a closed-loop approach to event handling.
When the Athena EPP manager is connected to the Internet, any detected infected files are automatically identified by Neural-X, which will then provide relevant results. In cases where files cannot be automatically identified, you can manually submit them to Neural-X for identification.
After identification is complete, click View to review the identification details. 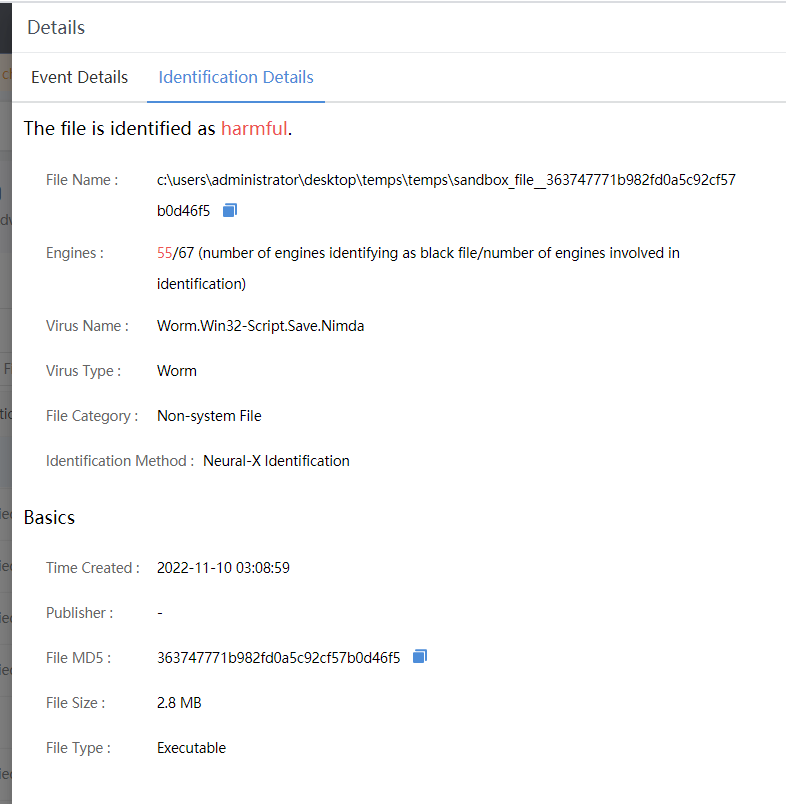
Fixed:
The Fixed tab displays all infected files that have been quarantined. You can Remove, Restore, or Ignore the files, as shown below.
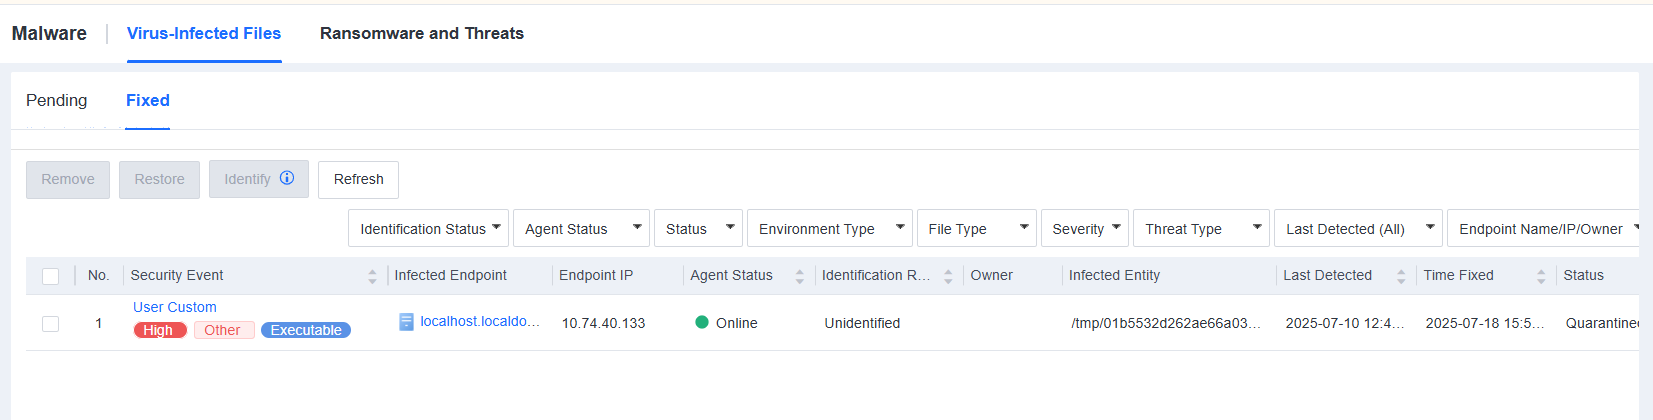
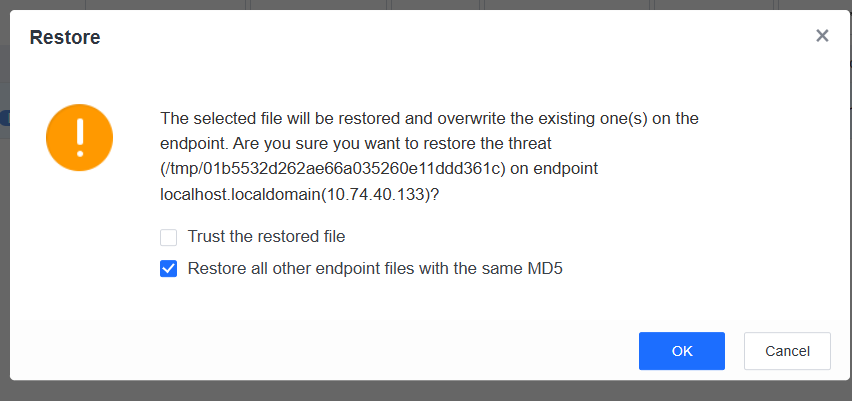
Select infected files and click Remove to delete quarantined files in bulk, or click Restore to restore quarantined files in bulk, as shown in the following figure.
You can fix up to 10,000 infected files at a time. To fix all infected files at a time, click Select all on all pages, and click Fix.
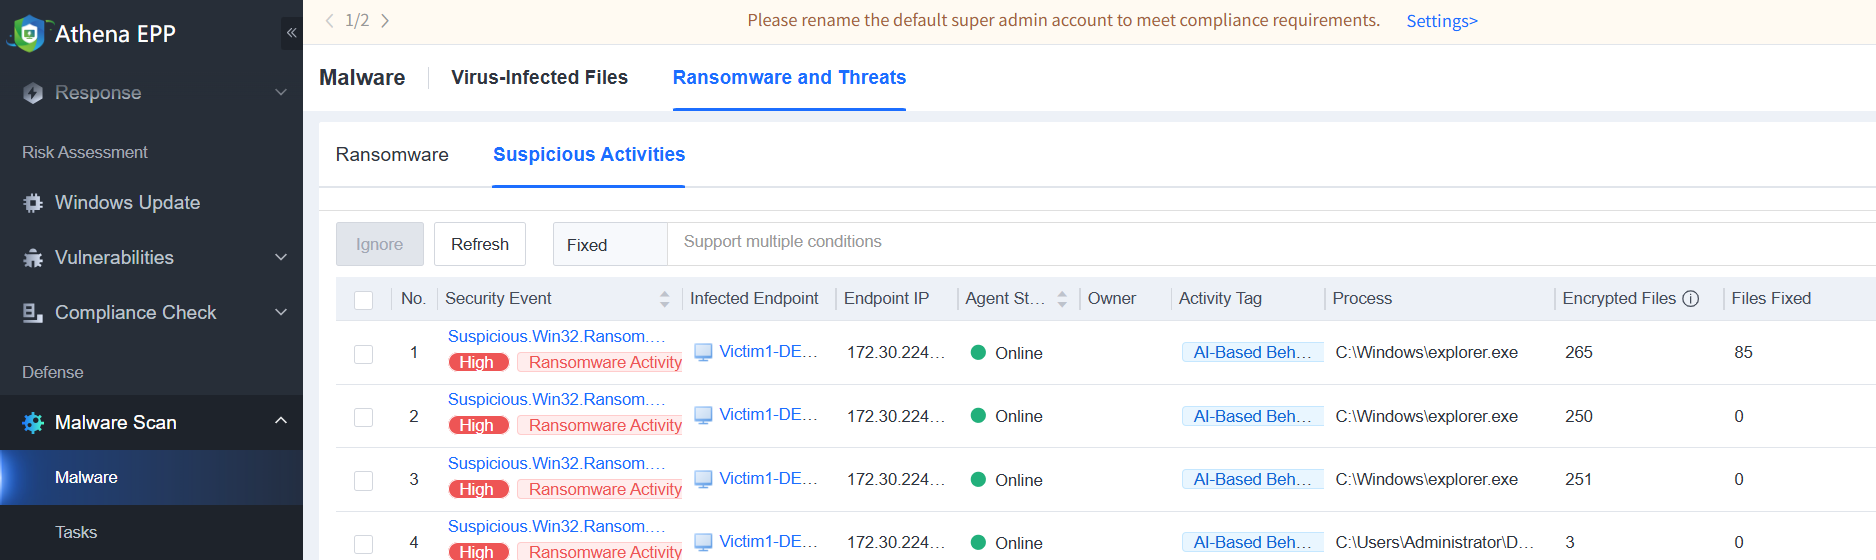
4.4.1.1.2 Ransomware and Threats
Ransomware: Ransomware attacks include malicious files and suspicious activities. Athena EPP can detect ransomware files and identify ransomware attacks by using Sangfor Engine Zero before the ransomware encrypts host files. This proactive approach ensures early detection and timely prevention.
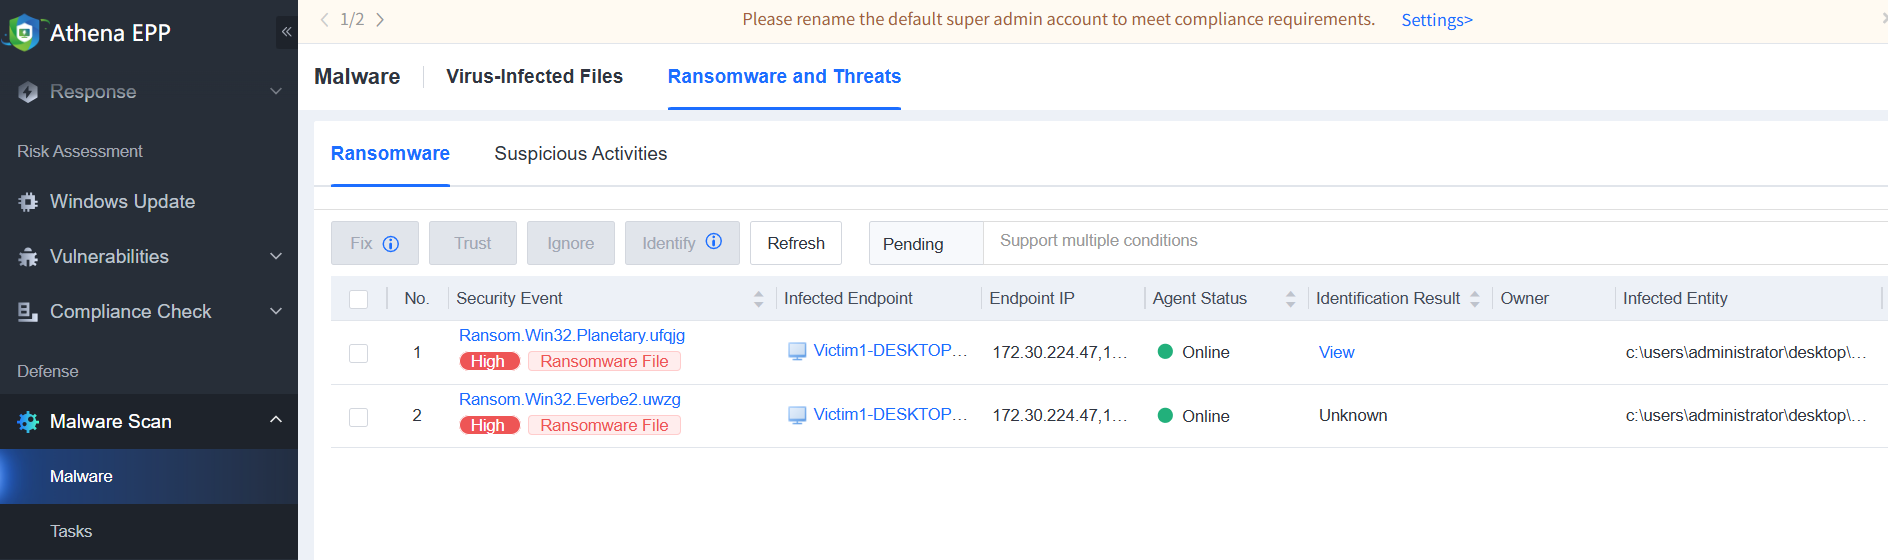
Suspicious activities: Suspicious activities refer to ransomware attacks, such as ransomware encryption, sending a ransom note, and baiting, identified via Sangfor Engine Zero. Athena EPP ensures early detection and timely prevention before the ransomware encrypts host files, as shown in the following figure.
The actions to be taken when detecting malicious files are according to the configurations on the Policies > General Policies > Anti-Malware tab.
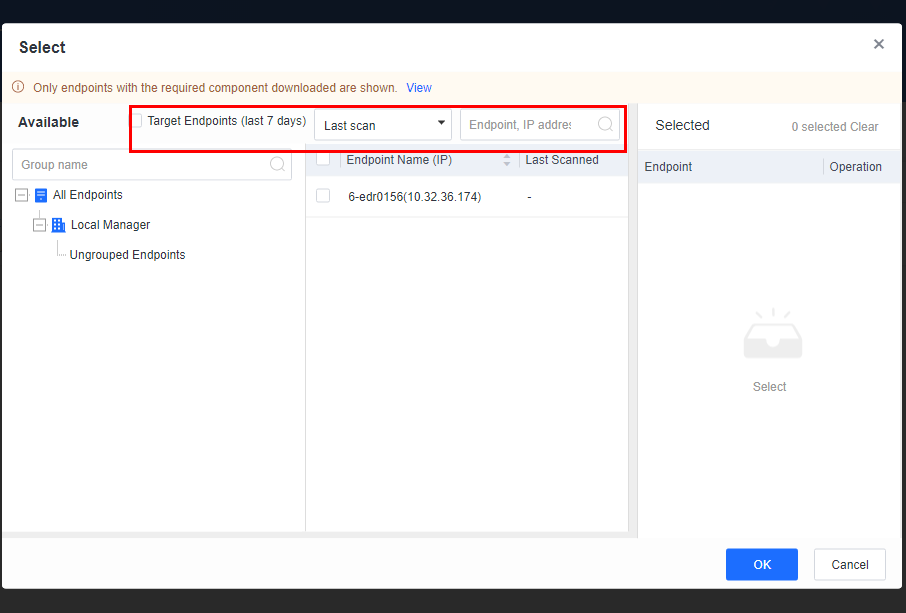
Go to Defense > Malware Scan > Tasks, and click Create Task. In the dialog box that appears, select Full Scan, Quick Scan, or Forced Scan as needed.
Endpoints: You can view the target endpoints of the last 7 days, view endpoints that have not been scanned in the last 7 days, 30 days, or 90 days, view the last scan time of an endpoint, and search for specific endpoints by name or IP address as an administrator.
Scan Mode: Three scan modes are supported: High CPU, Adaptive, and Low CPU, each with the following distinct characteristics:
• High CPU: Consumes the most CPU resources (<50% when CPU usage restriction is enabled).
• Adaptive: Dynamically adjusts CPU resources based on the CPU usage. It optimizes the scan speed by leveraging ample CPU resources when the CPU usage is low and minimizing resource consumption when the CPU usage is high, thus ensuring smooth service operations.
• Low CPU: Consumes no more than 10% of CPU resources (<5% when CPU usage restriction is enabled).
Select endpoints and issue virus scan tasks. Then, check the task status of the endpoints, as shown in the following figure. 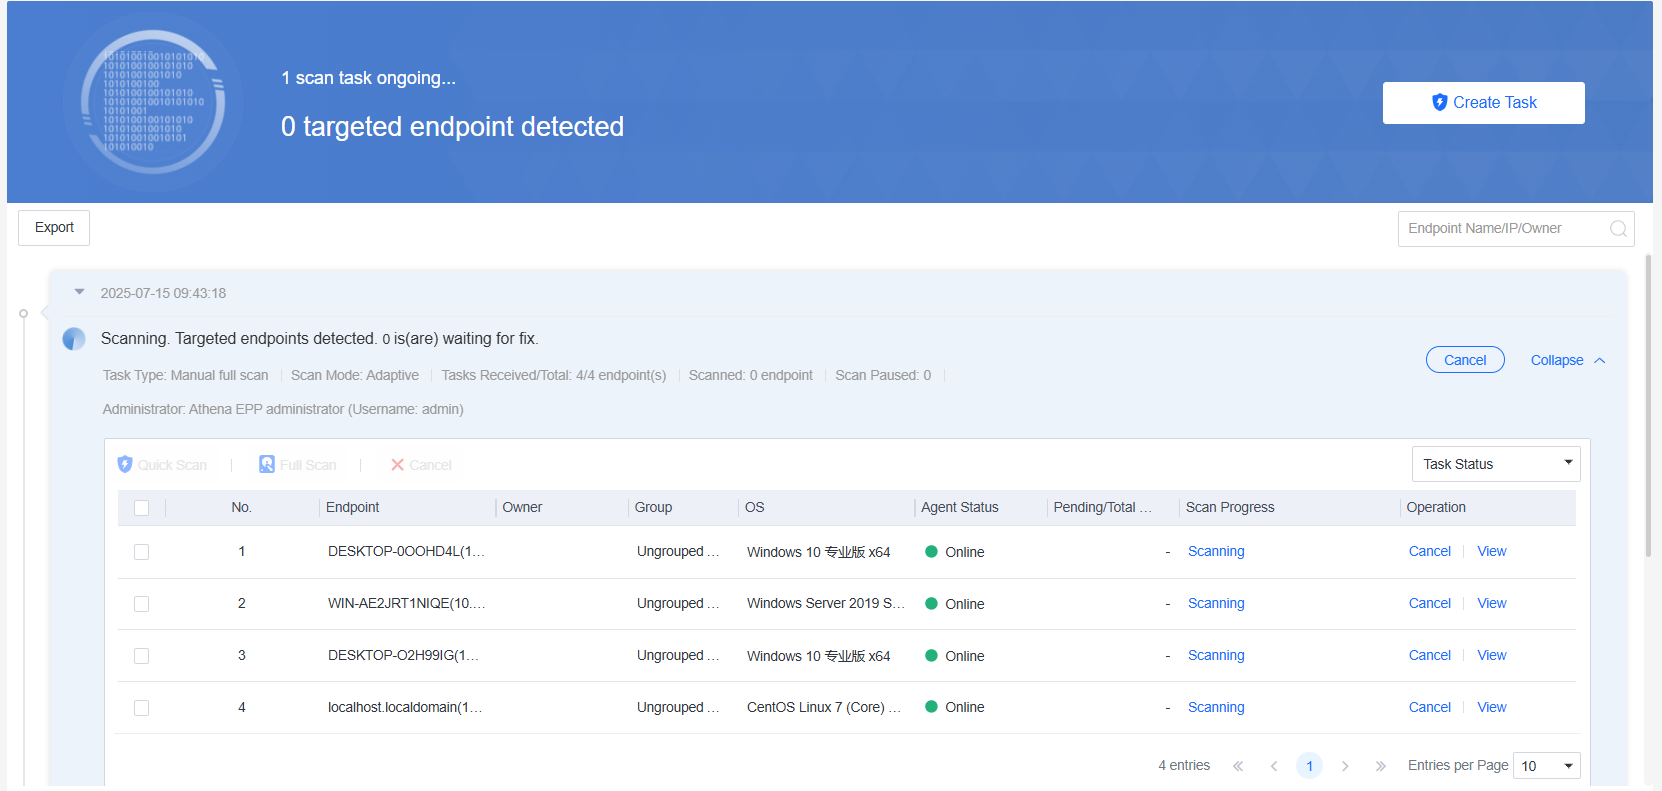
Click View on the right of a specific endpoint and view its scan progress, as shown in the following figure. 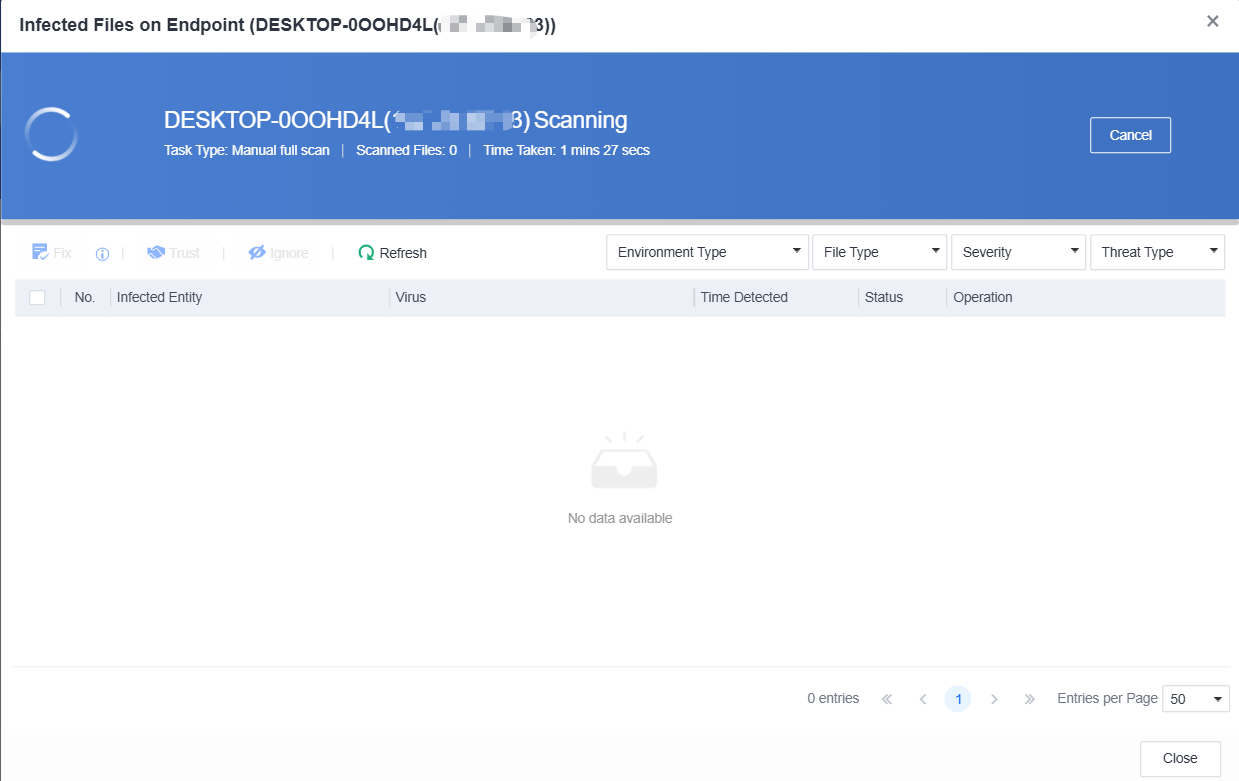
After the scan is complete, review the scan results, which include details such as the task type, CPU usage, number of tasks received by endpoints, scanned endpoints, paused endpoints, endpoint names and IP addresses, groups, operating systems, endpoint status, pending/total viruses, and scan progress, as shown in the following figure. 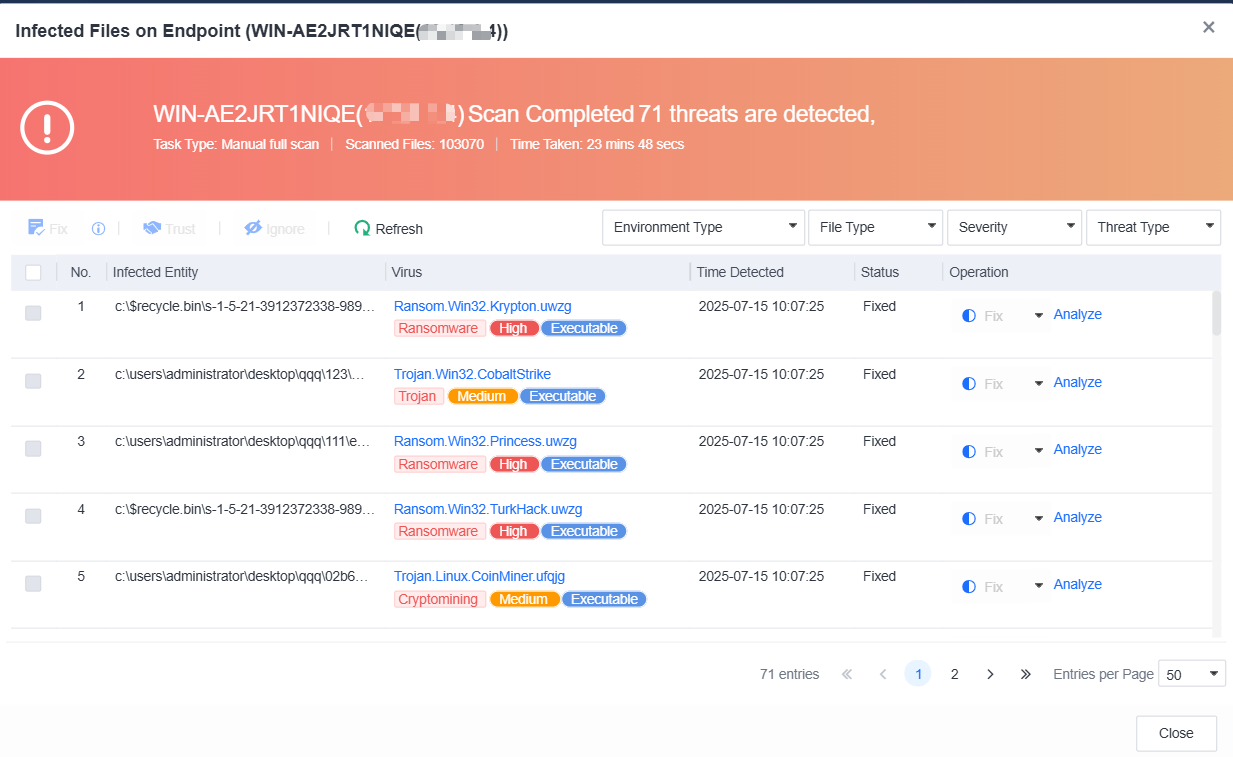
Handle the detected infected files by either fixing or trusting them. If the infected files seem suspicious, click Analyze to access Neural-X Threat Intelligence for analysis. Then, fix the files based on the analysis result, as shown in the following figure.
Click Export to export the virus scan results within a selected period. 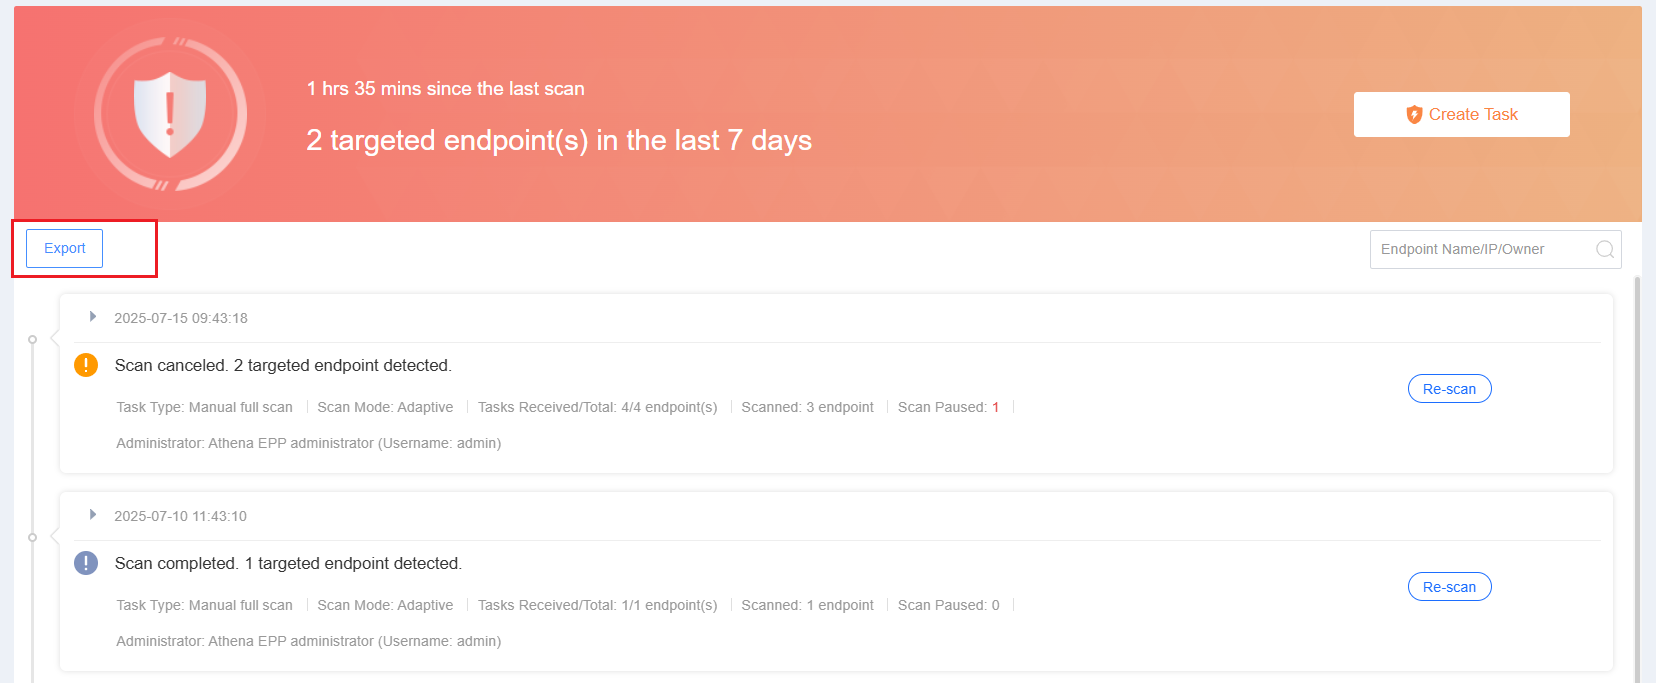
The virus scan results are exported as an Excel file, as shown in the following figure. 

 {{ $t('index.defaultHeader.chromeBrowserTip') }}