{{ secondMenu.name }}


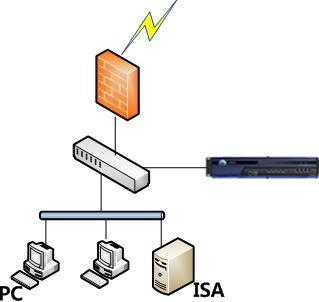
It is applicable when the ISA server is located in the intranet, and ISA login data does not pass through the device. An extended plug-in can be registered with the ISA server and used to send ISA login information of PCs to the device, which makes users log in to the device. See the figure below.
The process is as follows:
Step 1.Set the authentication policy. Navigate to Access Mgt > Authentication > Web Authentication > Authentication Policy and click Add to set the authentication policy according to the IP or MAC addresses of the users who require SSO.
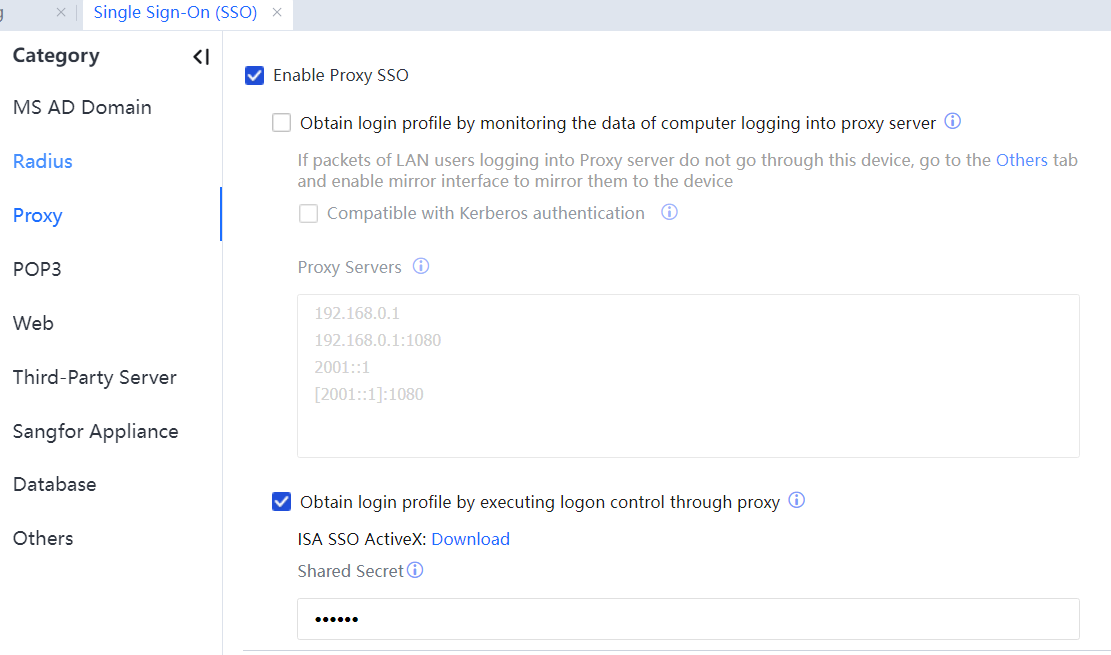
Step 2.Navigate to Access Mgt > Authentication > Web Authentication > Single Sign-On(SSO) > Proxy and tick Enable Proxy SSO.
Select Obtain login profile by executing logon control through proxy. Specify Shared Key, as shown in the following figure.
Step 3.Download the ISA SSO login plug-in and a sample configuration file from the device, configure the ISA server, register the plug-in, and configure SangforAC.ini.
Config:
acip=192.168.0.1 IP address of the device.
key=123 Packet encryption key for logging in to the ISA. It must be the same as that configured on the device.
cycle=30 Minimum intervals for an IP address to send login packets (unit: second). It reduces the packet-sending frequency by preventing an IP address from sending a login packet every time it initiates a session to access a website.
logpath= Debug log path. If it is blank, the debug log function is disabled. If it is set, the debug log function is disabled. Enable it when necessary. In addition, make sure that the NETWORK SERVICE user can read and write the directory.
maxlogsize=1 Maximum size of a debug log file (unit: MB). When the size reaches the upper limit, its content is deleted.
charset=UTF-8 The supported encoding types include UTF-8, UTF-16, GB2312, GB18030, and BIG5.
Step 4.Log in to the proxy server on a computer. If the login is successful, you can access the Internet.
![]()
1. After modifying SangforAC.ini, you must register the plug-in again.
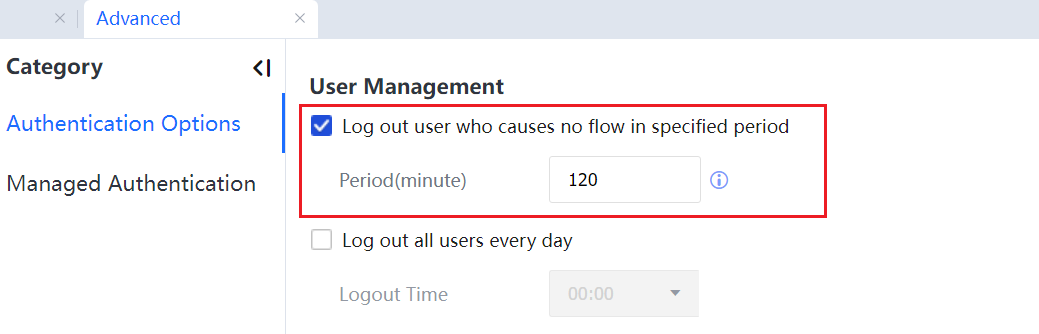
2. The ISA plug-in cannot log out a domain user of the device when the user logs out of the domain or shuts down the computer. You can set a timeout interval on the device console to log out the device's user. See the following figure.
3. The IAG and ISA servers must use the same key, different from other SSO keys.
4. The ISA server must not block data of its UDP 1773 port connected to the IAG.
5. If the proxy server is in the IAG WAN, users must be allowed to access the proxy server before being authenticated.
To allow them to access the proxy server, do as follows:
Choose Authentication Policy > Action > Advanced, select Before authentication, added to the group, and set a group.
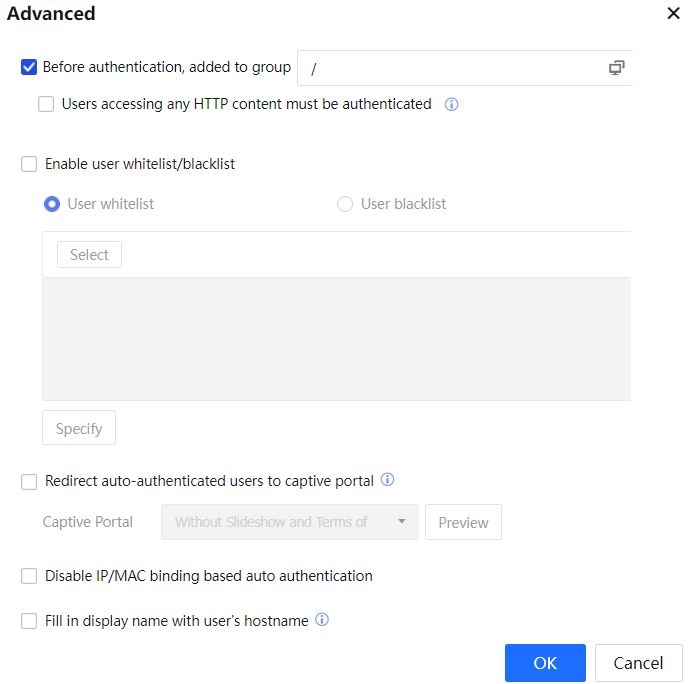
Configure the Internet access permissions of this group to include the IP address and port number of the proxy server.

 {{ $t('index.defaultHeader.chromeBrowserTip') }}