{{ secondMenu.name }}


You can set the maximum bandwidth of a channel to implement traffic control over the data transferred using the channel. The bandwidth used by the channel must not exceed the maximum value.
Scenario:
A company leases a 10 Mbps line and has 1000 intranet users. Many marketing department personnel often download files using tools such as XunLei and P2P download tools, which occupy much bandwidth and affect the office jobs of other departments. Therefore, the Bandwidth Management system limits the bandwidth allocated to the marketing department to download files to 2 Mbps and limits the bandwidth allocated to each user to download files to 30 Kbps.
Configuration steps:
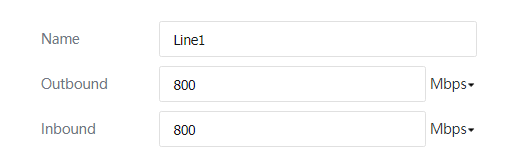
Step 1.Choose Bandwidth Management > Edit Line Bandwidth and configure Internet line bandwidth. Click Line 1. The Edit Line Bandwidth window is displayed. In this example, the company leases an 800 Mbps line; therefore, the values of Outbound and Inbound are set to 800 Mbps.
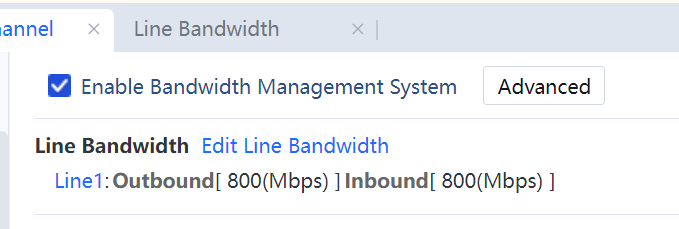
Step 2.Choose Bandwidth Management > Line bandwidth.
Select Enable Bandwidth Management System to enable Bandwidth Management.
The Line Bandwidth section displays the total bandwidth of all Internet lines. Click Edit Line Bandwidth Attributes.
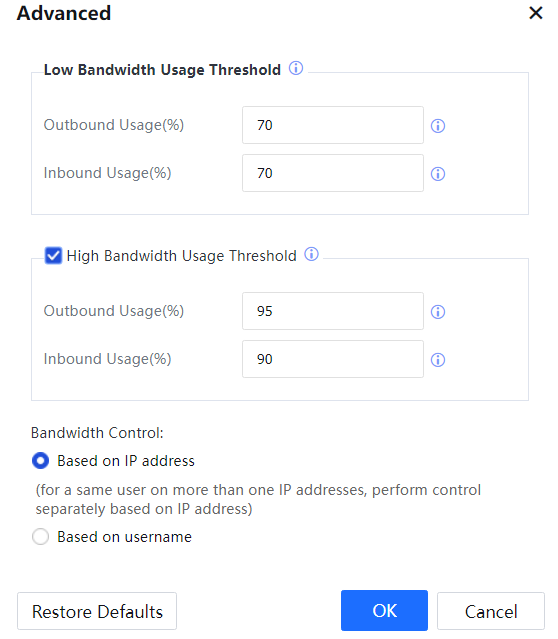
Click Advanced, set the Low Bandwidth Usage Threshold, and specify whether to enable a High Bandwidth Usage Threshold. See the following figure.
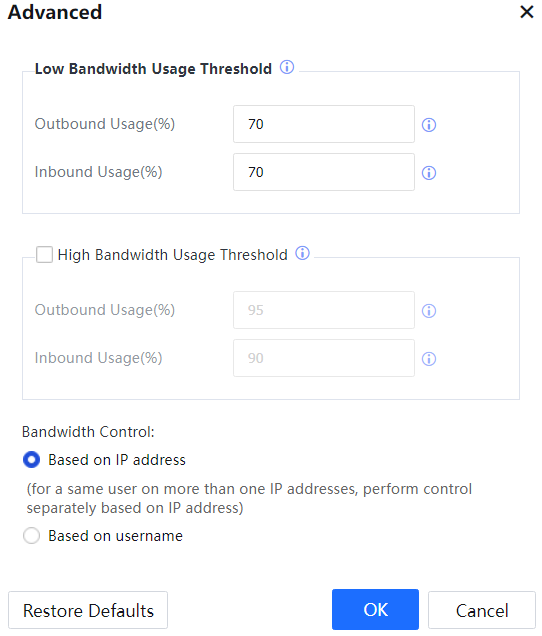
Low Bandwidth Usage Threshold: sets the line’s low bandwidth usage threshold. When a line load is lower than the low bandwidth usage threshold, the limitation channels with intelligent tuning enabled can increase the channel bandwidth to a value greater than the user-defined upper limit to keep the load close to the low bandwidth usage threshold. The bandwidth is decreased to the upper limit when the load exceeds the threshold.
High Bandwidth Usage Threshold: Ensure line availability during peak traffic hours and improve the dynamic bandwidth assurance performance. By default, High Bandwidth Usage Threshold is disabled. You can select Low Bandwidth Usage Threshold to enable the function and set the upper limits on the upstream and downstream traffic. The default values are recommended.
In the Bandwidth Control section, select either of the following options:
Based on IP Addresses (When multiple IP addresses are connected to the Internet with the same username, traffic control is implemented for each IP address.)
Based on username (When multiple IP addresses are connected to the Internet with the same username, traffic control is implemented for all the IP addresses as a whole.)
To save the configuration, click OK[A106]. To cancel the configuration, click Cancel.
![]()
If you are unsure about the advanced settings, click Restore Defaults to use the recommended settings.[LCH107][A108]
Step 3.Configure the limitation channel.
In this example, traffic control is applied to P2P data downloads performed by marketing personnel, and the bandwidth for P2P data download applications is limited to 2 Mbps.

On the Bandwidth Channel tab page, click Add and choose Add Parent Channel. The Parent Channel page is displayed.
If Enable Channel is selected, the channel is enabled. Otherwise, it is disabled.
Enter the name of the channel in the Channel Name text box. The Home Channel field displays the level of the channel and/or indicates a level-1 channel.
In the Channel Editing menu, choose Bandwidth Channel Settings. The related attributes for setting the channel are on the right.
Bandwidth Channel Settings: It sets the effective line, channel type, limited or assured bandwidth, and per-user bandwidth.
Target Line: It is to select the line applicable to the channel. The channel is used only when data is transferred through the selected line. In this example, there is only one line. Therefore, select Line 1.
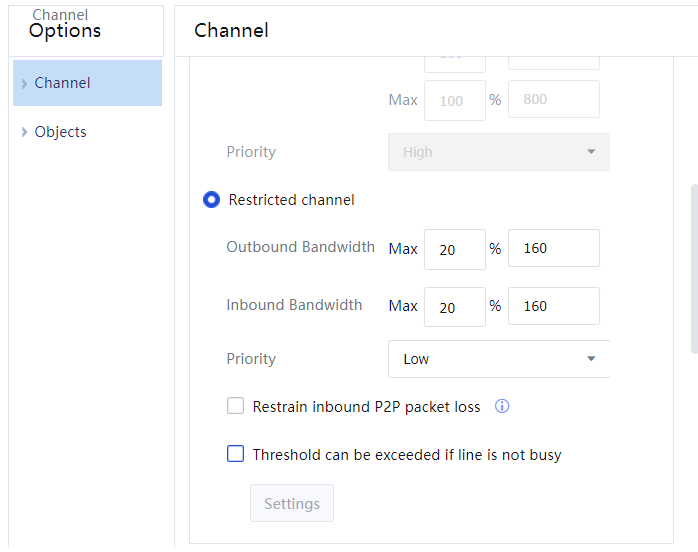
Channel Type: To select a channel type and set bandwidth thresholds. In this example, the bandwidth for P2P data downloads performed by marketing personnel is limited. Select Limitation Channel and set Outbound Bandwidth and Inbound Bandwidth to 20% of the total bandwidth each. The total bandwidth is 800 Mbps; therefore, the limited bandwidth is 160 Mbps. Priority includes High, Medium, and Low, which indicate the priority of bandwidth allocation to the channel during peak traffic hours.
Restrain inbound P2P packet loss: To specify whether to control the downstream packet loss rate of P2P download applications and streaming media applications. It is recommended that this option be selected only for P2P applications.
Threshold can be exceeded if line is not busy: To specify whether to enable the intelligent tuning function for the channel. If it is selected, the function is enabled. You can click Low Bandwidth Usage Threshold: go to the setting for Threshold can be exceeded if line is not busy. After the function is enabled, when a line load is lower than the low bandwidth usage threshold, the limitation channel can increase the channel bandwidth to a value greater than the user-defined upper limit to keep the load close to the low bandwidth usage threshold. When the load is higher than the threshold, the bandwidth is decreased to the upper limit.
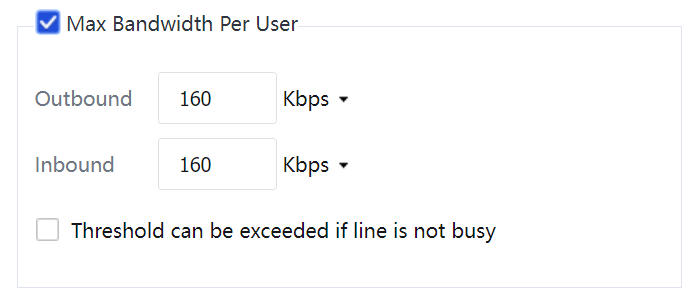
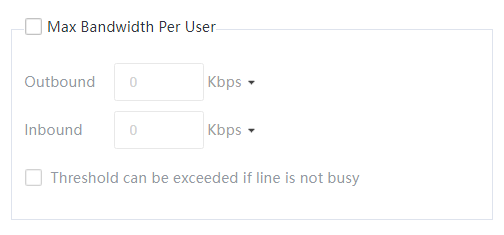
MaxBandwidth Per User: To limit the bandwidth available to each IP address using the channel. In this example, the bandwidth for each user's P2P data download application is limited to 30 Kbps. Set Outbound and Inbound to 30 Kbps.
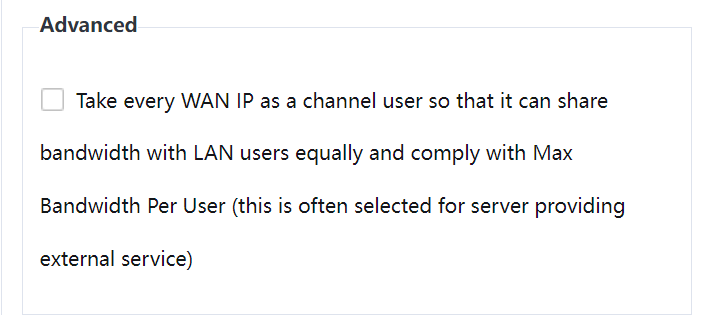
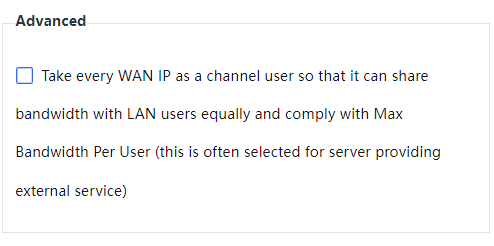
Advanced: If this option is selected, each external network IP address can be regarded as a user in the channel so that bandwidth can be fairly allocated among the users in the channel, and the maximum bandwidth attribute set for each user applies to the external network IP addresses. (This option is generally used by servers providing services externally. Use it with caution.)
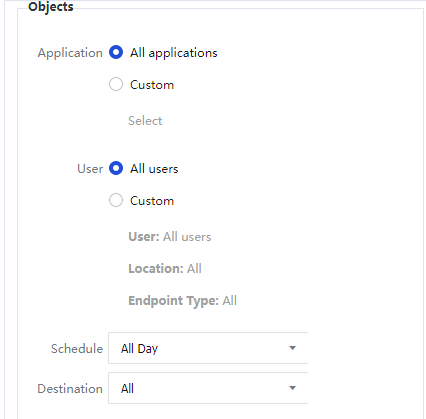
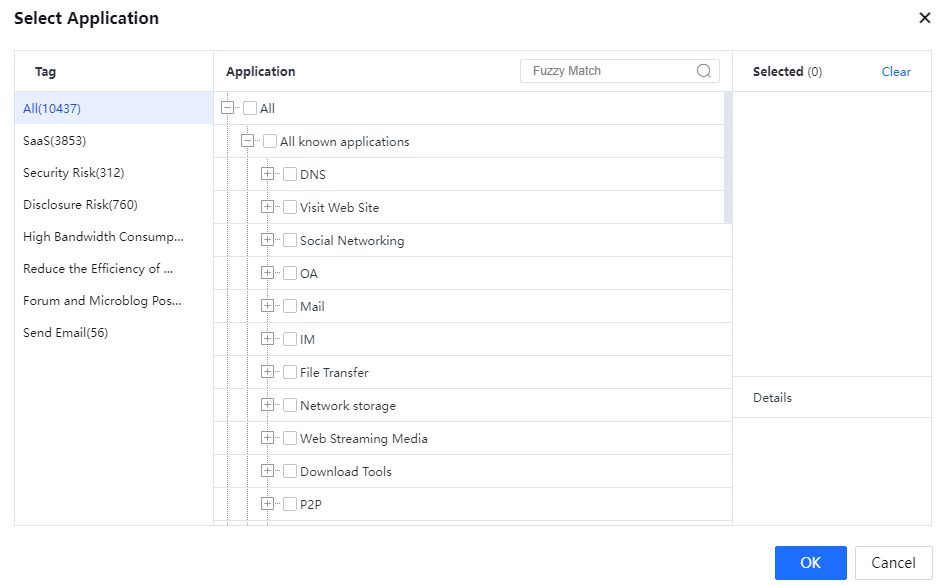
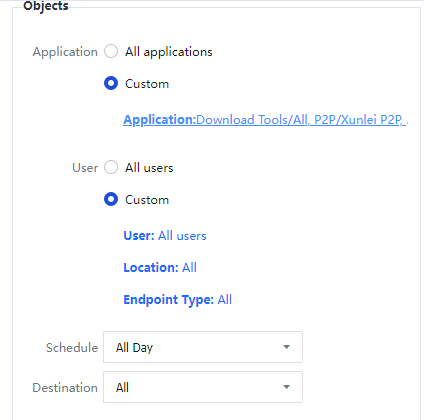
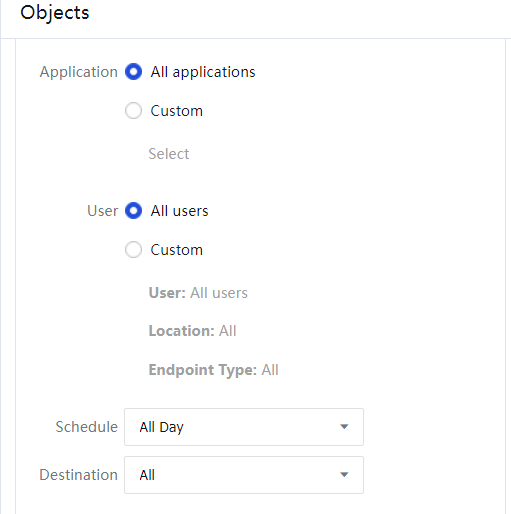
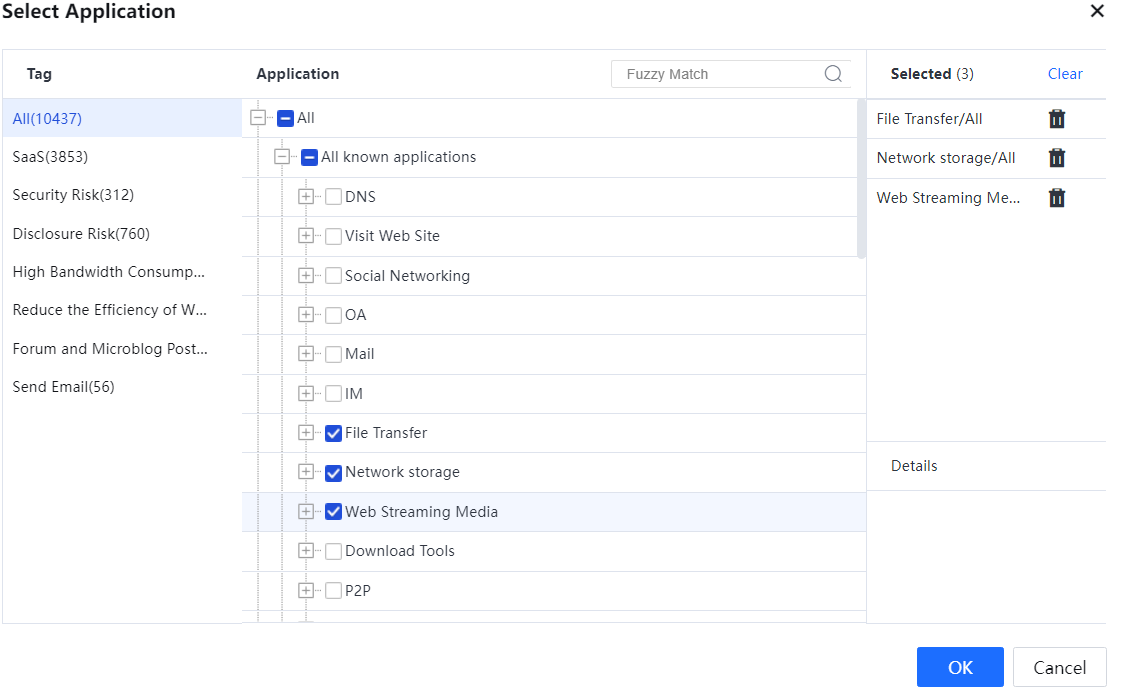
Objects: To specify the application types to which the channel is available. All Applications indicates all types of applications. Specified allows you to select application types. You can click Select and select application types in the User-Defined Applicable Service and Application dialog box that appears. In this example, select Download Tools, P2P, and P2P Stream Media to implement traffic control for P2P data download tools. Make sure that the Selected list is correct and click OK.
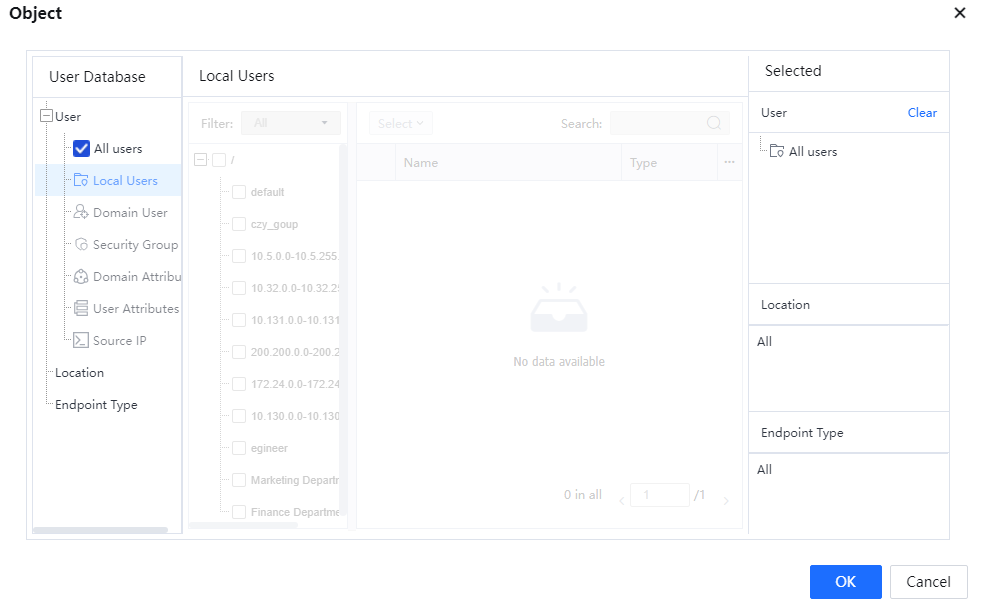
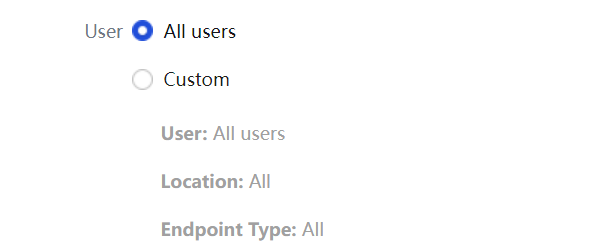
Applicable Object: It specifies the users, locations, and endpoint types to which the channel is available. All Users indicate all intranet users. Specified indicates specified users and user groups. You can click Objects and select objects in the User-Defined Applicable Object dialog box that appears. In this example, bandwidth limitation must be implemented for all users in the marketing department. Therefore, select the Marketing Department user group and click OK.
Scheduled: To set the effective time of the channel.
![]()
Destination: To select the destination IP address group.

After the parameters are set, the settings are displayed. See the following figure.
Click OK.
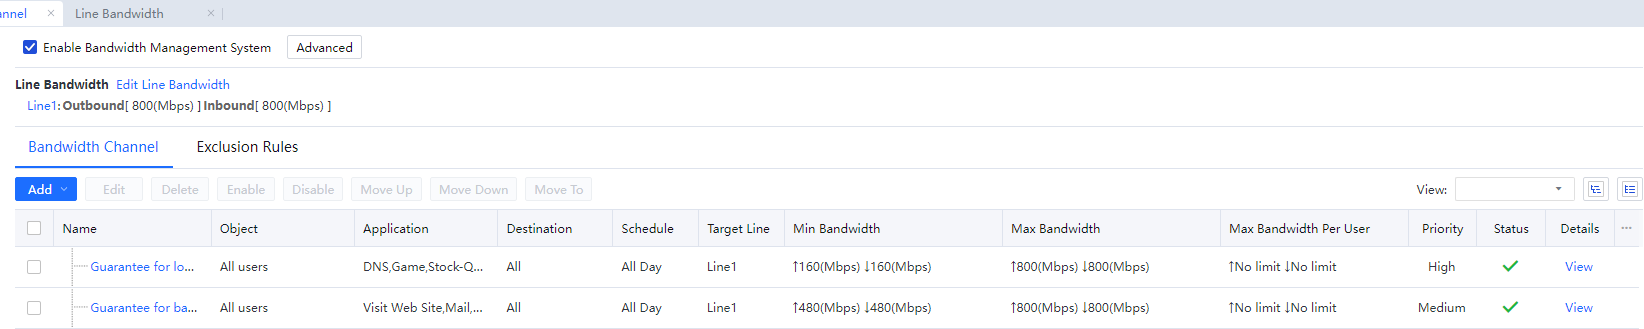
Step 4.The Bandwidth Channel tab page displays the configured channel.
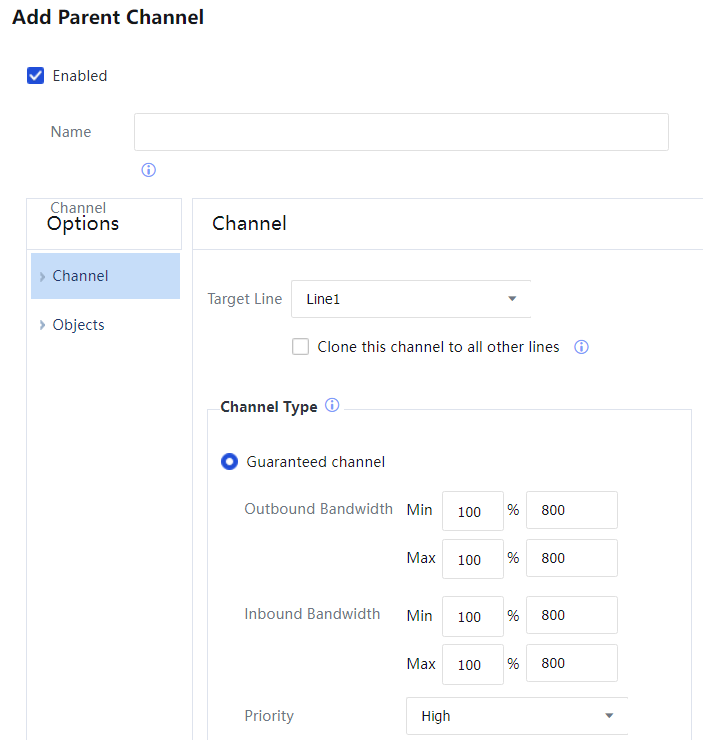
Step 5.Configure the assurance channel.
In this example, bandwidth assurance ensures that finance department personnel can access online banking websites and send and receive emails properly.
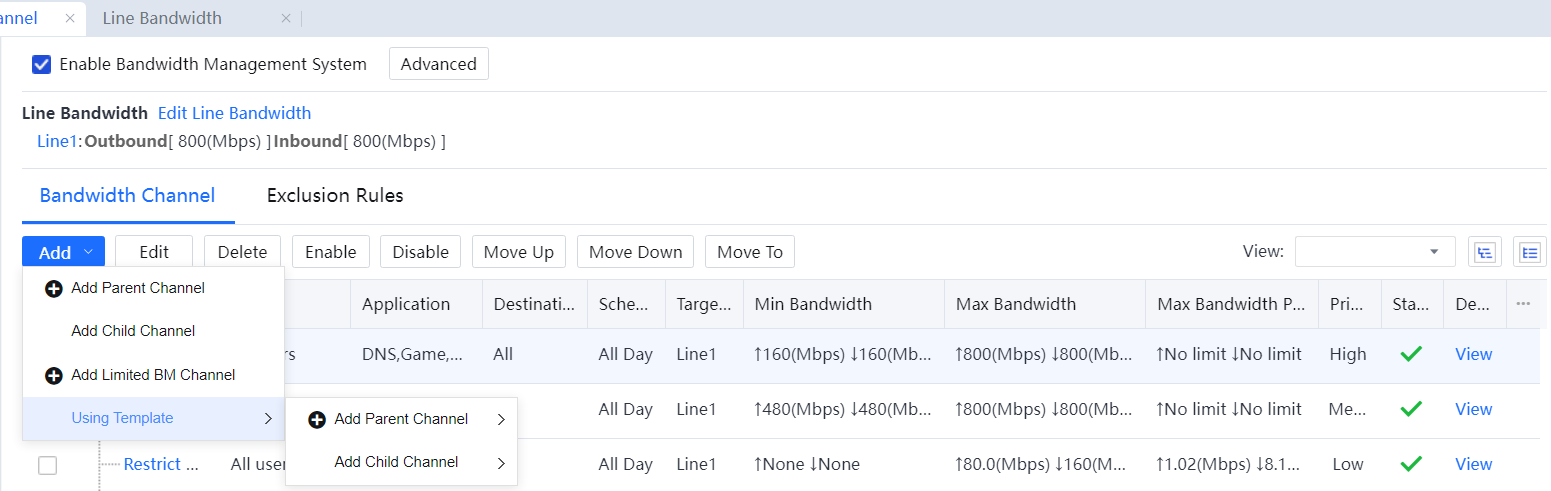
On the Bandwidth Channel tab page, click Add and choose Add Parent Channel.
If Add Parent Channel is selected, the channel is enabled. Otherwise, it is disabled.
Enter the name of the channel in the Name text box. The Channel field displays the level of the channel and / indicates a level-1 channel.
In the Channel Editing menu, choose Channel. The related attributes for setting the channel are on the right.
Channel: To set the effective line, channel type, limited or assured bandwidth, and per-user bandwidth.
Target Line: To select the line applicable to the channel. The channel is used only when data is transferred through the selected line. In this example, there is only one line. Therefore, select Line 1.
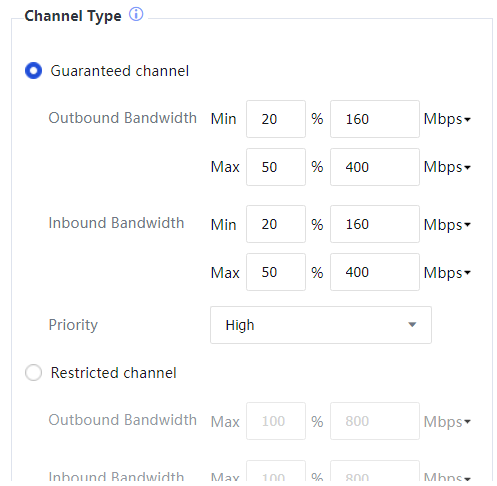
Channel Type: To select a channel type and set bandwidth thresholds. In this example, the finance department personnel must be allocated 160 to 400 Mbps bandwidth to access online banking websites and send and receive emails. Therefore, select Guaranteed Channel and set minimum and maximum Outbound Bandwidth and Inbound Bandwidth to 20% and 50% of the total bandwidth. The total bandwidth is 800 Mbps; therefore, the assured bandwidth is 160 Mbps, while the maximum bandwidth is 400 Mbps. Priority includes High, Medium, and Low, which indicate the priority of allocating bandwidth of other channels to this channel when the other channels are idle.
Maximum Bandwidth Per User: To limit the bandwidth available to each IP address using the channel. This example does not involve this limitation. Therefore, do not select this option.
Advanced: If this option is selected, each external network IP address can be regarded as a user in the channel so that bandwidth can be fairly allocated among the users in the channel, and the maximum bandwidth attribute set for each user applies to the external network IP addresses. (This is generally used by servers providing services externally. Use it with caution.)
Object: It specifies the data types to which the channel is available. The channel is available only when the criteria, including applicable application, applicable object, effective time, and destination IP address group, are met.
Application: To specify the application types to which the channel is available. All Applications indicates all types of applications. Specified allows you to select application types. You can click Select and select application types and website types in the User-Defined Applicable Service and Application dialog box that appears. In this example, select Mail/All, Website Access/Online Payment, and Website Access/Personal Banking to ensure access to online banking websites and send and receive emails.
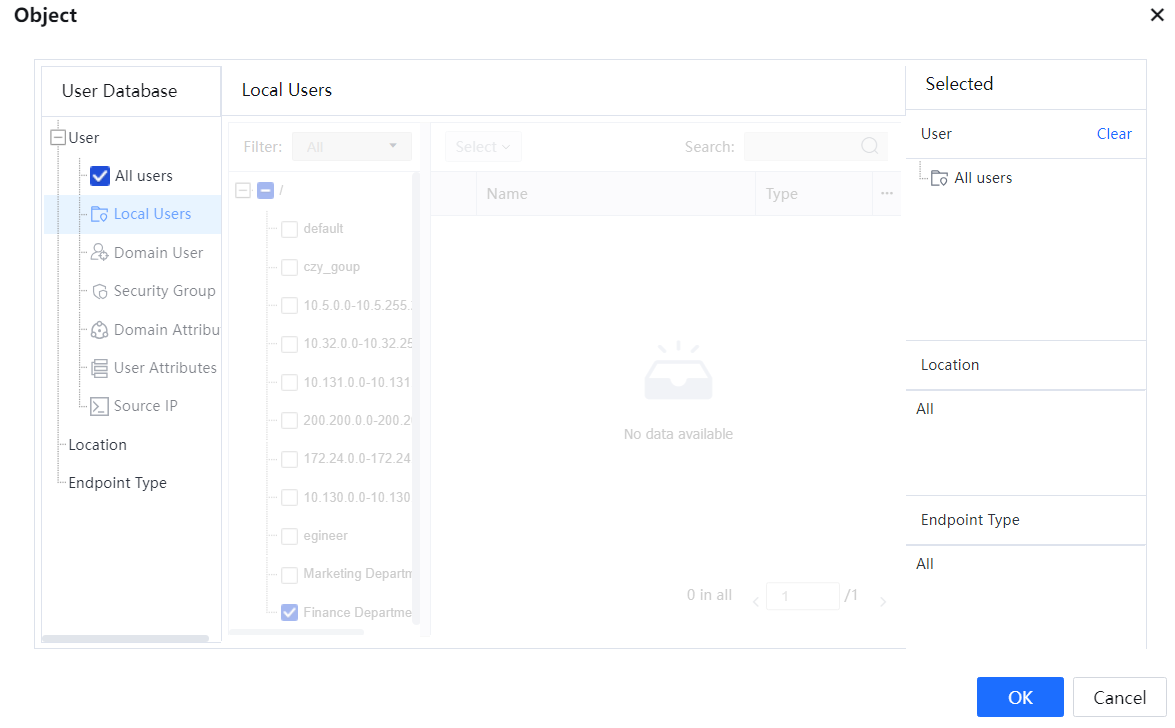
Select Application: To specify the users, locations, and endpoint types to which the channel is available.
All Users indicate all intranet users. Specified indicates specified users and user groups. You can click the links in blue and select objects in the User-Defined Applicable Object dialog box that appears. In this example, bandwidth assurance must be implemented for all users in the finance department. Therefore, select the Finance Department user group and click OK[A109].
Schedule: To set the effective time of the channel.
![]()
Destination: To select the destination IP address group.
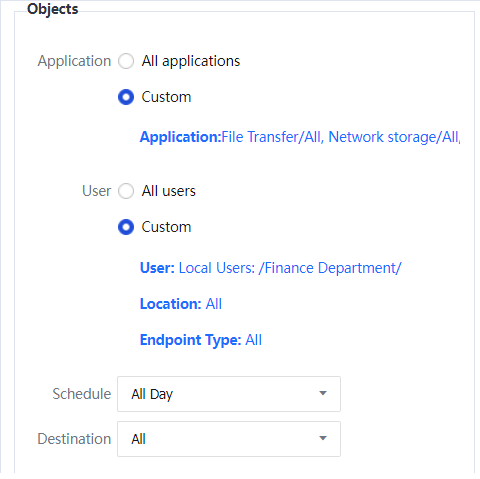
After the parameters are set, the settings are displayed. See the following figure.
Click OK to save the settings.
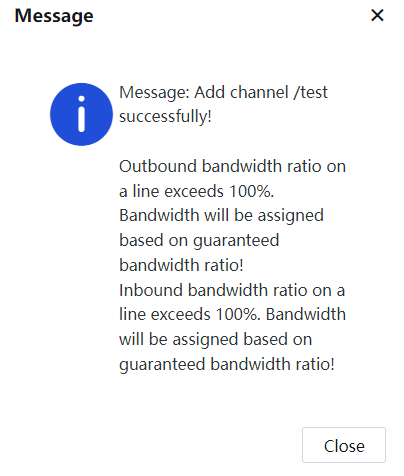
Step 6.When you save the settings, a message will pop up. Click Close.
The Bandwidth Channel tab page displays the configured channel. Ensure that the channel is configured completely.

![]()
1. The aggregated bandwidth percentage of bandwidth assurance channels may be more significant than 100%. In this case, the minimum bandwidth of each channel is reduced proportionately. For example, two channels are created. The assured bandwidth of channel one is set to 30%, while the assured bandwidth of channel two is set to 90%. In this case, the actual assured bandwidth of channel 1 is 25% (30/(90+30)%), and the actual assured bandwidth of channel 2 is 75% (90/(90+30)%).
2. Priority: If some bandwidth is available, the channel with a higher priority can use the bandwidth first.

 {{ $t('index.defaultHeader.chromeBrowserTip') }}