{{ secondMenu.name }}


Web authentication, also known as Web authentication, provides users with personalized information services such as identity authentication in a browser or client. Portal authentication includes four modules: authentication policy, authentication server, single sign-on, and custom webpage. The flexible combination of these functions meets the needs of diverse authentication methods.
Before accessing the Internet, all endpoints on the intranet must pass user authentication to identify the online computer's identity and reduce the intranet's security risk. The authentication policy determines the authentication method for a computer with an IP/network segment/MAC address to access the Internet. Set the authentication range, authentication method, and post-authentication action of intranet users through authentication policies.
3.5.3.1.1.1 Authentication Policy Configuration
Before accessing the Internet, all users need to pass identity authentication. The Authentication Policy specifies the Auth Method of computers on an IP address segment, network segment, or MAC address segment. You can set the Auth Method of intranet users and the policy for adding new users. Authentication policies are matched from the top down one by one. You can adjust the priorities of authentication policies by moving them up or down. You can configure different Auth Methods for different network segments.
The Auth Methods supported by the device are listed as follows:
USB Key-authenticated users can be directly added to the page displayed after you choose Access Mgt > User Management > Advanced > USB Key User. No authentication policy needs to be independently set for USB Key users. USB Key authentication has the highest priority. A USB Key-authenticated user can forcibly log out another user authenticated in another mode. Suppose an IP address or MAC address range is prevented from authentication. In that case, USB Key users cannot be successfully authenticated using any IP or MAC addresses.
Set the open Auth, Password-based, SSO, and Disabled in authentication policies. The Auth Method of a user is determined by matching the IP address or MAC address range specified in authentication policies.
The following describes these Auth Methods:
Open Auth
If authentication is opened, the device will identify users based on the source IP address, source MAC address of packets, and the hostname of endpoints. In this mode, the device will not prompt for the username and password before users access the Internet. The device is invisible to users.
Password-based
The Password-based procedure is as follows:
Four Auth Methods are displayed because the local authentication server, WeChat Based Authentication server, QR Code Based Authentication server, and SMS Based Authentication server are selected in authentication policies. Each authentication server maps an Auth Method.
Password-based falls into two types: Local Password Based and Password based on an external server. The external server can be an LDAP server, a Radius server, or a POP3 server.
Perform the following steps before conducting a Password-based on an external server:
The Password-based procedure is as follows:
To sum up, the system performs local authentication first and then only proceeds to external authentication.
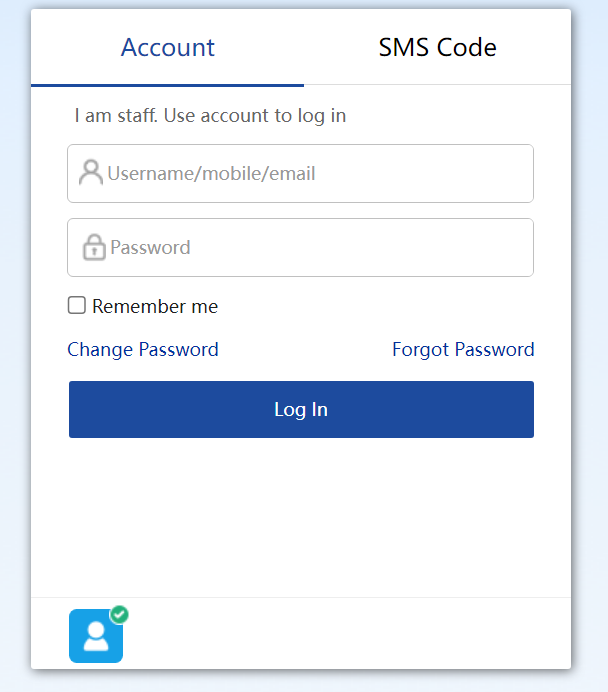
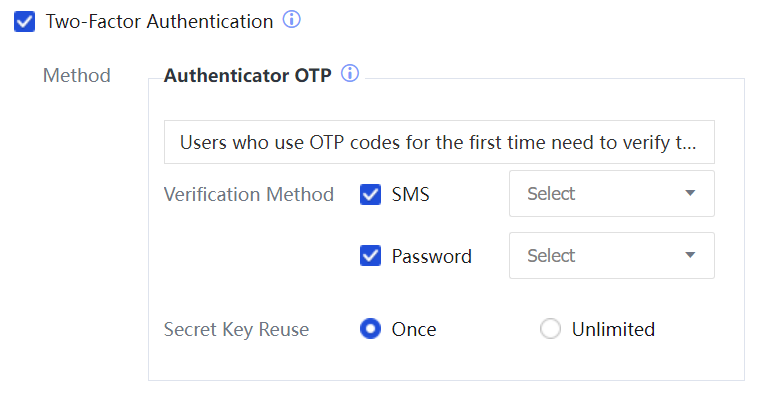
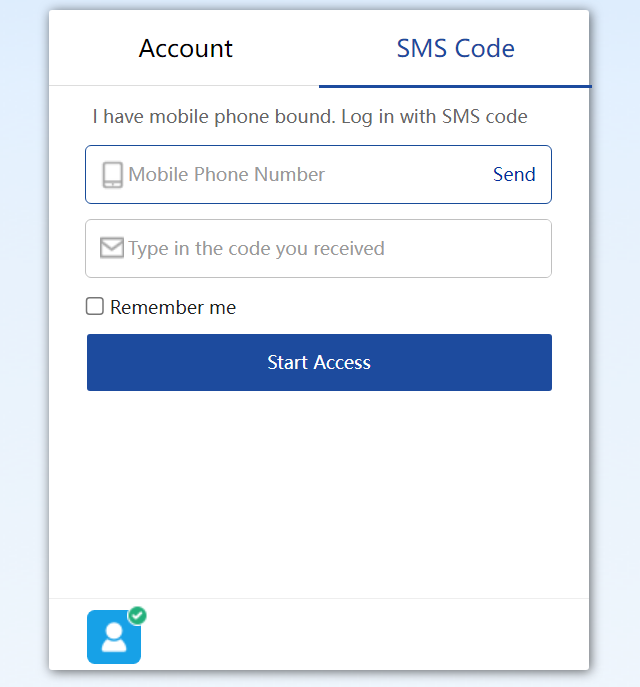
At the same time, when you select Password based authentication, Local Password Based Authentication, LDAP, Radius, POP3, SMS Based Authentication, login with Wechat, login with SMS code, and Two-Factor authentication are supported.
SMS Based Authentication: In SMS-based authentication, the SMS modem or gateway connected to the IAG will send an SMS message to users. Users can access the Internet by entering the verification code carried in the SMS message.
Before performing SMS-based authentication, perform the following steps:
The SMS Based Authentication procedure is as follows:
WeChat Based Authentication:
Unauthenticated users can click perform authentication by following either of the following processes:
• Tap authentication process: A user accesses a Wi-Fi hotspot. The browser displays a Portal page. The user follows the WeChat account for authentication.
• Scan authentication process: A user starts WeChat and scans the QR code of a store. The authentication page is automatically displayed.
Before performing WeChat Based Authentication, perform the following steps:
QR Code Authentication: This authentication method includes QR code-based approved login and QR code registered login.
QR Code Based Approved Login: When redirecting to the authentication page, select QR Code Auth Method, and then a QR code will be displayed on the page. Meanwhile, the user needs to prepare a mobile phone passing the authentication and scans the QR code on the page via this mobile phone, and then the user can obtain the authentication to access the Internet.
The QR code-based approved login involves the following three scenarios:
• The guest fills in information, and the approver scans the QR code.
• The guest logs in through the name of the approver who scans the QR code.
• The approver scans the QR code and fills in guest information.
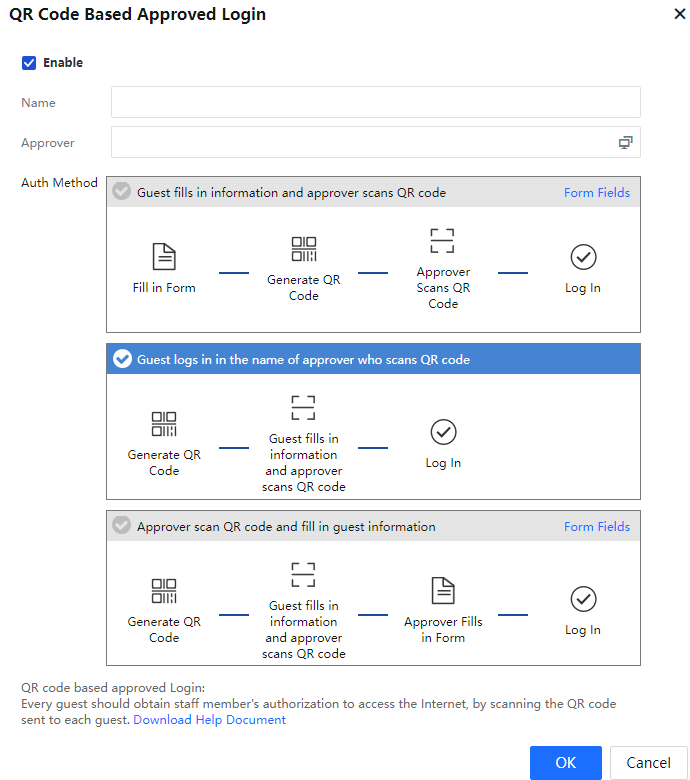
When the QR code-based approved login is used, the following two points shall be configured in advance:
![]()
The mobile phone user scanning the QR code should be a user checked in QR code-based approved login server - Approver. Otherwise, the user has no audit permission.
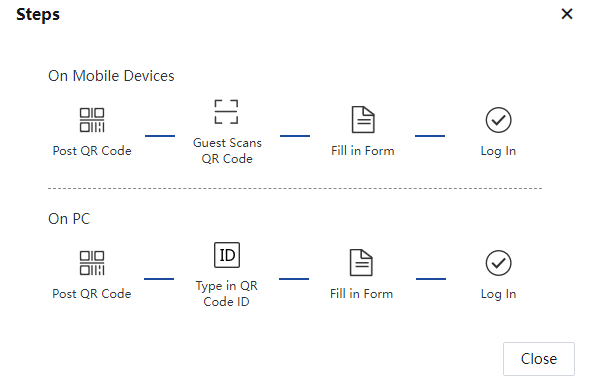
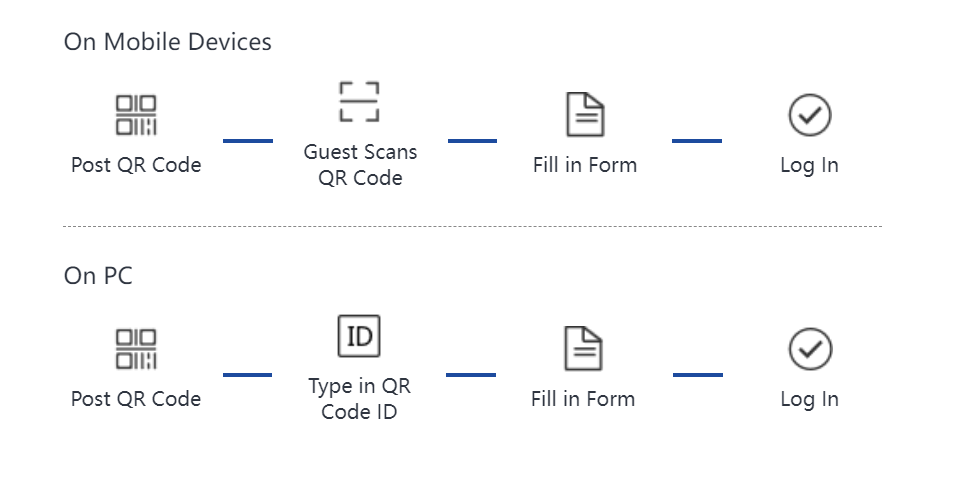
QR Code Registered Login: It applies to authentication when guests participate in online meetings. The mobile endpoint scans the QR code for authentication, and the PC enters the QR code for authentication.
Details of the authentication process are as below:
When the QR code registered login is used, the following two points shall be configured in advance:
Single Sign-On (SSO)
Suppose the customer has a third-party authentication server available for authenticating intranet users. In that case, intranet users can be authenticated by the device when being authenticated by the third-party authentication server through SSO. In addition, the users can obtain relevant Internet access permission.
The same username and password are used for authentication on the IAG and the third-party authentication server.
The supported SSO types include AD domain SSO, Radius SSO, proxy SSO, POP3 SSO, Web SSO, database SSO, and SSO on Sangfor devices and other third-party devices Ruijie SAM system, H3C CAMS system, and HTTP/HTTPS authentication system of CITY HOT. Before performing SSO, perform the following steps:
Disabled (always reject the requests)
If authentication is not allowed, users within the IP address or MAC address range cannot be authenticated on the IAG for Internet access. Otherwise, these users are restricted from Internet access. SSO users and USB Key users cannot be authenticated for Internet access.
3.5.3.1.1.2 Add Authentication Policy
Choose Access Mgt > Authentication > Web Authentication > Authentication Policy.
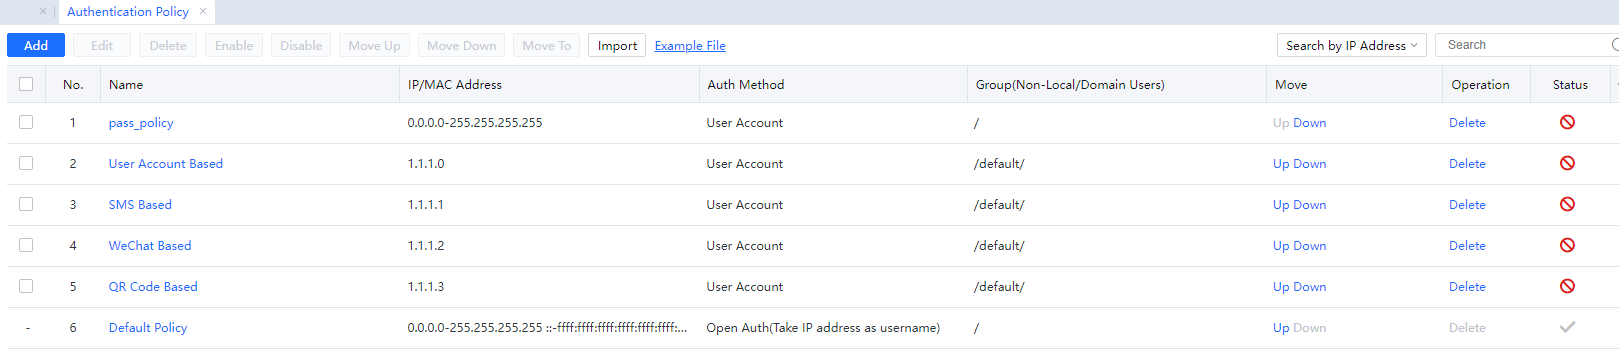
Click Add and add an authentication policy, as shown in the following figure.

Select Device: Select all or according to needs. Select the device range for which the authentication policy takes effect. The applicable range is to set the range of endpoints and users that match the authentication policy and set the IP, IP segment, MAC address, or VLAN ID. Users who match these address segments use the settings in this policy.
Select Enable to enable this authentication policy.
Name: Set the name of the authentication policy.
Description: Set the description information of the authentication policy.
Auth Range: Set an applicable object of this authentication policy. The range is specified through IP address, MAC address, VLAN ID, and key value, and supports adding description in <>.
Key value: This matching condition is usually used for a PORTAL controller docking scenario. Example: The wireless controller can carry SSID parameter information when executing portal docking. The authentication policy is specified as "SSID=ztest-wifi", an authentication range condition for authenticating wireless users meeting SSID=ztest-wifi in batch parameters.
The KEY=VALUE matching condition is identical with IP, MAC, and VLAN levels, with no priority relationship.
Set IP, IP range, MAC address, or VLAN ID in Applicable Range, and users matching these address ranges can be authenticated using the authentication method in this authentication policy.
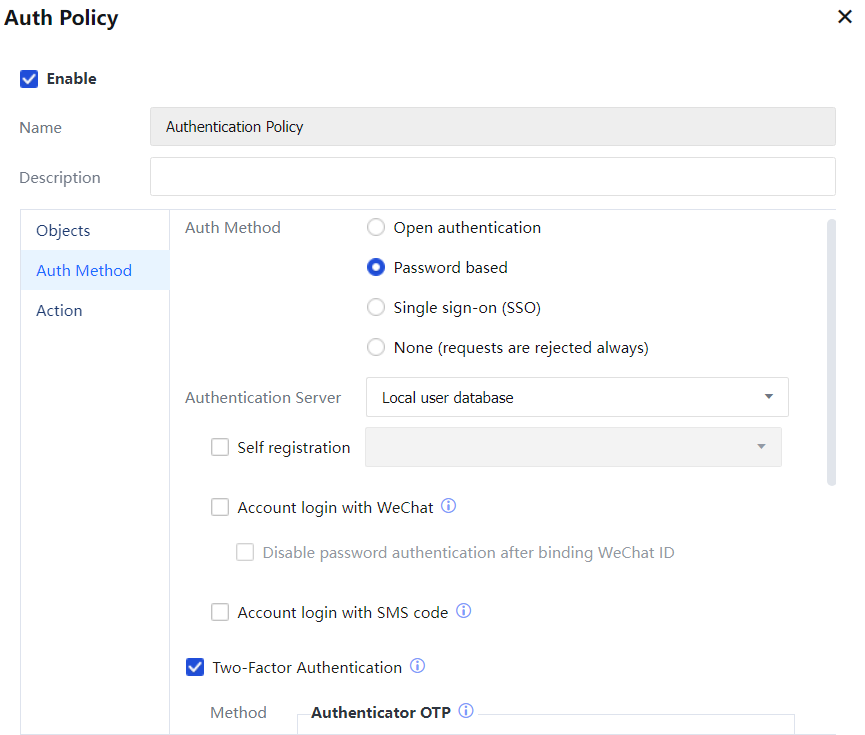
Auth Method: specifies the Auth Method of users in the authentication scope. The following describes the configuration items of different Auth Methods.
Configuration items of Open Auth:
Select Open Auth in Auth Method. When a user accesses the Internet, the device will identify the user based on the source IP address, source MAC address of packets, and the computer name of the endpoint. No authentication dialog box is displayed. The device is invisible to the user.
In Username, select a username to be used after authentication. You can use the IP address, MAC address, or hostname as the username.
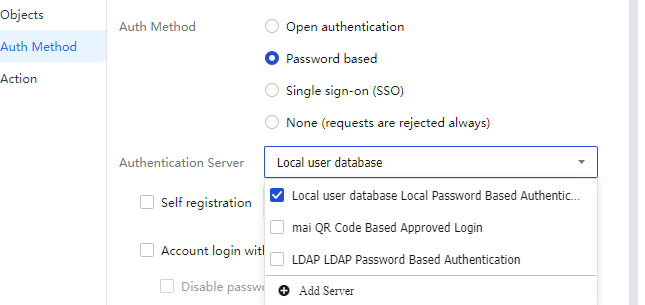
Configuration items of Password-based:
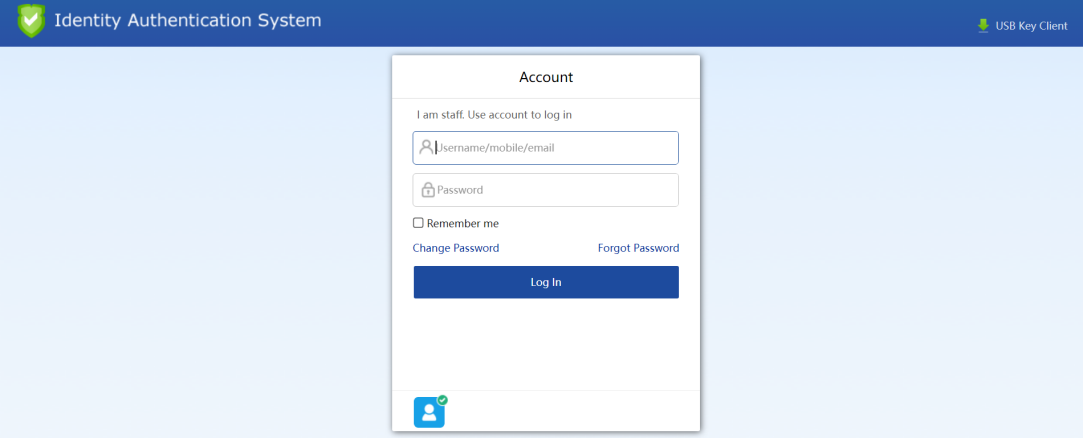
Select Password based for Auth Method. When a user opens a webpage, it will redirect the user to an authentication page. The user needs to be authenticated before accessing the Internet.
There are five types of password-based authentication: local password-based authentication, password-based authentication through an external server, SMS-based authentication, WeChat-based authentication, and QR code-based authentication. You can select only the Local user database in Auth Server, which means local password-based authentication. To select another authentication server, choose Access Mgt > Authentication > Web Authentication > Auth Server and select an authentication server.
To use the local password-based authentication, go to Access Mgt > User Management > Local Users and add a user.
In Authentication Policy, define the authentication page to be displayed when a user attempts to access the Internet. Go to Access Mgt > Authentication > Web Authentication > Custom Webpage and manage and customize an authentication page. 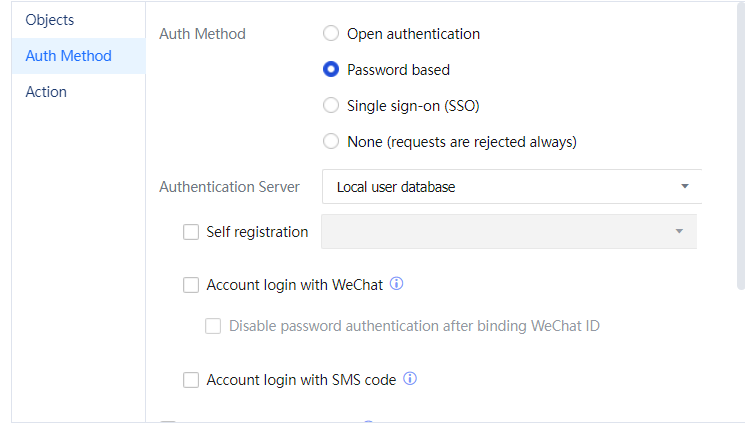
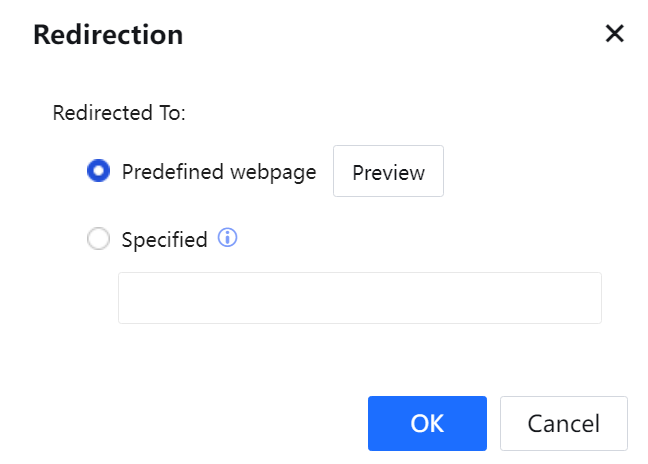
In Login Redirection, specify the page where the user will be redirected to after successful password-based authentication. The configuration page is as shown in the following figure.
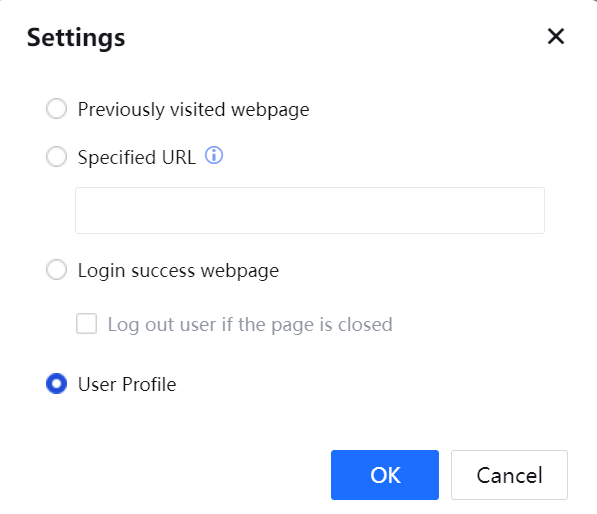
On the page for setting a web page to which an authenticated user redirects, select the previously visited webpage and jump to the web page requested before authentication.
If a Specified URL is selected, the user will be redirected to the page to which the specified URL points after the user passes authentication.
If the Login successful webpage is selected, the user will be redirected to the authentication success page after the user passes authentication, as shown in the following figure. The login username and authentication result are displayed.
Click Logout to log out.
Click Traffic Statistics to view the traffic statistics of users.
If both Login successful webpage and Log out user if the page is closed are selected, the user will be logged out after the authentication page is closed. 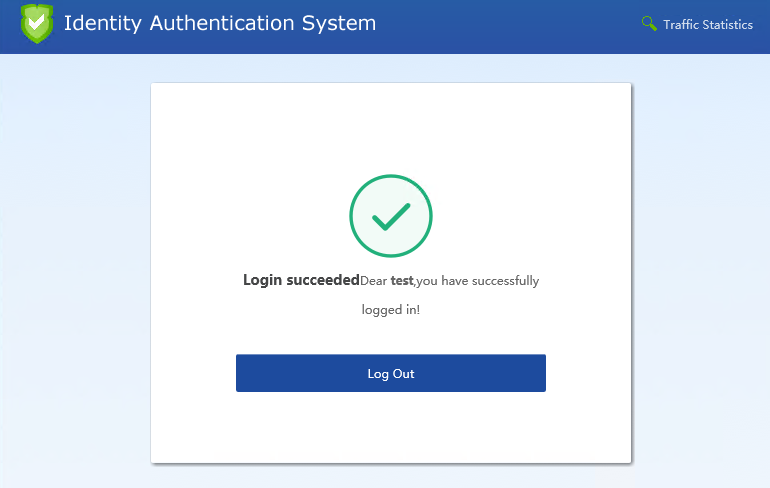
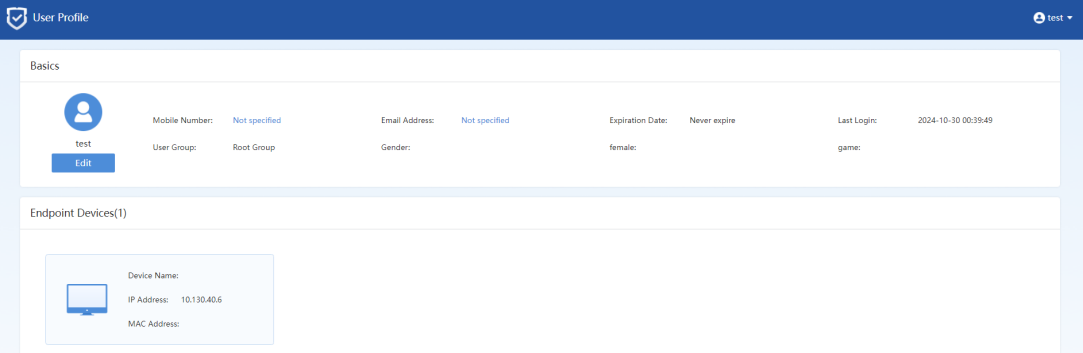
User Profile: If this check box is selected, the user will be redirected to the user profile page after the user passes authentication, where the user profile page displays basic information about the user.
• Configuration items of SSO:
Select Single Sign-On (SSO) for Auth Method. Suppose the customer has a third-party authentication server available for authenticating intranet users. In that case, the device's intranet users can be authenticated by the third-party authentication server through SSO. In addition, the users can obtain relevant Internet access permission. The SSO process is transparent to intranet users. 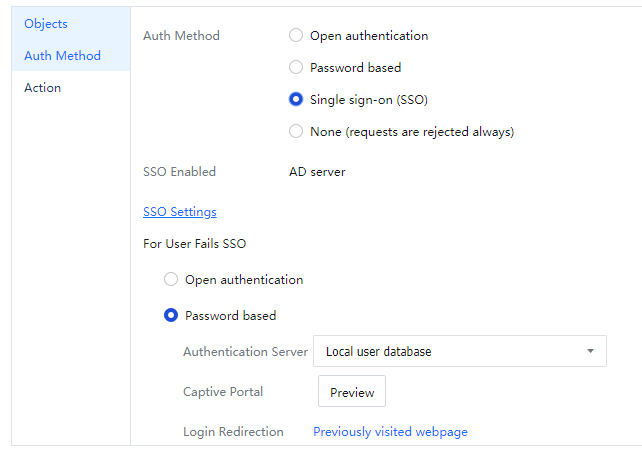
Before performing SSO, perform the following steps:
Predefined webpage can be selected when SSO is integrated with Active Directory. The page prompts users to use SSO and provides an authentication tool. Users can manually run this tool and authenticate using SSO integrated with Active Directory.
If Predefined webpage is selected, the predefined webpage will be displayed when users attempt to open a webpage after SSO fails.
Jump to CAS server: After a single sign-on fails, jump to a third-party authentication system, and enter username and password into this system to complete the authentication.
Configuration items of Disabled:
Select None (requests are rejected always) is selected in Auth Method. Users in the specified scope cannot be authenticated on the IAG and are restricted from accessing the Internet through the IAG.
On the Action page, specify the follow-up operations after authentication.
In Add Non-Local/Domain Users To Group, specify a group whose permission is used for Internet access by non-local users and non-Active Directory users after authentication. The Internet Access Policy of this group is also applied to these users.
Add user account to local user database specifies whether to automatically add non-local users and non-AD domain users to the local organization structure on the IAG after authentication. If Add user account to local user database is selected, authenticated users will be added to the group specified by Add Non-Local/Domain Users To Group.
You can also specify whether authenticated users are added to the local organization structure as public users or private users.
Automatic binding specifies whether to automatically synchronize the binding relationships between usernames and IP/MAC addresses of authenticated users, including local users, domain users, and new users. 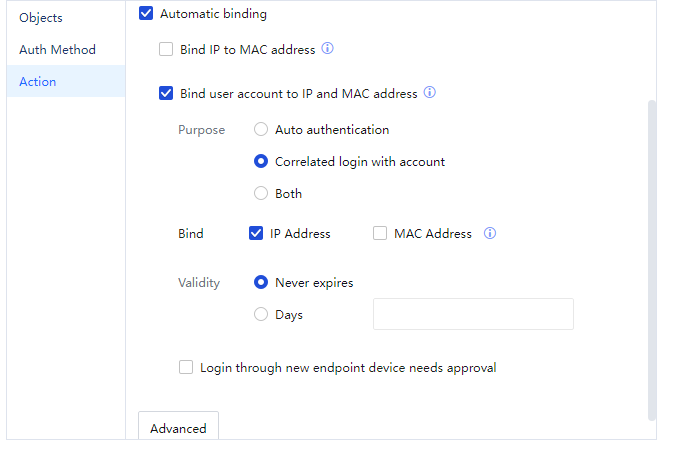
If Automatic binding is selected, users' IP addresses are recorded after login. When the users access the Internet through the IAG again within the Open Auth validity period, no authentication is required if the IP addresses are consistent with the recorded ones. If Bind IP to MAC Address is selected, the MAC addresses of users are recorded after login. When the users access the Internet through the IAG again within the Open Auth validity period, no authentication is required if the MAC addresses are consistent with the recorded ones.
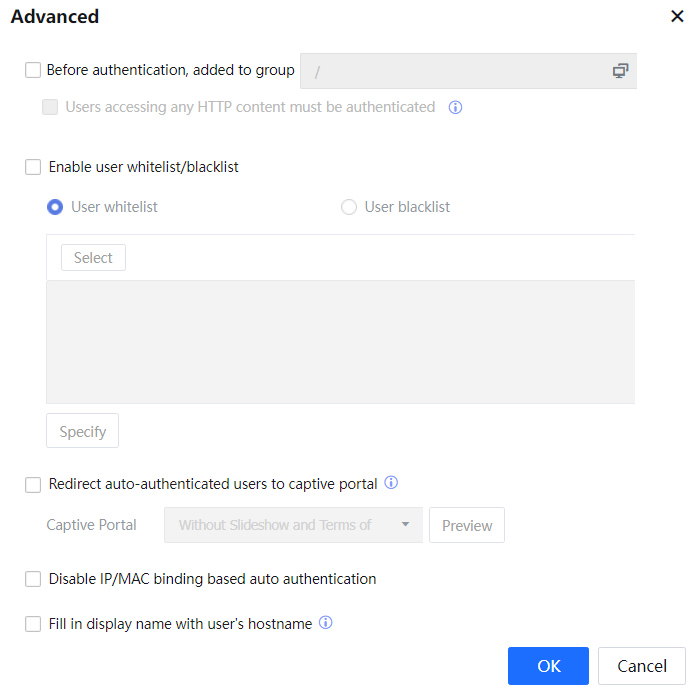
Click Advanced.
Before authentication, added to group: Set to match the Internet access permission of a certain group before user authentication.
Users accessing any HTTP content must be authenticated: If this option is selected, all Internet accesses shall be authenticated before the user authentication. If not, only HTTP accesses rejected by the group policy need authentication.
Enable user whitelist/blacklist: specifies the scope of users who access the Internet using this authentication policy. Certain users can be allowed to log in, and some can be restricted from login.
Show Terms of Use: Users meeting the Open Auth policy can access the Internet without authentication. You can select this option to display a reminder page before such users access the Internet.
Terms of Use with Slideshow: This item is available in advanced options when the Auth Method is SSO or Open Auth. If Terms of Use with Slideshow is selected, SSO users and authentication-free users will be redirected to the disclaimer page when accessing a webpage.
Not allow free authentication in the authentication scope of this policy: Enabling function switch indicates that users in current policy access cannot use the authentication-free function. [LCH44][45]
After setting the authentication policy, click Commit to save the settings.
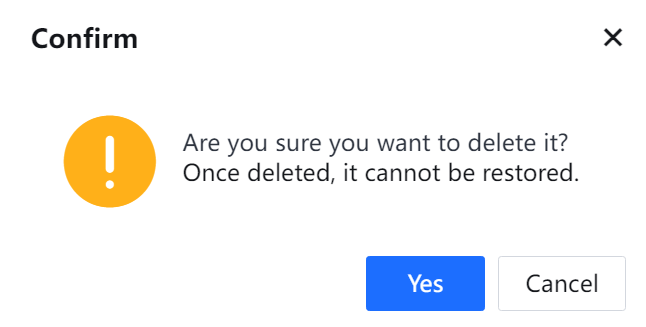
3.5.3.1.1.3 Delete Authentication Policy
The following is an example of deleting a new user authentication policy named test.
3.5.3.1.1.4 Edit Authentication Policy in Batches
You can edit all attributes of authentication policies except the name and authentication scope in batches.
Example: Change the Auth Method of test1 and test2 to Open Auth, take hostname as the username, incorporate new users to the local organization structure, and add them to the engineer group. The procedure is as follows:
![]()
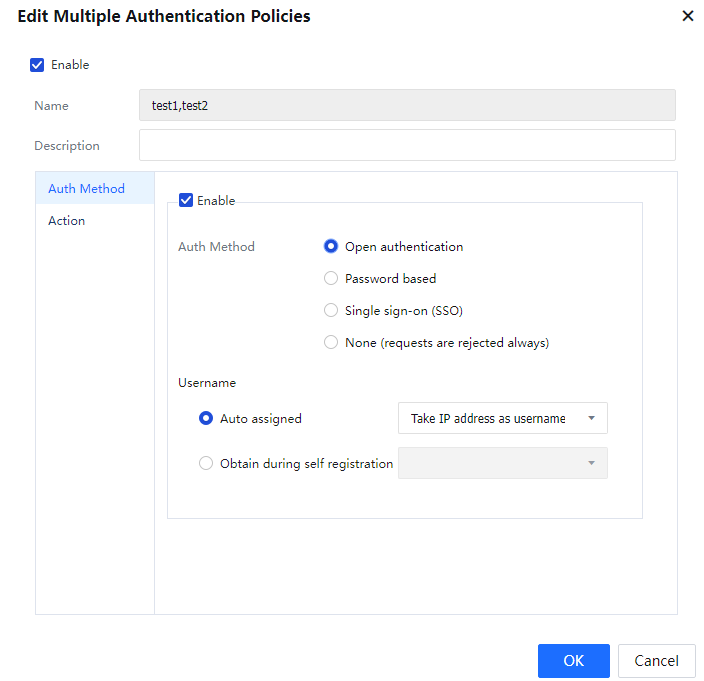
In Username, select Take hostname as username.
In Action, select Engineer Group from Add Non-Local/Domain Users to Group.
Select Add user account to local user database. Then new users are automatically added to the engineer group, with the computer name as the username. 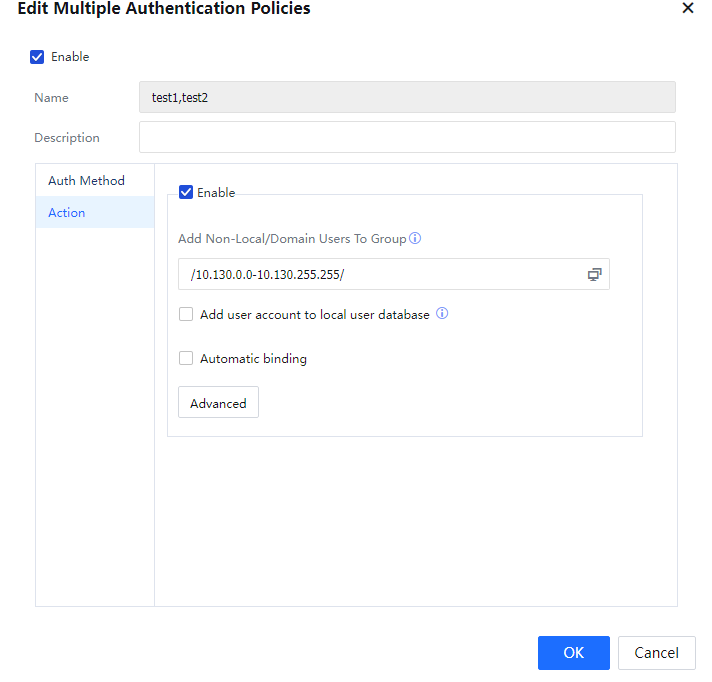

![]()
During the editing process, if only Auth Method is edited, the follow-up processing policies remain unchanged after batch editing. Likewise, if only Action information is edited, the Auth Method remains unchanged.
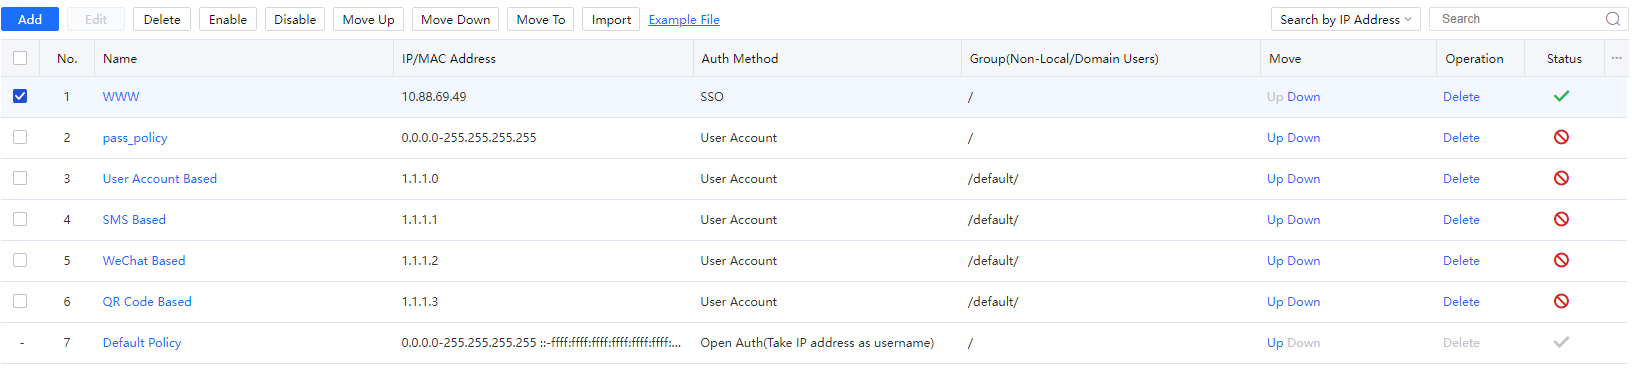
3.5.3.1.1.5 Adjust Priorities of Authentication Policy
Authentication policies are displayed in descending order of priority.
A smaller priority value indicates a higher priority. Authentication policies are matched from the top down. If the IP address, MAC address, VLAN ID, and endpoint scope meet a policy, the Auth Method of this policy takes effect.
Select an authentication policy for which the priority is to be adjusted.
Click Move Up or Move Down. Or click Move To and set the priority of the policy.
3.5.3.1.1.6 Import Authentication Policy
If there are many authentication policies, you can import them from a .csv table. As shown in the following figure, click Example File and edit authentication policies based on the example file format.
![]()
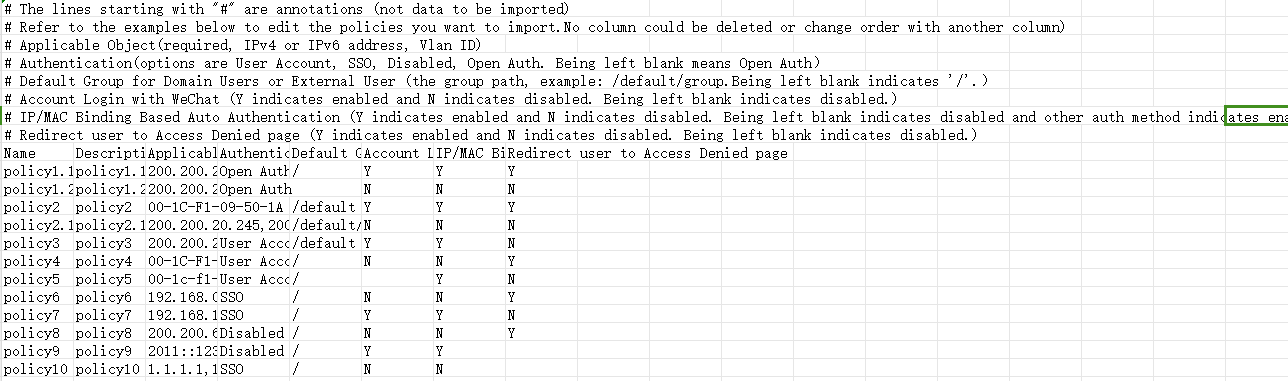
Example file: Edit the policy file to be imported based on the example file, click Import, and select the policy file.
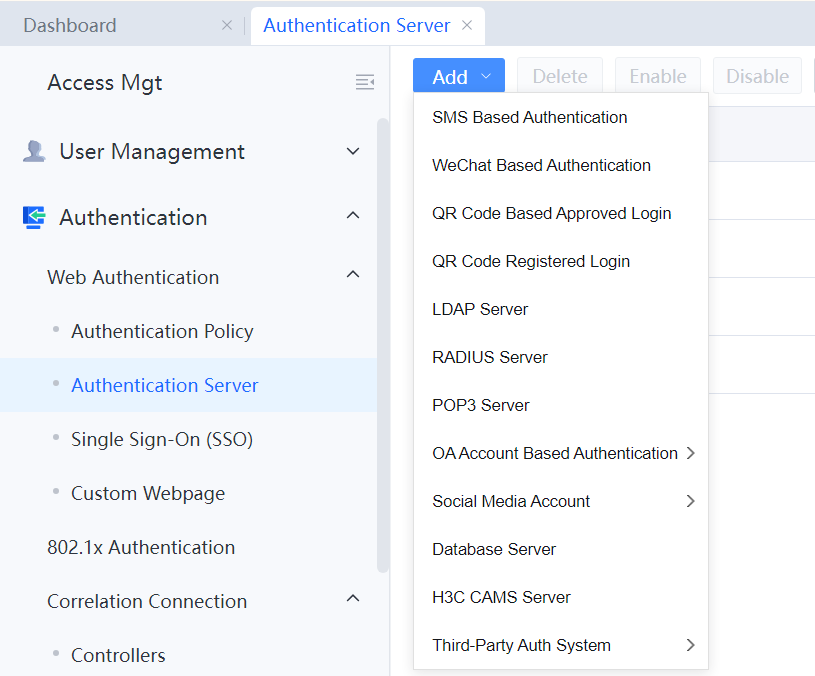
In the Authentication Server module, you can add third-party authentication servers. IAG supports a total of 12 third-party authentication servers: SMS-based authentication server, WeChat-based authentication server, authentication server for performing QR code-based approved login, authentication server for performing QR code registered login, LDAP server, RADIUS server, POP3 server, OA account-based authentication server, social media account server, database server, H3C CAMS server, and third-party authentication system.
As shown in the following figure, add a corresponding authentication server as needed.
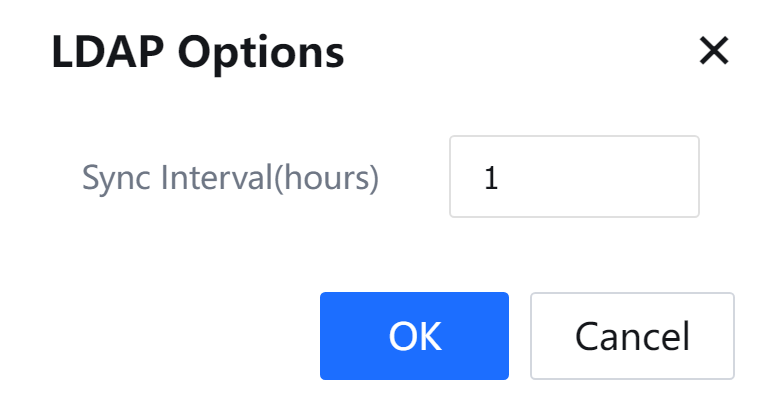
To set sync interval(1-24 hours), click LDAP Options, as shown in the following figure.
To synchronize data with all LDAP servers, click Sync with all LDAP servers.
3.5.3.1.2.1 SMS Based Authentication
When the LAN user uses this authentication method, a verification message will be sent to the client using an SMS modem, SMS gateway, or SMS platform connected to the IAG device. The client authenticates accessing the Internet using the SMS verification code. The SMS-based authentication can be implemented to add an SMS server on the External Auth Server page and configure the correct parameters.
Navigate to Access Mgt > Authentication > Web Authentication > Authentication Server, click Add, and select SMS Based Authentication:
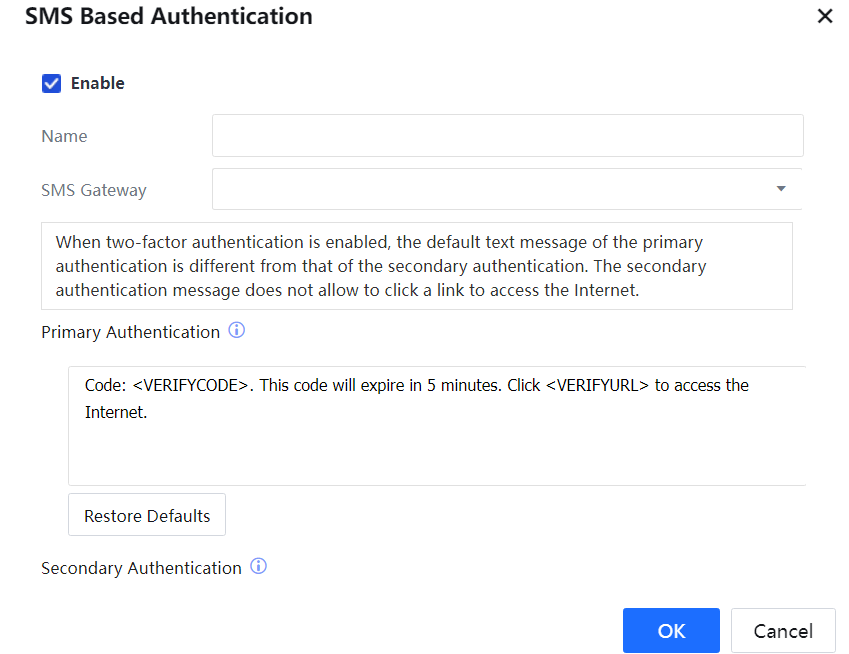
Name: Set the name of the SMS server.
SMS Gateway: Select available SMS platforms.
Primary Authentication: The user sets the contents of a verification message to be sent. The verification code is valid within 5 min.
Click Restore Defaults to restore the contents of custom SMS into default value.
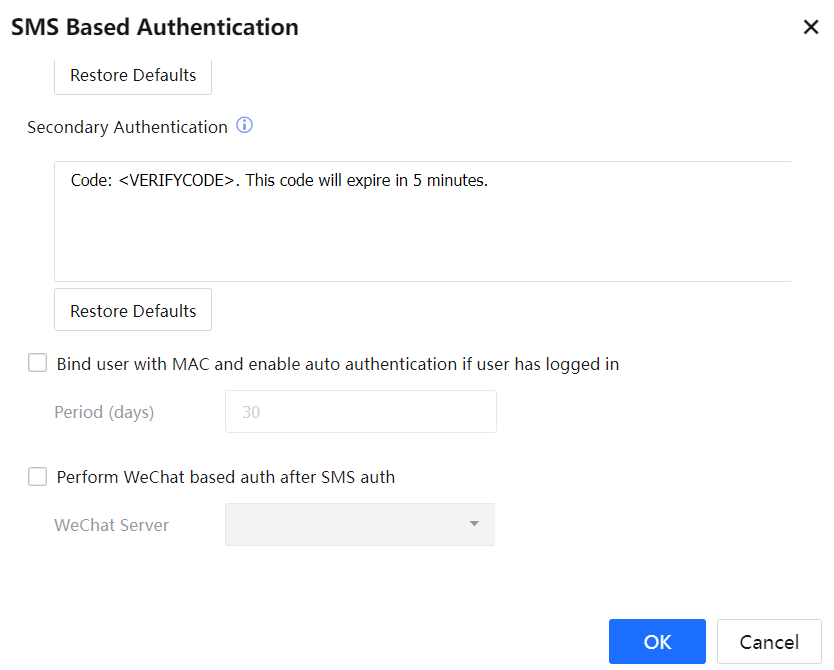
Secondary Authentication: The user sets the contents of a verification message to be sent. The verification code will expire in 5 minutes.
Click Restore Defaults to restore custom SMS settings to the default settings.
Bind user with MAC and enable auto authentication if user has logged in: Check this option to implement the following functions: after the user successfully logs in to a specific endpoint through SMS-based authentication, the device will record the login information and automatically bind the user and MAC address. Then the authentication will automatically pass when the user accesses the Internet using the same endpoint.
Period (days): Set the validity for no need for repeated login.
Perform WeChat based auth after SMS auth: Perform WeChat-based authentication after SMS-based authentication is completed: open the webpage after the endpoint accesses the network to perform the SMS based authentication; after successful authentication, pop up to Connect to Wi-Fi via WeChat page and click and pull up WeChat client; then click Connect Now to complete the WeChat-based authentication.
3.5.3.1.2.2 WeChat Based Authentication
Before performing WeChat-based authentication, add a WeChat authentication server on the Authentication Server page and set related parameters correctly.
Click Add and select WeChat Based Authentication.
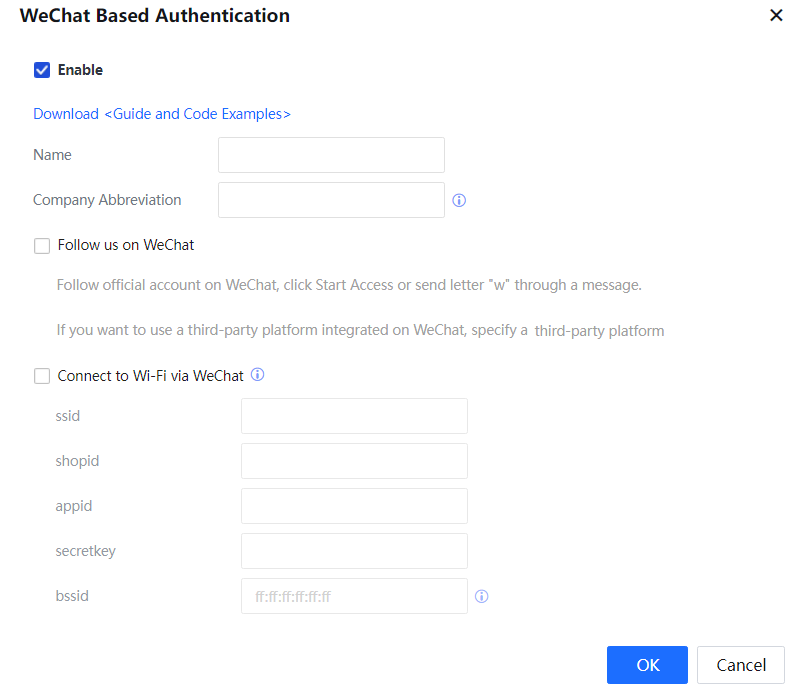
A link for downloading the WeChat-based authentication deployment guide and example code is provided.
Name: Name of the WeChat server.
Company Abbreviation: A character string that uniquely identifies a customer. This field can be used to check whether the public WeChat account followed by users is correct. You need to set the SALT field in the config.php file on the third-party server to the same character string.
Follow us on WeChat: After a user follows the public WeChat account, the user clicks Start Access or sends the letter W for authentication.
This Internet access scheme has two scenarios:
Scenario 1: Code needs to be deployed on a server (service account and subscription account supported).
In this case, we need to enable the development mode for the public WeChat platform. Code needs to be deployed on a local or leased server for responding to all kinds of events. For details about the deployment description and code, see the example code.
Scenario 2: No code needs to be deployed (service account and subscription account supported).
In interworking with a third-party WeChat platform, such as Weimob and Weigou, you need to set related parameters, as shown in the following figure.
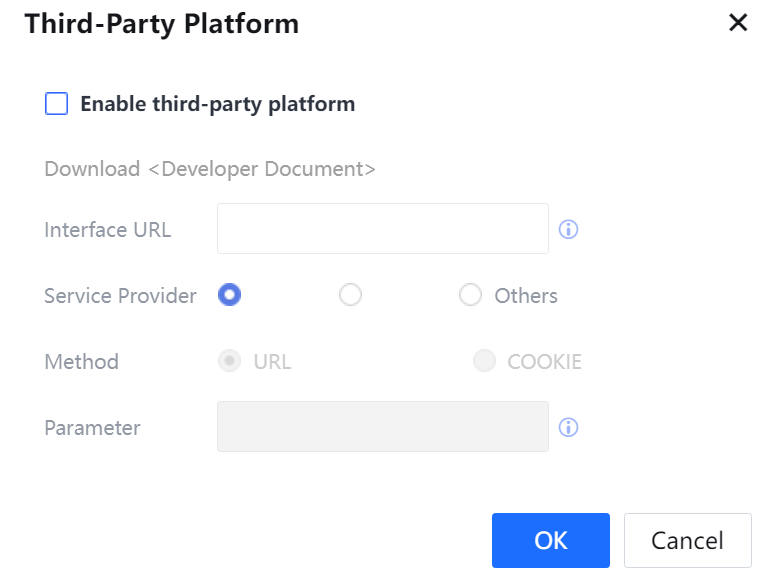
No Sangfor code needs to be deployed if a third-party platform is enabled. The user ID is extracted from the URL or cookie; no checking is needed. WeChat service providers, such as Weimop and Weigou, cannot modify the service code but can extract user IDs from the URL or cookie. See the developer documentation for details about the configuration method and a link for downloading the document is provided.
Enable Connect to Wi-Fi via WeChat: This scheme is implemented using the following two authentication methods:
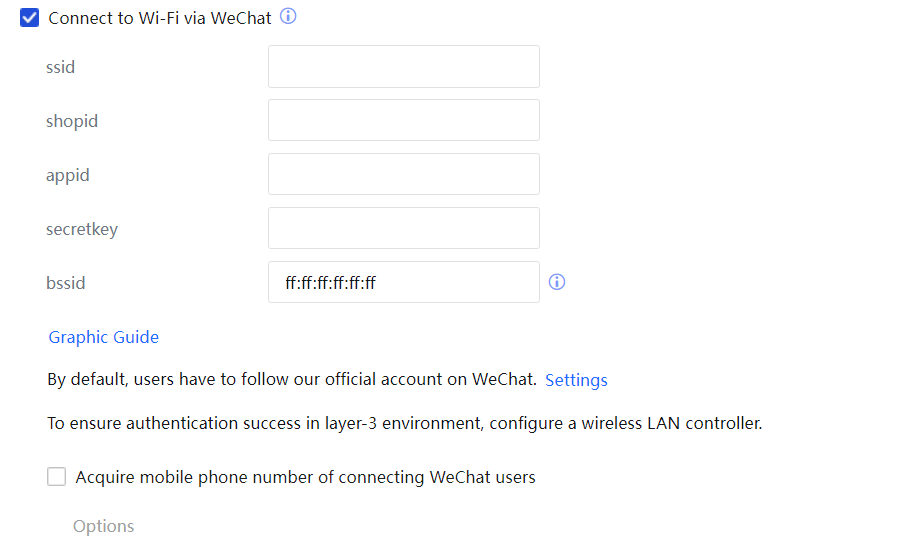
bssid: Enter the MAC address of any access point (AP) in the LAN, or use the default value.
ssid: Enter the service set identifier (SSID) of the wireless network.
shopid: Enter the ID of the shop where the user registered.
appid: Specify the unique application ID for third-party users. After adding the device on the WeChat public platform, view the device upgrading information to obtain the application ID.
secretkey: Specify the unique secret for third-party users. After adding the device on the WeChat public platform, view the device upgrading information to obtain the application secret.
All users are online by default. Please set Force users to follow us, if official account following is compulsory.
Set Force users to follow us: Setting this function is to force users to follow our official amount when accessing the Internet. After this function is enabled, the user account will log off automatically after one minute if the user does not follow the official account.
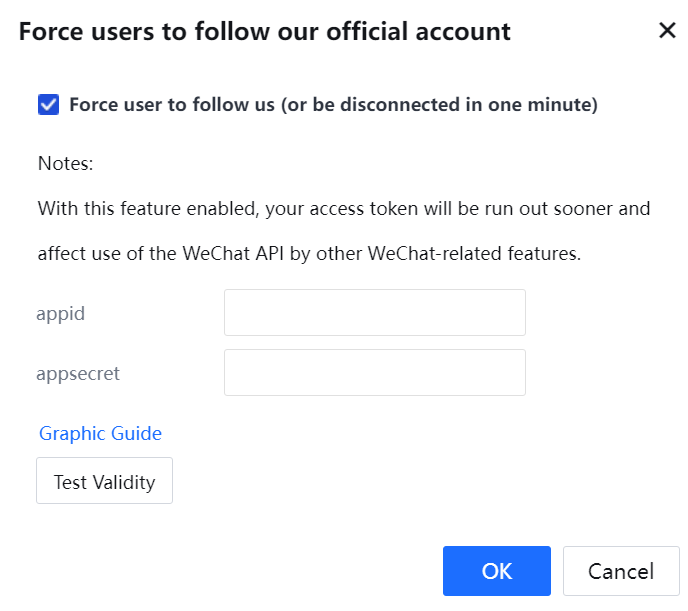
![]()
You can use this function only if the official account has passed the authentication.
appid: the unique evidence for third-party users. After adding the device on the WeChat public platform, view the device upgrading information to obtain the appid.
appsecret: the unique evidence for third-party users. After adding the device on the WeChat public platform, view the device upgrading information to obtain the appsecret.

Select Acquire mobile phone number of connecting WeChat users, and fill in the decryption key of the WeChat public platform; click Options, and fill in the information to apply for the decryption key from Tencent, with the help of Sangfor Technologies.
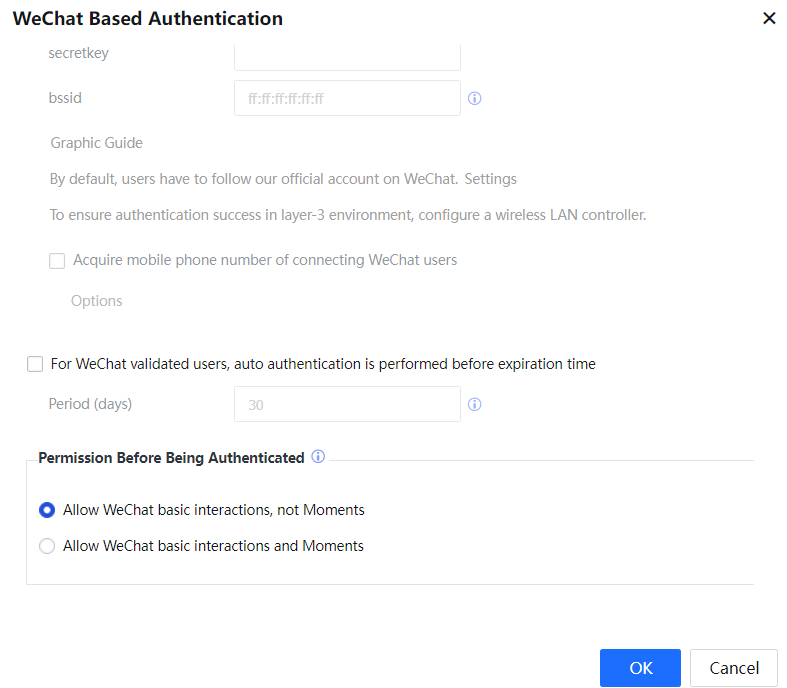
For Wechat validated users, auto authentication is performed before expiration time: Check this option to implement the following functions: after the user successfully logs in to a specific endpoint through WeChat-based authentication, the device will record the login information. Then, the IAG device automatically passes the authentication when the user accesses the Internet from the same endpoint.
Period (days): Set the validity for auto authentication; the range is within 1-100 days.
Permission Before Being Authenticated: Allow WeChat basic interactions, not Moments (default) or Allow WeChat basic interactions and Moments can be selected, and the configuration is as shown in the following figure.
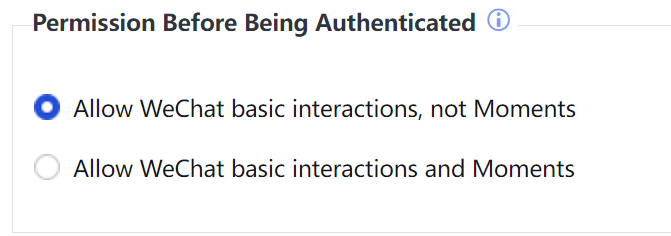
Click OK to complete the settings of the WeChat-based authentication server.
3.5.3.1.2.3 QR Code Based Approved Login
QR Code Based Approved Login: In the scenario of external guests, they can access the Internet after internal employees' approval. Thus, a good experience is brought for external guests and can be effectively managed by the internal employees. The QR code based approved login method is recommended, and the internal employees scan the QR code of each guest, thus implementing this scenario.
Three types of QR code-based approved login scenarios are involved, as described below:
• The guest fills in information, and the approver scans the QR code. Specifically, the guest information is collected, and the guest access to the Internet is approved after the approver scans the QR code and the approver's information is confirmed to be true.
• The guest logs in through the name of the approver who scans the QR code. If there is no need to collect guest information, select this method to grant the guest the approver's permission.
• The approver scans the QR code and fills in guest information.
Suppose there is no need to do more operations by the client. In that case, the internal employees are responsible for filling in the information, and online users can view specific information of the approver.
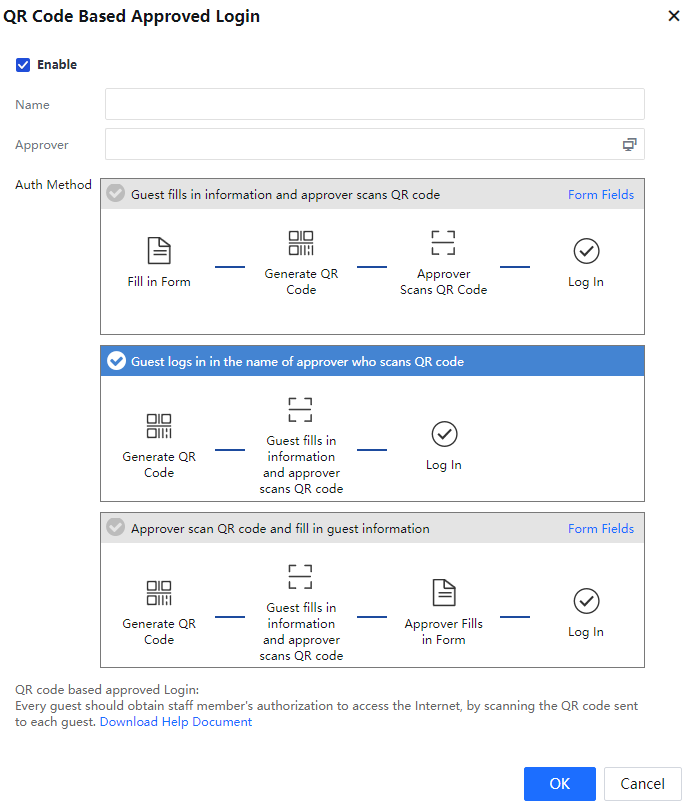
Name: Specify a name for the QR code-based approved login server.
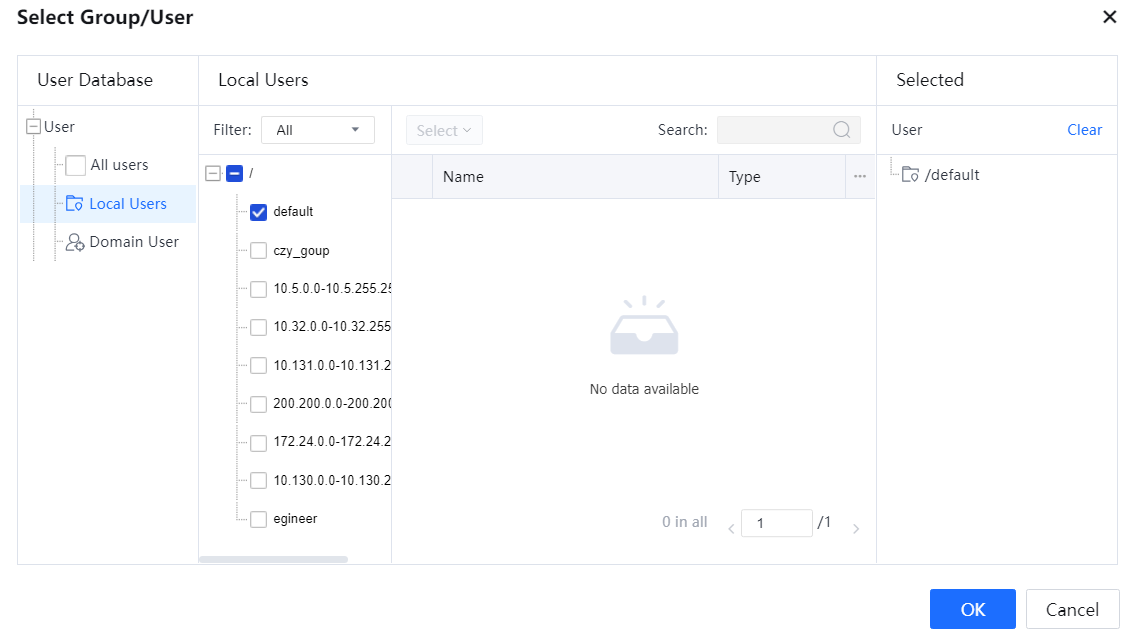
Approver: Specify the internal employee with the approval permission.
Auth Method: Select the authentication method as needed.
3.5.3.1.2.4 QR Code Registered Login
QR Code Registered Login: For online conferencing experience or small-range private Internet access experience, it is expected to access the Internet in a conference room or the small range without the permission of informing other people of the Internet access method. Therefore, the QR code registered login method is recommended to satisfy the requirements. Real-name authentication scenarios and non-real-name authentication scenarios are supported.
The general implementation process is as follows:
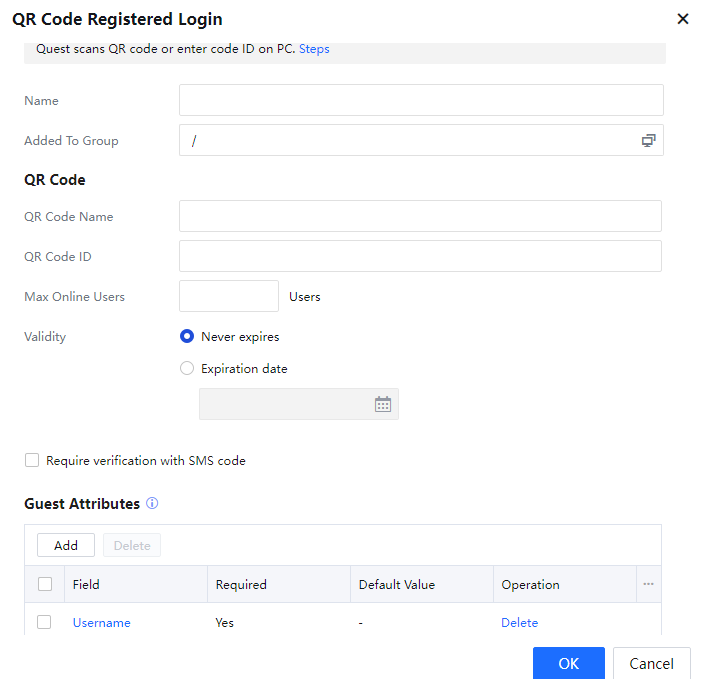
The configuration page of the QR code registered login server is as shown in the following figure.
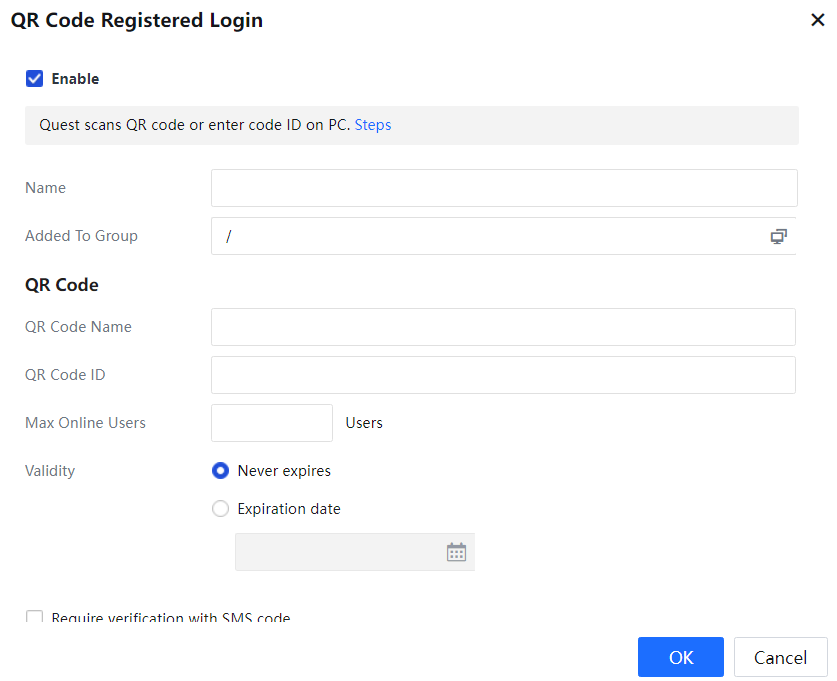
Name: Specify a name for the QR code-based approved login server.
Added To Group: Specify the group to which the user will be classified after the user completes the QR code registered login.
QR Code: Configure settings for the QR code to be posted in the conference room as needed.
QR Code Name: Specify the name of the QR code.
QR Code ID: Specify the ID of the QR code, so that PCs without the scanning functions can connect to the network through the ID.
Max Online Users: Specify the maximum number of users allowed in one conference room. This facilitates efficient user management.
Validity: Define the validity period of the QR code. Select Never expires or Expiration date as needed. If you select Expiration date, you must specify the date when the QR code will expire.
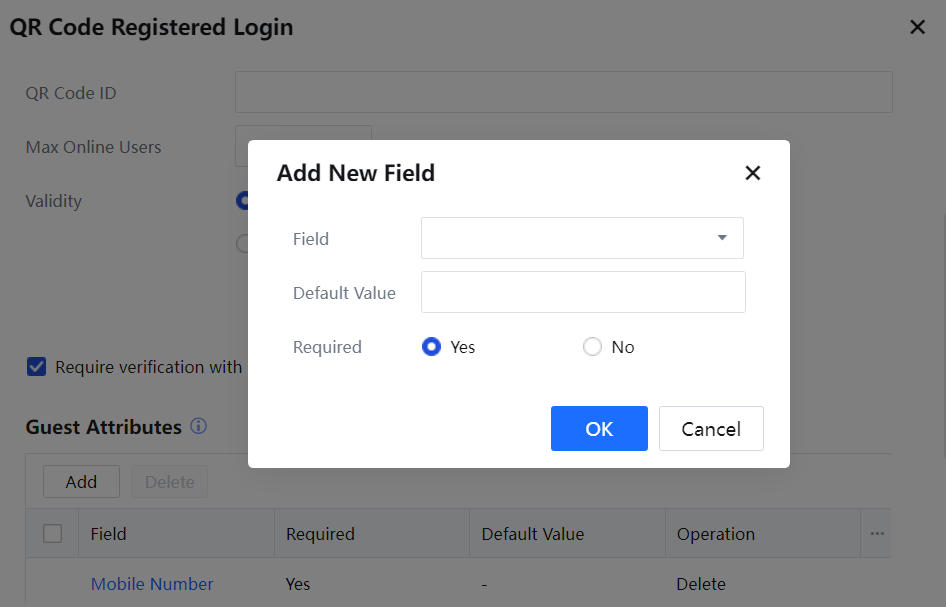
Require verification with SMS code: Specify whether to perform real-name verification through SMS verification code.
![]()
Before you enable Require verification with SMS code, go to System > General > Advanced > Notification to add an SMS notification server[A47].
3.5.3.1.2.5 LDAP Server
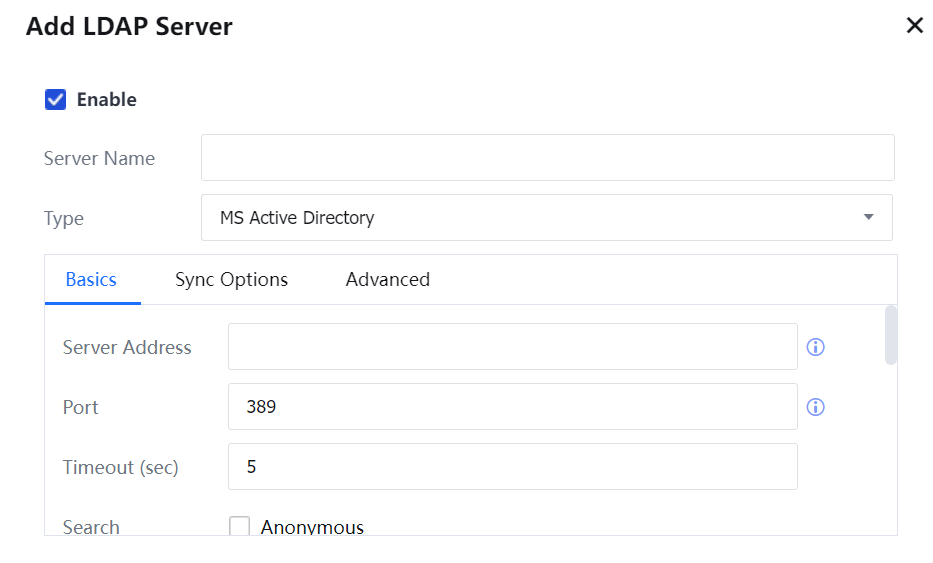
Before performing LDAP SSO or using the LDAP server for authentication, add an LDAP server on the Authentication Server page and set related parameters.
After adding the LDAP server, configure it on the following three tab pages:
Basics:
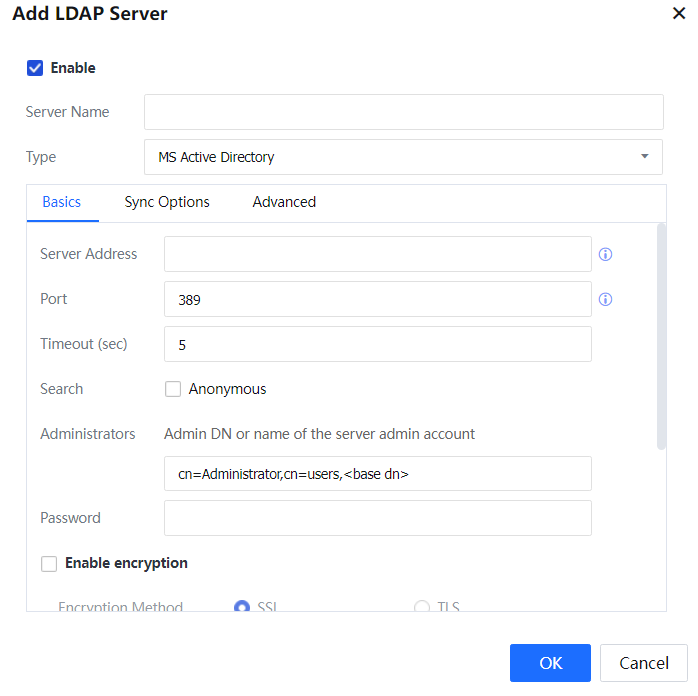
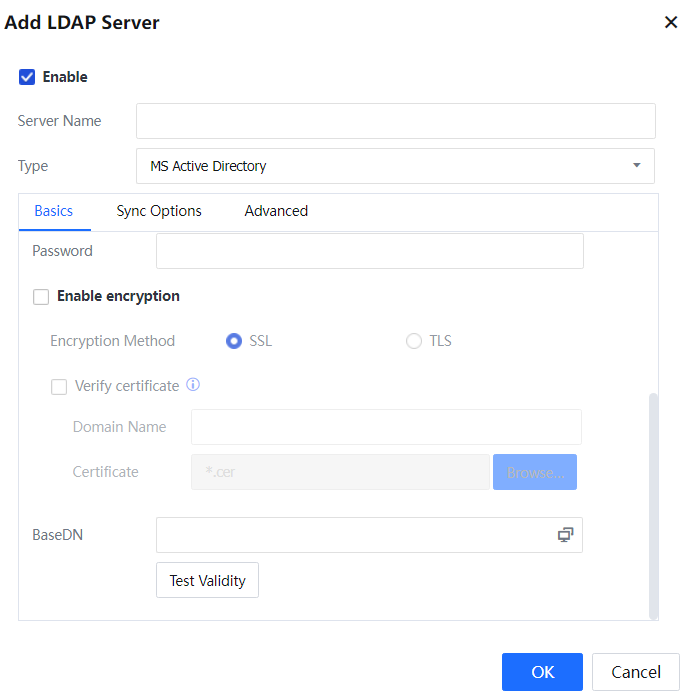
Server Address: IP address of the LDAP server.
Port: port to which the LDAP server is connected. For example, the authentication port is 389 in the AD domain.
Timeout (sec): The timeout duration of an authentication request. After the system forwards an authentication request to the LDAP server, authentication fails if no response is returned within the specified timeout duration. If the network conditions between the IAG and the LDAP server are poor, you can set the timeout duration to a larger value, for example, 10s.
Search: This option can be selected when the LDAP server supports an anonymous search.
Administrators: user account used for query and synchronization from the LDAP server. Specify the detailed user location and BaseDN.
Password: password of the account bound to the server.
Enable encryption: When the LDAP server enables SSL/TLS encryption, the IAG connection also needs to enable encryption. And the authentication port needs to be changed after encryption is turned on. When the AD domain uses SSL encryption, the default is 636.
Verify certificate: Verify the legitimacy of the certificate. Fill in the IP resolved to the domain name in System > Network > Advanced > Hosts.
BaseDN: start point of the domain search path. This starting point determines the applicable scope of the LDAP rule. If a user is outside the specified BaseDN, the user cannot get authenticated on the external server, and the configured policy is ineffective for this user. Therefore, you can define the jurisdiction areas of different administrators by using the BaseDN field.
The supported LDAP types are MS Active Directory, OPEN LDAP, SUN LDAP, IBM LDAP, Lotus LDAP, Novell LDAP, and OTHER LDAP.
Sync Options:
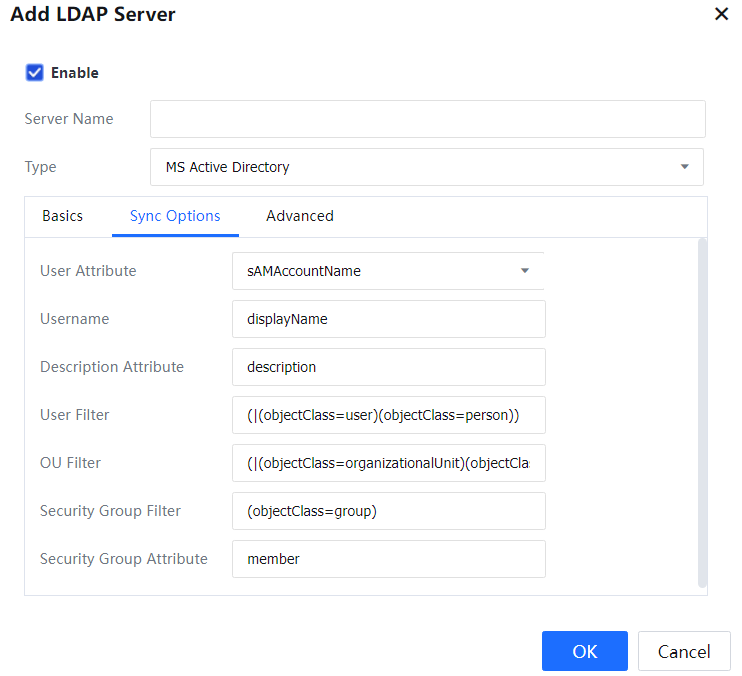
User Attribute: an attribute field that uniquely identifies a user on the LDAP server. For example, the sAMAccountName attribute uniquely identifies a user in the AD domain, and the uid attribute uniquely identifies a user on the Novell LDAP server.
Username: an attribute that uniquely identifies the displayed name of a user on the LDAP server. For example, in the AD domain, displayName uniquely identifies the displayed name of a user.
Description Attribute: an attribute that uniquely identifies the description of a user on the LDAP server. For example, in the AD domain, description uniquely identifies the description of a user.
User Filter: user filtering condition on the LDAP server for determining whether a node is a user. For example, you can enter "(|(objectClass=user)(objectClass=person))" in the AD domain to determine whether a node is a user.
OU Filter: The organization unit filtering condition on the LDAP server determines whether a node is an organization unit. For example, you can enter "(|(objectClass=organizationalUnit)(objectClass=organization)(objectClass=domain)(objectClass=domainDNS)(objectClass=container))" in the AD domain to determine whether a node is an organization unit.
Security Group Filter: (security) group filtering condition on the LDAP server. The group refers to a security group in the AD domain and a common group in the non-AD domain. Therefore, you can determine whether a node is a (security) group. For example, you can enter "(objectClass=group)" in the AD domain to determine whether a node is a security group.
Security Group Attribute: specifies which attribute identifies the member list of a security group. This attribute is valid only when the LDAP server is the AD domain. Enter member in common cases.
If Type is set to MS Active Directory, the preceding parameters are already set, and it is recommended to use the default setting. If another LDAP type is selected, adjust the parameters based on the actual situation so the IAG can read the correct information from the LDAP server.
Advanced:
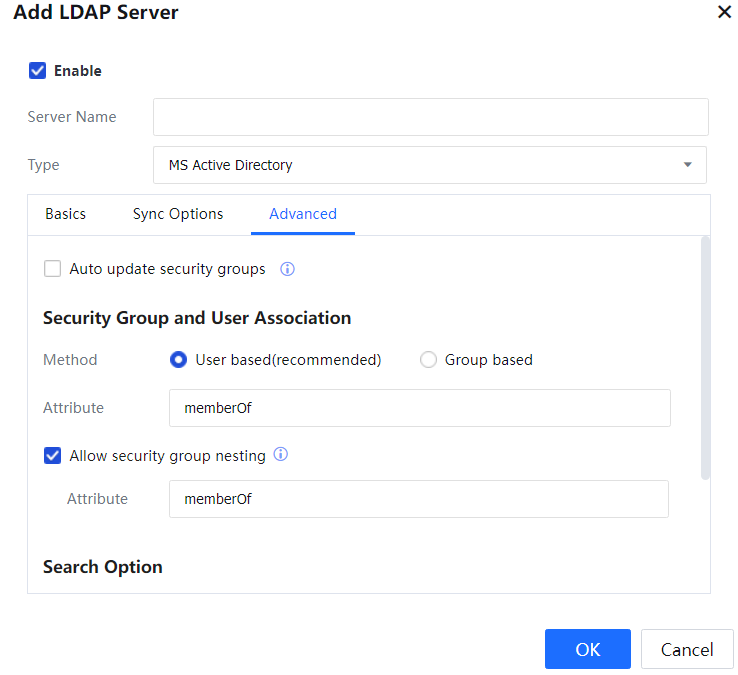
Auto update of security groups: If this option is selected, the IAG will request the LDAP server to synchronize required contents in real time. It will increase the pressure on the LDAP server. This option is valid only in the AD domain.
Security Group and User Association: The default value is recommended.
Method: The association method can be set to User based (recommended) or Group based. On the LDAP server, if an attribute of a user stores the group to which the user belongs, Group based can be selected to improve the matching performance and reduce the performance pressure on the LDAP server. On the LDAP server, if only groups save information about member users, User based (recommended) must be selected.
Attribute: If Group based is selected, this field must be set to the parent group attribute saved by the group or user on the LDAP server. For example, the memberOf attribute in the AD domain identifies the parent group of a node. Therefore, the memberOf attribute is to search the parent group. If User based is selected, this field must be set to the member user attribute saved by the group on the LDAP server. For example, the member attribute in the AD domain identifies the member users of a group. Therefore, the member attribute is to search the member users of a group.
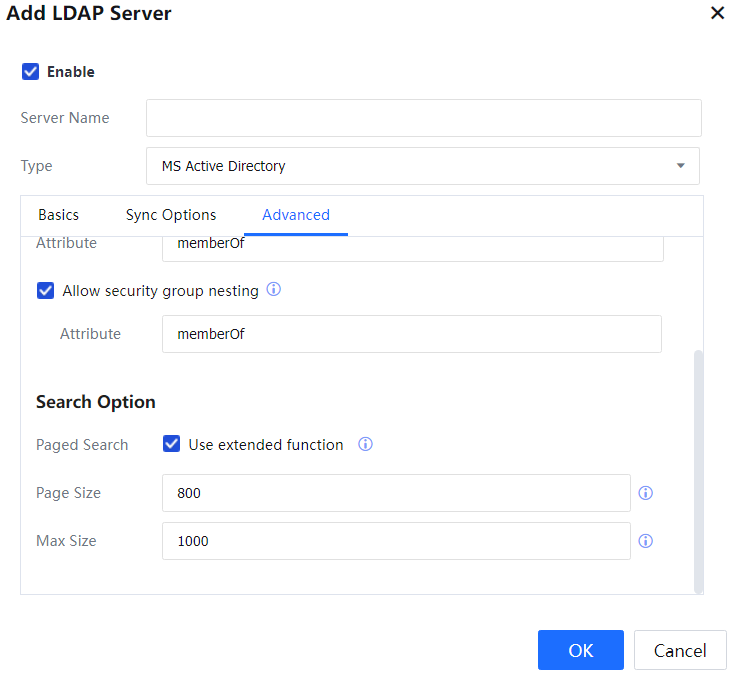
Allow security group nesting: specifies whether a (security) group is valid for member users of this group or member users and child groups. If this option is selected, the configured (security) group is valid for both member users and child groups. If it is not selected, the configured (security) group is valid only for member users of this group.
Attribute: This field is valid only when Allow security group nesting is selected. This field specifies the attribute identifying a group to be searched in recursive mode. If Group based is selected, this field must be set to the same value as Attribute. If User based is selected, this field must be set to the child group attribute saved by the group on the LDAP server. For example, the member attribute in the AD domain identifies the child groups of a group. Therefore, the member attribute is used to search the child groups of a group.
Paged Search: An extended API is used for search on the LDAP server. The default setting is recommended.
Page Size: The value 0 indicates that the page size is not limited. The default setting is recommended.
Max Size: The default setting is recommended.
![]()
The global catalog needs to be enabled for all sub-domains on the parent domain. When adding an LDAP server, the settings are the same as above. Set Authentication Port to 3268 and IP Address to the IP address of the parent domain. See the following figure.
LDAP Server Sync Configuration:

Click LDAP Options to configure time intervals of LDAP synchronization, and set the range to 1-24 hours.[A48]
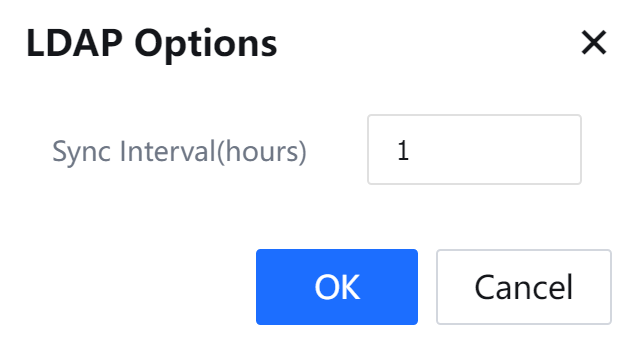
Click Sync with all LDAP servers to synchronize all LDAPs manually.[A49]
3.5.3.1.2.6 RADIUS Server
Before using the Radius server for authentication, add a Radius server on the Authentication Server page and set related parameters.
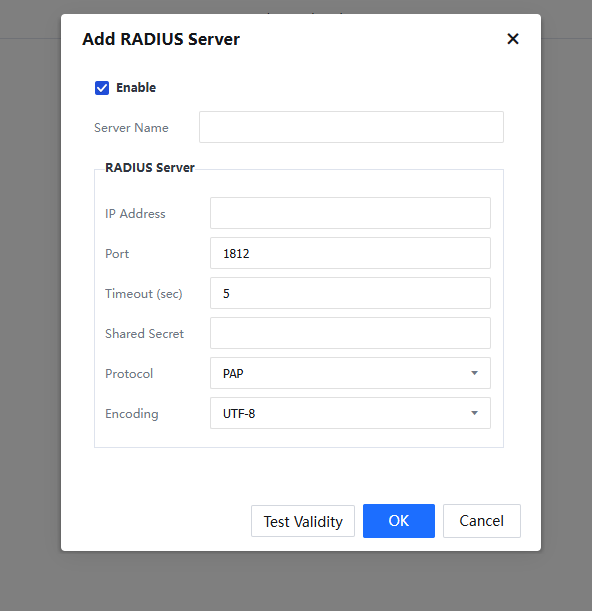
Server Name: Name of the Radius server to be added.
IP Address: IP address of the Radius server.
Port: Authentication port of the Radius server, which is 1812 by default.
Timeout (sec): Timeout duration of authentication requests.
Shared Secret: Key for Radius negotiation.
Protocol: Set Radius negotiation protocol, unencrypted protocol PAR, challenge handshake authentication protocol, Microsoft CHAP, Microsoft CHAP2, and EAP_MD5.
Encoding: Support selecting UTF-8 or GBK encoding format.
3.5.3.1.2.7 POP3 Server
Before performing POP3 SSO, add a POP3 server on the Auth Server page and set related parameters.

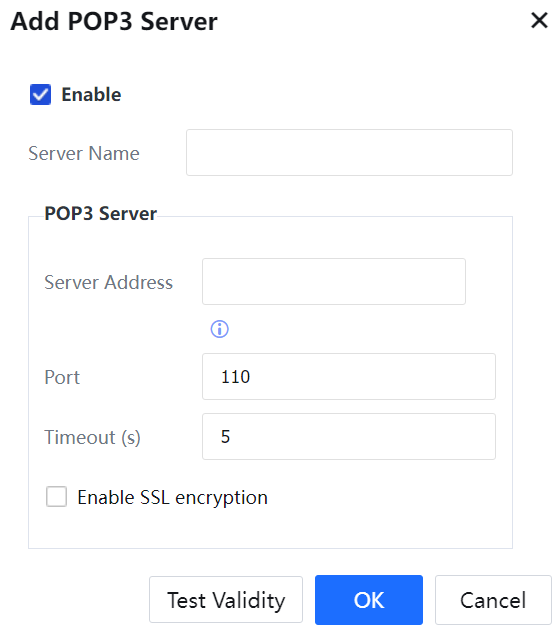
Server Name: Name of the POP3 server to be added.
POP3 Server: Set the server IP address, authentication port, and timeout duration.
3.5.3.2.2.8 OA Account Based Authentication
Along with the development of the Internet, users require great authentication scenarios. Therefore, IAG also supports mainstream applications such as DingTalk, Enterprise WeChat, Pocket Assistant, Facebook, Twitter, Line, and Gmail, and authentication is implemented through the OAUTH interface.
Implementation process:
OAUTH protocol provides a safe, open, and simple standard for authorizing user resources. OAUTH does not enable the third party to access the user's account information (such as username and password), i.e., a third party can apply for the authentication of user resources without accessing the user's username and password.
A standard Oauth process is as follows:
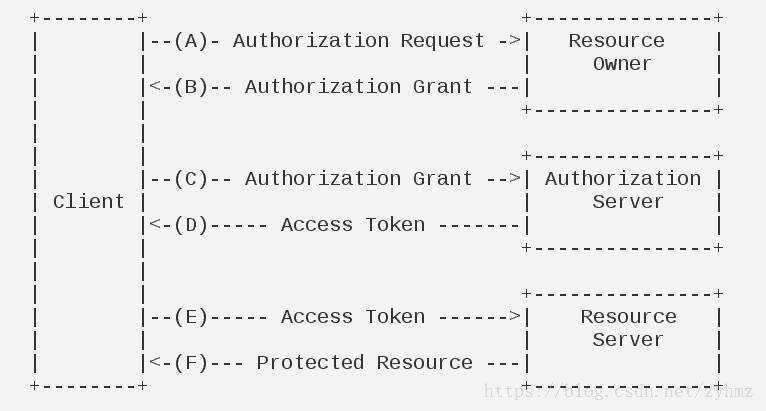
(A) After the user opens the client, the client requires the user to grant authentication.
(B) The user agrees to grant the authentication.
(C) The client uses the authentication obtained in the last step to apply for an access token from the authentication server.
(D) After authenticating the client, the authentication server agrees to distribute the access token after confirmation.
(E) The client uses the access token to apply for resources from the resource server.
(F) After confirming that the access token is correct, the resource server agrees to open the resources to the client.
Nowadays, WeChat, DingTalk, and Pocket Assistant are widely used in enterprises. The clients already have a complete organizational structure and authentication system in Enterprise WeChat and wish IAG could implement the authentication of accessing the Internet using Enterprise WeChat. IAG provides a method for combining with the Enterprise WeChat for authentication to complete the authentication. During Internet access, the QR code pops up, and mobile WeChat scans the QR code to authorize it to realize the authentication. An authorization page pops up on the mobile phone, and then WeChat is directly launched to perform authorization authentication.
Application of Oauth2.0 authorization method: IAG's predefined OA account authentication supports three authorization methods: Enterprise WeChat, DingTalk, and Pocket Assistant.
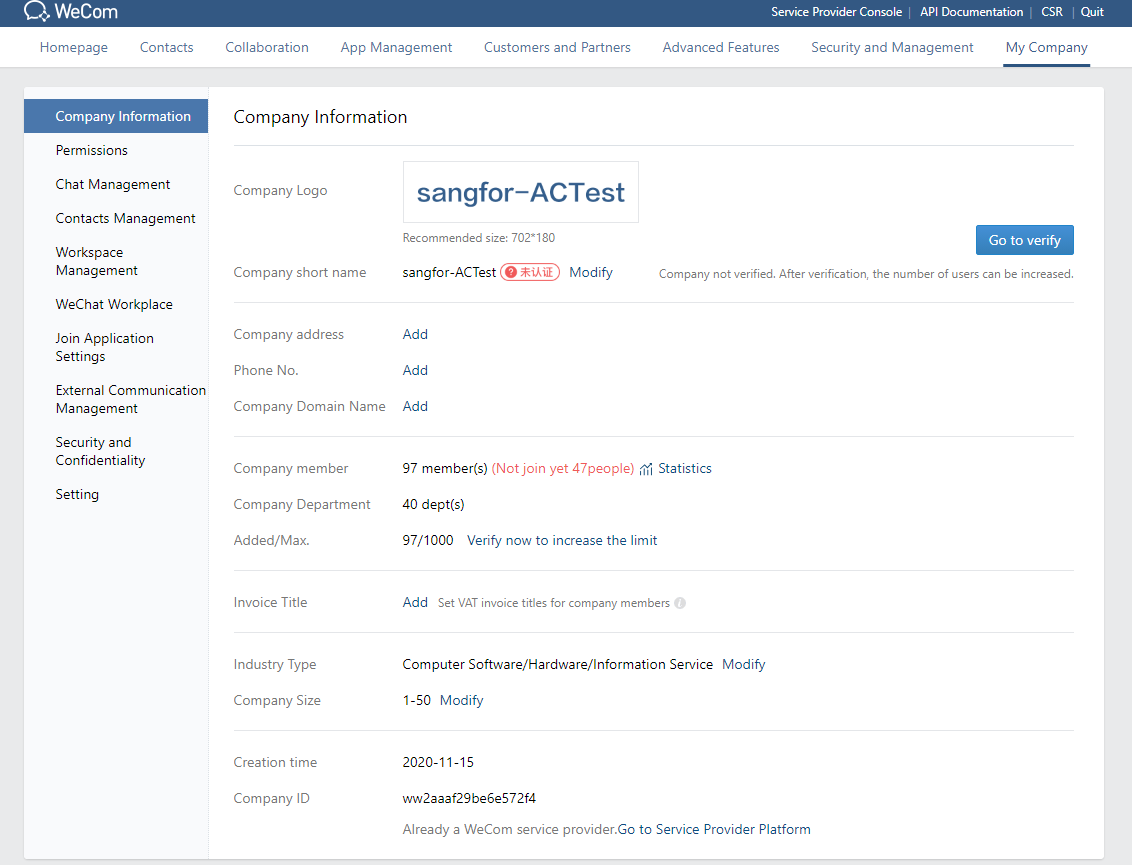
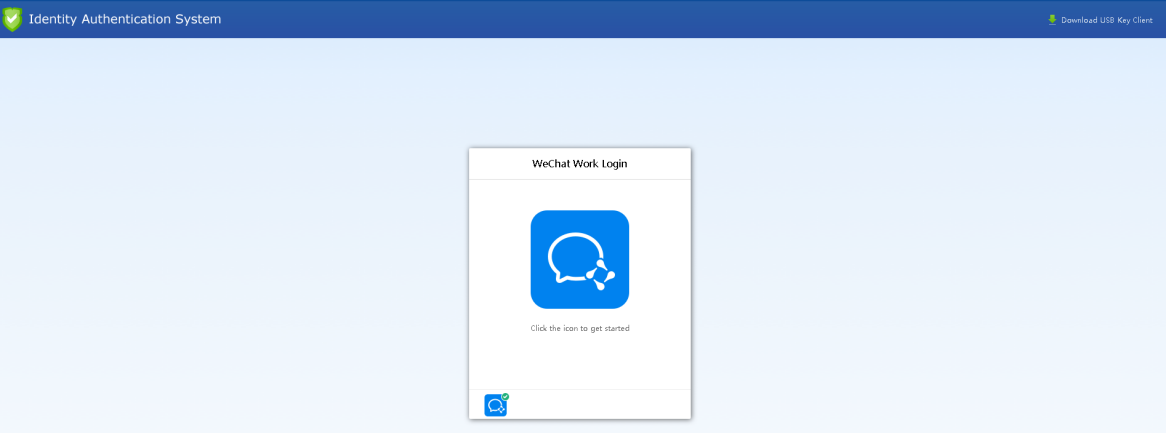
3.5.3.2.2.8.1 WeCom
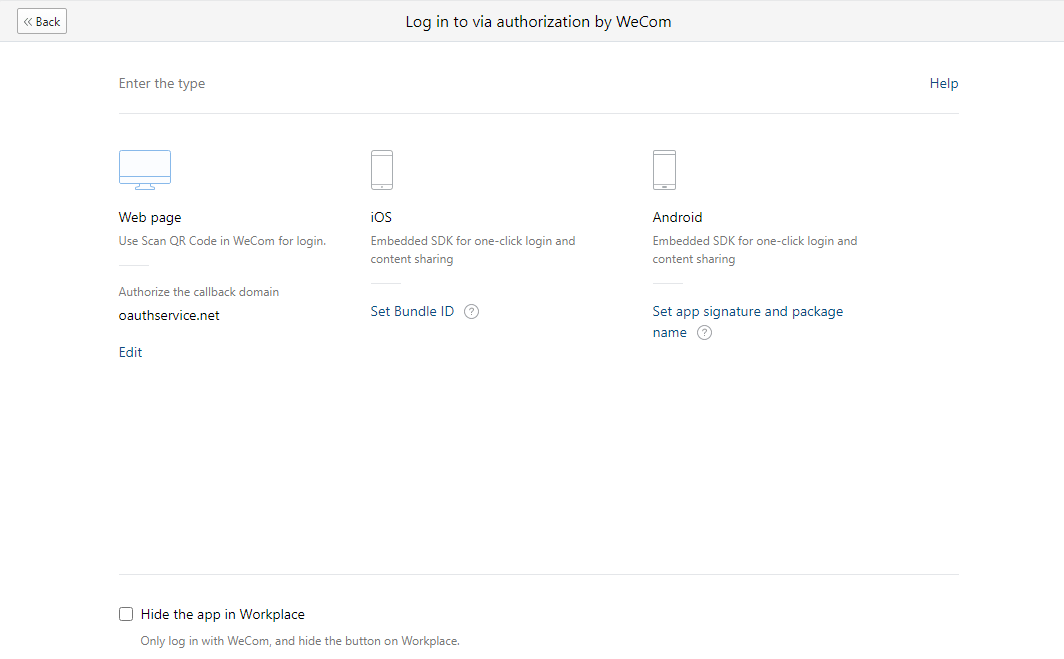
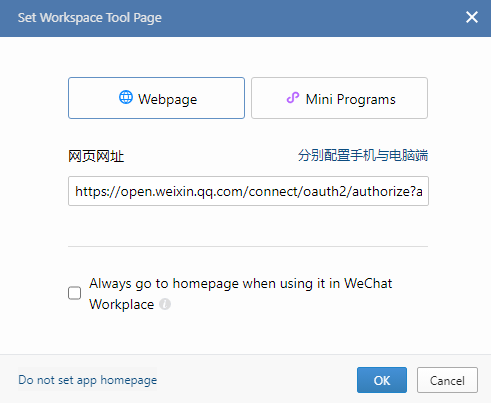
• Complete relevant settings on the WeCom developer platform
![]()
All screenshots in this chapter will be in Chinese due to the developer platform.
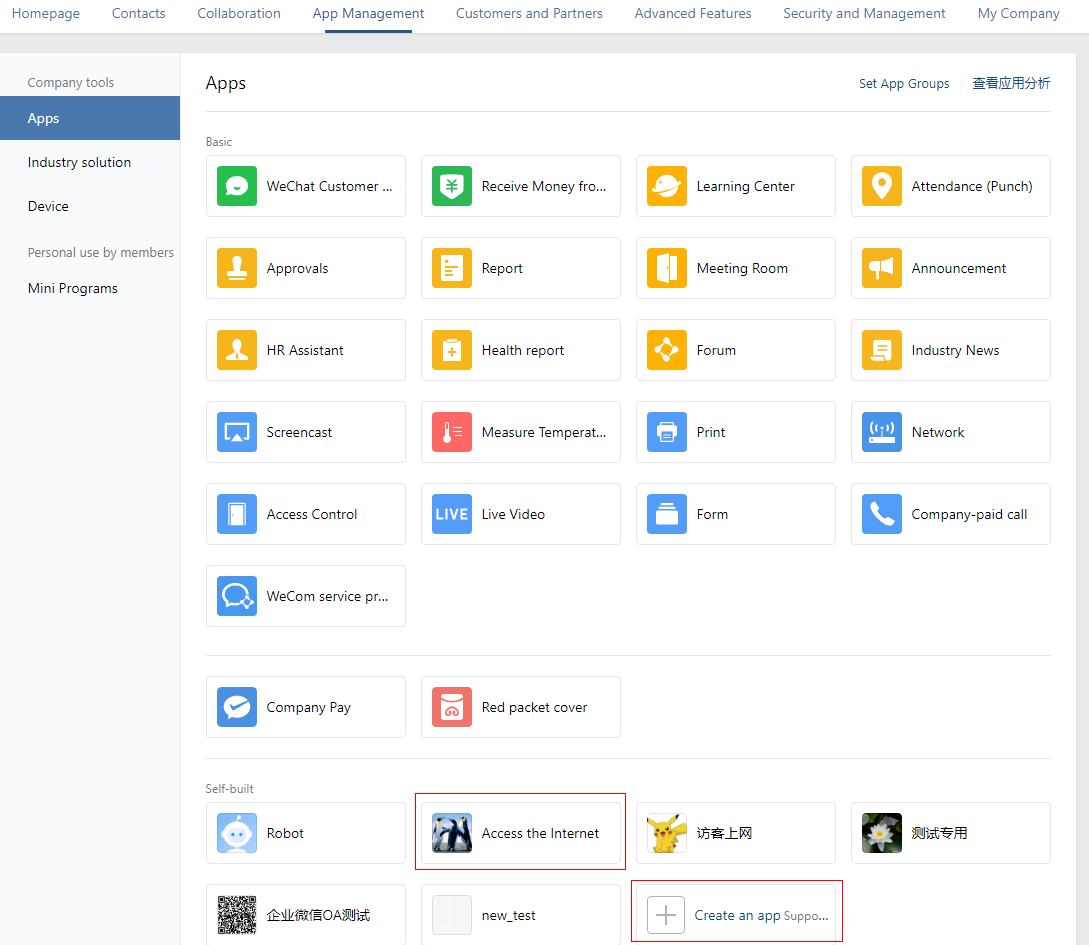
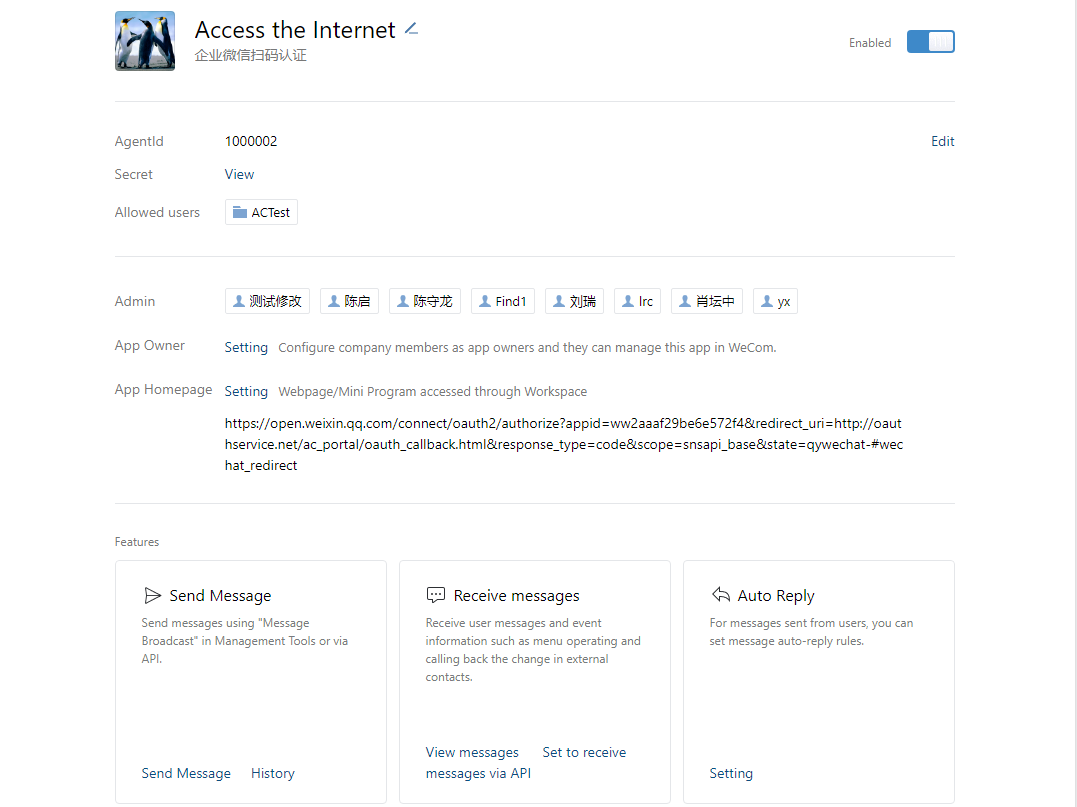
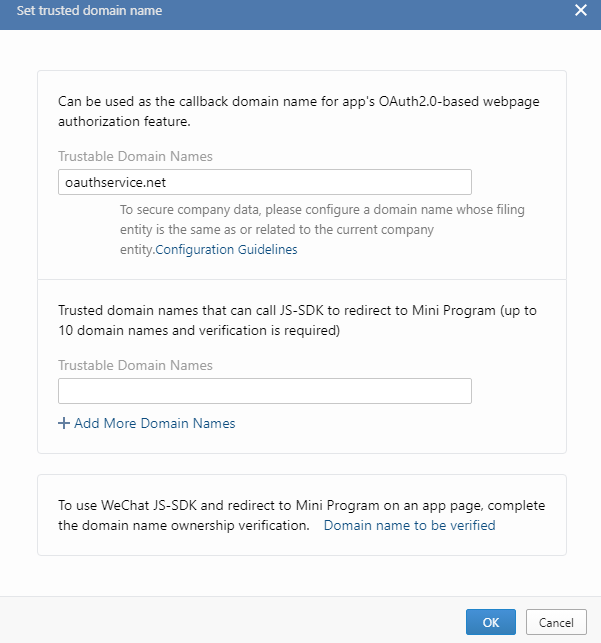
Replace the AppID in the address with the AppID obtained in Step 1.

• Complete relevant settings in the IAG console
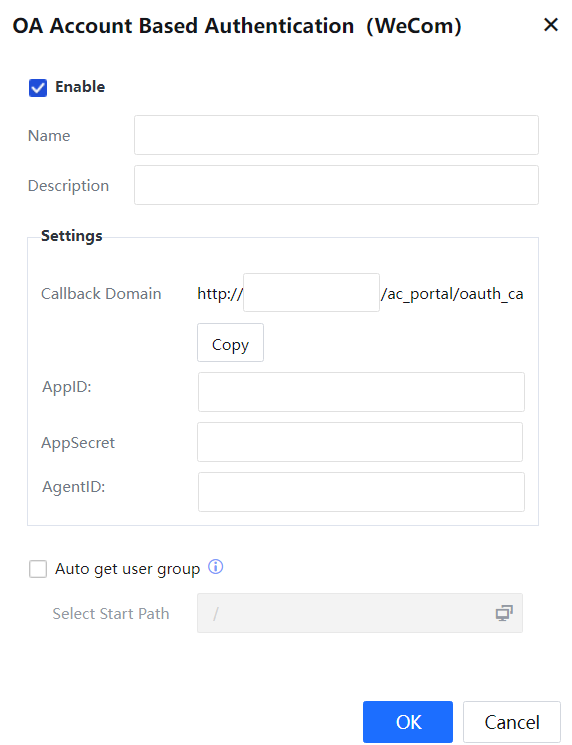 [zyl50]
• Verify the result
PC Client:

Mobile Client:
![]()
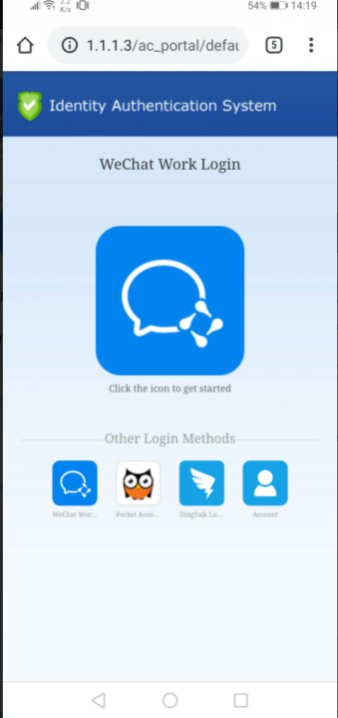
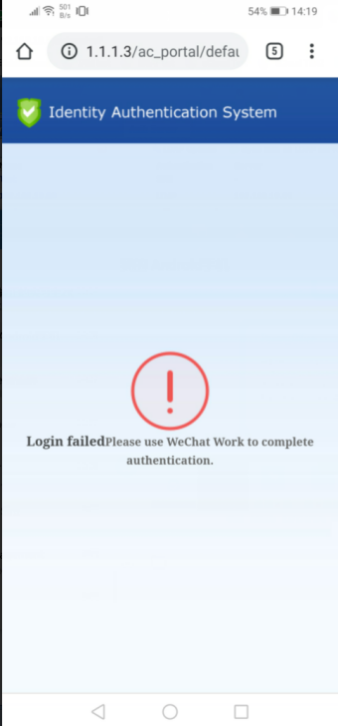
![]() [zyl51]
[zyl51] 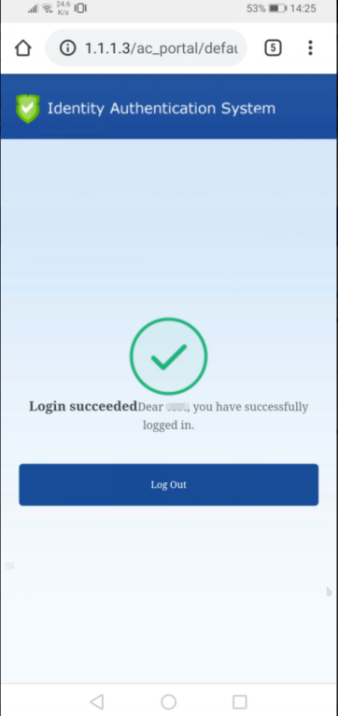
3.5.3.2.2.8.2 DingTalk
![]()
All screenshots in this chapter will be in Chinese words due to the developer platform.
• Complete relevant settings on the DingTalk developer platform
• Complete relevant settings in the IAG console
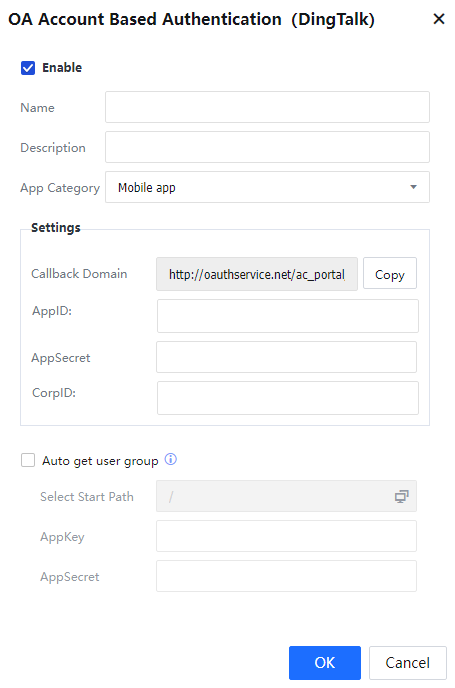
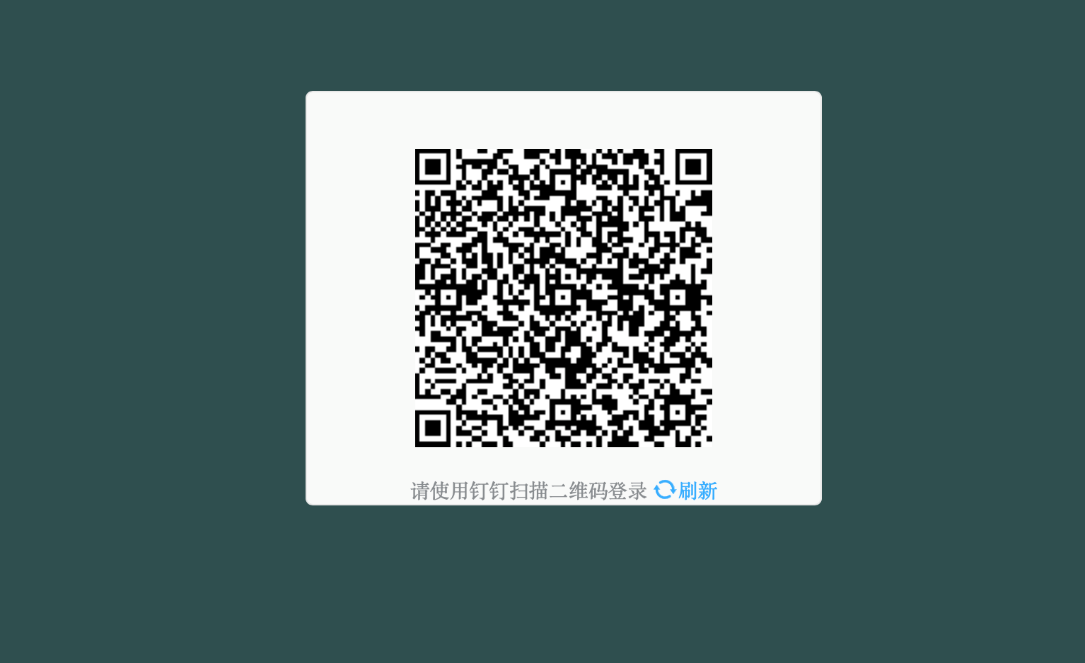
• Verify the result
PC client:


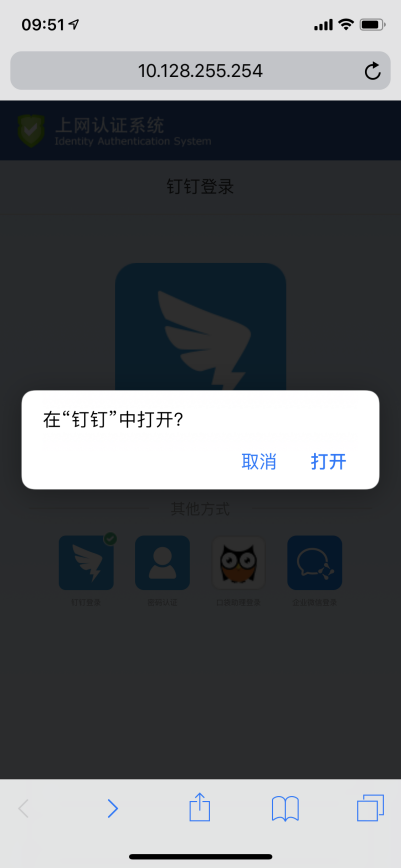
Mobile client:
![]()

3.5.3.2.2.8.3 Pocket Assistant
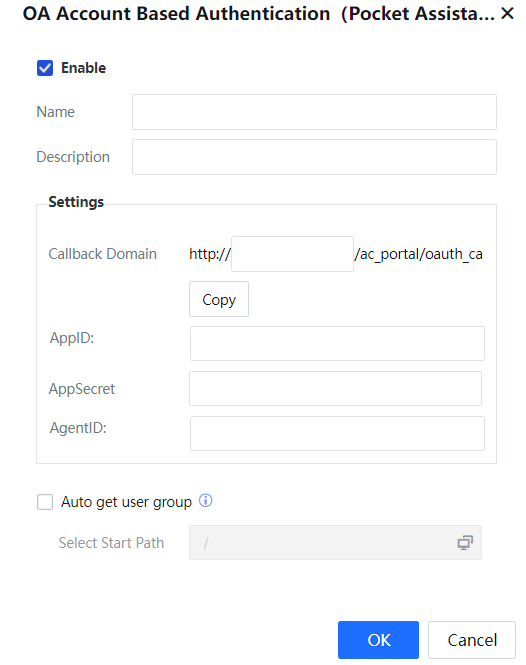
The Pocket Assistant does not have an open developer platform. Please contact Sangfor after-sales service to obtain the parameter information required for Pocket Assistant-based authentication.
• Complete relevant Pocket Assistant authentication settings in the IAG console
• Verify the result
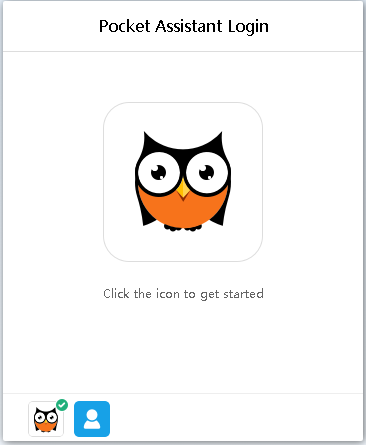
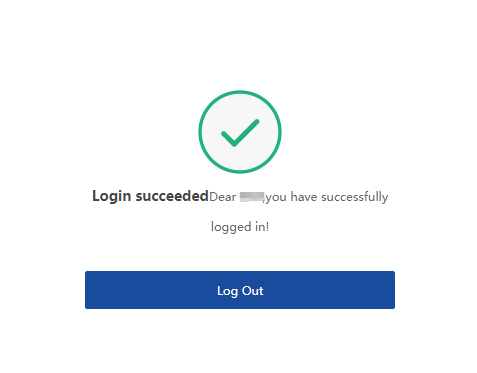
PC client:
 [zyl52]
Mobile client:
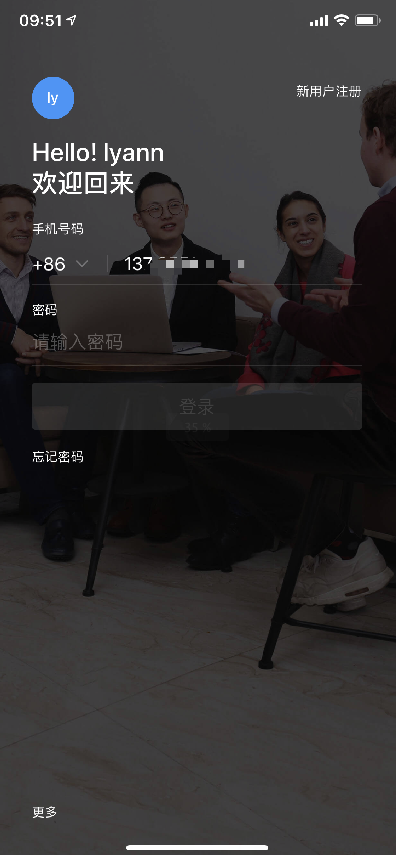
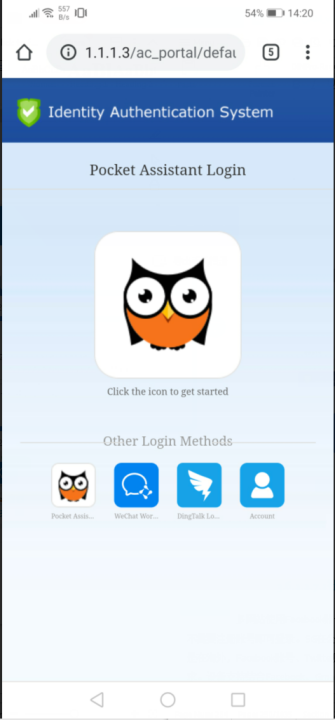
Unlike WeCom-based authentication and DingTalk-based authentication, you do not need to open Pocket Assistant during the Pocket Assistant-based authentication.
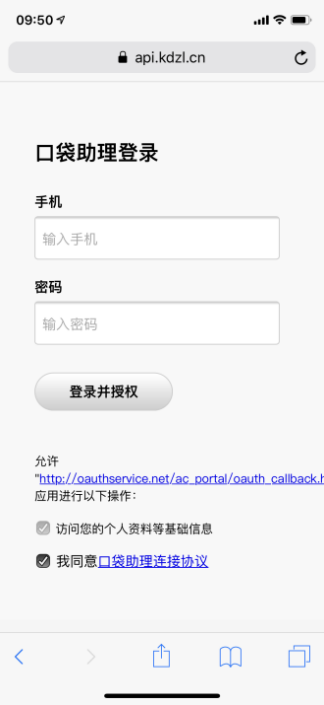
Specifically, access a webpage and click the Pocket Assistant-based authentication icon. The Pocket Assistant login page appears.
Then, enter the mobile number and password to complete the authentication.
![]()
 [zyl53][U54][55]
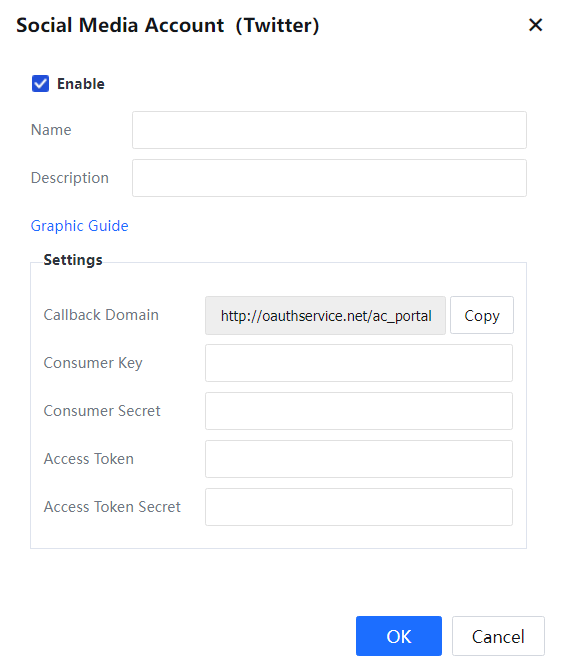
3.5.3.2.2.9 Social Media Account Based Authentication
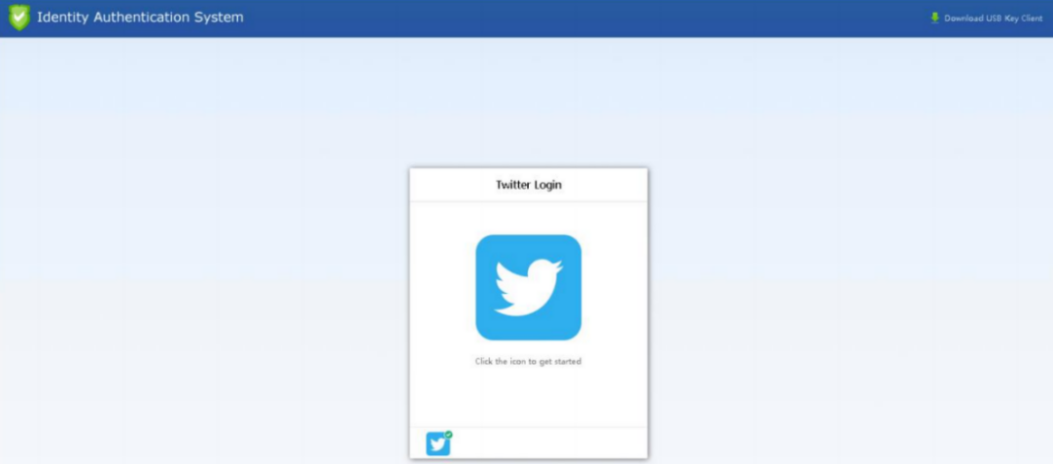
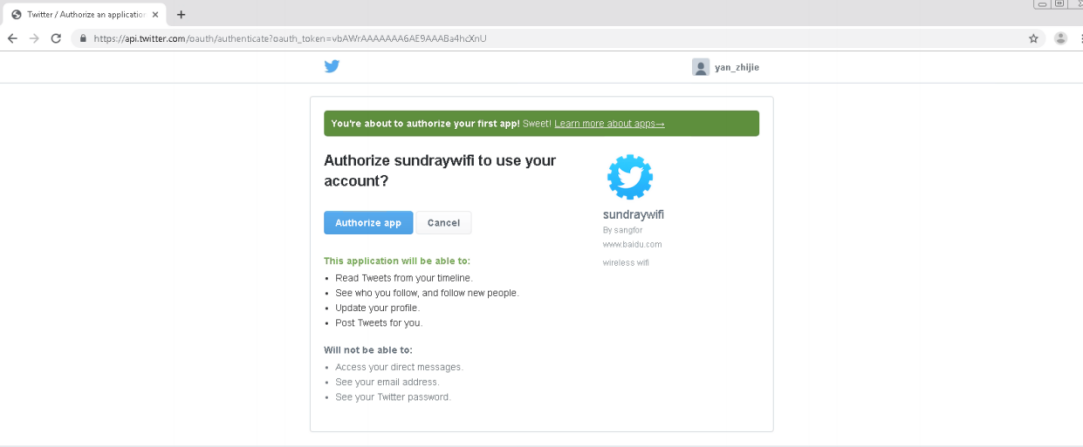
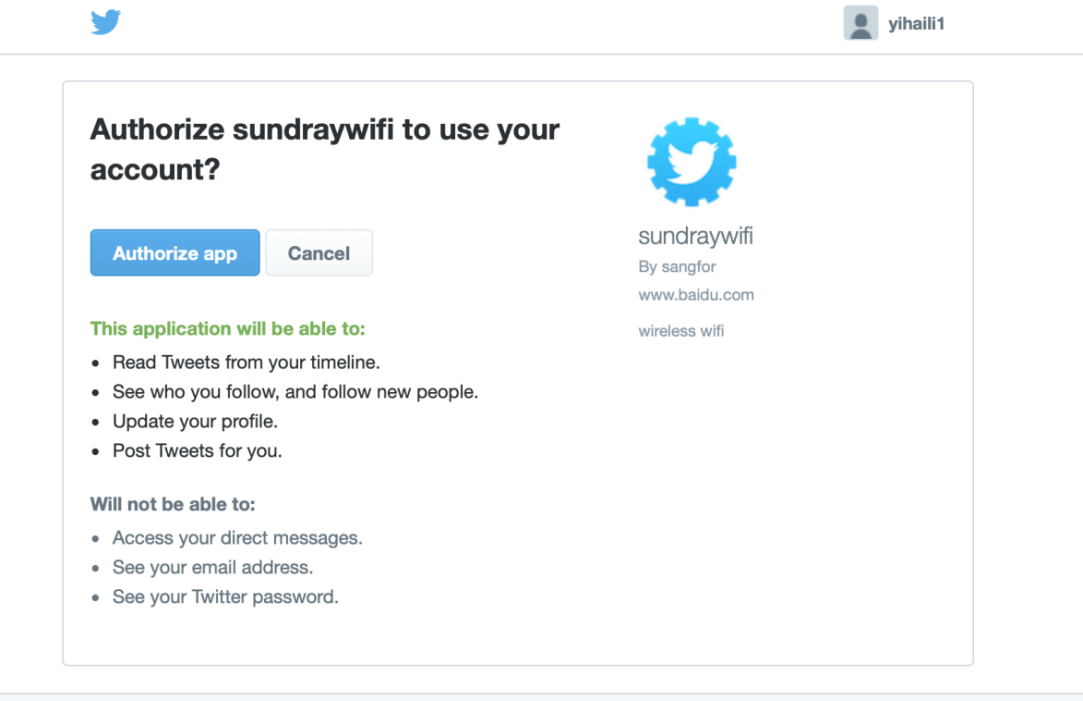
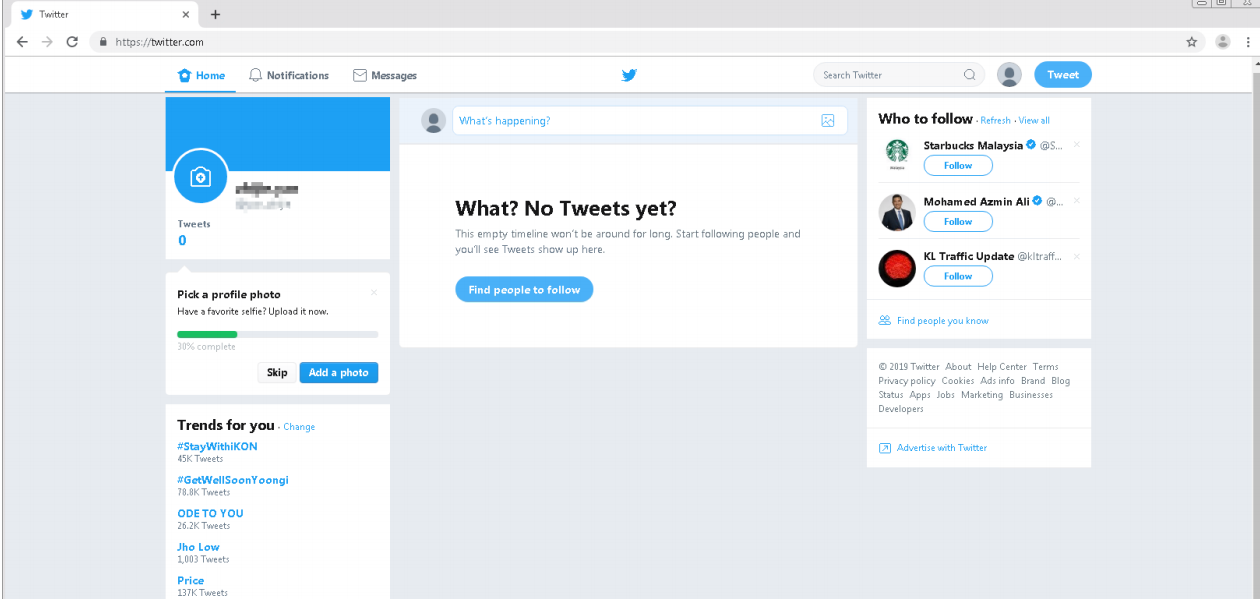
Many websites allow users to log in via Facebook, Twitter, and Google accounts without registering new accounts. Similarly, IAG users hope to pass IAG authentication by using their social media accounts such as FaceBook, Twitter, and Google accounts, to connect to the internet in the public network environment. IAG supports four types of social media account-based authentication: Facebook, Gmail, Line, and Twitter.
To create a corresponding social media account-based authentication server, log in to the IAG console, go to Access Mgt > Authentication > Web Authentication > Authentication Server, click Add, and select Social Media Account.
3.5.3.2.2.9.1 Facebook
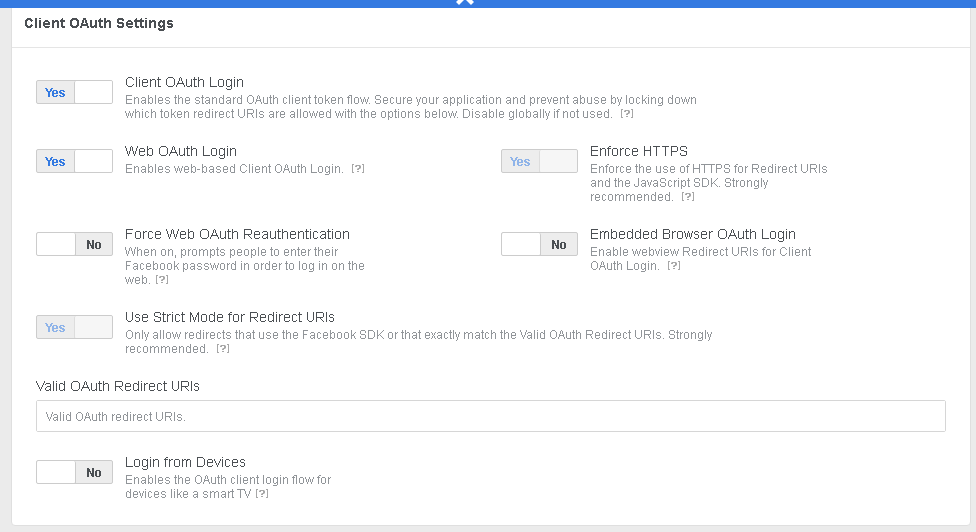
• Complete relevant settings on the Facebook developer platform

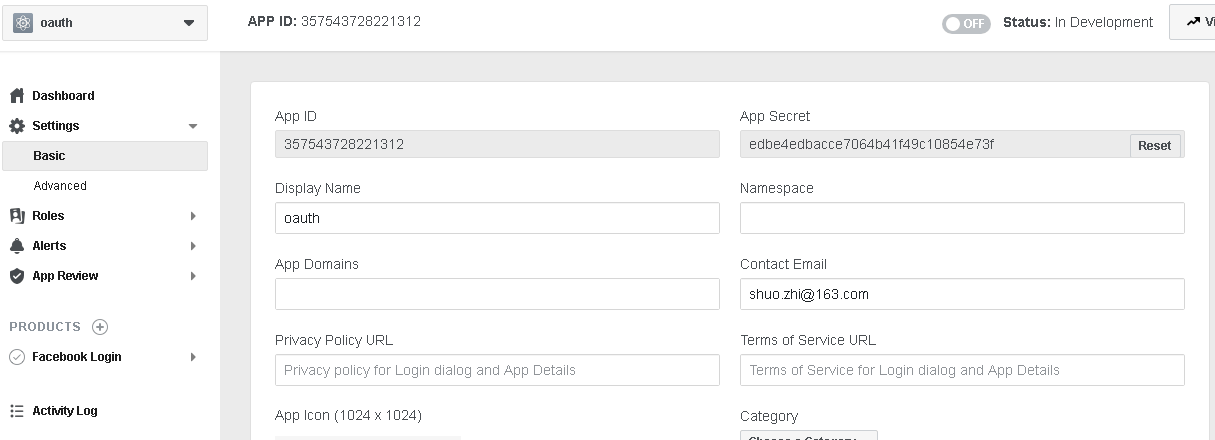
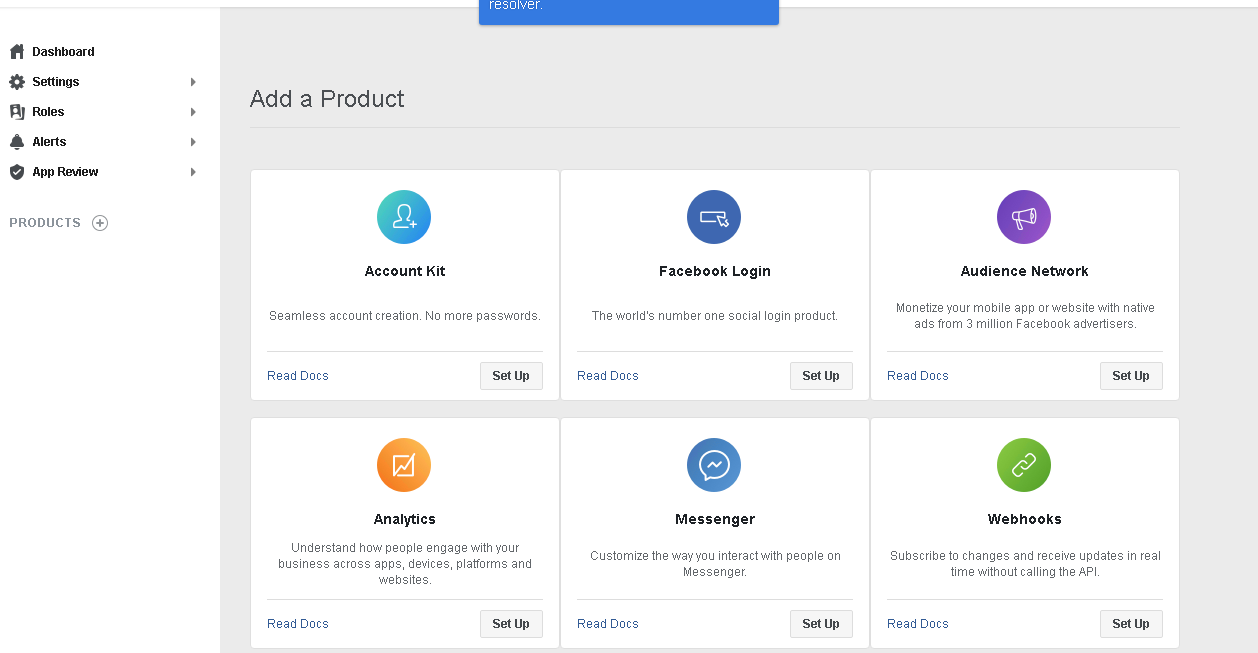
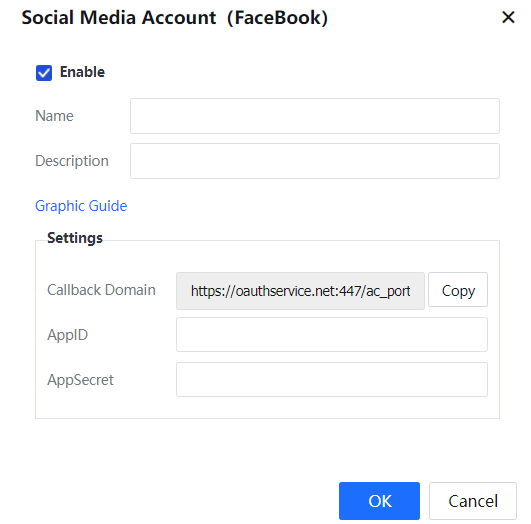
• Complete relevant authentication settings in the IAG console
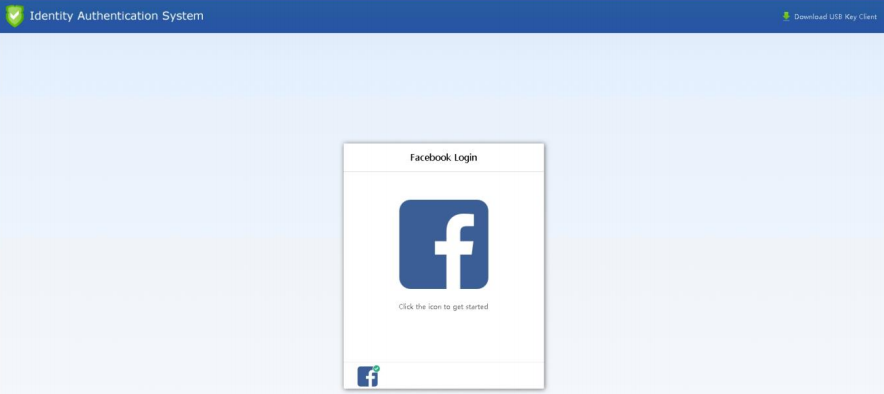
• Verify the result

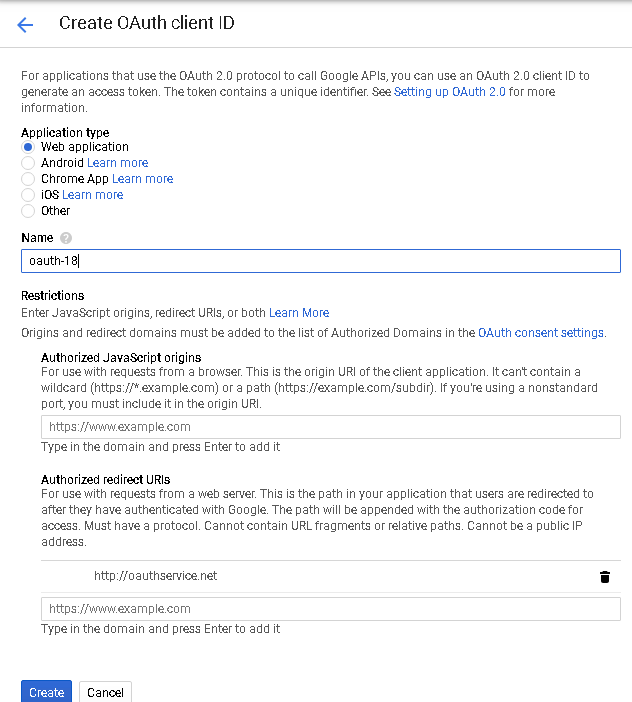
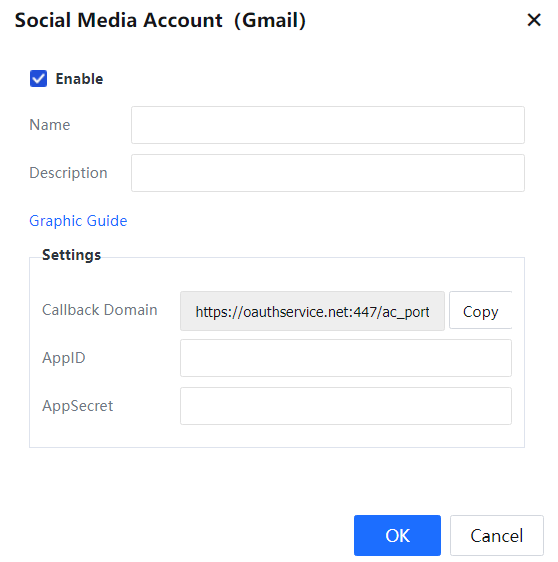
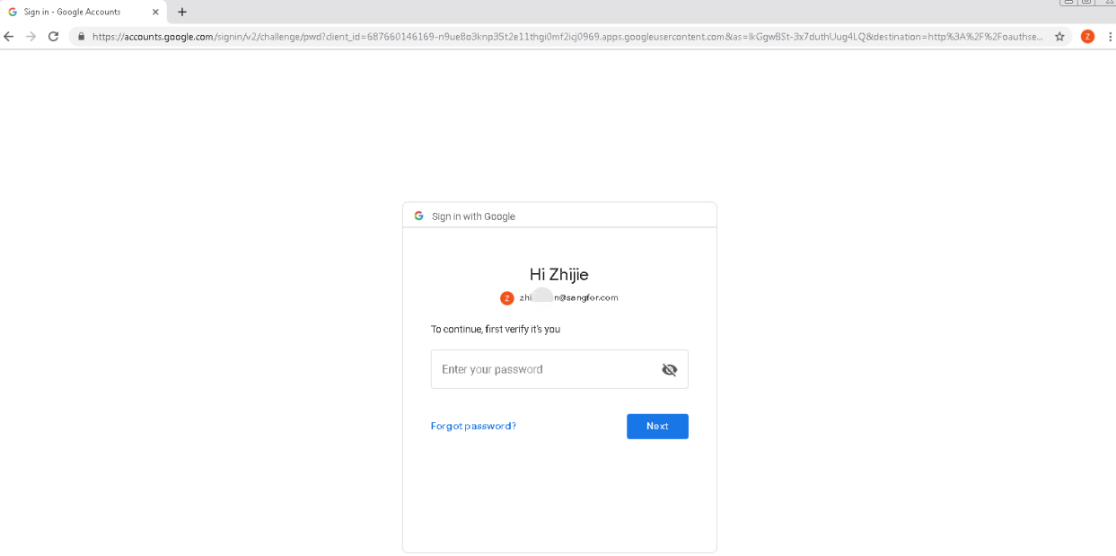
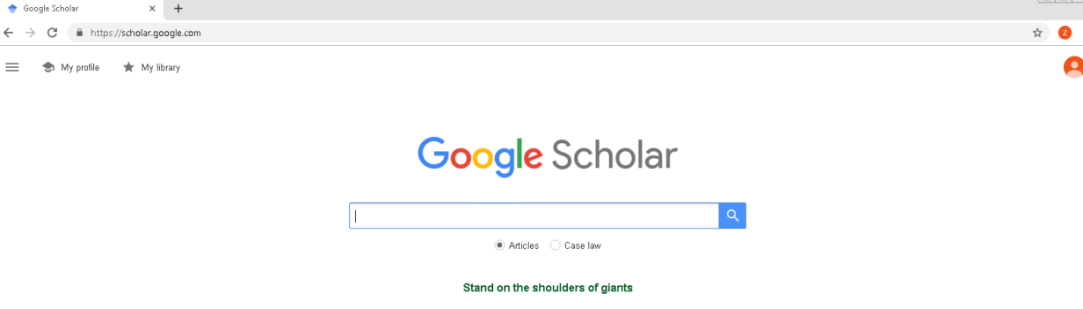
3.5.3.2.2.9.2 Gmail
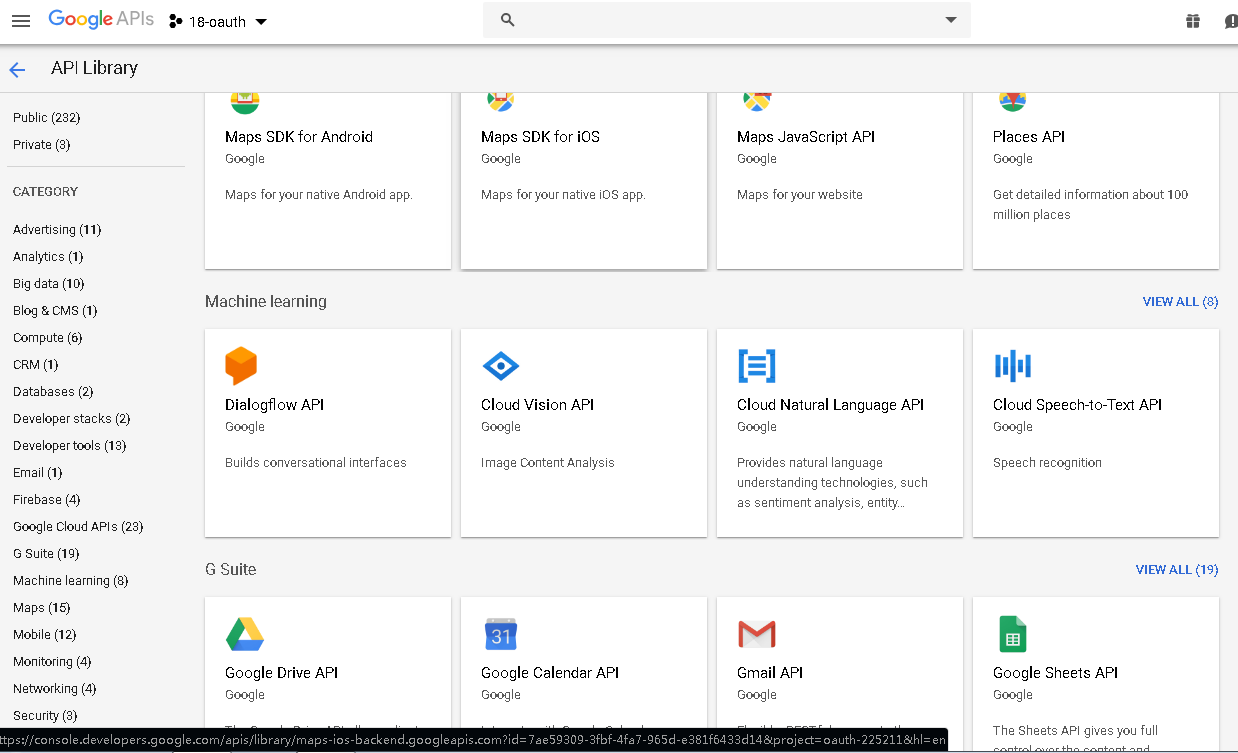
• Complete relevant settings on the Google developer platform
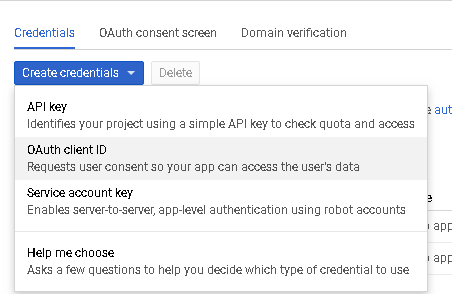

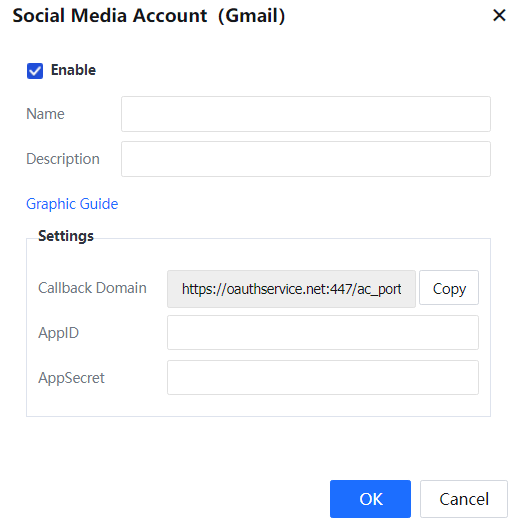
• Complete relevant authentication settings in the IAG console
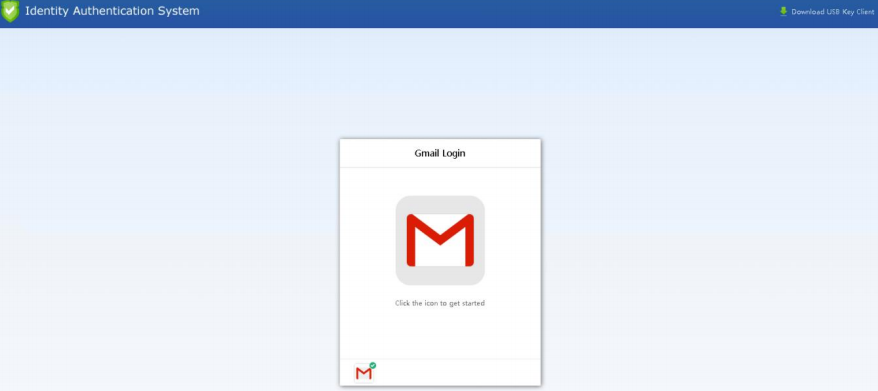
• Verify the result
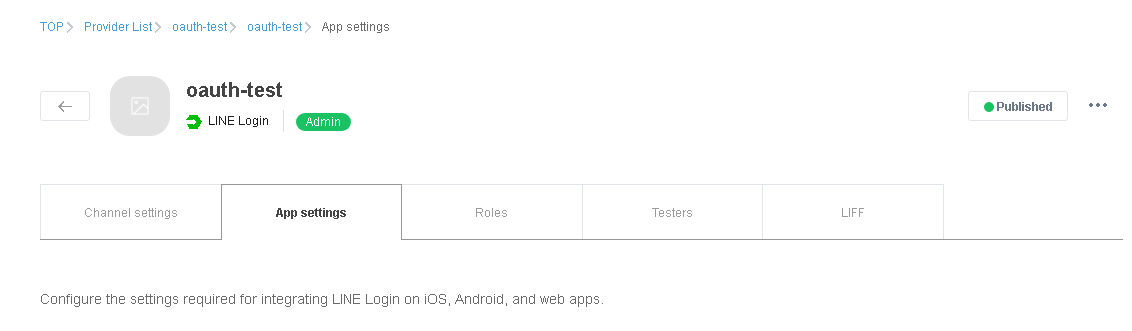
3.5.3.2.2.9.3 Line
• Complete relevant settings on the Line developer platform
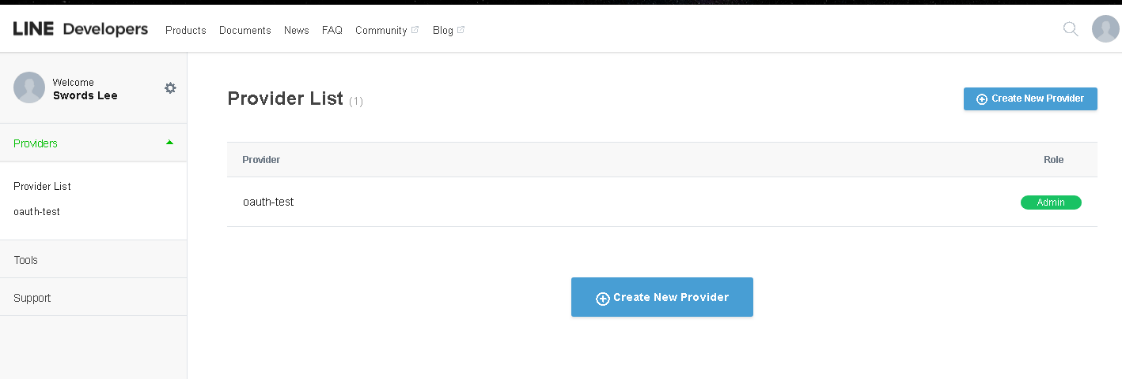
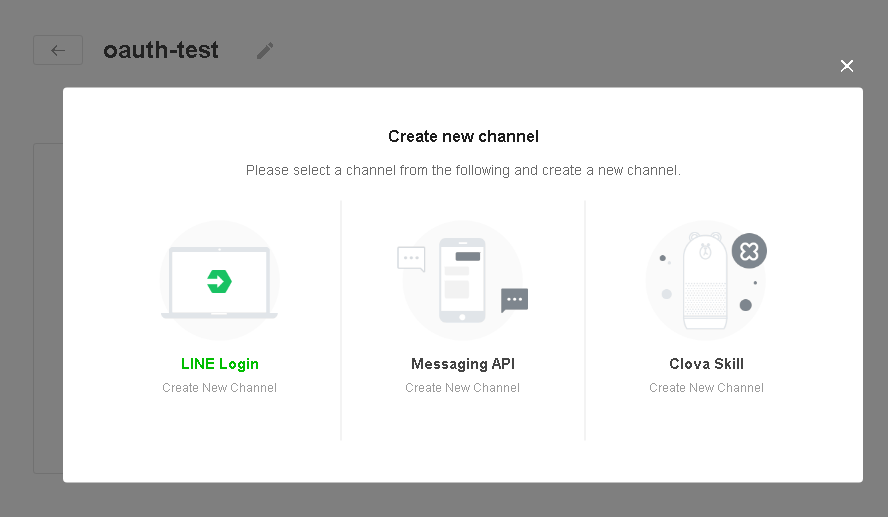
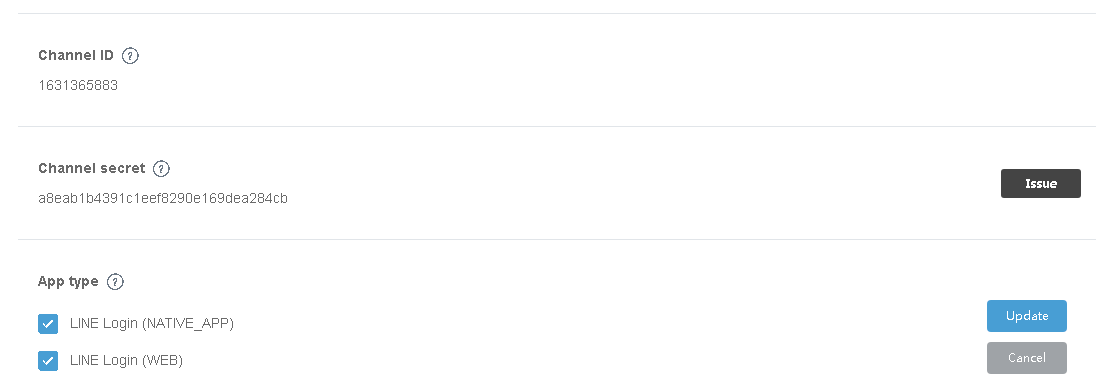

• Complete relevant authentication settings in the IAG console

• Verify the result
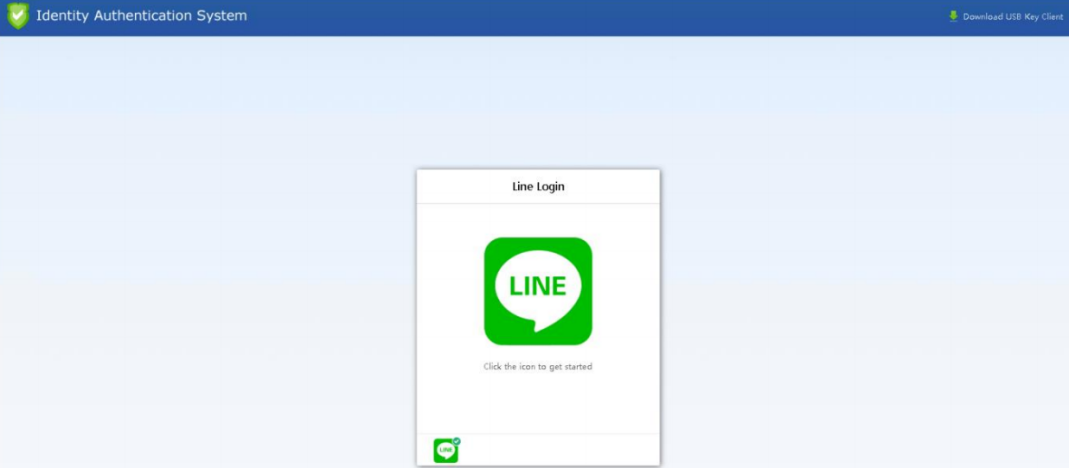
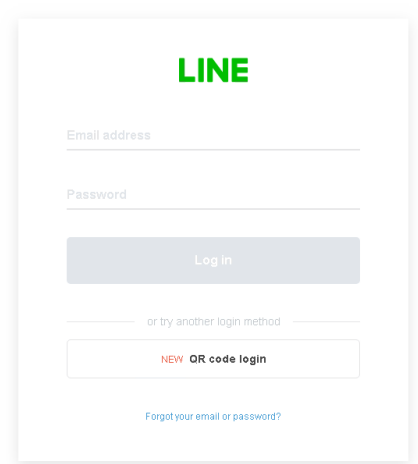
[zyl56]
3.5.3.2.2.9.4 Twitter
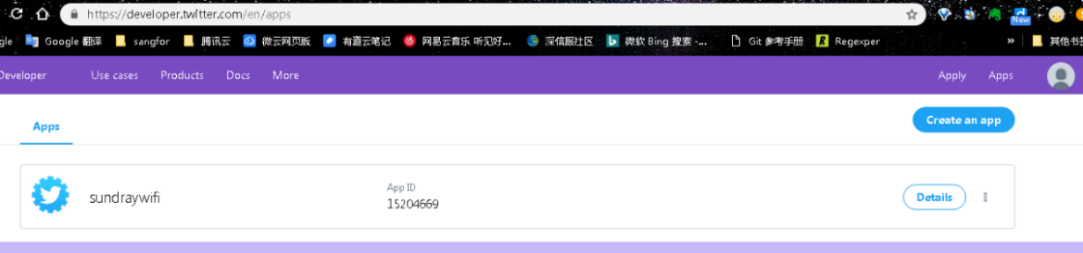
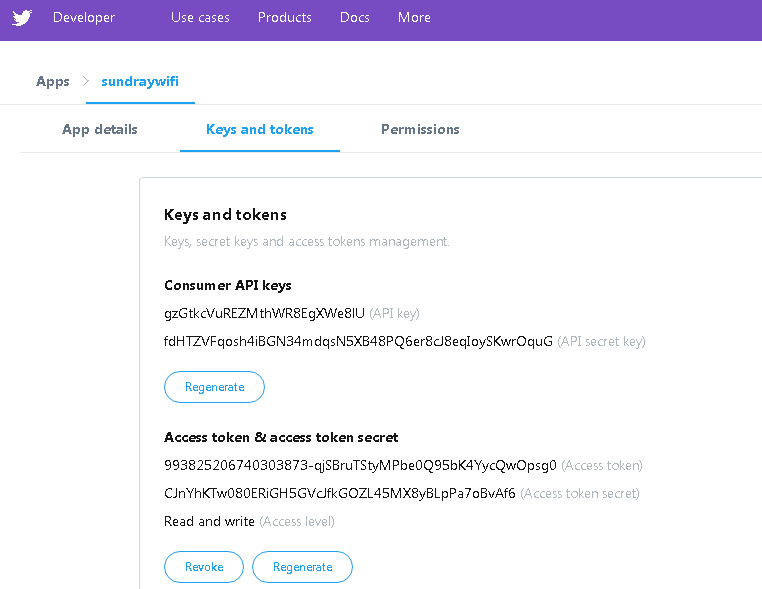
• Complete relevant settings on the Twitter developer platform
• Complete relevant authentication settings in the IAG console
• Verify the result
3.5.3.2.2.10 Database Server
Before performing database SSO, add a database server on the Auth Server page and set related parameters.
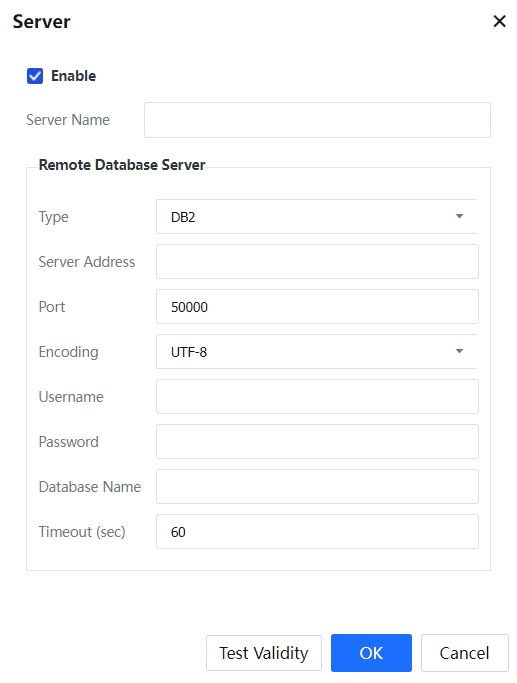
Select Enable To enable the external authentication server.
Server Name: Name of the database server to be added.
Type: The type of database to be added, which can be set to DB2, Oracle, MS SQL, or MySQL. Server Address: Address of the database server.
Port: Listening port of the database.
Encoding: The encoding type of the database, which can be set to UTF-8, GBK, or BIG5. Username: Name of a user with permission to query SQL statements.
Password: Password of the user.
Database Name: Database name.
Timeout (sec): Timeout duration for the IAG to request data from the database server. The default value is 60 seconds. The timeout duration can be adjusted based on the server load and user quantity.
Click Test Validity to test the connectivity between the IAG and the database server and the effectiveness of the initial configuration.
3.5.3.2.2.11 H3C CAMS Server
Before performing H3C CAMS SSO, add an H3C CAMS server on the Auth Server page and set related parameters.
Select Enable to enable the external authentication server.
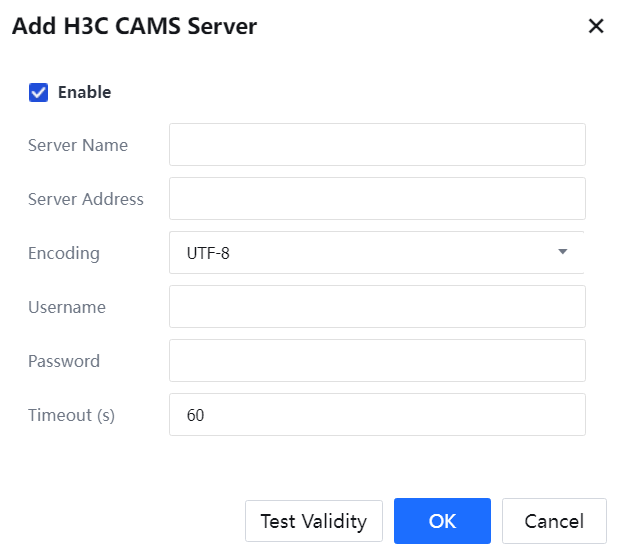
Server Name: Name of the H3C CAMS server to be added.
Server Address: IP address and port number of the H3C CAMS server, in the format of IP address: Port or URL.
Encoding: The encoding type of the database can be set to UTF-8, GBK, or BIG5. If the type of coding is incorrectly selected, the username may be displayed as garbled characters.
Username: Username of the system administrator of the H3C CAMS.
Password: Password of the system administrator.
Timeout (s): timeout duration for the IAG to connect to the H3C CAMS system. The timeout duration can be adjusted based on the server load. However, we recommend you use the default value of 60 seconds.
Click Test Validity to test the connectivity between the IAG and the server.
3.5.3.2.2.12 Third-Party Auth System
The LAN user can select the third-party authentication system servers, including CAS, OAUTH, and SAML2.0, in the password authentication method.
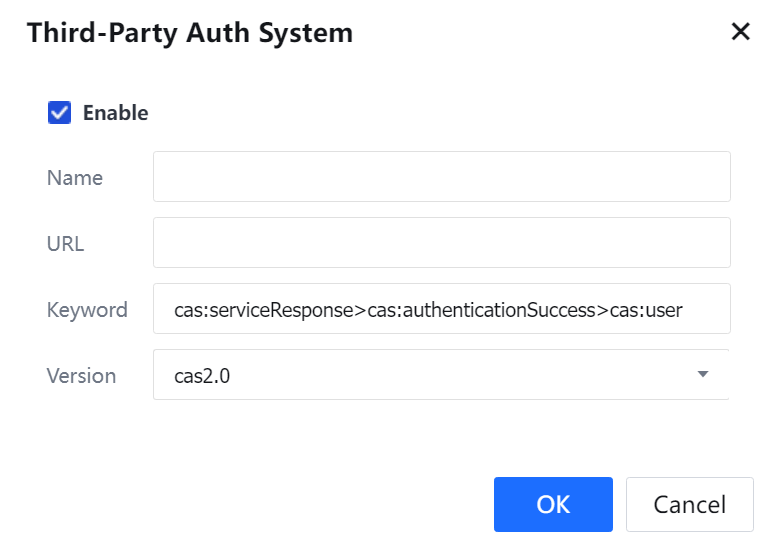
To enable a CAS, click Enable.
Name: Specifies a different name for the third-party authentication system.
URL: Specifies the URL of the third-party authentication system. Example: https://ip:8443/cas/login
Keyword: Specifies the keyword to identify the response and extract the username. Default format: cas:serviceResponse>cas:authenticationSuccess>cas:user
Version: Specifies the version of the third-party authentication system, cas2.0 or cas3.0. To save and apply the settings, click Commit.
The device is equipped with seven OAuth authentication methods. If Oauth authentication other than the seven authentication methods needs to be implemented, configure the OAUTH server.

Choose Access Mgt > Authentication > Web Authentication > Authentication Policy > Add authentication policy. Fill in the authentication range and use configured Oauth authentication server to complete the configuration.
Third-Party Auth System (SAML 2.0)
You may click Download Sample on the top right corner to let IAG authenticate with Azure AD with SAML 2.0.
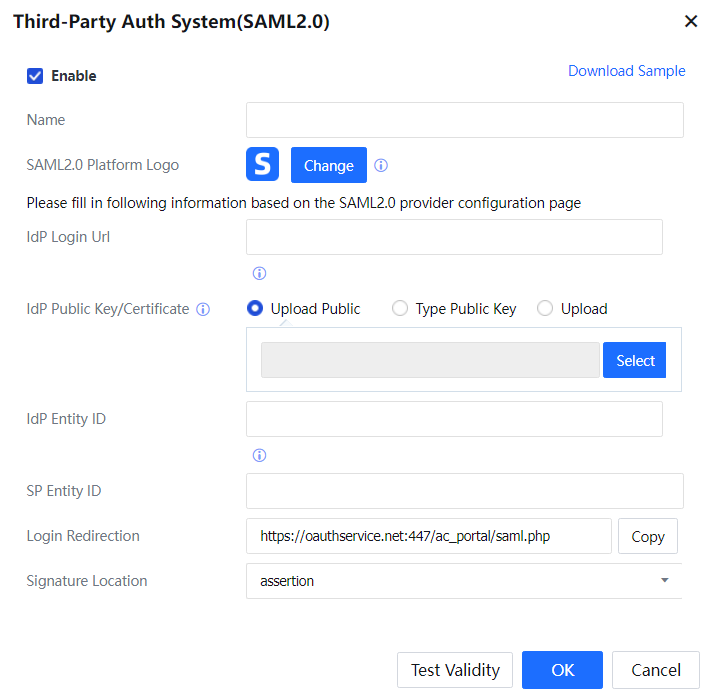
Suppose the customer has a third-party authentication server available for authenticating intranet users. In that case, the device's intranet users can be authenticated by the third-party authentication server through SSO. In addition, the users can obtain relevant Internet access permission. The same username and password are used for authentication on the IAG and the third-party authentication server. The supported SSO types include MS AD domain SSO, Radius SSO, proxy SSO, POP3 SSO, Web SSO, database SSO, and SSO on Sangfor devices and other third-party devices, such as Ruijie SAM system, H3C CAMS system, and HTTP/HTTPS authentication system of CITY HOT. In addition to the basic configuration, you need to configure the users, authentication server, and Auth Method.
3.5.3.1.3.1 MS AD Domain
You can implement Domain SSO if a Microsoft AD server is deployed for user management on the customer's network and intranet users log in using domain accounts. Users can access the Internet by logging in to the domain without the need to get authenticated on the IAG. Domain SSO can be implemented by:
The preceding methods can be used independently or combined. They do not conflict with each other. You can improve the SSO success rate by combining several modes.
Mode 1: By delivering the login script in the domain
Configure the logon.exe and logoff.exe scripts on the AD server. When a user logs in to the domain or logs out from the domain, the IAG executes the login or logout script based on the domain policy and implements the user's login or logout.
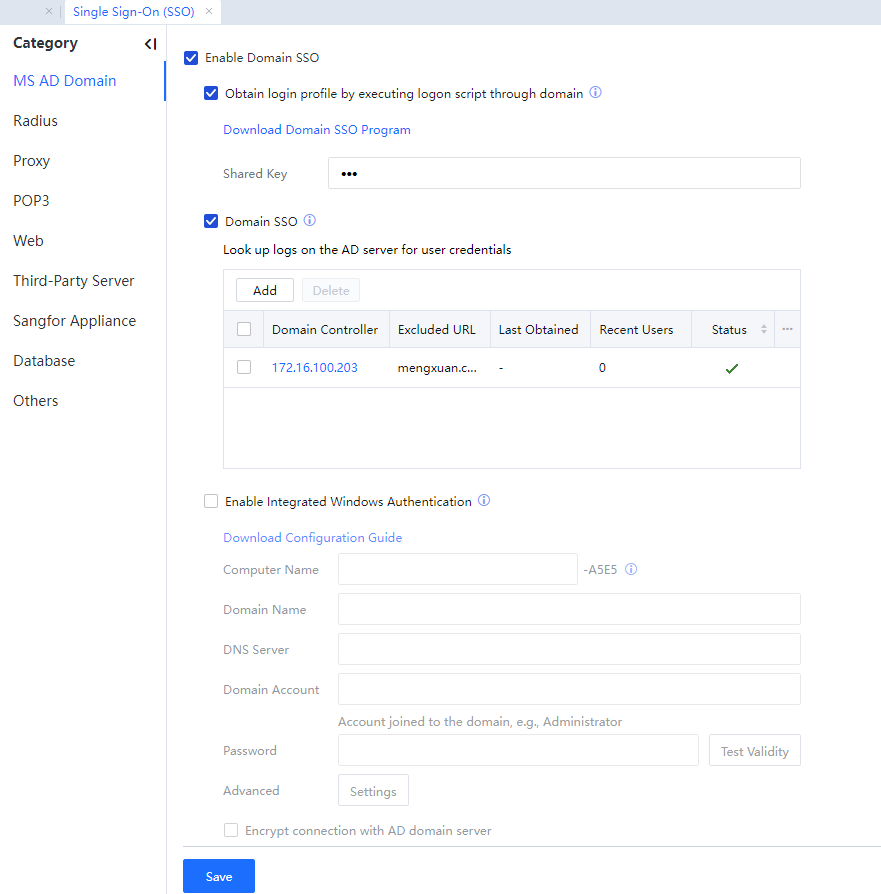
Configure SSO on the IAG as follows:
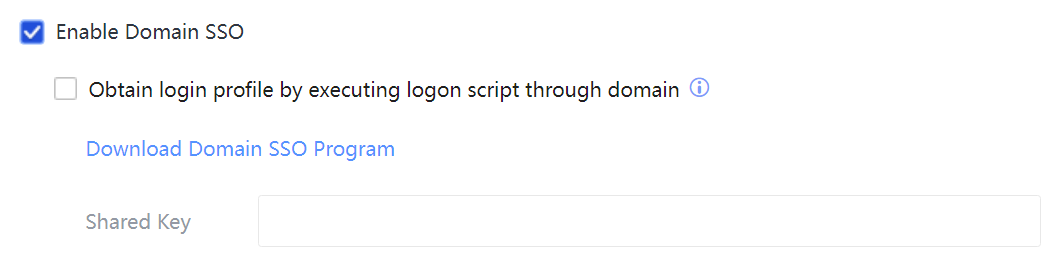
Step 1.Select Enable Domain SSO.
Step 2.Select Obtain login profile by executing the logon script through the domain.
Step 3.In Shared Key, set the shared key used by the login script to send information.
Mode 2: By obtaining login information through the program embedded in IAG
Embed an SSO client program ADSSO on the IAG. The program will periodically obtain login information from the AD server and report the received information to the IAG for implementing SSO.
Configure SSO on the IAG as follows: Select Enable Domain SSO.
Select Domain SSO.
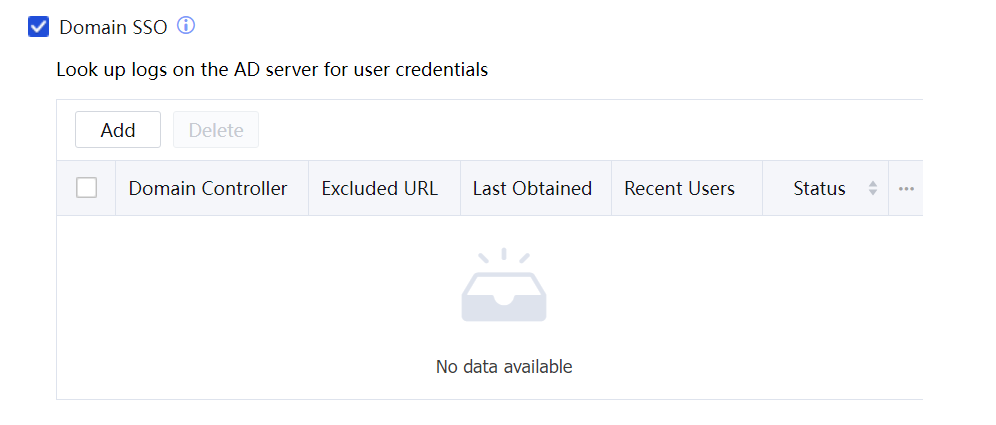
Click Add to add a domain server.
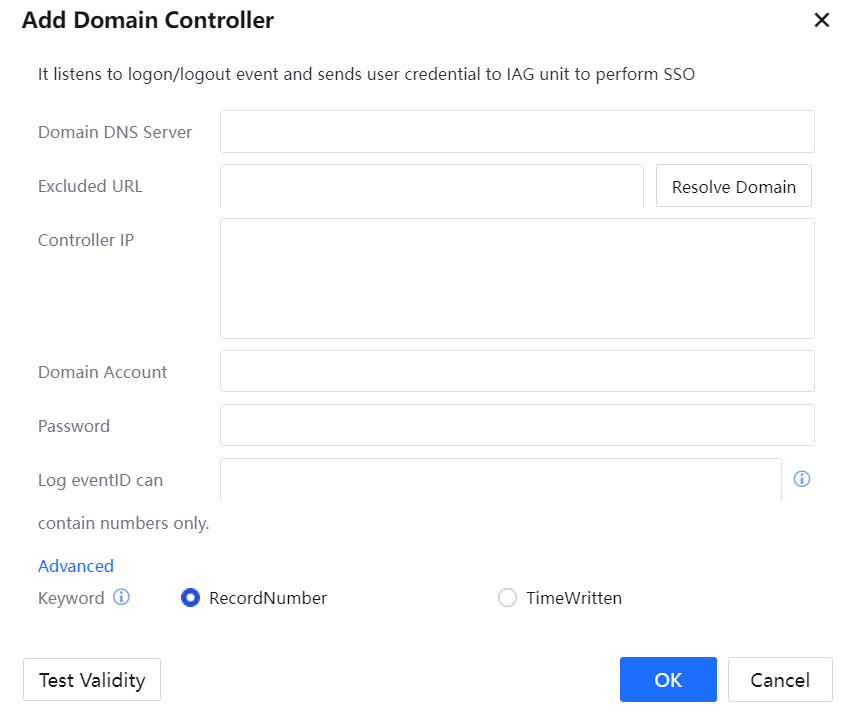
Domain DNS Server: Domain name of the domain DNS server. The domain DNS server must resolve the domain name. Click Resolve Domain to parse the IP addresses of all domain controllers.
Domain Name: Domain name of the domain server.
Controller IP: IP address of the domain server.
Domain Account: Enter an account with the domain administrator's permission. The user must be an administrator or be added to the administrator group.
Password: Password of the domain account.
Log eventID: Fill in AD domain event IDs that are separated using commas
Advanced Keyword: RecordNumber filter log or TimeWitten filter log
Click Test Validity to test the domain controller. Click OK[A57] to save the settings.
Mode 3: By IWA (Integrated Windows Authentication)
IWA is a common Auth Method that is applicable in Windows. In IWA, the IAG and intranet computers need to be added to the domain. When an intranet user opens a webpage, the computer automatically accesses the IAG and submits an identity credential for implementing SSO.
Configure SSO on the IAG as follows: Select Enable Domain SSO. Select Enable Integrated Windows Authentication.

Computer Name: The computer name of the IAG after being added to the domain. In the computer name, the last four digits are the last four digits of the gateway license. The field prior to the gateway license can be defined. It consists of letters, digits, and hyphens (-) and contains a maximum of 10 bytes.
Domain Name: The name of the domain to which the IAG was added.
DNS Server: The IP address of the DNS server corresponding to the domain.
Domain Account: The account used by IAG to join the domain.
Password: The password of the domain account.
Click Test Validity to test whether the parameters are valid. Then click Commit.
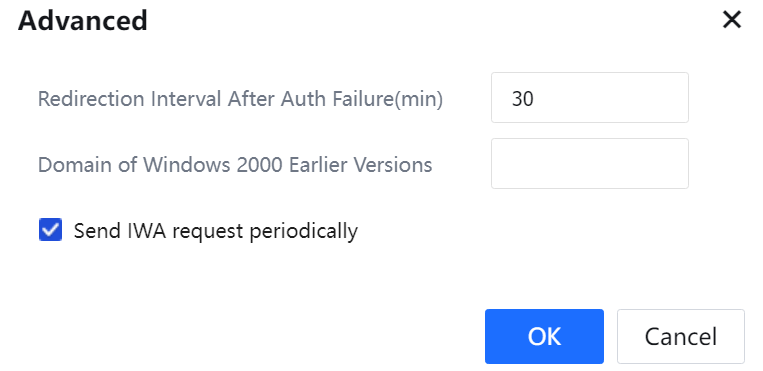
Redirection Interval After Auth Failure (min): Interval for redirection and authentication after IWA SSO fails.
Domain of Windows 2000 Earlier Versions: If the OS on the domain server is a version earlier than Windows Server 2000, you need to set the domain name here.
The server signing requirement enabled in the AD domain will affect the IWA single sign-on function. Therefore, if the server signing requirement is enabled on the AD domain, you need to enable the encrypted connection with the AD domain server at the IWA single sign-on location.
Mode 4: Obtain login profile by listening to computer login to the domain
In this mode, the IAG intercepts data of the PC that logs in to the domain server and obtains login information from the data, thereby implementing SSO. No component needs to be installed on the domain server, but the data of intranet PCs that log in to the domain server needs to be mirrored to the device.
Configure SSO on the IAG as follows:
Select Enable Domain SSO.
Select Obtain login profile by listening to computer login to domain.
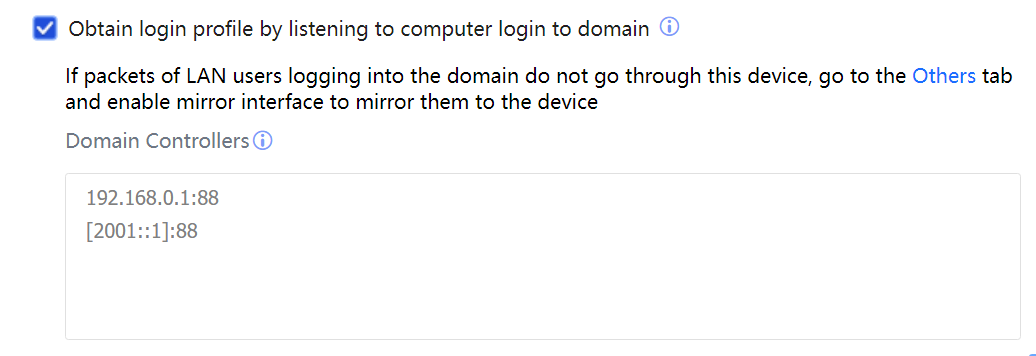
Domain Controllers: Enter the domain server's IP address and listening port. If there are multiple domain servers, enter the information about one server in each row. The default listening port is UDP 88.
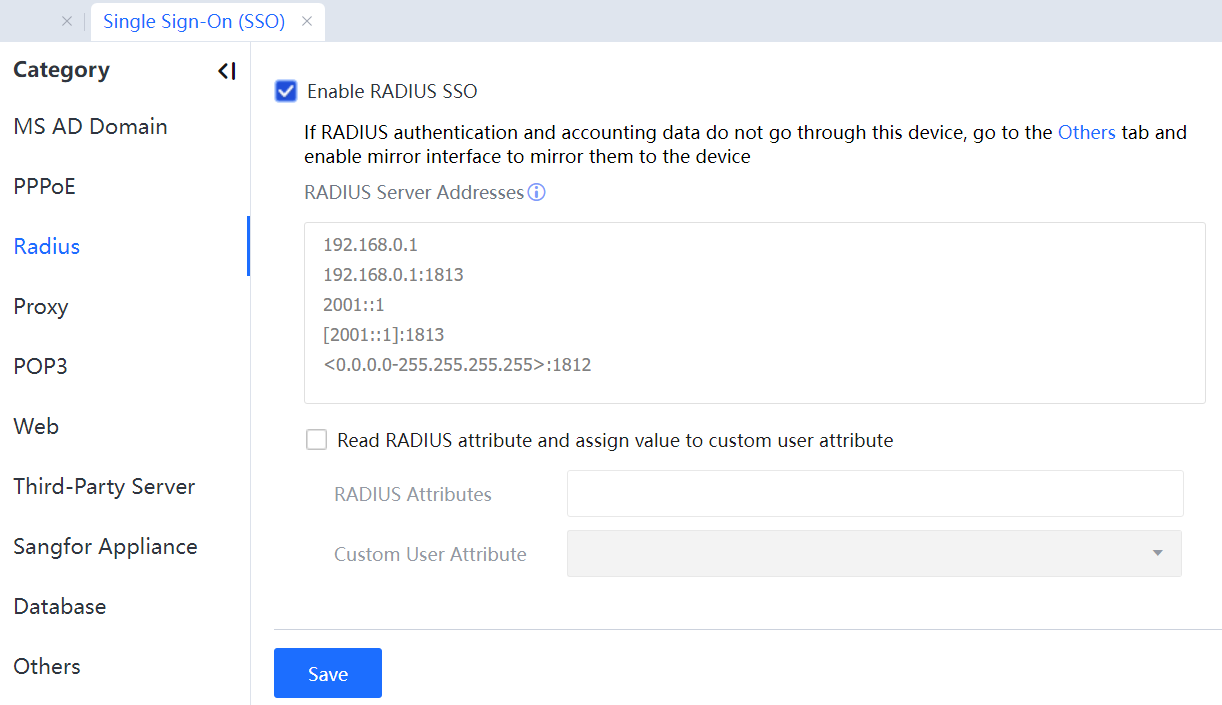
3.5.3.1.3.2 Radius
You can enable Radius SSO if a Radius server exists and the Radius authentication and charging packets pass the IAG. An authenticated user gets online on the IAG by using a Radius username.
The configuration procedure is as follows:
Step 1.Select Enable RADIUS SSO.
Step 2.In RADIUS Server Addresses, enter the IP address of the Radius server.
Step 3.Suppose Radius authentication and charging packets do not pass the IAG. In that case, a mirrored port needs to be set on the IAG, and the authentication and charging data need to be mirrored to the IAG through the mirrored port.
Step 4.Select Read RADIUS attributes and assign value to custom user attribute. A Radius user has some attribute values; you can set them on the IAG. When a Radius user is authenticated, this option must be selected if the user attributes must be synchronized to the IAG.
Step 5.In RADIUS Attribute, set the Radius attribute to be read.
Step 6.In Custom User Attribute, set a custom user attribute to which the read Radius attribute value is assigned.
3.5.3.1.3.3 Proxy
You can use the Proxy SSO if a proxy server is deployed and intranet users access the Internet using accounts and passwords through the proxy server. An intranet user is automatically authenticated on the IAG after being authenticated on the proxy server. A user can access the Internet after connecting to the proxy server without getting authenticated on the IAG. Proxy SSO can be implemented by listening or executing the specified login control. The configuration page is shown in the following figure.
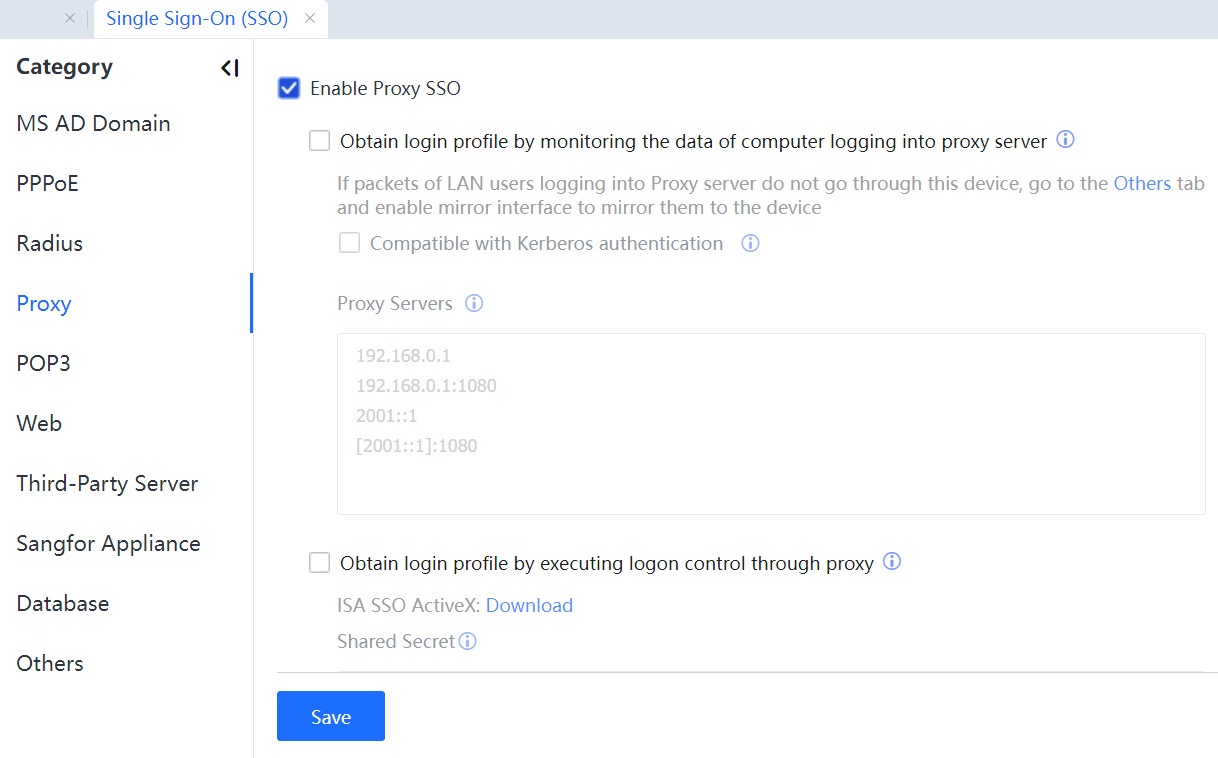
Enable Proxy SSO: to enable or disable proxy SSO.
Obtain login profile by monitoring the data of computer logging into proxy server: If this option is selected, the IAG obtains login information about users through interception. If users logging in to the proxy server does not pass the IAG, a mirrored listening port needs to be set.
Compatible with Kerberos authentication: If the proxy server is an ISA server that adopts IWA, this option needs to be selected for implementing SSO. This option is applicable only when login packets pass the IAG and are inapplicable if a mirrored port is set to mirror the login data to the IAG.
Proxy Servers: IP address of the proxy server.
Obtain login profile by executing login control through proxy: Configure a login script on the proxy server. When a user logs in, the proxy server will automatically execute this script and send login packets to the IAG.
3.5.3.1.3.4 POP3
You can use POP3 SSO if a POP3 mail server is deployed and intranet users log in to the mail server with accounts and passwords. A user can access the Internet after being authenticated by the POP3 server. See the following figure.
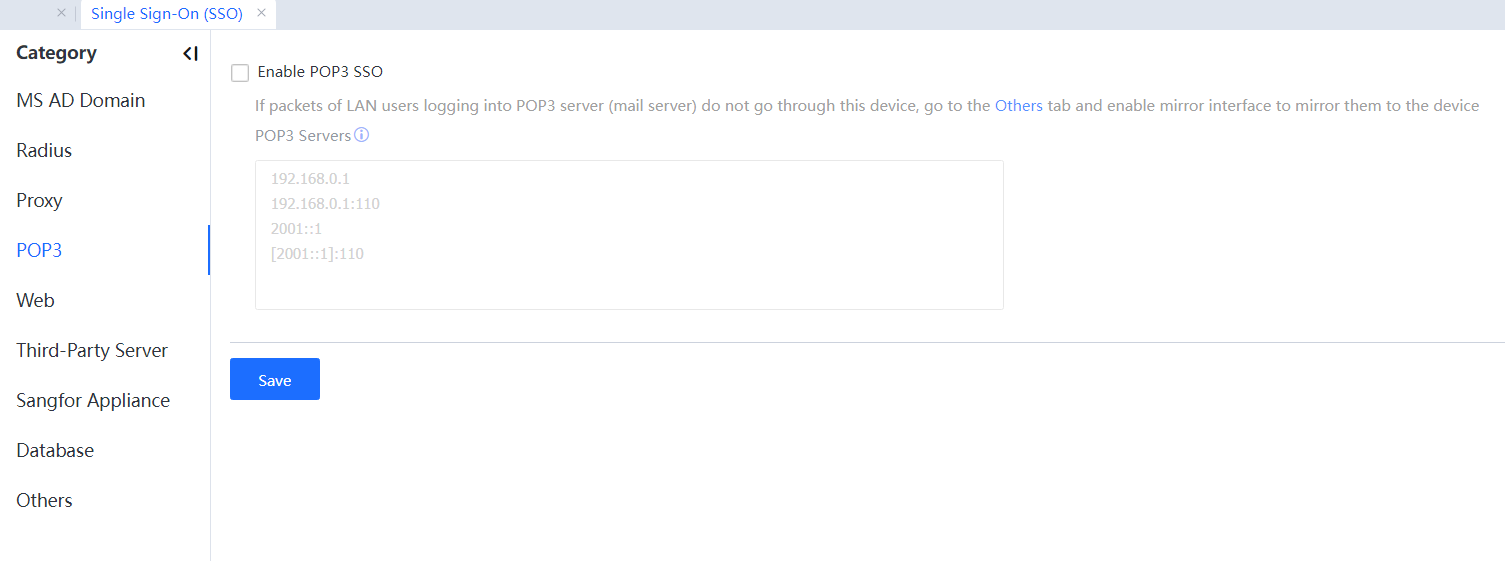
Enable POP3 SSO: to enable or disable POP3 SSO.
POP3 Servers: IP address of the mail server.
For details about the configuration procedure, see Chapter 4.1.3.
3.5.3.1.3.5 Web
Suppose the WEB server has been deployed in the user network environment, and the client LAN users have respective accounts and passwords for logging in to the WEB server. In that case, the LAN users can access the Internet using a WEB single sign-on (SSO) method after they pass the WEB server's authentication. The configuration interface is as below:
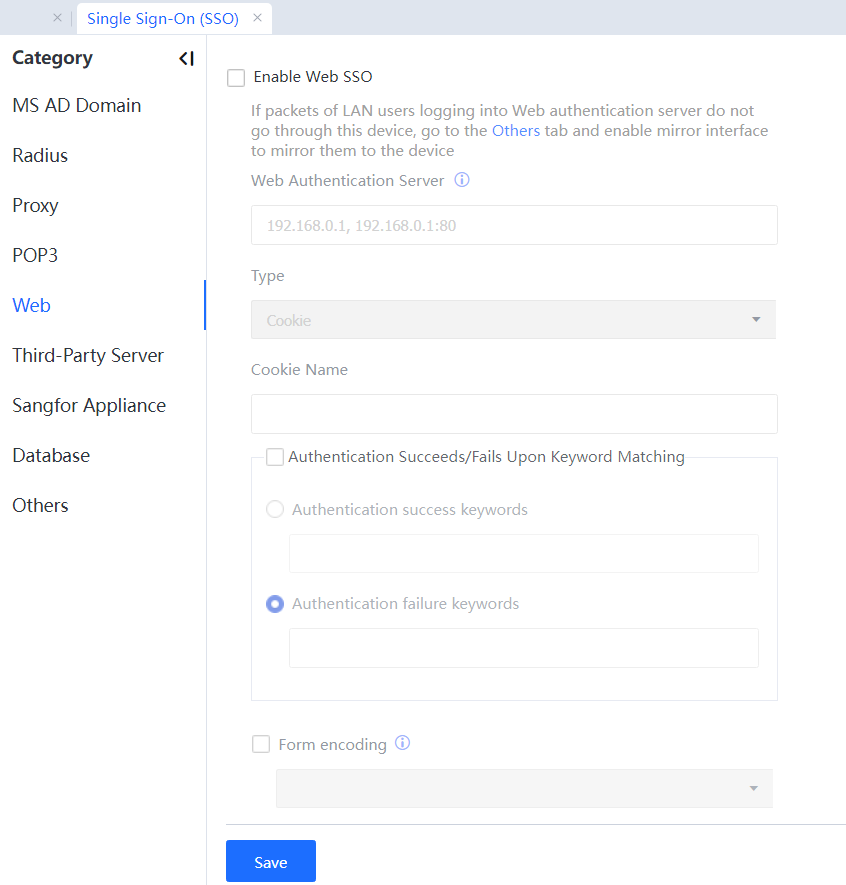
Enable Web SSO: Enable and disable the Web SSO.
Web Auth Server: Set the IP address of the Web server.
Type: Select from Cookie, Form submitted using POST, and Parameter in URL request, which applies to different Web authentication servers.
Cookie: After the user's authentication succeeds, the Web server returns one Cookie value to determine whether the login succeeds.
Cookie Name: Fill in the Cookie name returned by the server after the authentication succeeds.
Form submitted using POST: Select this type when the username is submitted using the POST method.
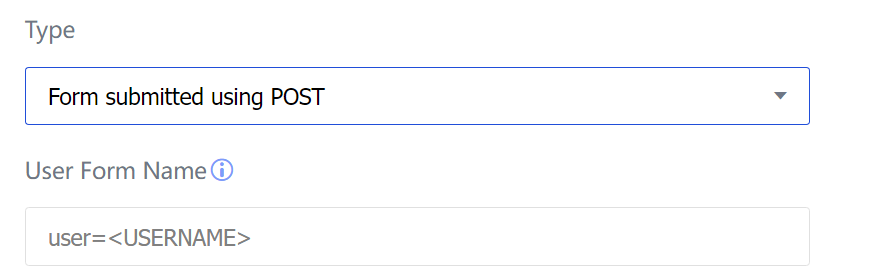
User Form Name: Fill in the user form name submitted to the server during Web authentication, supporting a regular expression.
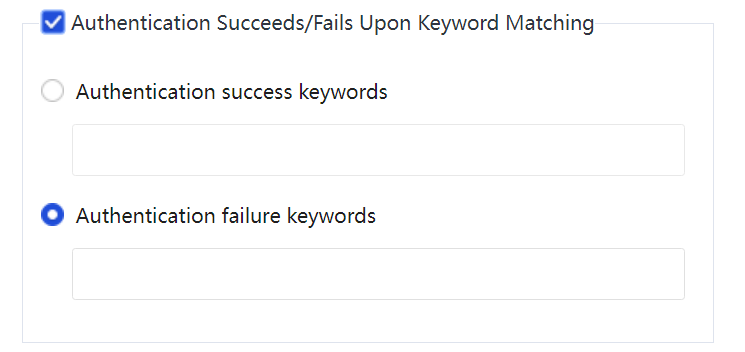
Support enabling/disabling the Authentication Succeeds/Fails Upon Keyword Matching:
Authentication success keywords: Refer to the keywords for identifying whether the Web login succeeds. If the returned result includes preset keywords, the Web SSO succeeds.
Authentication failure keywords: If the returned result includes preset keywords, it indicates that the Web SSO fails.
Parameter in URL request: Select this when authentication information is submitted through the HTTP GET method during web authentication.
URL Parameter: Fill in parameter names corresponding to authentication fields in the URL request.

Form Encoding: If gibberish appears, try to specify the encoding type; otherwise, the device will automatically identify the selected encoding code, and no setting is required.
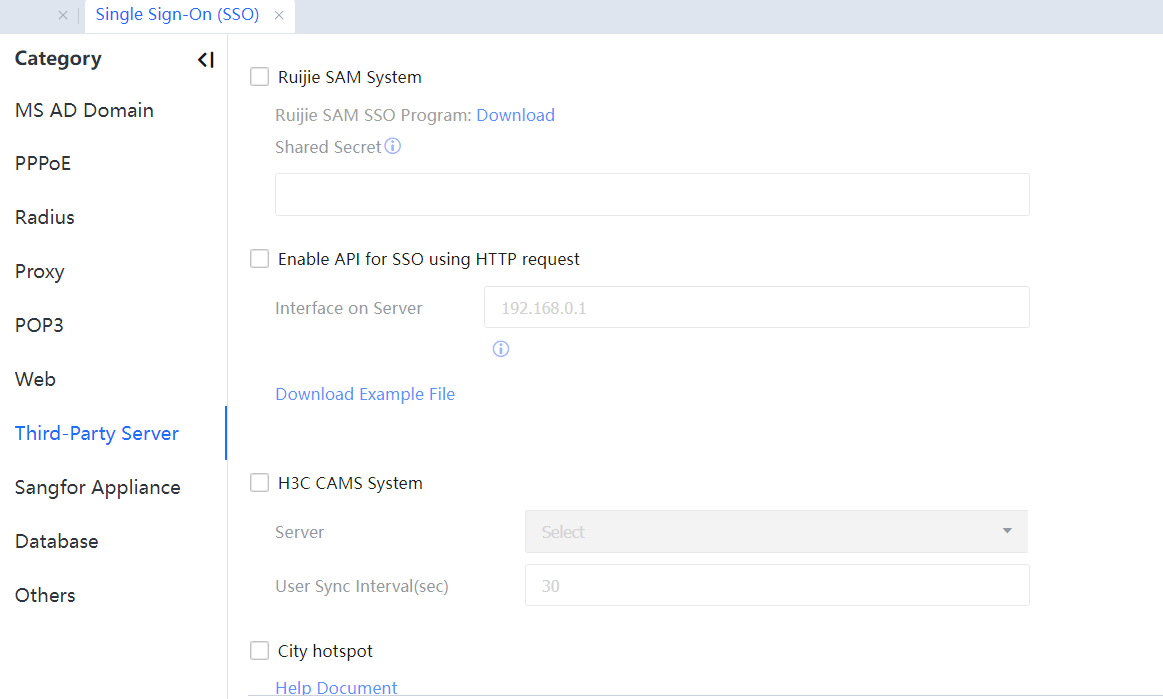
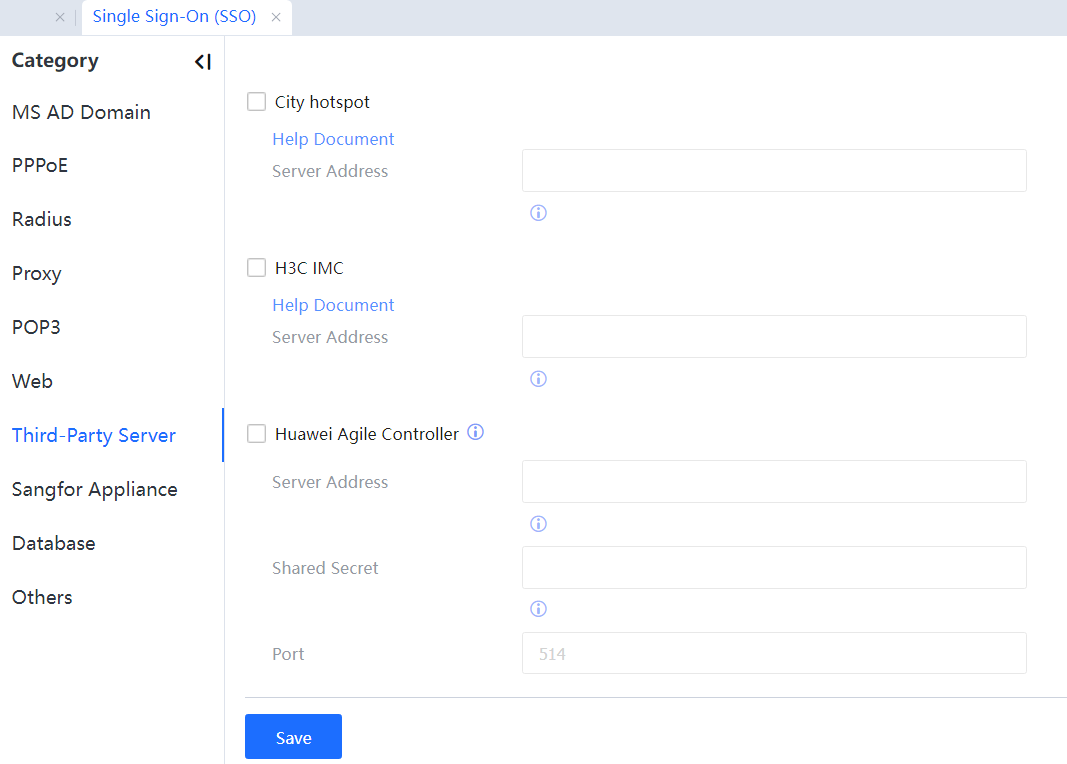
3.5.3.1.3.6 Third-Party Server
If a third-party authentication system is deployed for user authentication and organization structure management, the IAG can integrate with the third-party authentication system to implement SSO. Currently, the Ruijie SAM system, HTTP SSO interface, H3C CAMS system, web authentication system of City hotspot, H3C IMC system, and Huawei Agile Controller are supported. See the following figure.
For details about the configuration procedure, see Chapter 4.1.5.
3.5.3.1.3.7 Sangfor Appliance
The IAG can work with another IAG to implement authentication, one for authentication and the other for audit and control. After a user is authenticated on the authentication IAG, the audit and control IAG can synchronize the user information from the authentication IAG for audit and control. See the following figure.
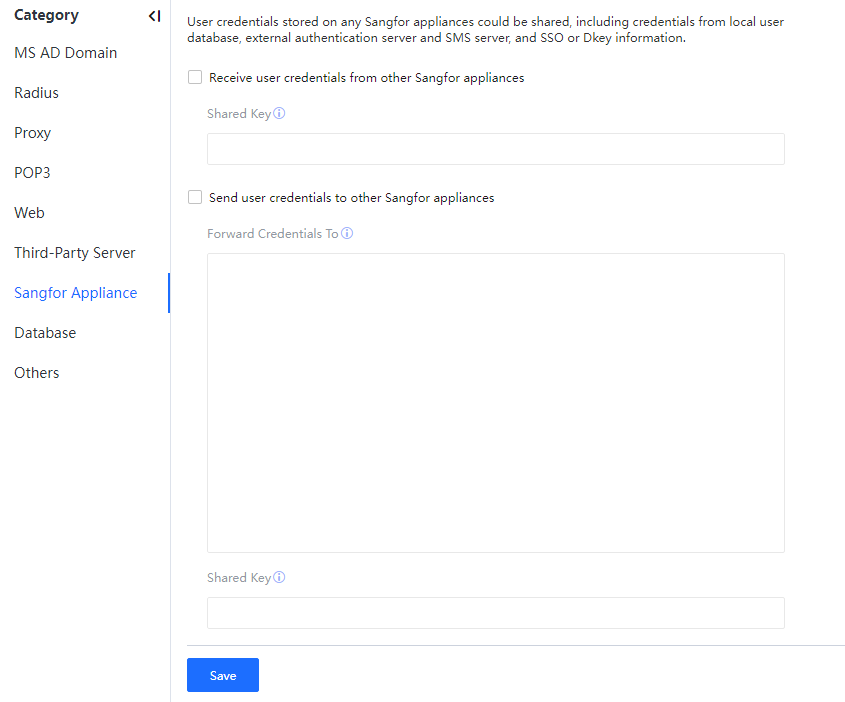
Receive user credentials from other Sangfor appliances: The appliance receives user credentials from other appliances and automatically adds authenticated users. A shared key identical to the appliance needs to be set and forwarded.
Send user credentials to other Sangfor appliances: Send user credentials of this appliance to other appliances.
Forwarding Credentials To: Set the policy to forward the credentials.
Control on source IP address: %forward IP% indicates that a forward range is all and must be separated using two %.
Writing form: applicable range%target appliance%policy description.
Applicable range: Support IP address and controller name, which are separated using semicolons.
Target appliance: Support IP or IP: Port. Conditions are separated using semicolons.[LCH58][59]
Examples are as follows:
Shared Key: A key to encrypt the user credentials. The receiving appliance shall be consistent with the sending appliance.
3.5.3.1.3.8 Database
Suppose a database system is deployed for storing and managing user authentication information and the organization structure. In that case, SQL statements can be configured on the Sangfor IAG to query the user list and authenticate users from the database system, synchronizing the information to the local organization structure and online user list by working with the database system. After a user is authenticated in the database, the user is automatically authenticated on the IAG. Then the user is logged out from the database and automatically logged out on the IAG. Currently, the supported database types include Oracle, MS SQL Server, DB2, and MySQL. See the following figure.
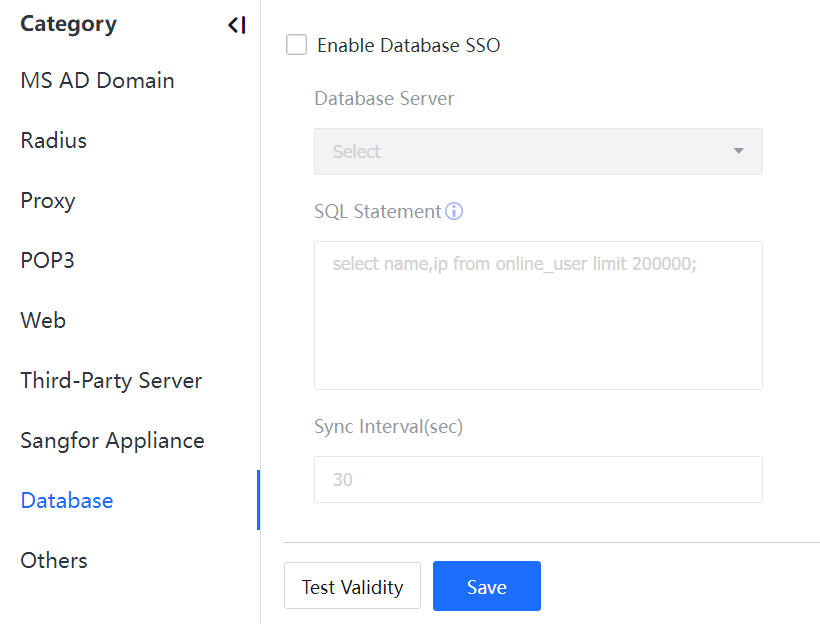
Database Server: Select the database server you set on the External Auth Server page.
SQL Statement: Set a select statement that can query online users. The IAG runs this select statement to query online users in the user information table of the database.
Sync Interval(sec): The maximum duration from when a user is authenticated on the server to when the user is authenticated on the IAG. The default interval is 30 seconds.
For details about the configuration procedure, see Chapter 4.1.7.
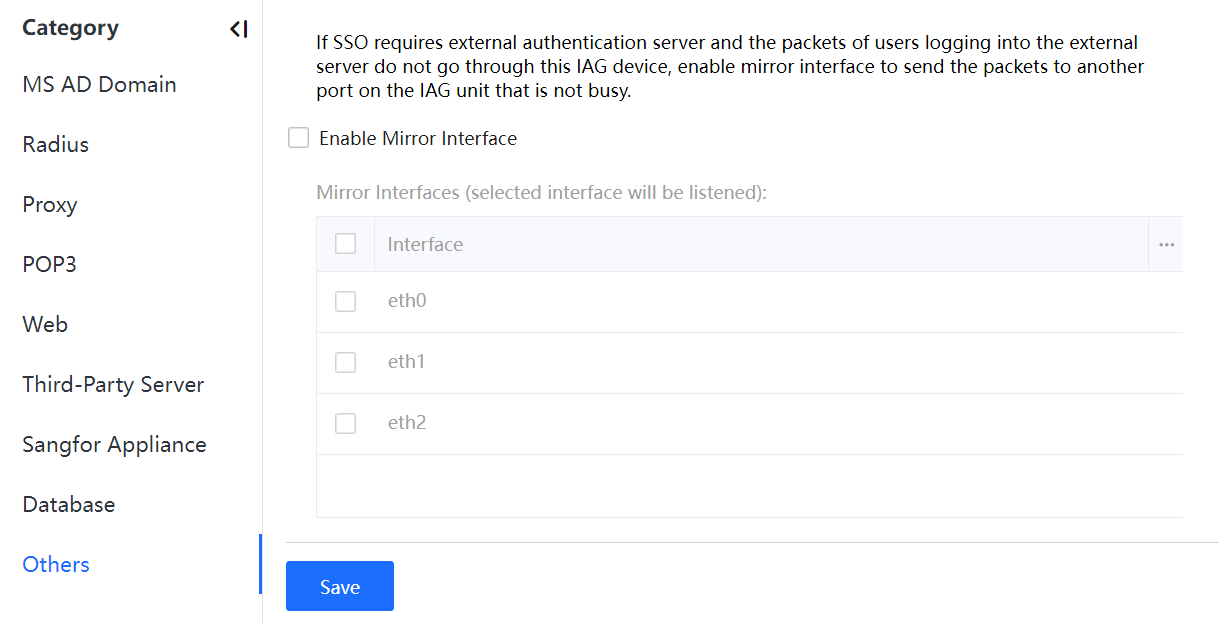
3.5.3.1.3.9 Others
If the login data does not pass the IAG, a mirrored listening port needs to be set to intercept login data. Select any idle interface. The listening port can be set in domain SSO (listening mode), Radius SSO, POP3 SSO, and web SSO.
This listening port can also be used to intercept mirrored Internet access data when the IAG is deployed in bypass mode.
A user that adopts Password-based will be redirected to the authentication page if the user attempts to access the Internet before authentication. You can customize the authentication page and the disclaimer page. See the following figure.
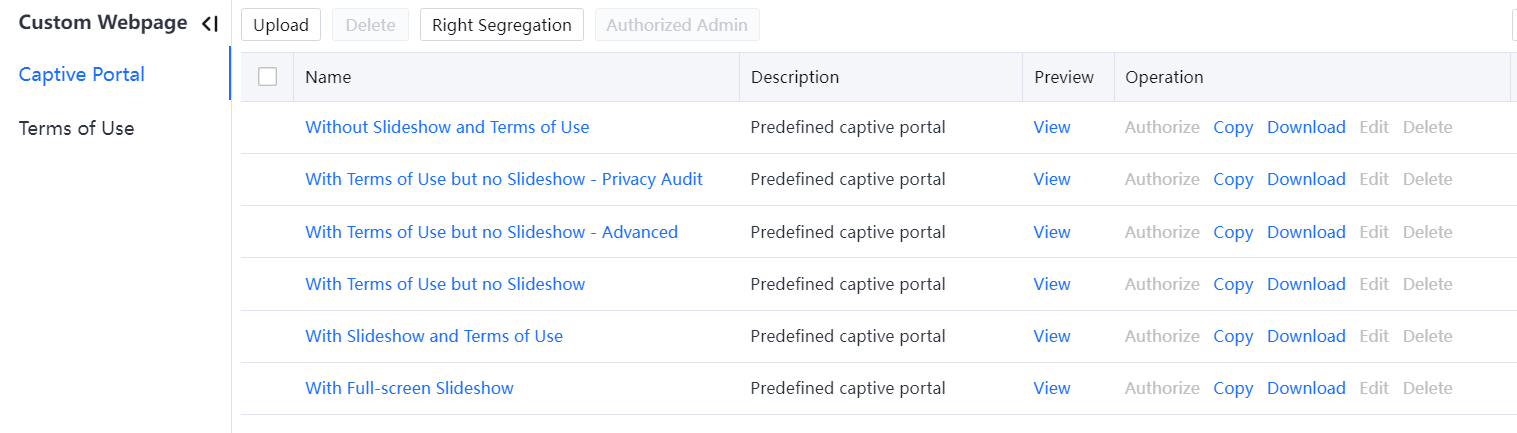
3.5.3.1.4.1 Captive Portal
Embedded authentication page templates are listed below:
• Captive Portal without Slideshow and Terms of Use
• Captive Portal with Terms of Use but no Slideshow
• Captive Portal with Slideshow and Terms of Use
• Captive Portal with Full-screen Slideshow
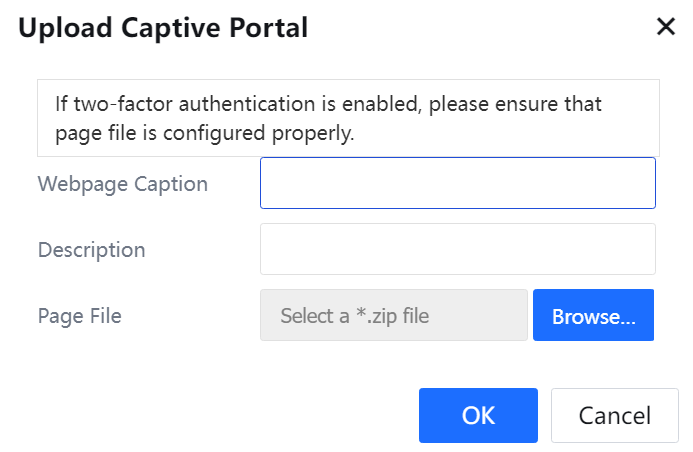
Click Upload to upload an authentication page template. You can download an example page and edit it.
Click Delete to delete a template. However, the Embedded authentication page templates cannot be deleted.
If you select Enable segregation of webpage administration on the Right Segregation page, all other administrators, except the administrator admin, can edit only authorized pages.
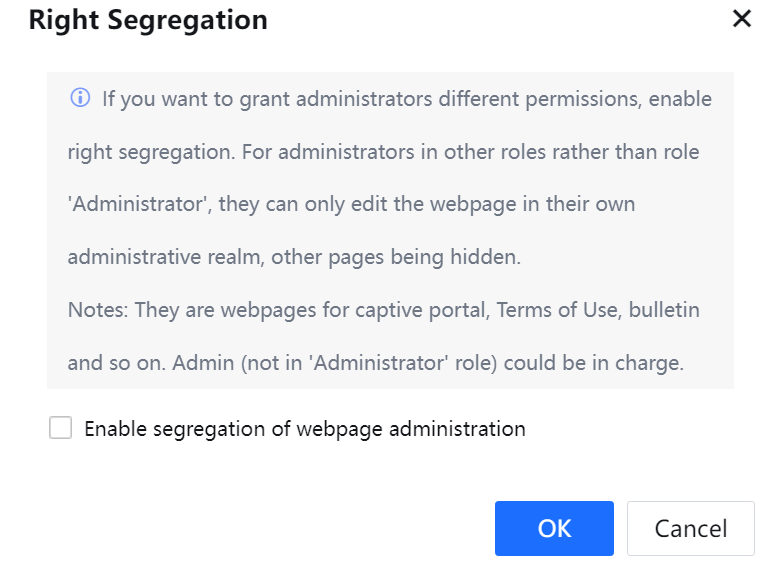
Authorized Admin: Authorize editable pages to non-admin administrators after enabling independent permission control.
View: to preview the display effects on a computer and a mobile phone.
Clone: create a template based on an existing template and edit this template.
Download: download a page template and click Upload to upload the template to other devices.
Authorize: to authorize a template for non-admin administrators. Authorized administrators can edit and view this template.
Click Edit to modify the Webpage Caption and Description of the template. You can also import other pages. You can also edit the Embedded page templates. The procedure is as follows:
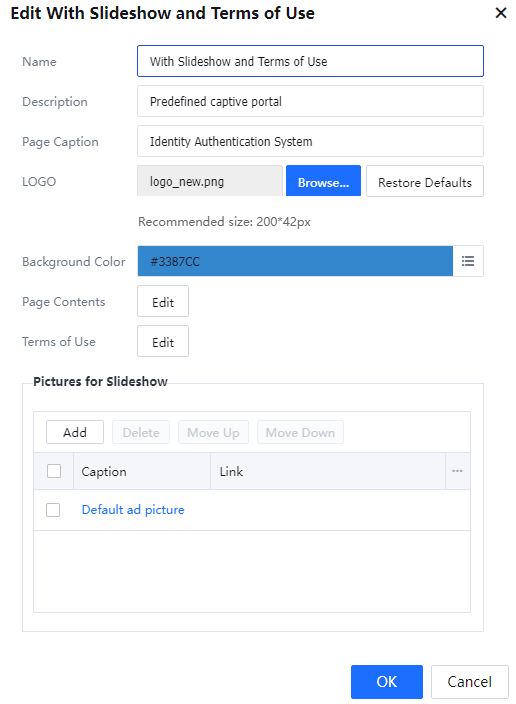

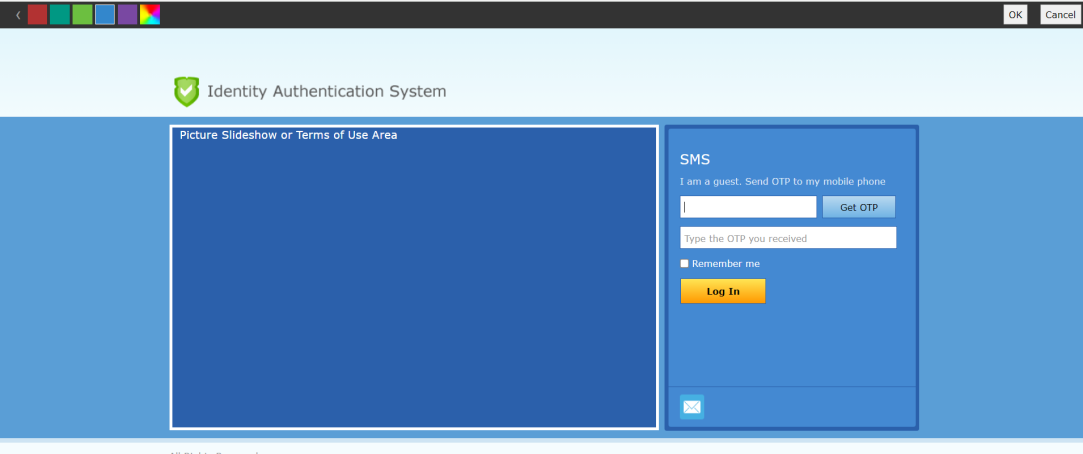
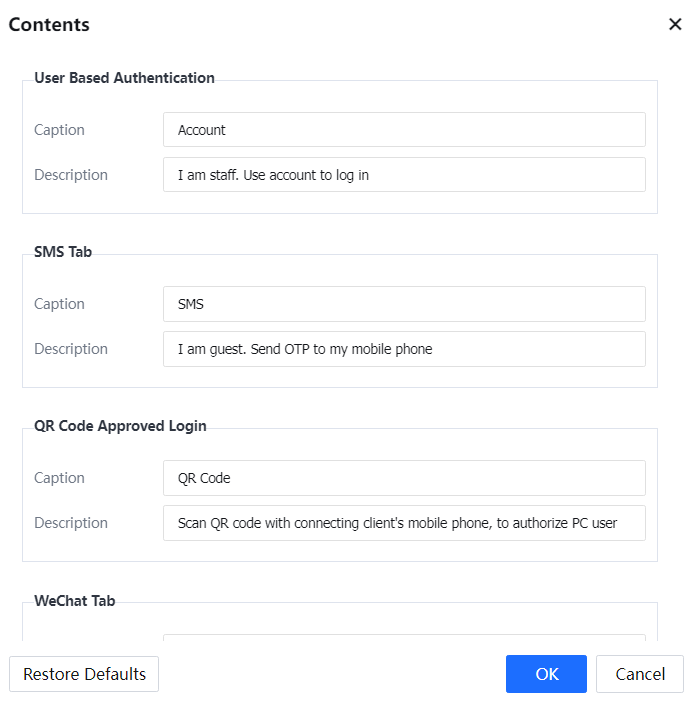
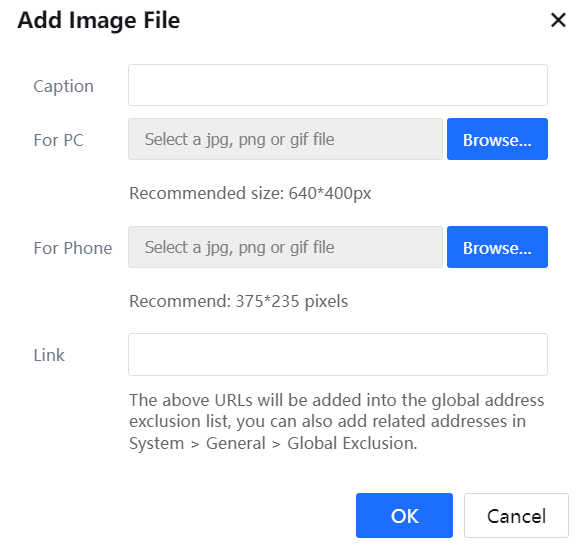
![]()
The contents on embedded authentication page templates differ from those on custom templates. The preceding procedure is an example of editing a page, and disclaimers are for reference only.
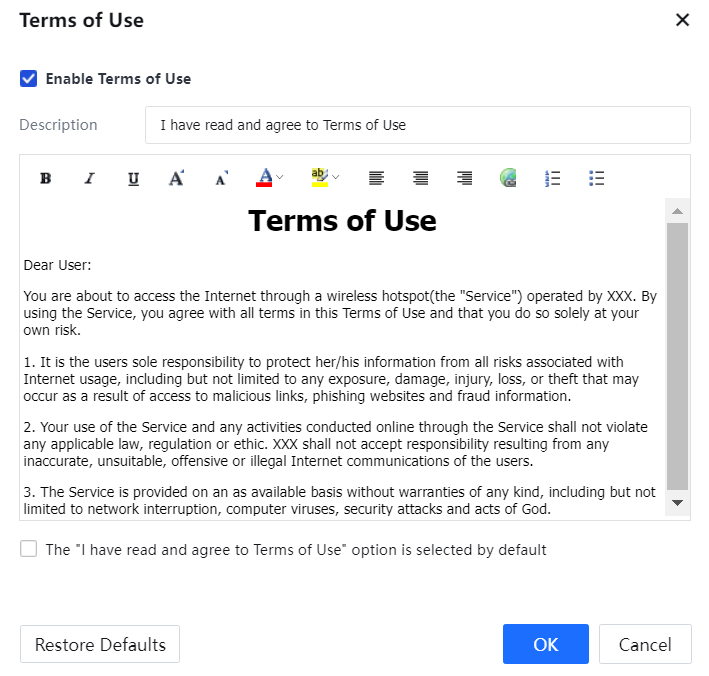
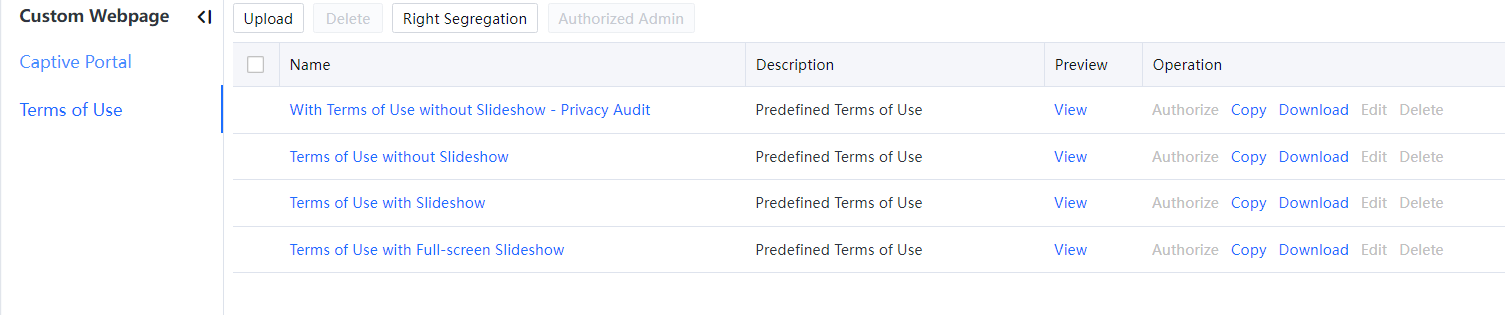
3.5.3.1.4.2 Terms of Use
The page for editing a disclaimer page is shown in the following figure.
The procedure for editing a disclaimer page is similar to editing an authentication page and therefore is not described in this section.

 {{ $t('index.defaultHeader.chromeBrowserTip') }}