{{ secondMenu.name }}


Configuration Example 1: The PCs in a customer's intranet segment 192.168.1.0/255.255.255.0 are authenticated using usernames and passwords. The PCs are assigned fixed IP addresses. The administrator wants to bind the users with MAC addresses to log in only through their PCs. The administrator also wants to specify the relationships between the IP addresses and MAC addresses, not changing their IP addresses. If they do so, they cannot be authenticated by the IAG and cannot access the Internet.
Step 1.The customer wants to authenticate all the PCs in the 192.168.1.0/255.255.255.0 segment using usernames and passwords. Therefore, set the authentication mode for the PCs first.
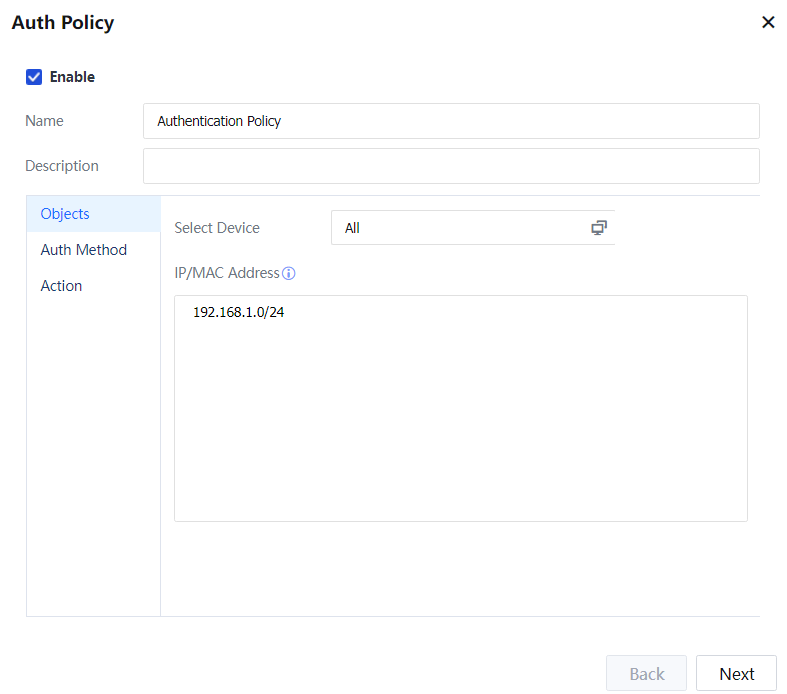
Navigate to Access Mgt > Authentication > Web Authentication > Authentication Policy and set an authentication policy. Set the objects to 192.168.1.0/255.255.255.0.
Set Authentication Method to Password-Based and Authentication Server to Local User Database.

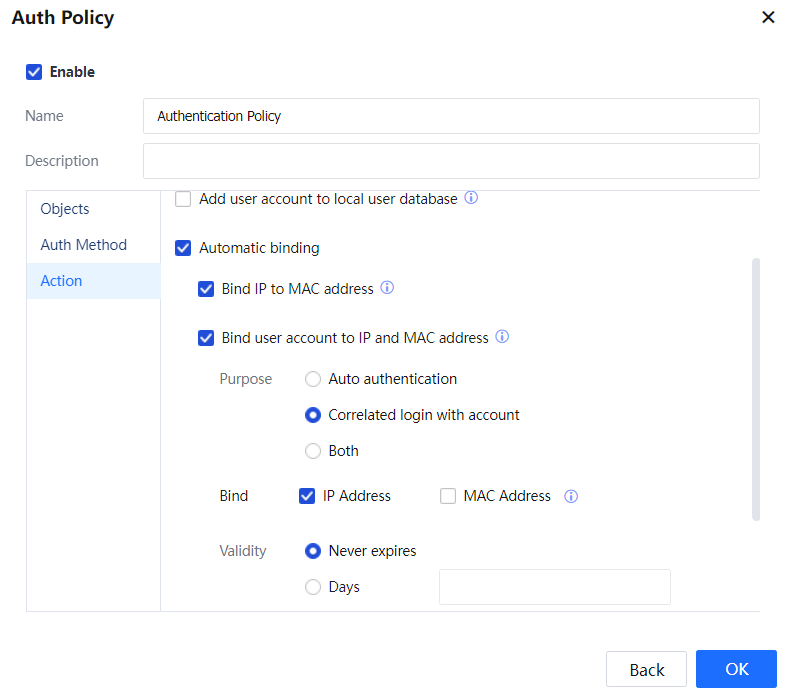
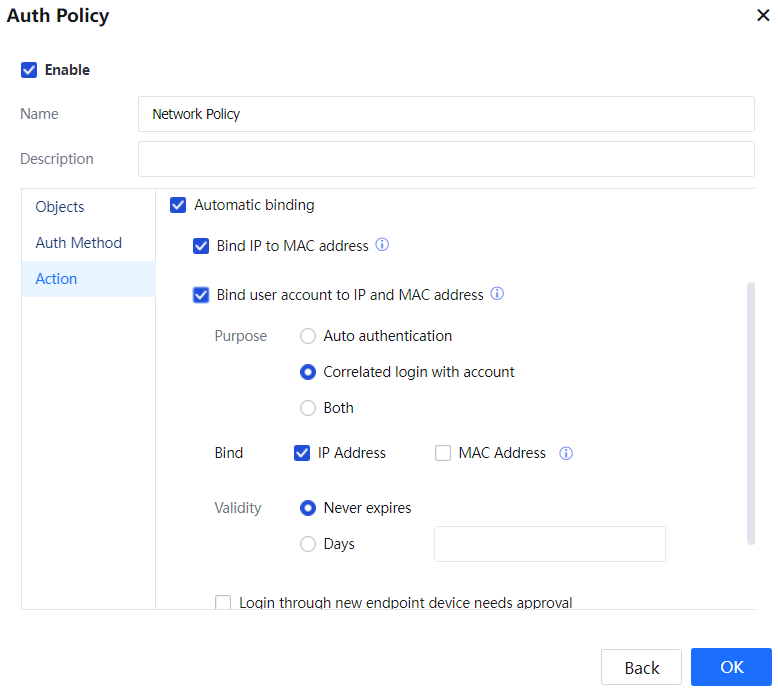
Set Action to Automatic Binding and select Bind user account to IP address and MAC address.
Administrators manually add or import the local users and are not automatically added to the organization structure on the IAG. Therefore, do not select Add Non-Local/Domain Users to Group.
Step 2.You must bind MAC addresses. No additional configuration is required if the intranet and IAG are on layer 2. If L3 switches are deployed between the intranet and IAG, MAC addresses must be transferred through layer 3. In this case, configure the intranet switchers to support SNMP. Navigate to Access Mgt > Authentication > Correlation Connection > MAC Address Acquisition and tick Enable MAC acquisition across L3 network and configure the IP addresses, MAC addresses, and SNMP information of the L3 switches.
Step 3.Navigate to Access Mgt > User Management > Local User, and add a local user group and local users.
Step 4.When a user within the network segment accesses the Internet and opens a webpage, the authentication page of the IAG is displayed. Enter a username and password and click Login.

After authentication, navigate to Access Mgt > User Management > User Binding Mgt > User Binding to view the automatically bound MAC addresses. Next, choose IP&MAC Address and view the binding relationships between IP addresses and MAC addresses.
Configuration Example 2: The PCs in a customer's intranet segment 192.168.2.0/255.255.255.0 are authenticated using passwords for Internet access. Some users must enter domain accounts during authentication, while others must enter local group accounts. After authentication, users are automatically bound with IP addresses. They do not need to be authenticated again within ten days after successful authentication if they access the Internet using the authenticated IP addresses. Only domain users and users in the Internet Group can be authenticated within this network segment.
Step 1.Choose Access Mgt > Authentication > Web Authentication > Auth Server and set the authentication domain server.
Step 2.The customer wants to authenticate all the PCs in the 192.168.2.0/255.255.255.0 segment using local user passwords and domain server passwords. Therefore, set the authentication mode for the PCs first.
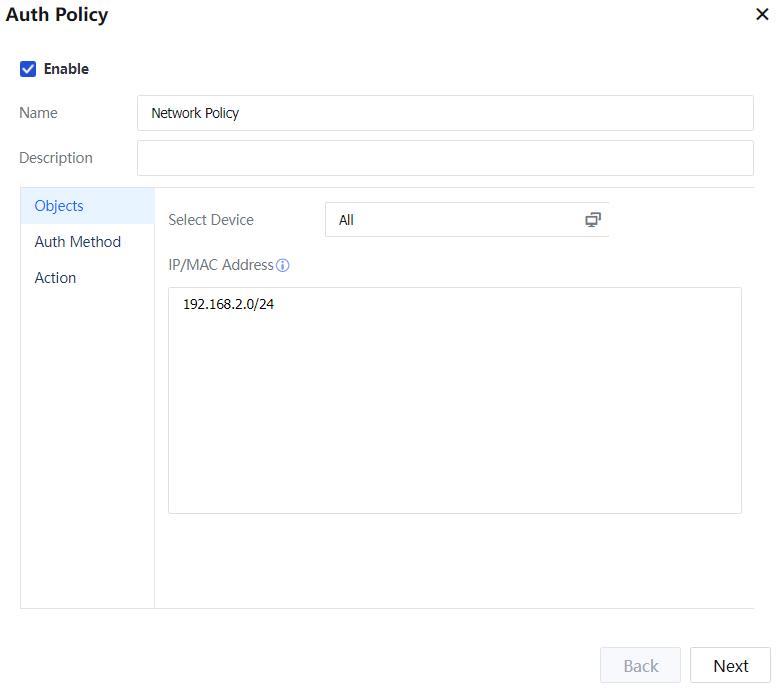
Choose Access Mgt > User Management > Authentication > Web Authentication > Authentication Policy to set an authentication policy. Set the objects to 192.168.2.0/24.
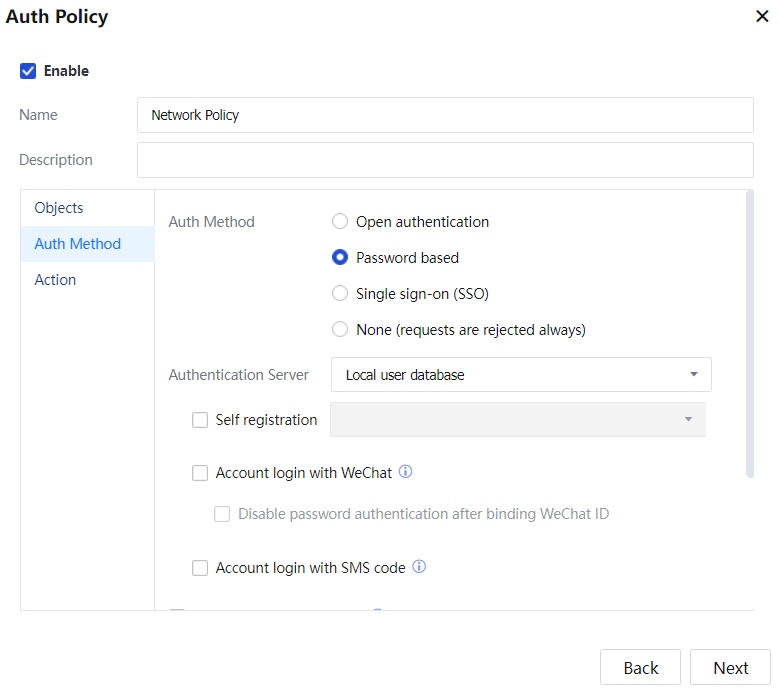
Set Authentication Method to Password based and Authentication Server to Local User database and Domain Server.
Set Action to Automatic binding and select Bind user account to IP address and MAC address. Select Enable open authentication and set the validity period to 10 days.
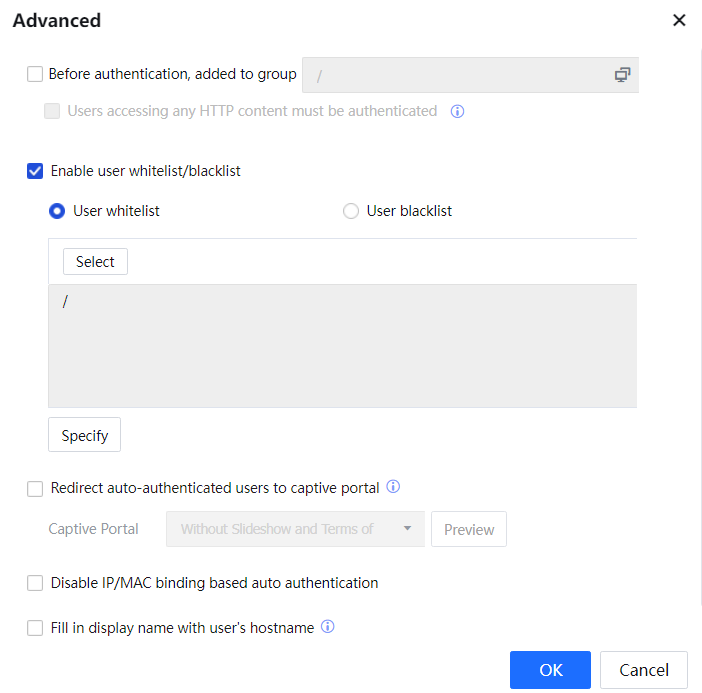
Advanced: Enable user login restriction, select Add Non-Local/Domain Users to Group, and select domain users and the Internet Group.
Function: Only domain users and users in the Internet Group can be authenticated within this network segment.
Step 3.Navigate to Access Mgt > User Management > Local Users and add a local user group and local users.
Step 4.When a user within the network segment accesses the Internet and opens a webpage, the authentication page of the IAG is displayed.
For a local user, enter the username and password of a local user account and click Login. For a domain user, enter the username and password of a domain account and click Login.

 {{ $t('index.defaultHeader.chromeBrowserTip') }}