{{ secondMenu.name }}


After logging in to the web console, you will see the following major modules: Dashboard, Status, Access Mgt, Online Activities, Activity Audit, Endpoint Mgt, and System, as shown in the following figure:
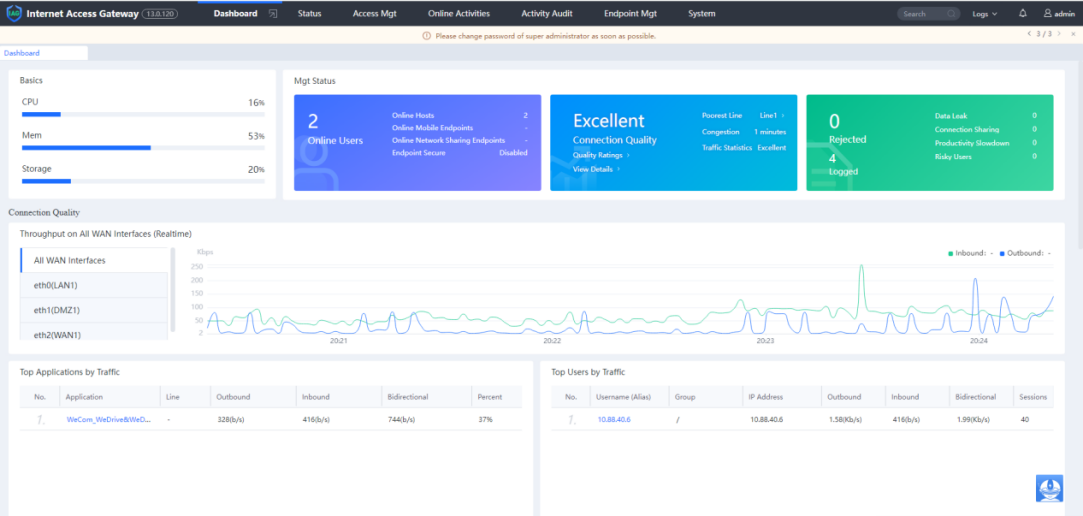
The following instructions for the buttons and icons apply to all the configuration pages on the IAG device and will not be described again in the subsequent sections:
• If a Commit button is included on the configuration page, you need to click this button to apply your configuration changes after you change the configurations. Generally, it may take 5 to 10 seconds for the configuration changes to take effect. To make them take effect immediately, click the ![]() icon at the bottom-right of the page.
icon at the bottom-right of the page.
• The ![]() icon at the bottom-right of the page is for broadcasting some system messages or warning messages in real time.
icon at the bottom-right of the page is for broadcasting some system messages or warning messages in real time.
• Most of the configuration pages include the ![]() icon. When you put your mouse cursor over this icon, a brief description of the current configuration item will pop up.
icon. When you put your mouse cursor over this icon, a brief description of the current configuration item will pop up.
![]()
When you modify the settings on the System > Network > Deployment page or System > General > Date/Time[LCH3][4] page or default encoding on the System > General > Advanced > Web UI page, the IAG device will restart, and you need to re-login.
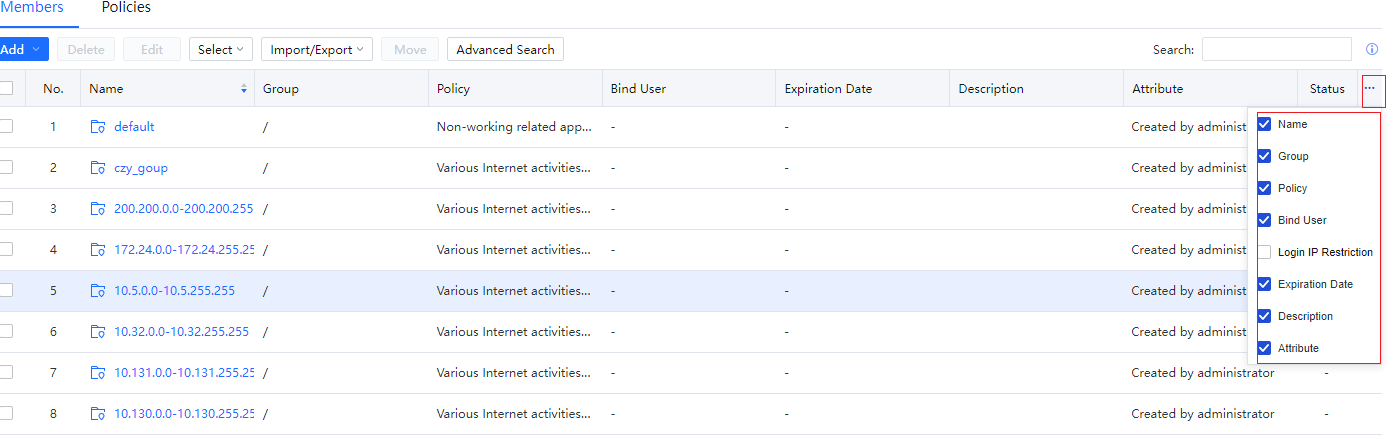
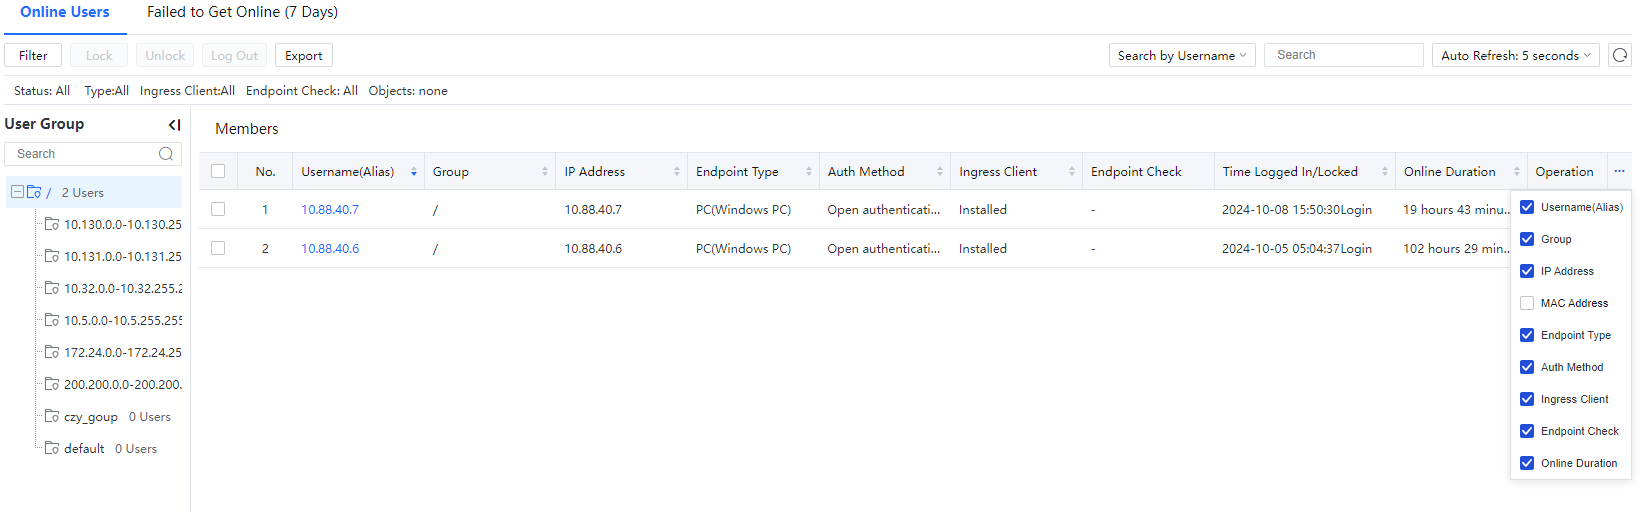
For most pages that display the configuration information and status in List View, you can select the columns to be shown to quickly get your desired information and sort the information in ascending or descending order according to your needs. For example:

 {{ $t('index.defaultHeader.chromeBrowserTip') }}