


{{ secondMenu.name }}






The outbound attack protection prevents the LAN host from becoming a zombie to attack the WAN, thus bringing certain legal risks.
6.3.2.3.1.1Configuration Case
In the office network environment of an enterprise, it is found in the internet egress that several PCs often use excessive bandwidth, resulting in the slow speed of the LAN network. If you log in to the PC for viewing, you will find that it sends SYN and UDP messages to an IP address all the time. To prevent this recurrence, you need to add an outbound attack protection policy on the Network Secure.
Step 1.On the Anti-DoS/DDoS page, click Add and select Outbound Attack Protection. Then, the Add Outbound Attack Protection Policy dialog box appears, as shown in the following figure.

Step 2.Click Select for Scan Type to enable Scan Prevention, as shown in the following figure.

Step 3.Click Selected: DNS flood protection,ICMP flood protection,SYN flood protection,UDP flood protection to configure DoS/DDoS Protection, as shown in the following figure.
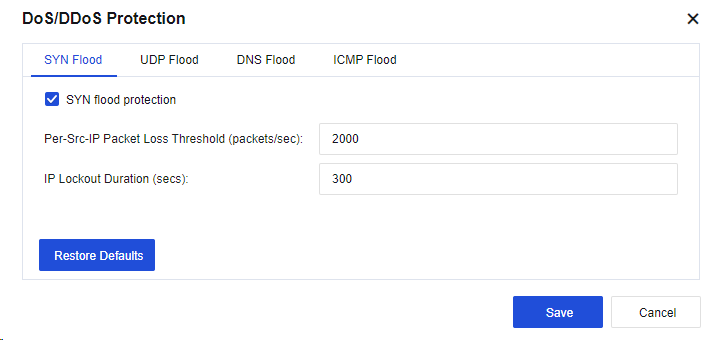
Set the SYN Flood, UDP Flood, DNS Flood, and ICMP Flood parameters according to actual requirements.
Step 4.Optional. Click Advanced to select protection options against specific attacks, as shown in the following figure.

Step 5.The configuration results are shown in the following figure.

Step 6.The attack details are shown in the following figure.


 {{ $t('index.defaultHeader.chromeBrowserTip') }}