{{ secondMenu.name }}


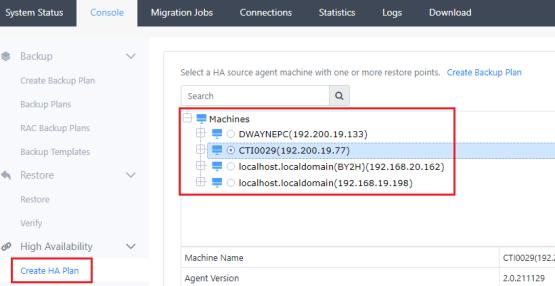
Step 1. Enter the Console > Create HA Plan interface, select the HA backup client, and click Next.
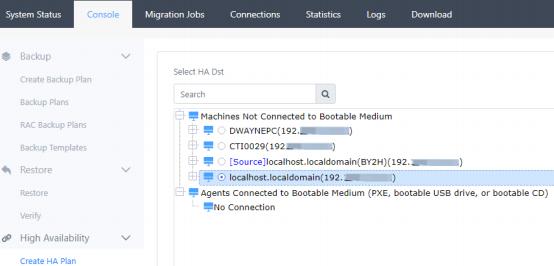
Step 2. Select the HA backup destination machine and click Next.
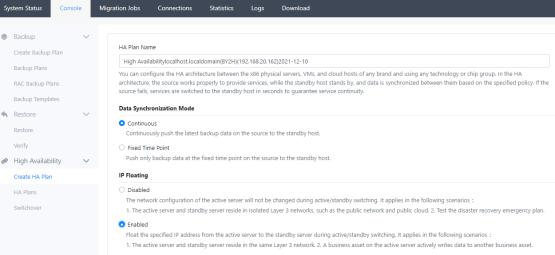
Step 3. Configure the HA backup plan. Here you can choose to enable the IP drift function according to your needs. Steps 4 and 6 introduce its
configuration guidelines.
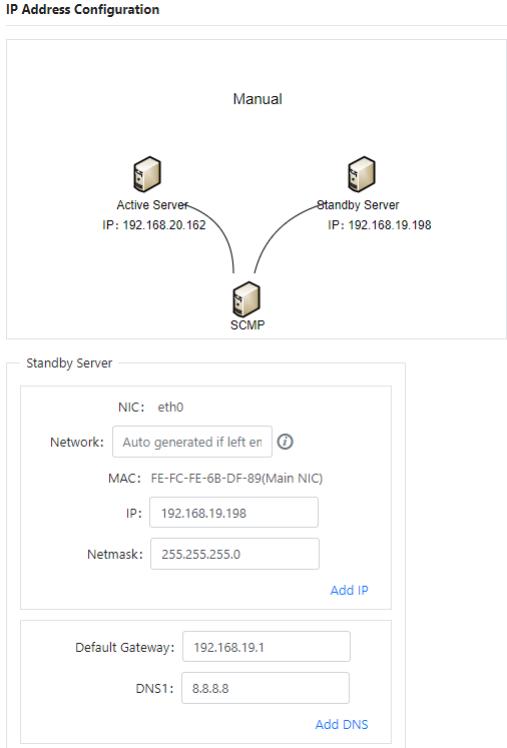
Step 4. When the source and destination IPs are different (change the IP address while migrating), select disable the IP drift function.

Step 5. Configure the HA backup network, and configure the IP for the
destination machine. The default is to use the IP of the startup tool here to modify the IP of the destination server according to the migration
requirements.
Step 6. When the source and destination IPs are the same (the migration does not change the IP address), the IP drift function must be enabled.
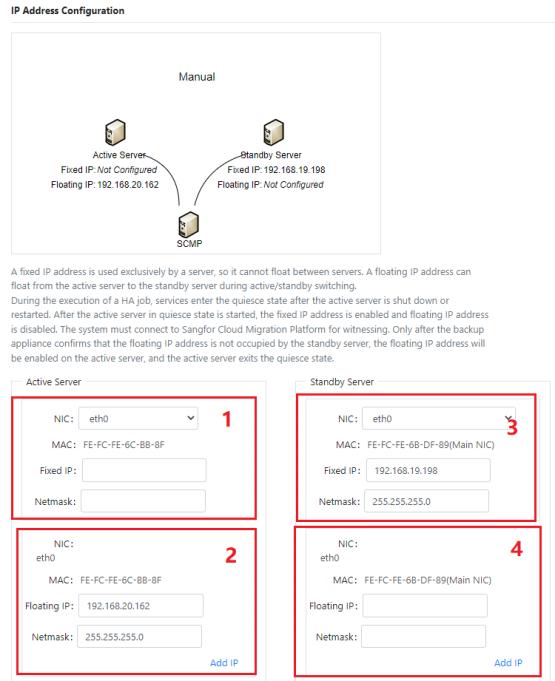
Step 7. Configure the HA backup network, the role and usage of each IP in the following figure:
• • The inherent IP of the source can not be empty. This IP is configured on the source NIC after the HA backup switch is completed.
• • Source drifting IP is the source service IP. This IP will drift to the destination end after the HA backup switch is completed.
• • The inherent IP of the destination is the IP of the startup medium. This IP will be deleted after the HA backup switch is completed.
• • The drifting IP of the destination end is consistent with the drifting IP of the source end. This IP is the destination IP after the handover.
Step 8. Select Entire Machine Restore as the recovery mode.

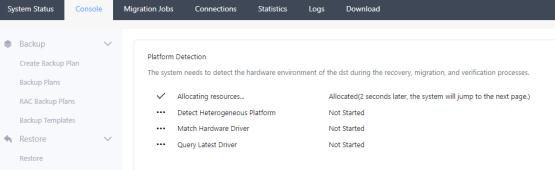
Step 9. Check whether resources, drivers, tools, etc., meet the migration conditions.
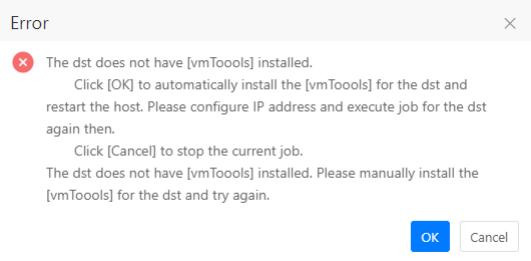
Step 10. If this bare metal restore boot medium is used for the first time, it will report an error "The dst does not have [vmTools] installed". Click Restart
Bare Metal Restore and install the vmTools. This action does not affect the source side business and only restarts the bare metal restore boot medium.
After restarting, enter the bare metal restore boot medium to reconfigure the IP connection to the server and reconfigure the HA backup plan according to the above steps. If no such error is reported, skip this step.
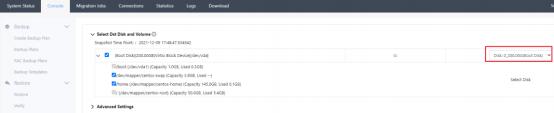
Step 11. Confirm the restored disk and partition information. The number of
hard disks of the destination machine must not be less than the number of
hard disks of the source machine, and the capacity of each hard disk of the
destination machine must not be less than the hard disk capacity of the source machine.
Step 12. Business stop and start scripts are uploaded according to the
customer's business needs. If there is no such requirement, skip it directly. Click Finish.

Step 13. You can see the process and status of the HA backup in the System Status > Jobs interface. In the beginning, the hardware configuration of the destination client was prepared.
Step 14. After the hardware configuration of the destination client is ready, start to synchronize data.

Step 15. After the data synchronization reaches 100%, the destination machine enters the state of booting and loading OS (as shown in the figure below),
waiting for the HA backup switch.
• • The Linux operating system loads the OS status interface, as shown in the figure below.

• • The Windows operating system loads the OS status interface, as shown in the figure below.

Step 16. The HA backup plan is completed.

 {{ $t('index.defaultHeader.chromeBrowserTip') }}