{{ secondMenu.name }}


Function Description
Install the migration agent at the source machine for communication. The SCMP will complete the information collection of the operating system and issue migration instructions through the agent.
1. Make sure the computer is able to run normally and the running memory is greater than 2G.
2. Ensure the selected source system is in the list of operating systems supported by the SCMP. For details, please refer to the
SCMPCompatibilityList-20211214.
3. The MD5 value of the downloaded migration agent must be the same as the MD5 value displayed on the SCMP.
4. The agent is only available when login as a system administrator. The
downloaded agent corresponds to the system administrator, where the
agent downloaded through the system administrator account can only be issued migration/backup tasks by the respective administrator.
5. Ensure that the source machine can access the SCMP.
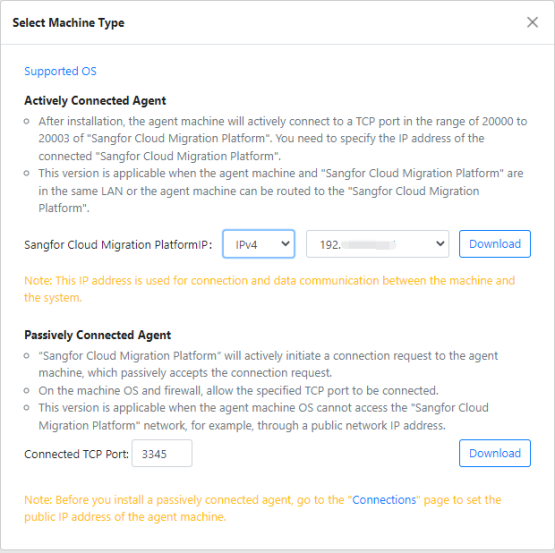
6. There are two types of agents in SCMP: Actively Connected Agent and
Passively Connected Agent. When using Actively Connected Agent, the agent will initiate the connection from the source machine to the SCMP.
For Passively Connected Agent, the agent will passively accept the connection initialization from the SCMP instead.
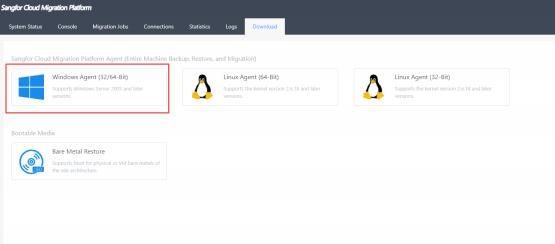
Step 1. Login to the SCMP with the newly created system administrator on the source Windows machine. Navigate to Download and click Windows
Agent(32/64-Bit) to download.
Step 2. Select agent type. When the source system is in the NAT environment and unable to reach SCMP directly, select Passively Connected Agent for
SCMP to initiate the connection to the source system.
Step 3. Click on the download link to start the agent download.
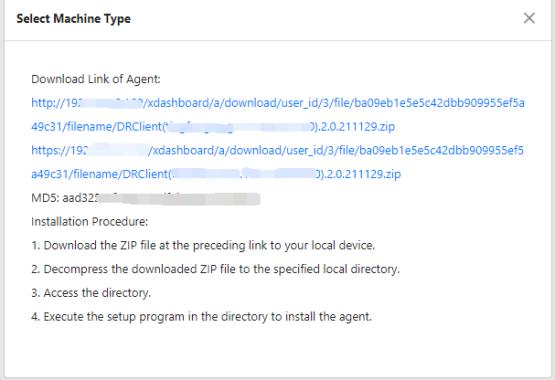
Step 4. After the download is complete, verify the MD5 value.
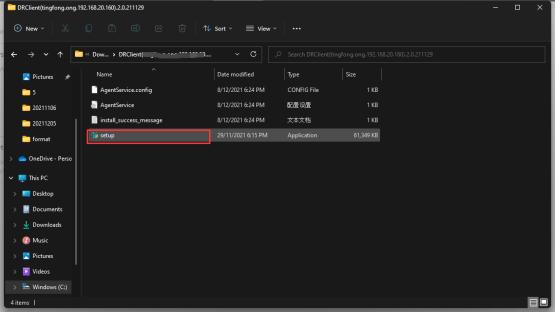
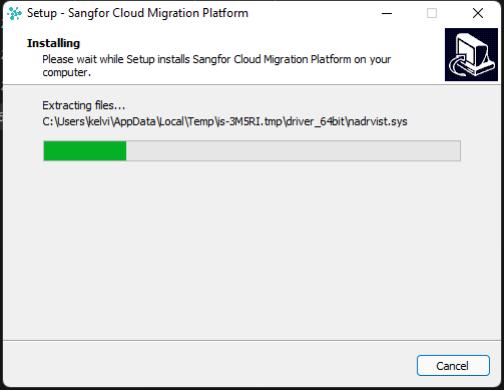
Step 5. Unzip it to the local folder, and install the application by double- clicking on the setup file.
Step 6. After the installation is completed, SCMP IP will then appear on the screen.
Step 7. The detailed information of this agent will be displayed in the SCMP
console after login as the system administrator where the agent corresponded.
Step 8. The installation is complete.

 {{ $t('index.defaultHeader.chromeBrowserTip') }}